
Subscribe to Our Youtube Channel
Related Manuals for Kontron RAK-100S-DNV


Summary of Contents for Kontron RAK-100S-DNV
- Page 1 USER GUIDE RAK-100S-DNV Doc. User Guide, Rev. 1.0 Doc. ID: [To be Determined] www.kontron.com...
- Page 2 RAK-100S-DNV - User Guide, Rev. 1.0 This page has been intentionally left blank www.kontron.com // 2...
- Page 3 In cases of doubt, please contact Kontron. This user guide is protected by copyright. All rights are reserved by Kontron. No part of this document may be reproduced, transmitted, transcribed, stored in a retrieval system, or translated into any language or computer language, in any form or by any means (electronic, mechanical, photocopying, recording, or otherwise), without the express written permission of Kontron.
- Page 4 ENVIRONMENTAL DAMAGE (COLLECTIVELY, "HIGH RISK APPLICATIONS"). You understand and agree that your use of Kontron devices as a component in High Risk Applications is entirely at your risk. To minimize the risks associated with your products and applications, you should provide adequate design and operating safeguards.
- Page 5 If you have any difficulties using this user guide, discover an error, or just want to provide some feedback, contact Kontron support. Detail any errors you find. We will correct the errors or problems as soon as possible and post the revised user guide on our website.
-
Page 6: Symbols
RAK-100S-DNV - User Guide, Rev. 1.0 Symbols The following symbols may be used in this user guide DANGER indicates a hazardous situation which, if not avoided, will result in death or serious injury. WARNING indicates a hazardous situation which, if not avoided, could result in death or serious injury. -
Page 7: For Your Safety
Therefore, in the interest of your own safety and of the correct operation of your new Kontron product, you are requested to conform with the following guidelines. -
Page 8: Lithium Battery Precautions
General Instructions on Usage In order to maintain Kontron’s product warranty, this product must not be altered or modified in any way. Changes or modifications to the product, that are not explicitly approved by Kontron and described in this user guide or received from Kontron Support as a special handling instruction, will void your warranty. -
Page 9: Table Of Contents
RAK-100S-DNV - User Guide, Rev. 1.0 Table of Contents Symbols ..........................................6 For Your Safety ........................................7 High Voltage Safety Instructions .................................. 7 Special Handling and Unpacking Instruction ............................7 Lithium Battery Precautions ..................................8 General Instructions on Usage ..................................8 Quality and Environmental Management .............................. - Page 10 RAK-100S-DNV - User Guide, Rev. 1.0 4.4.2. SATA Power Connector & SATA Power Cable..........................25 4.4.3. M.2 Socket ......................................25 4.4.4. mSATA / mPCIe Socket ..................................25 4.4.5. PCIe x16 Add-on Card Slot ................................. 25 Accessing Internal Components ..............................26 5.1.
-
Page 11: List Of Tables
Figure 4: Internal View (without cover) ..............................24 Figure 5: mSATA / mPCIe Selection Jumper JP1 ............................. 25 Figure 6: Descrewing the access cover of the RAK-100S-DNV ......................27 Figure 7: Disengaging the access cover ..............................27 Figure 8: Optional rackmount server slide kit ............................33 Figure 9: Removing the chassis (inner) slide rail .......................... - Page 12 RAK-100S-DNV - User Guide, Rev. 1.0 Figure 37: BIOS Boot Setup Menu - Hard Drive BBS Priorities ......................72 Figure 38: BIOS Security Setup Menu ............................... 73 Figure 39: BIOS Save & Exit Setup Menu ..............................75 www.kontron.com // 12...
-
Page 13: 1/ General Safety Instructions For It Equipment
Kontron is exempt from accident liability, this also applies during the warranty period. The product has been built and tested according to the basic safety requirements for low voltage (LVD) applications and has left the manufacturer in safety-related, flawless condition. - Page 14 RAK-100S-DNV - User Guide, Rev. 1.0 Additional safety instructions for DC power supply circuits To guarantee safe operation of devices with DC power supply voltages larger than 60 volts DC or a power consumption larger than 240 VA, please observe that: ...
-
Page 15: Electrostatic Discharge (Esd)
RAK-100S-DNV - User Guide, Rev. 1.0 1.1. Electrostatic Discharge (ESD) A sudden discharge of electrostatic electricity can destroy static-sensitive devices or micro-circuitry. Therefore proper packaging and grounding techniques are necessary precautions to prevent damage. Always take the following precautions: 1. Transport boards in ESD-safe containers such as boxes or bags. - Page 16 RAK-100S-DNV - User Guide, Rev. 1.0 Do not dispose of lithium batteries in general trash collection. Dispose of the battery according to the local regulations dealing with the disposal of these special materials, (e.g. to the collecting points for dispose of batteries).
-
Page 17: 2/ Electromagnetic Compatibility
Consult the dealer or an experienced radio/TV technician for help. Kontron is not responsible for any radio television interference caused by unauthorized modifications of this equipment or the substitution or attachment of connecting cables and equipment other than those specified by Kontron. -
Page 18: 3/ Shipment And Unpacking
6. If you notice any shipping damage or inconsistencies between the contents and your order, please contact Kontron for help and information. 3.2. Scope of Delivery 3.2.1. Standard 1x RAK-100S-DNV (corresponding to the ordered system configuration) 1x Power cord (plug type depending on country) 1x Quick installation guide 3.2.2. -
Page 19: 4/ System Overview
RAK-100S-DNV - User Guide, Rev. 1.0 4/ System Overview The RAK-100S-DNV is an embedded server enclosed within a short-depth chassis, offering the superior qualities for operation in the space-saving wall-mount racks or cabinets. It can be optionally factory-equipped with an mPCIe WLAN, Bluetooth or WWAN card for three antennas. Users may choose the implementation of up to four 2.5"... -
Page 20: System Expansion Capabilities
The baseboard comes with an onboard full-sized mSATA / mPCIe interface connector. The connector can be switched to mSATA or mPCIe setting via the jumper JP1. Users can expand the RAK-100S-DNV with mSATA SSD drive, mPCIe WLAN card or mPCIe WWAN modem card. -
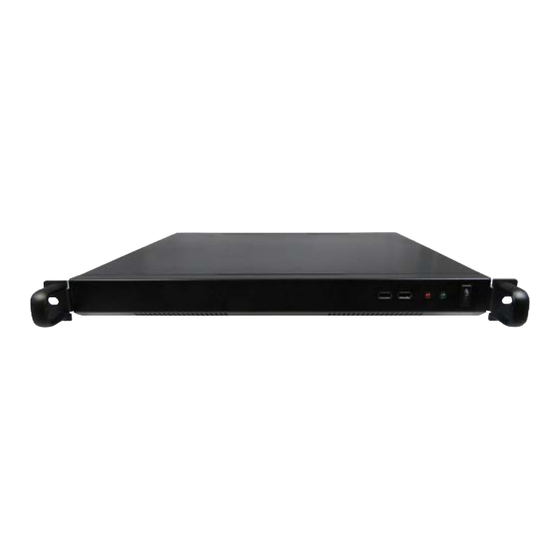
Page 21: Front I/O Panel
The storage LED blinks red when data is being written into or read from the HDD / SSD drive. 4.2.4. USB 2.0 The RAK-100S-DNV provides two USB 2.0 / 1.1 interfaces on the front I/O panel. These connectors allow connection of USB-compatible devices to the system. -
Page 22: Rear I/O Panel
RAK-100S-DNV - User Guide, Rev. 1.0 4.3. Rear I/O Panel Figure 2: Rear I/O Panel 1 AC-In Power Socket (see Chapter 4.3.1) 2 VGA (see Chapter 4.3.2) 3 GbE LAN (see Chapter 4.3.3) 4 USB 3.0 (see Chapter 4.3.4) 5 RS232/422/485 (see Chapter 4.3.5) 6 PCIe x16 Add-on Card Slot (see Chapter 4.3.6) -
Page 23: Usb 3.0
4.3.6. Accessible Bay for PCIe x16 Add-on Card Slot The RAK-100S-DNV provides one bay on the rear I/O panel to access the internal PCIe x16 Add-on card slot for network, storage, graphics, video or other functional expansion. The slot supports only x8 signal. -
Page 24: Internal View
8 M.2 fixing bolt for Key B type 2280 9 mSATA / mPCIe fixing bolt 10 mSATA / mPCIe Selection Jumper (JP1, see Chapter) 4.4.1. DDR4 UDIMM Memory Socket The RAK-100S-DNV provides two 288-pin DDR4 UDIMM sockets (Figure 4, pos. 1) to install memory RAMs. www.kontron.com // 24... -
Page 25: Sata Power Connector & Sata Power Cable
3) and two dual 2.5" HDD / SSD brackets (Figure 4, pos. 7) for installing up to four 2.5" SATA HDDs / SSDs. 4.4.3. M.2 Socket The RAK-100S-DNV reserves one M.2 Key B socket (Figure 4, pos. 4), allowing the expansion with a Type 22x80 M.2 SSD drive. -
Page 26: 5/ Accessing Internal Components
RAK-100S-DNV - User Guide, Rev. 1.0 5/ Accessing Internal Components This section contains important information that you must read before accessing the internal components. You must follow these procedures properly when installing, removing or handling any board. It is recommended to expand your system with applicable expansion card(s) before it is installed into a rack or cabinet. -
Page 27: Opening And Closing The Chassis
1. Close all applications. Shut down the system properly and disconnect the connection to the main power source. Disconnect all peripherals. 2. The RAK-100S-DNV should lay on a flat, clean surface with the access cover facing upwards. 3. Loosen the hand-screw knobs (two located on the rear side), that secure the access cover to the chassis. -
Page 28: Installing Udimm Memory Module(S)
7. Tighten the hand-screw knobs when the cover is firmly in place.. When used as intended, the RAK-100S-DNV is to operate only in closed condition. Only when the access cover is properly fixed with the hand-screw knobs and the rear... -
Page 29: Installing An M.2 Ssd
RAK-100S-DNV - User Guide, Rev. 1.0 5.1.3. Installing an M.2 SSD To install an M.2 SSD please proceed according to the steps described: 1. Open the device as described in the subsection 5.1 "Opening and Closing the Chassis" (step 1-5). -
Page 30: 6/ Thermal Considerations
The applied cooling method provides adequate cooling of the device during operation and performs a one-way thermal transfer to the airflow. There are ventilation holes located on the front and rear sides of the RAK-100S-DNV. They provides heat dissipation during operation. - Page 31 RAK-100S-DNV - User Guide, Rev. 1.0 When the RAK-100S-DNV is extended and configured with third party components like mPCIe / M.2 expansion card(s) and hard drives (HDD or SSD), it has to be taken into account that the air temperature inside the system is higher than the ambient temperature.
-
Page 32: 7/ Installation Instructions
Do not operate the RAK-100S-DNV with foreign objects inside the chassis. Further do not insert any retrieval device into the device while it is connected to power. Kontron rejects all liability for any and all damages resulting from operation of the unit with foreign objects inside the chassis. -
Page 33: System Mounting
RAK-100S-DNV configuration with a rackmount kit for horizontal installation into a rack / cabinet. Depending on the ordered RAK-100S-DNV configuration, your system may be supplied with a rackmount server slide kit (Figure 8). The kit consists of one piece of left-hand server slide (Figure 8, pos. R), one piece of right-hand server slide (Figure 8, pos. -
Page 34: Figure 10: Mounting The Chassis (Inner) Slide Rail To The Server Chassis
RAK-100S-DNV - User Guide, Rev. 1.0 Press the trigger dowm to release Pull chassis (inner) slide rail out Chassis (inner) slide rail Cabnet (outer) slide rail 2. Mount the chassis (inner) slide rail to the server chassis through the two standoffs located on the chassis and a supplied M4 screw. -
Page 35: Figure 12: Inserting The Chassis (Inner) Slide Rail Into The Cabinet (Outer) Rail
RAK-100S-DNV - User Guide, Rev. 1.0 Release safety lock before mounting Push the safety lock forward to secure 4. Make sure that the ball retainer is in fully open position. Then insert the chassis (inner) slide rail into the cabinet (outer) slide rail. -
Page 36: Figure 14: Securing The Server
RAK-100S-DNV - User Guide, Rev. 1.0 Figure 14: Securing the server Cabinet rack rail Center hole Chassis (inner) slide rail Cabinet (outer) slide rail For a sufficient air circulation around the device, we recommend keep a proper clearance and not mount / operate any other devices within the clearance around the RAK-100S-DNV. -
Page 37: Ac Power Connection
RAK-100S-DNV - User Guide, Rev. 1.0 7.2. AC Power Connection The RAK-100S-DNV integrates a power supply unit with the chassis and can be connected by a AC-in power socket (Figure 2, pos. 1) directly to an AC power source. www.kontron.com... -
Page 38: 8/ Start Up
AC. For details refer to the chapter 10/ “Technical Specifications”. 8.1. Connecting to DC Power Supply The AC-in power socket (Figure 2, pos. 1) is located on the rear side of the RAK-100S-DNV. The RAK-100S-DNV is supplied with a AC power cord. -
Page 39: Operating System And Hardware Component Drivers
Your system can be supplied optionally with a pre-installed operating system. If you have ordered your RAK-100S-DNV with a pre-installed operating system, all drivers are installed in accordance with the system configuration ordered (optional hardware components). Your system is fully operational when you switch it on for the first time. -
Page 40: 9/ Maintenance And Cleaning
9/ Maintenance and Cleaning Equipment from Kontron requires only minimum servicing and maintenance for proper operation. For light soiling, clean the RAK-100S-DNV with a dry cloth. Carefully remove dust from the surface of the chassis using a clean, soft brush. ... -
Page 41: Technical Specifications
RAK-100S-DNV - User Guide, Rev. 1.0 Technical Specifications Table 2: Technical Specifications System Processor Intel® Atom® C3000 Series Processor Memory 2x DDR4 UDIMM Video Display Interface 1x VGA (on rear) Network Connection Ethernet 6x GbE LAN (RJ45 on rear, 2x Intel® I210-AT, 4x Marvell® 88E1543) Peripheral Connection ... -
Page 42: Mechanical Specifications
RAK-100S-DNV - User Guide, Rev. 1.0 10.1. Mechanical Specifications Table 3: Mechanical Specifications Construction 1U Metal Rackmount Chassis Dimensions (W x D x H) 430.4 mm x 400.0 mm x 44.5 mm / 16.94” x 15.75” x 1.75” (without handles) ... -
Page 43: Environmental Conditions
RAK-100S-DNV - User Guide, Rev. 1.0 10.2. Environmental Conditions Table 4: Environmental Conditions Operating Temperature 0 °C ~ 40 °C / 32 °F ~ 104 °F Storage Temperature -20 °C ~ 80 °C / -4 °F ~ 176 °F Humidity ... -
Page 44: 11/ Standard Interfaces - Pin Assignments
RAK-100S-DNV - User Guide, Rev. 1.0 11/ Standard Interfaces – Pin Assignments Low-active signals are indicated by a minus sign. 11.1. AC-in Power Socket Table 6: AC-in Power Socket (see Figure 2, pos. 1) Signal Name AC Connector (female) Live Source (AC 100 V ~ 240 V) -
Page 45: Vga Connector
RAK-100S-DNV - User Guide, Rev. 1.0 Signal Name 4-pin USB Connector Type A Version 2.0 +USBVCC USB_D- USB_D+ 11.5. VGA Connector Table 10: VGA Connector (see Figure 2, pos. 2) Signal Name 15-pin D-SUB Female Cpnnector Green Blue DDC data... -
Page 46: 12/ Bios
Supervisor Password (see Security menu), press <RETURN>, and proceed with step 5. 5. A setup menu will appear. The RAK-100S-DNV uEFI BIOS setup program uses a hot key-based navigation system. A hot key legend bar is located on the bottom of the setup screens. -
Page 47: Starting The Uefi Bios
RAK-100S-DNV - User Guide, Rev. 1.0 12.2. Starting the uEFI BIOS The Setup utility features shows six menus in the selection bar at the top of the screen: Main Advanced Power Boot Security Save & Exit The Setup menus are selected via the left and right arrow keys. -
Page 48: Figure 16: Bios Main Menu Screen System Data And Time
RAK-100S-DNV - User Guide, Rev. 1.0 Figure 16: BIOS Main Menu Screen System Data and Time BIOS SETUP UTILITY Main Advanced Power Boot Security Save & Exit Product Information Product Name RAK-100S-DNV BIOS Version R1.00 (x64) BIOS Build Date 02/19/2019 ME FW Version 0B:4.0.4.181... -
Page 49: Advanced Setup Menu
RAK-100S-DNV - User Guide, Rev. 1.0 12.2.2. Advanced Setup Menu The Advanced setup menu provides sub-screens and functions for advanced configurations. The following sub- screen functions are included in the menu: LAN Configuration FIA HSIO12 Configuration CPU Chipset Configuration ... -
Page 50: Figure 17: Bios Advanced Menu
RAK-100S-DNV - User Guide, Rev. 1.0 Figure 17: BIOS Advanced Menu BIOS SETUP UTILITY Main Advanced Power Boot Security Save & Exit Load Intel I210 UNDI [Disabled] Load X553 1GbE UNDI [Disabled] > FIA HSIO12 Configuration > CPU Chipset Configuration →... -
Page 51: Figure 18: Bios Advanced Menu - Fia Hsio12 Configuration
RAK-100S-DNV - User Guide, Rev. 1.0 Figure 18: BIOS Advanced Menu - FIA HSIO12 Configuration BIOS SETUP UTILITY Main Advanced Power Boot Security Save & Exit Flexible I/O Adapter HSIO12 Configuration HSIO12 I/O amount Full Active Lane 8:PCIE-C6139(VGA) [PCIE Enable]... - Page 52 RAK-100S-DNV - User Guide, Rev. 1.0 Feature Option Description Lane15:SATA4 [Lane Disabled], Select Lane to work as Disabled / SATA4 [SATA Enable] Lane16:SATA5 [Lane Disabled], Select Lane to work as Disabled / SATA5 [SATA Enable] Lane17:SATA6 [Lane Disabled], Select Lane to work as Disabled / SATA6...
-
Page 53: Figure 19: Bios Advanced Menu - Cpu Chipset Configuration
RAK-100S-DNV - User Guide, Rev. 1.0 Figure 19: BIOS Advanced Menu - CPU Chipset Configuration BIOS SETUP UTILITY Main Advanced Power Boot Security Save & Exit CPU Chipset Configuration EIST [Enabled] Turbo Mode [Enabled] CPU C State [Enabled] → ←: Select Screen Active Processor Core ↑... -
Page 54: Figure 20: Bios Advanced Menu - Nvme Configuration
RAK-100S-DNV - User Guide, Rev. 1.0 Figure 20: BIOS Advanced Menu - NVMe Configuration BIOS SETUP UTILITY Main Advanced Power Boot Security Save & Exit NVMe controller and Drive information No NVMe Device Found → ←: Select Screen ↑ ↓: Select Item Enter: Select +/-: Change Opt. -
Page 55: Figure 21: Bios Advanced Menu - Sata Configuration
RAK-100S-DNV - User Guide, Rev. 1.0 Figure 21: BIOS Advanced Menu - SATA Configuration BIOS SETUP UTILITY Main Advanced Power Boot Security Save & Exit SATA Configuration SATA Controller 0 [Enabled] SATA-0 Port Multiplier [Disabled] SATA Controller 1 [Enabled] SATA-1 Port Multiplier... -
Page 56: Figure 22: Bios Advanced Menu - Usb Configuration
RAK-100S-DNV - User Guide, Rev. 1.0 Figure 22: BIOS Advanced Menu - USB Configuration BIOS SETUP UTILITY Main Advanced Power Boot Security Save & Exit USB Configuration USB Devices: → ←: Select Screen 1 Keyboard, 2 Hubs ↑ ↓: Select Item... -
Page 57: Figure 23: Bios Advanced Menu - Trusted Computing
RAK-100S-DNV - User Guide, Rev. 1.0 Figure 23: BIOS Advanced Menu - Trusted Computing BIOS SETUP UTILITY Main Advanced Power Boot Security Save & Exit Configuration Security Device Support [Disabled] NO Security Device → ←: Select Screen ↑ ↓: Select Item Enter: Select +/-: Change Opt. -
Page 58: Figure 24: Bios Advanced Menu - Network Stack Configuration
RAK-100S-DNV - User Guide, Rev. 1.0 Figure 24: BIOS Advanced Menu - Network Stack Configuration BIOS SETUP UTILITY Main Advanced Power Boot Security Save & Exit Network Stack Configuration LAN Boot I210-AT-1 [Disabled] → ←: Select Screen LAN Boot I210-AT-2 [Disabled] ↑... -
Page 59: Figure 25: Bios Advanced Menu - Super Io Configuration
RAK-100S-DNV - User Guide, Rev. 1.0 Figure 25: BIOS Advanced Menu - Super IO Configuration BIOS SETUP UTILITY Main Advanced Power Boot Security Save & Exit Super IO Configuration > Serial Port 1 Configuration → ←: Select Screen > Serial Port 2 Configuration ↑... -
Page 60: Figure 27: Bios Advanced Menu - Super Io Configuration - Serial Port 2 Configuration
RAK-100S-DNV - User Guide, Rev. 1.0 Feature Option Description 11, 12;] Serial Port 1 Type [RS232], [RS422], Select an appropriate type for Serial Port 1. [RS485] RS485 Duplex Mode [Half Duplex], [Full Select an appropriate RS485 Duplex Mode. Duplex] RS485 Auto Flow [Disabled], [Enabled] Select whether to enable or disable RS485 Auto Flow Control. -
Page 61: Figure 28: Bios Advanced Menu - Serial Port Console Redirection
RAK-100S-DNV - User Guide, Rev. 1.0 Figure 28: BIOS Advanced Menu - Serial Port Console Redirection BIOS SETUP UTILITY Main Advanced Power Boot Security Save & Exit COM1 Console Redirection [Enabled] > Console Redirection Settings COM2 Console Redirection [Disabled] → ←: Select Screen >... -
Page 62: Figure 29: Bios Advanced Menu - Serial Port Console Redirection - Com1 Console Redirection Settings
RAK-100S-DNV - User Guide, Rev. 1.0 Figure 29: BIOS Advanced Menu - Serial Port Console Redirection - COM1 Console Redirection Settings* BIOS SETUP UTILITY Main Advanced Power Boot Security Save & Exit COM1 Console Redirection Settings Terminal Type [ANSI] Bits per second [115200] →... - Page 63 RAK-100S-DNV - User Guide, Rev. 1.0 Feature Option Description Terminal data. Resolution 100x31 [Disabled], [Enabled] Select whether to enable or disable extended terminal resolution. Putty KeyPad [VT100], [LINUX], Select FunctionKey and KeyPad on Putty. [XTERMR6], [SCO], [ESCN], [VT400] www.kontron.com // 63...
-
Page 64: Figure 30: Bios Advanced Menu - Serial Port Console Redirection - Com2 Console Redirection Settings
RAK-100S-DNV - User Guide, Rev. 1.0 Figure 30: BIOS Advanced Menu - Serial Port Console Redirection - COM2 Console Redirection Settings* BIOS SETUP UTILITY Main Advanced Power Boot Security Save & Exit COM2 Console Redirection Settings Terminal Type [ANSI] Bits per second [115200] →... - Page 65 RAK-100S-DNV - User Guide, Rev. 1.0 Feature Option Description Terminal data. Resolution 100x31 [Disabled], [Enabled] Select whether to enable or disable extended terminal resolution. Putty KeyPad [VT100], [LINUX], Select FunctionKey and KeyPad on Putty. [XTERMR6], [SCO], [ESCN], [VT400] www.kontron.com // 65...
-
Page 66: Figure 31: Bios Advanced Menu - Serial Port Console Redirection - Legacy Console Redirection Settings
RAK-100S-DNV - User Guide, Rev. 1.0 Figure 31: BIOS Advanced Menu - Serial Port Console Redirection - Legacy Console Redirection Settings BIOS SETUP UTILITY Main Advanced Power Boot Security Save & Exit Legacy Console Redirection Settings Redirection COM Port [COM1] →... -
Page 67: Figure 32: Bios Advanced Menu - Serial Port Console Redirection - Out-Of-Band Mgmt Port Console Redirection Settings
RAK-100S-DNV - User Guide, Rev. 1.0 Figure 32: BIOS Advanced Menu - Serial Port Console Redirection - Out-of-Band Mgmt Port Console Redirection Settings* BIOS SETUP UTILITY Main Advanced Power Boot Security Save & Exit Out-of-Band Mgmt Port [COM1] Terminal Type... -
Page 68: Figure 33: Bios Advanced Menu - H/W Monitor
RAK-100S-DNV - User Guide, Rev. 1.0 Figure 33: BIOS Advanced Menu - H/W Monitor BIOS SETUP UTILITY Main Advanced Power Boot Security Save & Exit PC Health Status CPU Temperature - DTS : +34 C CPU Temperature - Therm : +34 C... -
Page 69: Power Setup Menu
RAK-100S-DNV - User Guide, Rev. 1.0 12.2.3. Power Setup Menu The Power setup menu provides functions and a sub-screen for power configurations. The following sub-screen function is included in the menu: WatchDog Timer Configuration Figure 34: BIOS Power Setup Menu... -
Page 70: Figure 35: Bios Power Setup Menu - Watchdog Timer Configuration
RAK-100S-DNV - User Guide, Rev. 1.0 Feature Option Description Driver], [FW- MagicPacket] ResumeLan I210-AT- [Disabled], [OS- Select whether to enable Wake from LAN Device Intel I210-AT-2. Driver], [FW- MagicPacket] Resume By RTC [Disabled], [Enabled] Select whether to enable or disable Wake Up on Alarm, to turn Alarm on your system on a special day of the month. -
Page 71: Boot Setup Menu
RAK-100S-DNV - User Guide, Rev. 1.0 12.2.4. Boot Setup Menu The boot setup menu lists the for boot device priority order, that is generated dynamically. Figure 36: BIOS Boot Setup Menu BIOS SETUP UTILITY Main Advanced Power Boot Security Save & Exit... - Page 72 RAK-100S-DNV - User Guide, Rev. 1.0 Feature Option Description WDc WD3200LPCX- 00VHAT0)], [Disabled] Figure 37: BIOS Boot Setup Menu - Hard Drive BBS Priorities BIOS SETUP UTILITY Main Advanced Power Boot Security Save & Exit Boot Option #1 [P4: WDC WD3200LPCX-…] Boot Option #2 [P5: WDC WD3200LPCX-…]...
-
Page 73: Security Setup Menu
The Security setup menu provides information about the passwords and functions for specifying the security settings. The passwords are case-sensitive. The RAK-100S-DNV provides no factory-set passwords. If there is already a password installed, the system asks for this first. To clear a password, simply enter nothing and acknowledge by pressing <RETURN>. - Page 74 RAK-100S-DNV - User Guide, Rev. 1.0 12.2.5.1. Remember the password It is highly recommended to keep a record of all passwords in a safe place. Forgotten passwords results in being locked out of the system. If the system cannot be booted because the User Password or the Supervisor Password are not know, contact Kontron Support for further assistance.
-
Page 75: Save & Exit Setup Menu
RAK-100S-DNV - User Guide, Rev. 1.0 12.2.6. Save & Exit Setup Menu The exit setup menu provides functions for handling changes made to the UEFI BIOS settings and the exiting of the setup program. Figure 39: BIOS Save & Exit Setup Menu... -
Page 76: Appendix A: List Of Acronyms
RAK-100S-DNV - User Guide, Rev. 1.0 Appendix A: List of Acronyms The following table does not contain the complete acronyms used in signal names, signal type definitions or similar. A description of the signals is included in the I/O Connector and Internal connector chapters within this user guide. -
Page 77: About Kontron
RAK-100S-DNV – User Guide, Rev. 1.0 About Kontron Kontron is a global leader in Embedded Computing Technology (ECT). As a part of technology group S&T, Kontron offers a combined portfolio of secure hardware, middleware and services for Internet of Things (IoT) and Industry 4.0 applications. With its standard products and tailor-made solutions based on highly reliable state-of-the-art embedded technologies, Kontron provides secure and innovative applications for a variety of industries.
Need help?
Do you have a question about the RAK-100S-DNV and is the answer not in the manual?
Questions and answers