
Subscribe to Our Youtube Channel
Related Manuals for CYP OR-44U-4K22


Summary of Contents for CYP OR-44U-4K22
- Page 1 OR-44U-4K22 4 x 4 HDMI Matrix Switcher with USB Power Output (4K, HDCP2.2, HDMI2.0) OPERATION MANUAL...
- Page 3 SAFETY PRECAUTIONS Please read all instructions before attempting to unpack, install or operate this equipment and before connecting the power supply. Please keep the following in mind as you unpack and install this equipment: • Always follow basic safety precautions to reduce the risk of fi re, electrical shock and injury to persons.
-
Page 4: Table Of Contents
CONTENTS 1. Introduction ..........1 2. Applications ........... 1 3. Package Contents ........ 1 4. Package Contents ........ 2 5. Features ..........2 6. Operation Controls and Functions ..3 6.1 Front Panel ........3 6.2 Rear Panel .........5 6.3 Remote Control ........6 6.4 LCD Menu Tree .........7 6.5 IR Cable Assignments ......7 6.6 RS-232 Protocol .........8... -
Page 5: Introduction
1. INTRODUCTION This 4K UHD 4 by 4 Matrix provides the ability to connect up to four 4K UHD HDMI sources to up to four 4K UHD HDMI displays and freely switch between them. This unit comes with full support for 18Gbps (600Mhz) resolutions up to, and including 4K@60Hz (4:4:4, 8-bit) as well as support for 48-bit Deep Color, HDR (High Dynamic Range), HD audio and other features defi... -
Page 6: Package Contents
4. PACKAGE CONTENTS • HDMI source equipment such as media players, video game consoles or set-top boxes. • HDMI receiving equipment such as HDTVs, monitors or audio amplifi ers. • The use of “Premium High Speed HDMI” cables is highly recommended. -
Page 7: Operation Controls And Functions
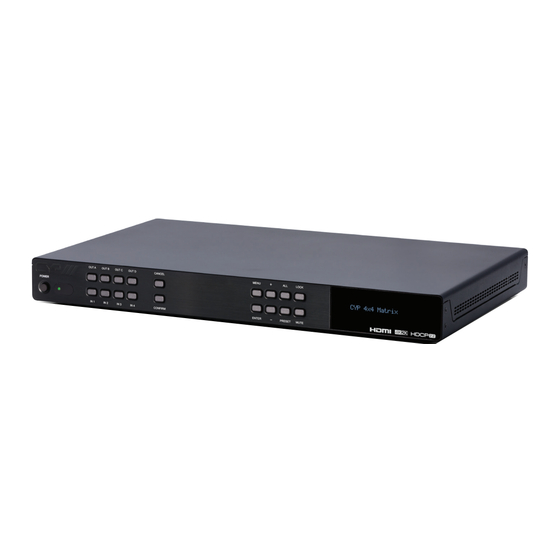
6. OPERATION CONTROLS AND FUNCTIONS 6.1 Front Panel OUT A OUT A OUT B OUT B OUT C OUT C OUT D OUT D CANCEL CANCEL MENU MENU LOCK LOCK POWER POWER 4x4 4K UHD+ Matrix IN 1 IN 1 IN 2 IN 2 IN 3... - Page 8 LOCK: Press to lock all button functions on the front panel. Press and hold for 3 seconds to release the lock function. The LCD will display “Lock” when the function is active. MUTE: The “MUTE” button functions as a blank audio/video source. To use it, follow the standard matrix routing instructions, but use the “MUTE”...
-
Page 9: Rear Panel
6.2 Rear Panel HDMI IN OPTICAL /HDMI OUT USB POWER OUTPUT (5V/1A) SERVICE CONTROL RS232 IR IN DC 24V HDMI IN 1~4: Connect to HDMI source equipment such as media players, game consoles or set-top boxes. OPTICAL / HDMI OUT A~D: Connect the HDMI outputs to devices such as HDMI TVs, monitors or amplifi... -
Page 10: Remote Control
6.3 Remote Control POWER: Press to power the unit on or place it into stand-by mode. 1 / A 5 / E INFO 2 / B 6 / F MUTE 1/A ~ 4/D: Press these keys to confi gure the video routing. Press the “OUT” key 3 / C 7 / G PRESET... -
Page 11: Lcd Menu Tree
6.4 LCD Menu Tree Level Level EDID In1 / In2 / In3 / In 4 / In All Preset Setup 1/2/3/4 Network Status Link (Valid) / Mode (Static/ DHCP)/ IP/Mask/Gate/MAC Network Setup Mode: (Static/DHCP) Static: IP/Mask/Gate Firmware Version Firmware Update USB update Factory Reset Factory reset... -
Page 12: Rs-232 Protocol
6.6 RS-232 Protocol MATRIX REMOTE CONTROLLER Assignment Defi ne TX / RX ► ◄ Baud Rate: 115200bps Data Bits: 8 Parity: None Flow Control: None Stop Bits: 1... -
Page 13: Rs-232 Command
6.7 RS-232 Command Description of parameter Command Name Description Show descript of ? command command. Show descript of HELP ? command command. All Ethernet ETH_FADEFAULT confi gure set to NONE factory default. Set Ethernet IP SIPMODE P SIPMODE mode. P=Mode(STATIC/DHCP) SETIP P1 P2 P3 Set Ethernet IP P1=IPADDRESS... - Page 14 Description of parameter Command Name Description System Reset to NONE A1,B2,C3,D4. EM P1 P2 P1=PORT(1~4) P2=(1-FHD2CH, 2-FHD- Setting EDID MCH, 3-4KUHD2CH, 4-4KUH- mode. DMCH, 5-4KUHD+2CH, 6-4KUHD+MCH, 7-TXA,8-TXB, 9-TXC,10-TXD, 11-USER1, 12- USER2, 13-USER3, 14-USER4) Update fi rmware by SERVICE USB port. note:Device UPDATE NONE...
- Page 15 Description of parameter Command Name Description OSDOFF P OSDOFF OSD off. P=Output Port(1~4) OSDXY P1 P2 P3 Set OSD coordi- P1=Output Port(1~4) OSDXY nate. P2=x(1~1920) P3=y(1~1080) OSDSTR P1 P2 P3 P1=Output Port(1~4) OSDSTR Set OSD string. P2=Line(1~2) P3=String(1~64 Charac- ters) OSDFSIZE P1 P2 Set OSD font OSDFSIZE...
-
Page 16: Telnet Control
6.8 Telnet Control Before attempting to use telnet control, please ensure that both the unit and the PC/Laptop are connected to the same active networks. To access Telnet in Windows 7, click on the “Start” menu and type “cmd” in the search fi eld, then press “Enter”. Under Windows XP go to the “Start”... -
Page 17: Webgui
This will connect us to the unit we wish to control. Type “help” to list the available commands. 6.9 WebGUI Install the IP Discovery Tool: Please obtain the Device Discovery software from your autho- rized dealer and save it in a directory where you can easily fi nd Note: The unit’s default IP address is 192.168.1.50 Connect the unit and your PC/Laptop to the same active net- work and execute the Device Discovery software. - Page 18 switch the unit into DHCP mode to automatically obtain proper network settings from a local DHCP server. To switch to DHCP mode, please select DHCP from the IP mode drop-down, then click “Save” followed by “Reboot”. Once you are satisfi ed with the network settings, you may use them to connect via telnet or WebGUI.
-
Page 19: Switch
The following function tabs will always display on left side of the WebGUI to aid with navigation. 6.9.1 Switch This page provides video routing settings, preset saving/loading, and I/O renaming options. Video Routing To begin assigning a new video route, please click the button of the HDMI output you wish to send video to and then click on the button of the preferred HDMI input port. - Page 20 Output Video Mute Each output can be individually muted (black video, no audio). To mute an output, please click the ( ) icon within the ap- propriate output button. To unmute the output, please click the icon a second time. ...
- Page 21 OSD Text Settings Each output can display up to 2 lines of customized OSD text. The text can be customized in content, color, background trans- parency, size and position. Click the “edit” icon ( ) associated with each output to modify these settings. Please click the “Save” button after making changes to the positioning or content.
-
Page 22: Edid Settings
• Recall: When you wish to load a previously stored preset, please click the “Preset Recall” icon ( ) and you will be presented with a choice of the available 4 presets. Hovering the mouse over each button will display the preset routes stored within it. - Page 23 to the Customer EDID Settings item you would like to change. An EDID Upload window will appear, allowing you to locate and upload your preferred EDID fi le from the fi le directory on your local PC. Once the correct fi le has been selected, please click the “Upload”...
- Page 24 Set EDID Input Content The Set EDID Input Content section allows for the assignment of an EDID to each individual input port, or to all inputs at once. Click on an input to open the EDID Source management win- dow.
-
Page 25: System Setting
6.9.3 System Setting This page provides system confi guration options including turn- ing the unit’s power on/off, turning the USB power support on/ off, changing the network settings, resetting the system to fac- tory defaults and updating the fi rmware. 6.9.4 Admin log out Clicking the “Logout”... -
Page 26: Connection Diagram
7. CONNECTION DIAGRAM HDMI TV/Display HDMI TV/Display HDMI TV/Display HDMI TV/Display Blu-ray/PS4 Player Blu-ray/PS4 Player Cable Blu-ray/PS4 Player Blu-ray/PS4 Player HDMI IN OPTICAL /HDMI OUT USB POWER OUTPUT (5V/1A) SERVICE CONTROL RS232 IR IN DC 24V HDMI TV/Display Amplifi er Active Speakers HDMI TV/Display... -
Page 27: Specifications
8. SPECIFICATIONS 8.1 Technical Specifi cation Video Bandwidth 18Gbps (600Mhz) Input Ports 4 x HDMI Control Interfaces 1 x IR In 1 x RS-232 1 x Service (USB) 1 x Control Output Ports 4 x HDMI 4 x USB port (5V/1A power supply) Supported Resolutions 480i~4K@24/50/60Hz 4K@50/60Hz... -
Page 28: Support Timing
8.2 Support Timing HDMI HDMI Input & output / Timing (Hz) Input Output 640x480@60/72/75/85 720x400@85 720x480p@59.94/60 720x576p@50 800x600@56/60/72/75/85 1024x768@60/70/75/85 1152x864@75 1280x720p@50/59.94/60 1280x768@60/75 1280x800@60RB/60 1280x960@60 1280x1024@60 1360x768@60 1366x768@60 1440x480i@59.94/60 1440x576i@50 1400x1050@60RB/60 1440x900@60RB/60 1600x900@60 1600x1200@60 1680x1050@60RB/60 1920x1080@60RB 1920x1080i@60 1920x1080p@23.97/24/25/29.97/30/59.94/60 3840x2160p@24/25/30 3840x2160@50/60(4:4:4)/50/60(4:2:0) 4096x2160p@24... -
Page 29: Hdmi Cable Length
8.3 HDMI Cable Length Timing Input Output 1080p 4k2k@30 4k2k@60 (certifi ed HDMI cable) - Page 32 CIE-Group Ltd, 3 Widdowson Close, Blenheim Industrial Estate, Bulwell, Nottingham NG6 8WB Tel: +44 (0)115 977 0075 | Fax: +44 (0)115 977 0081 Email: info@cie-group.com www.cie-group.com RDV1...
Need help?
Do you have a question about the OR-44U-4K22 and is the answer not in the manual?
Questions and answers