Table of Contents
Advertisement
Quick Links
Advertisement
Table of Contents

Related Manuals for CYP OR-42-4K22


Summary of Contents for CYP OR-42-4K22
- Page 1 OR-42-4K22 4 x 2 HDMI Matrix Switcher (4K, HDCP2.2, HDMI2.0) OPERATION MANUAL...
- Page 3 DISCLAIMERS The information in this manual has been carefully checked and is believed to be accurate. CYP (UK) Ltd assumes no responsibility for any infringements of patents or other rights of third parties which may result from its use. CYP (UK) Ltd assumes no responsibility for any inaccuracies that may be contained in this document.
-
Page 4: Safety Precautions
SAFETY PRECAUTIONS Please read all instructions before attempting to unpack, install or operate this equipment and before connecting the power supply. Please keep the following in mind as you unpack and install this equipment: • Always follow basic safety precautions to reduce the risk of fire, electrical shock and injury to persons. -
Page 5: Table Of Contents
CONTENTS 1. Introduction ...........6 2. Applications ...........6 3. Package Contents ........6 4. System Requirements ......6 5. Features ..........7 6. Operation Controls and Functions ..8 6.1 Front Panel ........... 8 6.2 Rear Panel ............. 9 6.3 Remote Control ........10 6.4 WebGUI ............11 6.4.1 WebGUI Control Page ....12 6.4.2 Power On/Off ........12 6.4.3 Routing ..........13... -
Page 6: Introduction
1. INTRODUCTION This 4x2 HDMI Matrix Switcher is designed to enable the user to switch between any of the four connected HDMI sources to send video and audio to either of the two connected HDMI displays. This matrix switcher fully supports 4K resolutions and is HDMI2.0 and HDCP 2.2 compliant, ensuring maximum compatibility with the latest 4K UHD sources and displays. -
Page 7: Features
5. FEATURES HDMI2.0 and HDCP2.2 compliant Routes four HDMI sources to two HDMI displays Supports pass-through of HD audio formats: LPCM 2/5.1/7.1CH, Dolby Digital 2/5.1CH, Dolby Digital Plus, Dolby TrueHD, Dolby Atmos and DTS-HD Master Audio 4K UHD resolutions (4K2K@60Hz - YUV4:4:4) Supports HDR (High Dynamic Range) and Deep Colour... -
Page 8: Operation Controls And Functions
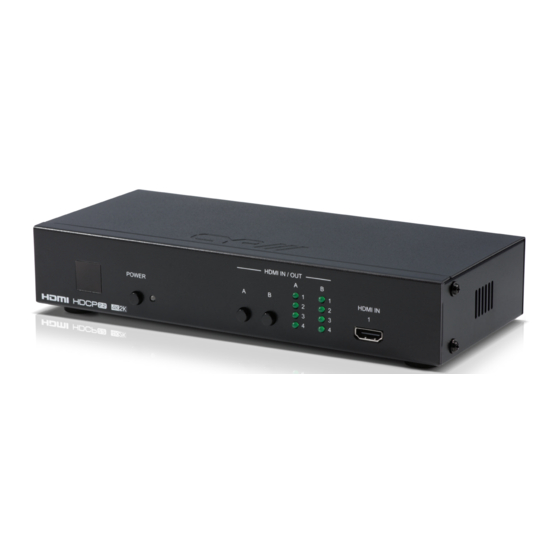
6. OPERATION CONTROLS AND FUNCTIONS 6.1 Front Panel HDMI IN / OUT POWER HDMI IN IR window: Accepts IR signals from the included IR remote for control of this unit only. POWER: Press this button to power on the unit or place it into stand- by mode. -
Page 9: Rear Panel
6.2 Rear Panel HDMI IN HDMI OUT SERVICE CONTROL RS-232 IR IN DC 5V HDMI In : Connect to HDMI source equipment such as a media player, game console or set-top box. DVI sources are also supported with the use of an HDMI to DVI adapter HDMI Out: Connect to HDMI TVs, monitors or amplifiers for digital video and audio output. -
Page 10: Remote Control
6.3 Remote Control POWER POWER: Press Power key to turn on the device or set to standby mode. OUTPUT A1~A4 & B1~B4:Press these buttons to change the routing of output A/B. CR-155... -
Page 11: Webgui
6.4 WebGUI Install the IP Discovery Tool: Please obtain Device Discovery software from your authorized dealer or download it from our website and save it in a directory where you can easily find it. Note: The unit’s default IP address is 192.168.1.50 Connect the unit and your PC/Laptop to the same active network and execute the Device Discovery software. -
Page 12: Webgui Control Page
6.4.1 WebGUI Control Page All functions, including power, input selection, EDID management, HDCP management, Ethernet settings, and reset/firmware functions, are presented on a single web page to allow for intuitive operation. The individual functions will be introduced in the following sections. 6.4.2 Power On/Off The unit can be powered on or off (stand-by mode) from this tab. -
Page 13: Routing
6.4.3 Routing This tab allows for the selection of the input source for each output. Four HDMI inputs and two HDMI outputs are available for selection. 6.4.4 Source Detect When a live input source is one of the 4 HDMI inputs the corresponding input in this tab will display “ON”. -
Page 14: Status
6.4.5 Status This tab displays the currently selected HDMI input sources for each output and the unit’s firmware version. It also provides a way to reset or reboot the unit. 1) To perform a factory reset on the unit, please click the “RESET” button. 2)To reboot the unit, please click the “REBOOT”... -
Page 15: Hdcp Control
6.4.7 HDCP Control This tab allows for the HDCP mode to be switched between “Standard” and “Apple” mode. “Apple” mode allows for the display of non-HDCP required content from Apple devices on non-HDCP displays. This setting can be assigned individually to each input. -
Page 16: Firmware Update
6.4.8 Firmware Update This tab provides a way to update the firmware of the unit. 1) BROWSE: Click the “BROWSE” button to select the firmware update .bin file which is located on your local PC. 2) UPDATE: Click the “UPDATE” button to begin the firmware update process. -
Page 17: Labelling
6.4.10 Labelling This tab allows for the labelling of the four HDMI input ports and the two HDMI output ports. Please click the “SAVE” button to store the changes. 6.4.11 Network Setting This tab provides control over the unit’s network settings. The IP mode can be set to DHCP for automatic IP configuration, if your local network supports it, or it can be placed into STATIC mode. -
Page 18: Telnet Control
6.5 Telnet Control Before attempting to use telnet control, please ensure that both the unit and the PC/Laptop are connected to the same active networks. To access Telnet in Windows 7, click on the “Start” menu and type “cmd” in the search field, then press “Enter”. - Page 19 This will connect us to the unit we wish to control. Type “help” to list the available commands.
-
Page 20: Rs-232 Command
6.6 RS-232 Command Command Description Parameter HELP/? List available commands NONE POWER OFF NONE POWER ON NONE INNAME SET/SHOW ALL INPUT NAMEIN NAME [1~4] [8 char] OUTNAME SET/SHOW HDMI OUTPUT OUTNAME [A/B] [8 char] NAME SET/SHOW OUTA SOURCE A [1~4] SET/SHOW OUTB SOURCE B [1~4] SET/SHOW OUTA/B SOURCE... - Page 21 Command Description Parameter IPCONFIG DISPLAY THE CURRENT NONE IPCONFIG SIPADDR SET ETHERNET IP ADDRESS SIPADDR X.X.X.X (X:0~255) SNETMASK SET ETHERNET NETMASK SNETMASK X.X.X.X (X:0~255) SGATEWAY SET ETHERNET GATEWAY SGATEWAY X.X.X.X (X:0~255) HTTPPORT SET HTTP PORT NUMBER HTTPPORT N (N=0~65535) TELNETPORT SET TELNET PORT NUMBER TELNETPORT N (N=0~65535)
-
Page 22: Connection Diagram
7. CONNECTION DIAGRAM Blu-ray Player Satellite Receiver Set-top Box Media Player HDMI Inputs HDMI IN / OUT POWER HDMI IN Power Supply HDMI IN HDMI OUT SERVICE CONTROL RS-232 IR IN DC 5V RS-232 Equipped IR Extender PC or Notebook RS-232 Connection HDMI Output... -
Page 23: Specifications
8. SPECIFICATIONS 8.1 Technical Specifications Video Bandwidth 600MHz/6Gbps Input Ports 4 x HDMI 1 x IR In Output Ports 2 x HDMI Others 1 x Control 1 x Service 1 x RS232 Supported Resolutions 480i to 4K2K@24/50/60 HDMI Sampling Rate 32kHz ~ 192 kHz IR Frequency 38kHz... -
Page 24: Support Timing Table
8.2 Support Timing Table HDMI RESOLUTION SUPPORTED 480i 576i 480p 576p 640x480 720p @50&60 800x600 1080i @50&60 1080p@24&50&60 1024x768 1366x768 1280x1024 1600x1200 1920x1200 3840x2160p@24&25&30&50&60(YUV444) 3840x2160p@50&60(YUV420) ... -
Page 25: Hdmi Cable Length
8.3 HDMI Cable Length HDMI CABLE LENGTH (MAX) 8-bit 1080p 12-bit 1080p Input Output Input Output HI SPEED 4K2K CABLE LENGTH (MAX) 4K2K HDMI In HDMI Out 3840x2160p24 3840x2160p60... - Page 28 CYP (UK) Ltd., Unit 7, Shepperton Business Park, Govett Avenue, Shepperton, Middlesex, TW17 8BA Tel: +44 (0) 20 3137 9180 | Fax: +44 (0) 20 3137 6279 Email: sales@cypeurope.com www.cypeurope.com v1.00...
Need help?
Do you have a question about the OR-42-4K22 and is the answer not in the manual?
Questions and answers