
Related Manuals for Fri-Jado MCC-60 H


Summary of Contents for Fri-Jado MCC-60 H
- Page 1 MCC – Hot USER MANUAL Modular Convenience Counter – Hot WARNING Read the instructions before using the machine. EN (Original Instruction) 9124741 / 2206...
- Page 2 MCC – Hot KEEP THIS USER MANUAL FOR FUTURE USE © 2022 Fri-Jado B.V., Oud Gastel, The Netherlands. We advise you to contact your supplier for the guarantee period and conditions. Further we refer to our General Terms and Conditions for Sales and Delivery that are available upon request.
-
Page 3: Table Of Contents
MCC – Hot CONTENTS INTRODUCTION ......................5 General ..........................5 Identification of the unit ..................... 5 Pictograms and symbols ....................5 Safety instructions ......................6 1.4.1 General ........................6 1.4.2 Moving (when applicable) .................... 7 1.4.3 Outdoor use restrictions ....................7 Hygiene .......................... - Page 4 MCC – Hot MALFUNCTIONS AND SERVICE .................. 32 Replace the mains cord ....................32 TECHNICAL SPECIFICATIONS ..................33 4/36...
-
Page 5: Introduction
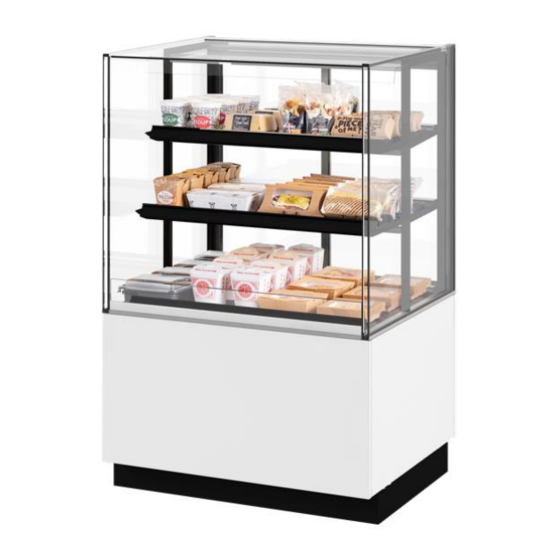
MCC – Hot INTRODUCTION General This manual is intended for the user of the Hot MCC (Modular Convenience Counter). The features and controls are being described, along with directions for the safest and most efficient use, in order to guarantee a long life of the unit. All pictograms, symbols and drawings in this manual apply to all available Hot MCC (US) models. -
Page 6: Safety Instructions
MCC – Hot Safety instructions WARNING The outside and shelves of the unit can be very hot. WARNING The maximum load on top of the unit may never exceed 22 lbs. WARNING See installation instructions for grounding requirements. WARNING Always use the brakes on both front wheels: 1.4.1 General The user of the unit will be fully responsible for abiding the locally prevailing safety- rules and... -
Page 7: Moving (When Applicable)
MCC – Hot 1.4.2 Moving (when applicable) When moving the unit: • Before moving the unit, first switch off the mains voltage by pulling the plug from the wall socket. • Remove pans containing a liquid product from the unit. •... -
Page 8: Storage
MCC – Hot Storage If the unit will not be used temporarily, and will be stored, follow these instructions: • Clean the unit thoroughly. • Wrap the unit from getting dusty. • Store the unit in a dry, non-condensing environment. •... -
Page 9: Description Of The Unit
MCC – Hot DESCRIPTION OF THE UNIT Technical description The panels are made of galvanized steel plating, stainless steel or aluminum. Some of the visible internal and external parts have been provided with a powder coating. The glass used is tempered or layered. -
Page 10: Installation And First Use
MCC – Hot INSTALLATION AND FIRST USE All packing materials used for this unit are suited for recycling. Before and during unpacking, check the state of the unit. In case of damage, store the packing material, and contact the transporter within fifteen working days after receiving the goods. Unpacking the unit 1. -
Page 11: Unpacking The Front Doors (Optional)
MCC – Hot 3.1.1 Unpacking the front doors (optional) The front door(s) (1-3) and fixings are placed in a crate during transport. Fixings Installation and positioning WARNING Electric chock hazard. Grounding instructions: only connect the appliance to an alternating current provided by a grounded wall socket, with a mains voltage in accordance with the information indicated on the data plate of the appliance. -
Page 12: Level The Unit
MCC – Hot 3.2.1 Level the unit Place the unit on a sturdy, flat surface and level the unit by adjusting unit’s legs (max. +1/2 inch). 3.2.2 Mounting the plinths Place rear plinth attaching both rear adjustable legs using its two clamps. -
Page 13: Mounting Front Doors (Optional)
MCC – Hot 3.2.3 Mounting front doors (optional) Position the doors with the handles to the outside and with the warning sticker above the handle. Position the door over the bottom profile and place a plastic spacer between the bottom profile and the collar bearing. -
Page 14: Applying Price Rail
MCC – Hot Result 3.2.4 Applying price rail Optional price rails for self-serve models can be mounted using the front screws underneath each of the SS shelves. Price rails for full serve models can be mounted on the air inlet grill and on the glass shelves. -
Page 15: Repositioning The Glass Shelves
MCC – Hot Repositioning the glass shelves 3.4.1 FS & SS-Humidified models The glass shelves can be positioned at three horizontal levels (I), or one of the three angled positions (II and III) by changing the positions of the LED-armature with respect to the rear. In order to change to any of these positions, follow the steps in the example below to change from a horizontal to an angled position. -
Page 16: Self-Serve Models
MCC – Hot 5. Position the side supports at the desired height by inserting them into the rear column. Let the front end rest on the LED- armature. Please note that the rear level is supposed to be located at an equal or higher level than the LED- armature. -
Page 17: Humidification Full-Serve And Self-Serve-Humidified Models
MCC – Hot To change to a different position: • Remove the plateaus from the unit. • Reposition the supports at the front and the back to the desired positions. • Place the plateaus back in the unit. Humidification Full-Serve and Self-Serve-Humidified models 3.6.1 Water connection automatic When connect to the water supply the FS and SS-Humidified will fill the water tray automatic when... -
Page 18: Manually Fill
Max. reservoir Unit GN tray size level when alarm to add (only when water level activates alarm is on!) MCC-60 H GN 1/2 (1.6 in) 0.66 gallon 0.19 gallon 0.46 gallon MCC-90 H GN 1/1 (1.6 in) 1.32 gallon 0.39 gallon 0.92 gallon... -
Page 19: First Use
MCC – Hot First use Before starting to use the unit, clean the inside thoroughly with mild detergent and water. After cleaning it wipe it with a cloth moistened with clean water to remove residual detergent, then dry the entire unit. Warning regarding to automated humidifier: When filling the water tray for the first time, water may come out of the pipe at high speed. -
Page 20: Operation And Use
MCC – Hot OPERATION AND USE The display and/or set value is not the product/unit temperature. The unit is set at 149ºF intake air temperature for the self-service model and 203ºF for full serve and self-serve humidified models. If required this temperature can be adjusted to some degree. - Page 21 MCC – Hot Loading the unit • Only place products that have a core temperature of at least 185ºF. • Only package the hot products in bags or containers that are suitable for this purpose. • To ensure a good contact with the heated trays, only place a single layer of products. •...
-
Page 22: Cleaning And Maintenance
MCC – Hot CLEANING AND MAINTENANCE WARNING Never use a water hose for cleaning. Water can seep into the unit through the ventilation holes of the unit. Appliances must be disconnected from their power supply during cleaning or maintenance and when replacing parts. Because of hygiene aspects and optimum condition of the unit it is of utmost... -
Page 23: Cleaning Glass Panes
MCC – Hot Cleaning Glass Panes Cleaning the top glass pane • For all MCC variants, lift and hold the top glass while cleaning the top glass pane. Cleaning the top air guides WARNING Do not use detergents and other cleaning products that may damage polycarbonate. Using inappropriate products to clean may tarnish, scratch or even crack any polycarbonate surfaces. - Page 24 MCC – Hot Cleaning the side double-glass pane • Slide the double glass pane towards the front along the top (A) and bottom (B) guiding rails. The side pane can be removed from the unit once it has slid in its entirety past the top guide.
- Page 25 MCC – Hot Cleaning front window • Lift and hold the top glass, the front glass will automatically remain in position • Gently tilt the front glass forward (do not drop) whilst holding the top glass. • Lower the top glass back in place. •...
- Page 26 MCC – Hot Cleaning sliding doors and rear of shelves Always keep the sliding doors closed as much as possible, or the unit cannot maintain its climate. Cleaning the sliding doors is therefore recommended during off-hours. Follow the following steps to access the inner sides of the sliding doors and the rear of the shelves for cleaning.
- Page 27 MCC – Hot • To clean the left (innermost) door, slide both doors to the right until the innermost door´s slot aligns with the guiding pin. NOTE: The outermost door should still be in its rotated position. • Turn the innermost door outwards as well to clean it.
- Page 28 MCC – Hot Cleaning front door(s) (optional) • Clean the outside of the front doors. • Open the front doors and clean the inside of the doors in the same way as the outside. 28/36...
-
Page 29: Cleaning Air Guides, Fans And Water Tray Humidified (Optional) Models
MCC – Hot Cleaning air guides, fans and water tray humidified (optional) models WARNING Switch off the unit first and let it cool down. Be aware of rotating parts. • Remove first the plating of the lower presentation deck. • Remove the plating above the water tray. - Page 30 MCC – Hot • Remove the inlet air guides at the frontside and clean them. • Remove the outlet air guides at the backside and clean them. • To clean the water tray: lift up the water level sensor pins and remove the water tray as shown.
- Page 31 MCC – Hot Only FS models • Clean the fans (when needed) with a brush. Fans are positioned below the inlet air guides. • Follow the above steps in reversed order to reassemble the air guides and plates. 31/36...
- Page 32 MCC – Hot MALFUNCTIONS AND SERVICE Before you consult your dealer or the service agency when there is a fault, you can check the following points yourself: • Is the power supply OK? Check the fuses and the earth leakage switch in the meter cupboard.
- Page 33 MCC – Hot TECHNICAL SPECIFICATIONS WARNING Consult the identification plate to get the proper specifications of the unit. The electrical data may vary from country to country. Self-service models Model 24-2-H SS 36-2-H SS 48-2-H SS Approved for USA / CAN USA / CAN USA / CAN Width...
- Page 34 MCC – Hot Full-service and Self-service Humidified models Model: 24-2-H FS / SS Hum. 36-2-H FS / SS Hum. 48-2-H FS / SS Hum. Approved for USA / CAN USA / CAN USA / CAN Width 23 5/8 in 35 7/16 in 47 1/4 in Depth 29 1/2 in...
- Page 35 MCC – Hot Notes. 35/36...
- Page 36 MCC – Hot Fri-Jado B.V. Fri-Jado Inc. Blauwhekken 2 1401 Davey Road, Suite 100 4751 XD Oud Gastel Woodridge IL 60517 The Netherlands Tel: +31 (0) 76 50 85 400 Tel: +1-630-633-7950 www.frijado.com 36/36...
Need help?
Do you have a question about the MCC-60 H and is the answer not in the manual?
Questions and answers