Table of Contents
Advertisement
Quick Links
Advertisement
Table of Contents

Summary of Contents for H-KING MX2 Extreme 4S EP0
-
Page 2: Specifications
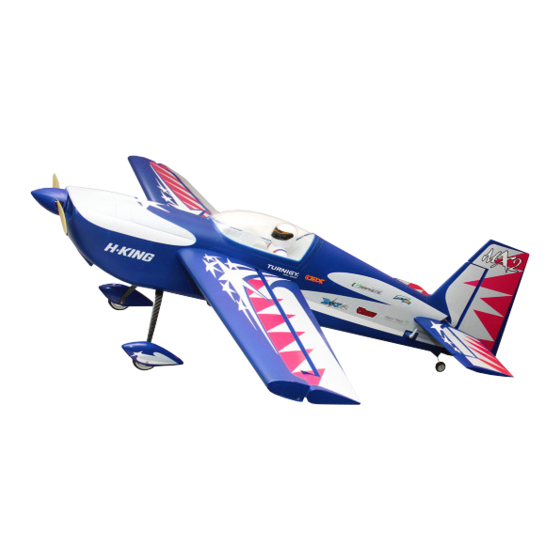
INTRODUCTION: The H-King MX2 3D was designed to be an all-out 3D performer with great, straight precision flying capabilities. It has a great combination of lightweight, durability, and performance with none of the compromises normally found in EPO foam aerobatic models. Michael Wargo, our team pilot, and 3D expert helped fine-tune the MX2 Extreme 3D into the type of plane he enjoys flying. - Page 4 INTRODUCTION: 8. 13 x 4 Propeller 1. Fuselage 9. Servo Y lead 2. Left main wing 10. Tail-wheel bracket 3. Right main wing assembly 4. Wing protectors 11. Carbon fiber landing gear 5. Rudder 12. Spinner 6. Carbon fiber wing joiner rod 13.
-
Page 5: Horizontal Stabilizer Installation
ASSEMBLY INSTRUCTIONS: Horizontal Stabilizer Installation. Apply a thin coat of foam safe glue to the stabilizer mid-section and gently slide it into place as shown. Check frequently if the stabilizer is level and square to the fuselage as the glue dries. A small piece of white foam comes with the fuselage. -
Page 6: Rudder Installation
Rudder installation. Insert the pre-installed rudder hinges into the fin and apply foam safe CA glue to secure in place. Check frequently to ensure that the rudder moves freely as the glue dries. Tail wheel installation. Insert the tail wheel landing gear wire into the small hole in the rudder. Then install the plastic bracket on to the rear of the fuselage and secure it using the supplied 3mm self-tapping screw as shown. -
Page 7: Rudder And Elevator Pushrod Installation
Rudder installation. Install one of the supplied M3 x 35mm bolts through one of the wheel spat outer halves and add a plywood washer and wheel as shown. Then slide on the inner half of the wheel spat, pass the remaining part of the bolt through the hole in the carbon landing gear, then secure the spat/wheel assembly in place by using the supplied M3 nut. -
Page 8: Main Wing Installation
Main wing installation. Install the carbon wing joiner rod through the fuselage. Then slide the left wing panel onto the rod and feed the aileron servo lead through the hole in the fuselage at the same time. Secure the wing panel by using the supplied nylon wing bolt. - Page 9 Your H-King MX2 Extreme 3D is now complete.
- Page 10 SETTING-UP THE H-KING MX2 EXTREME 3D: Travel Settings: Each flight control must be set to its physical limits. This means as far as it will go, but no farther than it has to. You set this by selecting the servo, fully deflect the surface with the transmitter, then increase (or occasionally decrease) the percentage to where the flight surface will not...
-
Page 11: Recommended Products
RECOMMENDED PRODUCTS: Turnigy Graphene Panther Turnigy Graphene 2200mAh 4S Turnigy Nano-Tech Plus 2200mAh 4S 75C Battery Pack 45C Lipo Pack w/XT60 2200mAh 4S 70C Lipo Pack w/XT60 SKU: 9067000372-0 SKU: 9067000136-0 SKU: 9210000301-0 Aerostar Composite Propeller YEP 80A (2~6S) SBEC OrangeRx Tx10i Mode 2 EU 13x4 Grey (1pc) Brushless Speed Controller... -
Page 12: Spare Parts
SPARE PARTS Fuselage Main wing set Rudder SKU: 9152000026-0 SKU: 9152000027-0 SKU: 9152000031-0 Horizontal stabilizer 13 x 4 prop Carbon fiber wing joiner SKU: 9152000030-0 SKU: 9152000035-0 SKU: 9152000032-0 2 blade spinner Canopy hatch Carbon fiber landing gear SKU: 9152000033-0 SKU: 9152000029-0 SKU: 9152000034-0 Cowling... - Page 13 APEX CE SPECIALISTS LIMITED UK REP 89 Princess Street, Manchester, M1 4HT, UK APEX CE SPECIALISTS LIMITED Unit 3D North Point House, North Point Business Park, New Mallow Road, Cork, T23 AT2P, Ireland...


