
Related Manuals for Exploranium KT-9


Summary of Contents for Exploranium KT-9
- Page 1 User’s Guide KT-9 Kappameter Rev. 1 264 Watline Avenue, Mississauga (Toronto), Ontario, Canada, L4Z 1P4 Tel (905) 712 3100 • Fax (905) 712 3105...
- Page 2 Exploranium G.S. Limited. © Copyright 1997 Exploranium G.S. Limited Revision 1...
-
Page 3: Table Of Contents
Table of Contents General information REFACE Introduction, iii Getting help, iii Conventions, iv The KT-9 Kappameter HAPTER Features, 1 Design, 4 Controls, 6 Displays, 9 Operating principle and Theory, 10 Using the KT-9 HAPTER Battery installation, 11 Power , 12... - Page 4 HAPTER Specifications, 47 Parts list and accessories, 48 Display symbols, 49 Error messages, 50 Warranty and repair, 51 Operating the KT-9 from a computer HAPTER —calibration program, 54 CALIB —simple data transfer, 57 KAPPA 1 —PC recording of data from a...
-
Page 5: Preface
KT-9 . Getting help If you should encounter a problem with either the KT-9 , the optional external sensors, the applications software or applying the instrument to a particular problem, please contact... -
Page 6: Conventions
Conventions Conventions To help you quickly find information, the KT-9 documentation follows these conventions: Symbols Symbol Meaning Indicates a note of interest, a default or special condition, or specific critical information. Indicates a tip, helpful hint or an alternate way of doing a task. - Page 7 One of the features of the KT-9 allows you to re-assign the functions of the buttons depending upon whether you prefer to hold the instrument in your right or left hand. All the operations will be described from the point of view of right- handed use.
- Page 8 Conventions Instrument display screen The KT-9 display screen is a five character liquid-crystal display (LCD). When an action or instructional sequence is being described, the appropriate display from the instrument will be shown. A sample screen looks like this: LoBAT...
-
Page 9: The Kt-9 Kappameter
APPAMETER magnetic susceptibility meter for obtaining accurate and precise measurements from outcropping rocks, drill cores and rock samples. Special design features make the KT-9 superior in measuring uneven rock surfaces and well suited to automated drill-core logging with digital recording. - Page 10 Long battery life – The special power saving techniques used by the KT-9 allows you to take up to 10,000 readings (under normal conditions) using a single 9-volt battery. Uneven samples – The measurement of magnetic susceptibil- ity is dependent upon the volume of material being sampled.
- Page 11 Data storage – Up to 10 readings can be stored in the KT-9 ’s internal memory. This data is retained even if the unit is pow- ered off! Data averaging –...
-
Page 12: Design
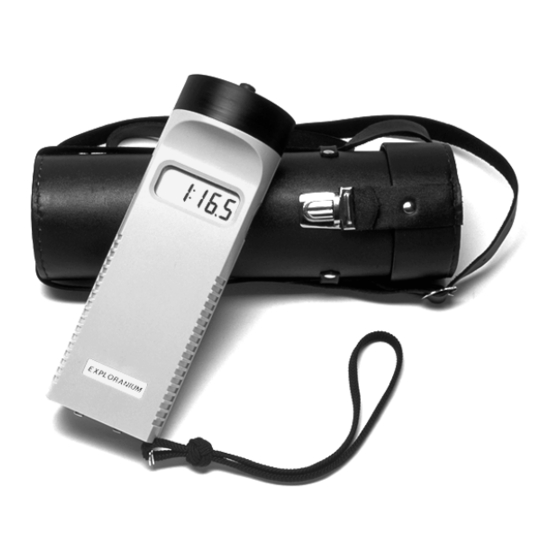
Design The KT-9 was specially designed to be an easy to use, one- handed, rugged field instrument. Rain and dust proof – To this end, the slim instrument case consists of two isolated compartments. - Page 13 Storage and transportation – A robust leather case is sup- plied with the KT-9 . The case can be either carried over the shoulder on a strap or worn on a belt to facilitate transporta- tion in the field. The case has a moulded bottom to accommo- date the sensor head with the pin in order to prevent the KT-9 from sliding around.
-
Page 14: Controls
Controls Controls Figure 2 The controls and features of the KT-9. - Page 15 1: KT-9 controls and features ABLE Item Description LCD Display Up to 5 large characters can be displayed making it easy to read under a variety of conditions Right Button Multiple functions: – main control – mappable to LEFT function –...
- Page 16 (at least a RIGHT LEFT one half-second [0.5 sec] push) for proper operation. The KT-9 is programmed to reject fast button activation as a means to prevent accidental activation.
-
Page 17: Displays
Displays The characters that the KT-9 displays are summarized as follows Character(s) Meaning Description Access: Indicates the mode of mea- surement can be set Control: Indicates that you can change from right-handed to left- handed operation Core: The measurement mode is set... -
Page 18: Operating Principle And Theory
EM field will be influenced to varying degrees by magnetically susceptible material. Operating principle The KT-9 uses a 10 kHz LC oscillator and an inductive coil to measure the susceptibility. The sequence required to obtain a measurement of susceptibility is: 1. -
Page 19: Using The
Using the KT-9 KT-9 Battery installation The KT-9 is powered by a single 9-volt alkaline battery (type 6F22, IEC standard). The battery compartment is accessed from the bottom of the instrument by removing the single screw. The battery compartment is shown in the following figure. -
Page 20: Power On Or Off
7 Replace the cover. 8 Insert and tighten the screw. If you are going to store your KT-9 for a longer term (over thirty days), please remove the battery from the unit to pre- vent damage from electrolyte leakage. It is also recom- mended that you visually inspect the battery after any long storage interval. -
Page 21: Menus
The KT-9 turns off automatically after five minutes of inactivity to conserve battery power. Menus The KT-9 has two main menus and one sub-menu that control the various configurations and modes. The displayed menu items are as follows and their relationships are shown in Figure... - Page 22 You will be able to toggle between the following core diame- ters (in units of centimetres): 3, 4, 5, 6 , 7, 8, 9, 10, 11, 12 The following value is used to represent a 1 inch diameter core: 2.54 Figure 4 KT-9 Menus flow chart...
-
Page 23: Configuring For Right Or Left-Handed Use
Configuring for right or left-handed use To make the KT-9 fully adaptable to your way of working in the field, it can be set to operate in either a right or left-handed mode. This means that the main measurement functions, i.e. -
Page 24: Selecting Mode Of Operation
The KT-9 has four modes of operation: – In this mode, measurements are activated by the special pin located at the top of the KT-9. This permits easier operation and achieves much higher accuracy when used for samples with irregular surfaces. This unique simple mode of operation auto- matically finds the zero-reference level after the reading has been taken. - Page 25 – In this special sub-mode of the N or C modes, the KT-9 continuously samples at a rate of 3 times per second. The unit also emits an audio tone that is directly proportional to the measured susceptibility. This mode may also be used for core logging with optional digital recording, as required.
- Page 26 You will pass through the C: menu in this step. To select Scan mode The scan mode can only be activated when the KT-9 is set to the or C modes, i.e. the display should show either of the...
-
Page 27: Taking Measurements
Taking measurements The KT-9 remembers the last mode of operation that was set. Therefore, for everyday use when the unit is turned on, it is ready to go. Depending upon what mode you have selected for opera- tion, there are slight variations in the procedures to obtain pre- cise and accurate true susceptibility readings. - Page 28 Taking measurements in Figure 4 on p. 14 Figure 5 KT-9 measuring modes Data Units – The KT-9 unit of measurement is in SI Units rang- ing from 0.01x10 to 999x10 , with a sensitivity of 0.01x10 Units.
- Page 29 This is the recommended mode of operation for the KT-9, and is sometimes referred to as the read-zero method. You may need to replace the S in the centre of sensor head with the P These items, found in the lid compartment of the storage case (as shown in Figure 12 on page 42), can be seen in the following figure.
- Page 30 Please refer to “Clearing the memory” on page 37 on how to clear the memory. 3 The internal buzzer will beep. 4 Remove the KT-9 from the sample (and at least 30 cm away from any other mag- netically susceptible material) to get the zero or free-air value.
- Page 31 SI Units. Therefore, a value of 0.01 = 0.01x10 SI Units = 1x10 SI Units, which is the limit of sensitivity for the KT-9. Additional readings 1 To take additional measurements, the above steps 1 to 5 are repeated. 2 Each new measurement is automatically stored in memory when you press the P for the next reading.
- Page 32 (read-zero method) is a simple three step procedure: 1 Press the P against the sample. 2 Remove the KT-9 after the beep (it is measuring the zero). 3 The result is displayed after the second beep. mode The N...
- Page 33 IGHT ment while holding it at least 30 cm away from any magnetically susceptible mate- rial. The KT-9 will beep when the button is pressed. 3 The display will show: C: 0 If the value is not 0, then you have old data in memory that should be cleared.
- Page 34 Taking measurements 6 Remove the KT-9 at least 30 cm away from the sample. 7 After one second, the KT-9 will beep again, and the true measured value will be displayed. 8 Press the R button to store this read- IGHT ing in memory.
- Page 35 1 Take a zero reading in free-space. 2 Place the sensor head against the sample and press the button again. IGHT 3 Remove the KT-9 after the beep (it is checking zero again). 4 The result is displayed after the second beep. mode The C...
- Page 36 You will need to specify the core diameter in order to get a cor- rect reading, as this diameter is critical to the geometric correc- tion that the KT-9 performs. You will be automatically presented with the d: ( ) menu when the C...
- Page 37 2 Press the L button to zero the instru- ment while holding it at least 30 cm away from any magnetically susceptible mate- rial. The KT-9 will beep when the button is pressed. 3 The display will show: C: 0 If the value is not 0, then you have old data in memory that should be cleared.
- Page 38 KT-9 will beep. Hold the unit on the sample for about half a second. 6 Remove the KT-9 at least 30 cm away from the sample. 7 After one second, the KT-9 will beep again, and the true measured value will be displayed.
- Page 39 2 Place the sensor head against the core sample and press the R button again. IGHT 3 Remove the KT-9 after the beep (it is checking zero again). 4 The result is displayed after the second beep. mode This is a special sub-mode of the N and C modes.
- Page 40 Taking measurements The S mode allows for rapid examination of rock faces and lengths of core. The variable audio allows you to rapidly corre- late visually the various lithologies being examined. This mode may also be used for detailed core logging with optional digital recording.
- Page 41 mode Taking readings 1 The display should show either of the following when in right-handed mode: r: nP r:C x 2 Press the R button to check if the IGHT data memory is empty. If the display does not show C: 0, then you will have to clear the data memory as described in “Clearing the memory”...
- Page 42 Taking measurements 1 In the S mode, the displayed data are not stored in memory. 2 Beware of temperature dependent drift in S mode! Since only one measurement of the free-space frequency is used for calculating all the susceptibilities, there is a possibility that you may experience a gradual decrease in the accuracy of the readings over a period of time.
-
Page 43: Data Handling And Memory
L button, before proceeding to take further readings. The KT-9 can store up to 10 samples in its memory stack. The display after the eleventh sample is taken will show:. F:XXX The XXX represents the value of the reading and the F indicates that the memory is now full. - Page 44 Data handling and memory Figure 10 Data recall and averaging flowchart 1 When there is more than one reading in memory, pressing the L button recalls prior readings in a last to first order, i.e. popping values off a stack. 2 To continue recording data without averaging or clearing the stack, press the R button before or when you reach...
- Page 45 Automatic averaging Automatic averaging Please refer to Figure 10 on page 36 to see where the averaging operation takes place. 1 If you hold the L button for 1 second, it will trigger the averaging operation and display the average of all the values in memory, e.g.
-
Page 46: If Something Goes Wrong
If something goes wrong If something goes wrong The KT-9 has very sophisticated error checking capabilities. It can display a variety of error messages when it detects an incor- rect function or fault. These error messages are: Error messages Table 2:... - Page 47 Chapter External sensors, maintenance and options The KT-9 has specially designed external sensors available to enhance the functionality and versatility of the instrument. Currently, there are two sensors with accessories available. External sensors KT-9-SC Remote Coil The remote coil was specially designed to overcome certain problems encountered in core scanning.
- Page 48 This remote coil has a built-in preamplifier with the sensor so that the cable length to the KT-9 would not become a serious limitation. The remote coil is shown in Figure 11 on page 40.
- Page 49 SENSOR bottom panel covering the battery compartment. 2 Turn on the KT-9 by pressing the button on the right side. 3 The KT-9 automatically recognizes that an external sensor has been connected and shows either of the following dis-...
- Page 50 Storing and transporting the KT-9 A robust leather case is provided for storing and transporting the KT-9. The case can be worn on a belt or carried over your shoulder using the provided strap. You should always store the instrument in the supplied case to prevent accidental damage.
- Page 51 C: 3 When the LoBAT warning appears, you have enough power left for only 100 readings (at normal temperatures). If the battery voltage drops below 5.3V, then the KT-9 will not allow any more readings, since proper operation cannot be...
- Page 52 All configuration settings and stored data are in flash mem- ory. You will not lose any data when you remove the battery. The KT-9 is powered by a single 9-volt alkaline battery (type 6F22, IEC standard). The battery compartment is accessed from the bottom of the instrument by removing the single screw.
- Page 53 8 Insert and tighten the screw. Long-term storage If you are going to store your KT-9 for a longer term (over thirty days), please remove the battery from the unit to pre- vent damage from electrolyte leakage. It is also recom- mended that you visually inspect the battery after any long storage interval.
- Page 54 Batteries and maintenance...
- Page 55 Chapter Technical reference Specifications Item Description Sensitivity 1x10 SI Units Measuring ranges 9.99, 99.9 x10 999. x10 SI Units autoranging Operating fre- 10 kiloHertz quency Display 4½ character LCD, 12mm high Data memory up to 10 measurements Controls 2 touch buttons & measuring pin Connectors Sensor (external) &...
- Page 56 Pin assembly (mounted on the unit) 97935 Blind S 97960 Spare rubber shield for the P 97961 Spare connector sealing 25-700-007 Options Code Description Part no. KT-9-RS RS-232C cable 97945 KT-9-ST Adjustable S with trigger and 97985 TICK clamp KT-9-ST Adjustable S with trigger, cable...
- Page 57 Options Display symbols The characters that the KT-9 displays are summarized as follows: Character(s) Meaning Description Access: Indicates the mode of mea- surement can be set Control: Indicates that you can change from right-handed to left- handed operation Core: Indicates that the measure-...
- Page 58 Err 4 enough. Susceptibility is below Take a measurement against a Err 5 known sample or calibration –0.99x10 standard to verify that the KT-9 is operating properly. Susceptibility is above See above for Err 5 Err 6 999x10 Mode error:...
- Page 59 If the problem still can not be resolved at this point, then you will be requested to return the KT-9 for the necessary repairs. Description of the problem...
- Page 60 • serial number • reason for return • packaging and weight Instruments should be shipped to: Exploranium G.S. Limited 264 Watline Avenue Mississauga, ON L4Z 1P4 CANADA Please do not ship the KT-9 with the batteries installed. Further damage may result!
- Page 61 (August 1997) of the software disk is labelled: “KT-9 Support Software — KT9–002”. When the KT-9 is used in a remote mode from a computer, it consumes more power. It is therefore highly recommended to immediately change the KT-9’s battery whenever the...
- Page 62 • a calibration standard sample • a serial port connector cable (Part no. 97945). The calibration procedure is as follows: 1 Connect the supplied cable (Part no. 97945) to the KT-9 computer port located on the bottom panel (covering the battery compartment).
- Page 63 The serial number of your KT-9—located on the tag on the back of the instrument c) You will then be reminded to make sure that the KT-9 is connected to the computer and is turned on. You will then have to select a measuring mode ( ) on the KT-9 for the calibration procedure.
- Page 64 KT-9. The particular external sensor is now calibrated and ready to use. This calibration remains in the KT-9’s memory until a new calibration for a different sensor is performed. When you disconnect the external sensor, the KT-9 automatically switches back to it’s internal sensor but remembers the external sensor’s...
- Page 65 CAN7C from the connection of the KT-9 to the RS-232 port all the way through to the opening and closing of the data files. A brief overview of the process is as follows.
- Page 66 6 You will be prompted to provide a filename where the col- lected data will be stored: Enter the name of file... 7 You will then be prompted to take a measurement with the KT-9 (see “Taking measurements” on page 19). Š 8 Press the key to exit the program.
- Page 67 The procedure for running the scanning program is as follows: 1 Connect the supplied cable (Part no. 97945) to the KT-9 computer port located on the bottom panel (covering the battery compartment).
- Page 68 CONNECT KT-9 TO COM1 OF PC-COMPUTER SWITCH KT-9 ON SELECT MEASURING MODE ’nP’ OR ’Cor’ ERASE ALL DATA FROM MEMORY OF KT-9 - press ENTER on PC *** KT-9 READY *** Enter name of file DEV:FILENAME.EXT mydata.dat File mydata.dat opened for input...
- Page 69 This indicates that the program is ready to start the measurement process. For the process to begin, the KT-9 needs to get a zero reading of free space. There- fore, please make sure that the sensor is at least 30 cm away from any magnetically susceptible material at this point.
- Page 70 CONNECT KT-9 TO COM1 OF PC-COMPUTER SWITCH KT-9 ON SELECT MEASURING MODE ’nP’ OR ’Cor’ ERASE ALL DATA FROM MEMORY OF KT-9 - press ENTER on PC *** KT-9 READY *** Enter name of file DEV:FILENAME.EXT mydata.dat File mydata.dat opened for input...
- Page 71 *** SCAN MODE *** PRESS ’C’ ON PC TO S T O P kappa = -0.57 [E-3 SI units] kappa = -0.37 [E-3 SI units] kappa = -0.40 [E-3 SI units] kappa = -0.50 [E-3 SI units] kappa = 0.10 [E-3 SI units] kappa = 48.18 [E-3 SI units] kappa =...
- Page 72 An example where this may be use is when you change to the next core box in the hole you are scanning. q) Pressing the key stops the program, closes the data file on the computer and returns control to the KT-9. — scan control from S device TICK...
- Page 73 CONNECT KT-9 TO COM1 OF PC-COMPUTER SWITCH KT-9 ON SELECT MEASURING MODE ’nP’ OR ’Cor’ ERASE ALL DATA FROM MEMORY OF KT-9 - press ENTER on PC *** KT-9 READY *** Enter name of file DEV:FILENAME.EXT mydata.dat File mydata.dat opened for input...
- Page 74 (quickly press and release) the trigger button on the stick. c) You should then see: *** KT-9 READY *** This messages indicates that the computer is properly talking to the KT-9 and there are no problems.
- Page 75 This indicates that the program is ready to start the measurement process. For the process to begin, the KT-9 needs to get a zero reading of free space. There- fore, please make sure that the sensor is at least 30 cm away from any magnetically susceptible material at this point.
- Page 76 CONNECT KT-9 TO COM1 OF PC-COMPUTER SWITCH KT-9 ON SELECT MEASURING MODE ’nP’ OR ’Cor’ ERASE ALL DATA FROM MEMORY OF KT-9 - press ENTER on PC *** KT-9 READY *** Enter name of file DEV:FILENAME.EXT mydata.dat File mydata.dat opened for input...
- Page 77 *** SCAN MODE *** PRESS ’C’ ON PC TO S T O P kappa = -0.57 [E-3 SI units] kappa = -0.37 [E-3 SI units] kappa = -0.40 [E-3 SI units] kappa = -0.50 [E-3 SI units] kappa = 0.10 [E-3 SI units] kappa = 48.18 [E-3 SI units] kappa =...
- Page 78 An example where this may be use is when you change to the next core box in the hole you are scanning. p) Pressing the key stops the program, closes the data file on the computer and returns control to the KT-9.
- Page 79 KT-5 vs. KT-9 operational differences In 1994 Exploranium released the KT-9 Susceptibility Meter. The KT-9 is a major advance over the already sensitive and accurate KT-5 unit, as it offers many new features. However, field experience has shown that some users, already familiar with the KT-5, experience difficulties in correctly using the KT-9.
- Page 80 N mode for a air to zero the KT-5. direct comparison with the KT-5.(See also page 25) Zero the KT-9 in free air by pressing the R button. IGHT The display should show C:0 (or 1,2...10, if data is in memory) 2.
- Page 81 (“P vs. N modes — comments” on page 74). Susceptibility KT-5 KT-9 The KT-5 was designed to The KT-9 automatically com- measure the A suscep- putes the T susceptibility. PPARENT tibility. At low susceptibility values, the differences between...
- Page 82 N modes — comments vs. N modes — comments The KT-9 permits the use of the N mode (same as the older KT-5 unit) or the newly developed P mode. Feedback from users in the field indicates that many do not clearly...
- Page 83 (weathered) and the susceptibility value from this thin layer is not representative of the actual sample. The KT-9 has an air-cored coil and 80% of the measured signal arises from a 20mm layer below the face of the coil. The pin spaces the coil away...
- Page 84 (if samples. weathering is not a problem). When you have removed the pin from the KT-9 for the mode, the supplied plastic screw MUST be installed. This will prevent moisture from leaking into the unit and...
- Page 85 Index Index Index Customs documents , 52 Access menu , 13 Accessories , 48 Accuracy estimates , 76 Data handling , 35 Ambient operating temperature , Automatic averaging , 37 erasing memory , 37 Automatic averaging , 37 PC data recording , 57 Retrieving a measurement , 35 Storing a measurement , 35 Data memory , 47...
- Page 86 — simple data transfer , 57 KAPPA 1 KT-5 , 71 operational differences , 71 Operating frequency , 47 KT-9-SC Remote Coil , 39 Operating Principle , 10 Operating theory , 10 Options , 48 LCD Display , 7 Left Button , 7...
- Page 87 — remote control & data CAN 7 storage , 59 Units of measurement , 20 — PC recording of data , 57 CAN 7 C Using external sensor , 41 Selecting core diameter , 28 Sensitivity , 47 Sensor external , 39 Warranty , 51 , 41 calibrating...
- Page 88 Index...
Need help?
Do you have a question about the KT-9 and is the answer not in the manual?
Questions and answers