SitOnit Seating Switchback Assembly Instructions Manual
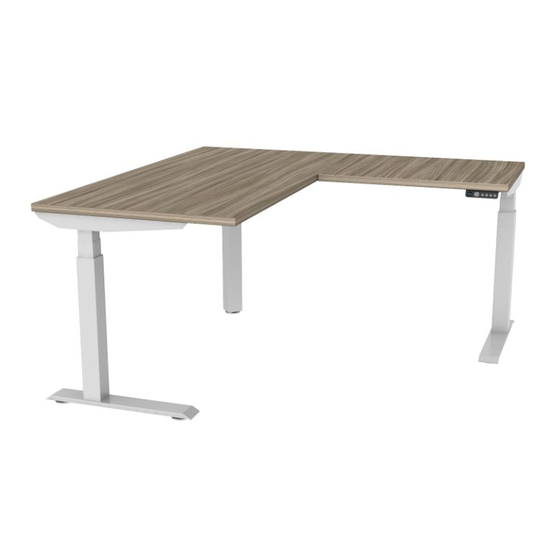
3-leg height-adjustable table
Hide thumbs
Also See for Switchback:
- Instruction sheet (14 pages) ,
- Assembly instructions manual (15 pages)
Advertisement
Quick Links
Switchback
3-LEG HEIGHT-ADJUSTABLE TABLE
ASSEMBLY INSTRUCTIONS
Find your fit.
Achieving the perfect position maximizes ergonomics and minimizes
fatigue or injury. With the press of a button, you can make the Switchback
height-adjustable table elevate the way you work while ensuring it matches
your unique needs. Configure your Switchback with a variety of leg options
and an extensive portfolio of tabletop shapes and workstation add-ons. All
that and quick installation make Switchback a leading solution in simplicity
and endless versatility.
|
|
C6553 Rev A
www.sitonit.net
1
Advertisement

Subscribe to Our Youtube Channel
Related Manuals for SitOnit Seating Switchback


Summary of Contents for SitOnit Seating Switchback
- Page 1 Find your fit. Achieving the perfect position maximizes ergonomics and minimizes fatigue or injury. With the press of a button, you can make the Switchback height-adjustable table elevate the way you work while ensuring it matches your unique needs. Configure your Switchback with a variety of leg options and an extensive portfolio of tabletop shapes and workstation add-ons.
- Page 2 Switchback 3-LEG HEIGHT-ADJUSTABLE TABLE Read the entire instruction manual before you start installation and assembly. If you have any questions regarding any of the instructions or warnings, please contact your local distributor for assistance. To report any issues with this product, contact our customer experience team at: (888) 274-8664 or sitonit@exemplis.com.
- Page 3 Switchback 3-LEG HEIGHT-ADJUSTABLE TABLE WARNING RISK OF DEATH AND SERIOUS INJURY Raising or lowering the table can trap, pinch, or crush body parts or property. Read all instructions before using this equipment. Keep at Least One Inch of Clearance Around the Desk...
-
Page 4: Grounding Instructions
Switchback 3-LEG HEIGHT-ADJUSTABLE TABLE WARNING RISK OF DEATH AND SERIOUS INJURY Raising or lowering the table can trap, pinch, or crush body parts or property. Read all instructions before using this equipment. Do Not Overload Table Make sure the table system is not overloaded by the weight of the tabletop and objects on table. - Page 5 Switchback 3-LEG HEIGHT-ADJUSTABLE TABLE Recommended Tools • Cordless Drill/Driver • #2 Phillips Bit • 5 mm Hex Key (Included) #2 Phillips Bit 5 mm Hex Key (Included) Cordless Drill/Driver Parts: Carton 1 Cable Clamps Corner Supports Column U-pipes Corner Bracket Quantity of M5 x 20 mm screws varies by model.
- Page 6 Switchback 3-LEG HEIGHT-ADJUSTABLE TABLE Parts: Carton 2 • • Cap (4) Data Extension Cable • • Clip, Small (3) Hand Control Cable • • Clip, Large (1) Power Cord • • Hardware: Foot (2) • • M4 × 22 mm Screw (2) Frame (1) •...
- Page 7 Switchback 3-LEG HEIGHT-ADJUSTABLE TABLE Step 1: Slide the corner bracket onto the column. Corner Bracket Column C6585 Rev A www.sitonit.net...
- Page 8 Switchback 3-LEG HEIGHT-ADJUSTABLE TABLE Step 2: Fasten the corner bracket into place. Corner Bracket 1:1 HARDWARE TOOL M6 × 16 mm Sockethead Screws 5 mm Hexy Key C6585 Rev A www.sitonit.net...
- Page 9 Switchback 3-LEG HEIGHT-ADJUSTABLE TABLE Step 3: Install cable clamps into the corner bracket. Cable Clamp Corner Bracket C6585 Rev A www.sitonit.net...
- Page 10 Switchback 3-LEG HEIGHT-ADJUSTABLE TABLE Step 4: Set the corner supports onto the corner bracket. Corner Support Corner Bracket C6585 Rev A www.sitonit.net...
- Page 11 Switchback 3-LEG HEIGHT-ADJUSTABLE TABLE Step 5: Begin attaching the corner supports to the corner bracket. Corner Support Corner Bracket Do not tighten more than half way. 1:1 HARDWARE TOOL M6 × 16 mm Screws 5 mm Hexy Key C6585 Rev A...
- Page 12 Switchback 3-LEG HEIGHT-ADJUSTABLE TABLE Step 6: Rotate the columns into the upright position. C6585 Rev A www.sitonit.net...
- Page 13 Switchback 3-LEG HEIGHT-ADJUSTABLE TABLE Step 7: Separate from the U-pipes. Set Screw U-Pipe If U-pipes do not separate easily, loosen set screws. If the tabletop is 48" or shorter, the U-pipes should be removed and discarded. For 72" tabletops, a longer U-pipe is used and shipped separately.
- Page 14 Switchback 3-LEG HEIGHT-ADJUSTABLE TABLE Step 8: Install the top supports by inserting the flange into the rectangular tube end. Rectangular Tube End Flange Top Support C6585 Rev A www.sitonit.net...
- Page 15 Switchback 3-LEG HEIGHT-ADJUSTABLE TABLE Step 9: Secure the motor housings by tightening the socket screws (already in place). Cover the open holes with the caps. Socket Screw Open Hole Ensure that the four additional pre-installed socket screws, to the left or right of the indicated socket screws, are also firmly tightened.
- Page 16 Switchback 3-LEG HEIGHT-ADJUSTABLE TABLE Step 10: Install the U-pipes into the two corner supports. No U-pipes are required for tabletops shorter than 48" in length. Unfasten half-way TOOL 5 mm Hexy Key C6585 Rev A www.sitonit.net...
- Page 17 Switchback 3-LEG HEIGHT-ADJUSTABLE TABLE Step 11: Insert the other side of the U-pipes into the corner bracket, aligning the top supports and corner supports with the pilot holes, before centering the U-pipe. No U-pipes are required for tabletops shorter than 48" in length.
- Page 18 Switchback 3-LEG HEIGHT-ADJUSTABLE TABLE Step 11: Finish tightening the sockethead screws from step 2 and the M6 × 16 mm screws from step 5. 120º 90º M6 × 16 mm Sockethead Screw TOOL 5 mm Hexy Key C6585 Rev A...
- Page 19 Switchback 3-LEG HEIGHT-ADJUSTABLE TABLE Step 12: Install the mending plates. Continue to step 14 if using a single tabletop without return. Ganging Bracket Location of the plates may vary based on table size and presence of grommets. 1:1 HARDWARE TOOL M5 ×...
- Page 20 Switchback 3-LEG HEIGHT-ADJUSTABLE TABLE Step 13: Attach feet to columns. Foot Column 1:1 HARDWARE TOOL M10 × 16 mm Sockethead Screws 5 mm Hexy Key C6585 Rev A www.sitonit.net...
- Page 21 Switchback 3-LEG HEIGHT-ADJUSTABLE TABLE Step 14: Connect the cables from the columns to the control box, using the included data extension cord for the one furthest from the control box. Column A Cable Corner Bracket Cable Data Extension Cable Control Box...
- Page 22 Switchback 3-LEG HEIGHT-ADJUSTABLE TABLE Step 15: Lift the frame to route the hand control cable under the mouse hole and attach to the control box. Attach the hand control to the tabletop. Hand Control Cable Hand Control Hand Control Cable...
- Page 23 Switchback 3-LEG HEIGHT-ADJUSTABLE TABLE Step 16: Attach the frame assembly to the underside of the tabletop. Base Attachment Hardware Tabletop Depth Number of Screws 24" Depth 24 Screws 30" Depth 30 Screws 1:1 HARDWARE TOOL M5 × 20 mm Screw...
- Page 24 Switchback 3-LEG HEIGHT-ADJUSTABLE TABLE Step 17: Attach the power cord to the control box. Control Box Power Cord C6585 Rev A www.sitonit.net...
- Page 25 Switchback 3-LEG HEIGHT-ADJUSTABLE TABLE Step 18: With the help of another person, flip the table to the upright position and reset it before the first use. The reset instructions are on the following page. NOTE: To avoid damage, note the location of the hand control and make sure that the process of flipping the table does not result in the table weight resting on the hand control.
-
Page 26: Controller Operation
Switchback 3-LEG HEIGHT-ADJUSTABLE TABLE 3-Digit Memorized Positions Display Reset Instructions Switching Between Metric and Imperial Press the button at the same time for three seconds. Continue 1. Press memory buttons 1, 2 and 4 pressing until the columns are in the for five seconds. - Page 27 Switchback 3-LEG HEIGHT-ADJUSTABLE TABLE Memorized Positions Height Limits Switchback supports, at most, four SET UPPER HEIGHT LIMIT: memory positions. 1. Adjust the desk to the preferred SET MEMORIZED POSITIONS: height of upper limit. 1. Adjust the desk to the desired height.
-
Page 28: Error Codes
Switchback 3-LEG HEIGHT-ADJUSTABLE TABLE Error Codes The digital display shows the error code below to suggest the issues that users may encounter during the operation. Error Code Description Resetting Not Reset Completely Overuse Protection Unbalance Protection Anti-Collision T-Touch Protection M1 Motor Over-Current Protection...
Need help?
Do you have a question about the Switchback and is the answer not in the manual?
Questions and answers