Advertisement
Table of Contents
Advertisement
Table of Contents

Related Manuals for SitOnit Seating WIT


Summary of Contents for SitOnit Seating WIT
- Page 1 Gone are the days when you clock in, stay in your cubicle and clock out. Dynamic environments call for adaptable seating that rolls with the punches. Our Wit family does exactly that. Because this is a design inspired by truths about how people work.
-
Page 2: Component List
WIT ASSEMBLY INSTRUCTIONS COMPONENT LIST REQUIRED TOOLS Basic Mechanism Swivel Tilt Mechanism Standard Synchro Mechanism • ⁵⁄₁₆" × 1" Screw (4) • ⁵⁄₁₆" × 1" Screw (4) • ⁵⁄₁₆" × 1" Screw (3) • ⁵⁄₁₆" Washer (4) • ⁵⁄₁₆" Washer (4) •... -
Page 3: Basic Mechanism
WIT ASSEMBLY INSTRUCTIONS BASIC MECHANISM Back Assembly Seat Assembly ⁵⁄ ₁₆ " × 1" Screw ⁵⁄ ₁₆ " Washer STEPS 1. Place seat/mechanism assembly on a firm, flat surface. 2. Place back assembly over hole pattern. 3. Secure back assembly by tightening four screws and four washers using a ¼" hex L-key to a minimum torque of 150 in-lbs. - Page 4 WIT ASSEMBLY INSTRUCTIONS SWIVEL TILT MECHANISM Back Assembly Seat Assembly ⁵⁄ ₁₆ " × 1" Screw ⁵⁄ ₁₆ " Washer STEPS 1. Place seat/mechanism assembly on a firm, flat surface. 2. Place back assembly over hole pattern. 3. Secure back assembly by tightening four screws and four washers using a ¼" hex L-key to a minimum torque of 150 in-lbs.
- Page 5 WIT ASSEMBLY INSTRUCTIONS STANDARD SYNCHRO MECHANISM Bracket Yoke Seat Assembly Back Assembly ⁵⁄ ₁₆ " × 1" Screw ⁵⁄ ₁₆ " Washer STEPS 1. Place seat/mechanism assembly on a firm, flat surface. Locate yoke by sliding in bracket and following hole pattern.
-
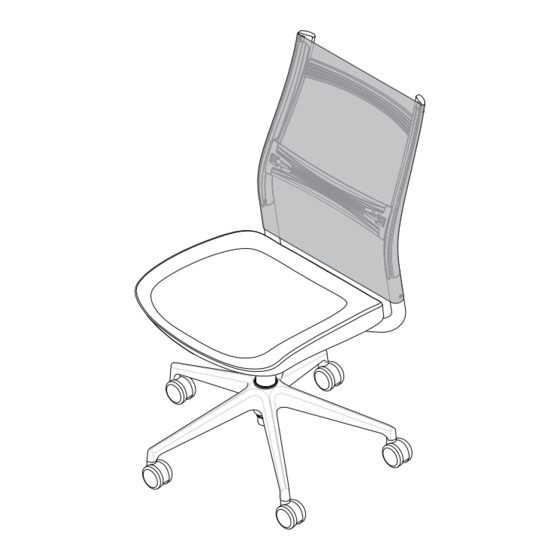
Page 6: Base Installation
WIT ASSEMBLY INSTRUCTIONS BASE INSTALLATION Foot Ring Cylinder Base Assembly Base Assembly Seat Assembly Back Assembly Cylinder STEPS 1. Slide the cylinder (for task or for stool) into the center of the base and give it a push to seat it into position.
Need help?
Do you have a question about the WIT and is the answer not in the manual?
Questions and answers