Devolo Giga Bridge Manual
Hide thumbs
Also See for Giga Bridge:
- Manual (190 pages) ,
- Installation manual (19 pages) ,
- Installation manual (17 pages)
Table of Contents
Advertisement
Quick Links
Advertisement
Table of Contents

Related Manuals for Devolo Giga Bridge


Summary of Contents for Devolo Giga Bridge
- Page 1 Manual devolo Giga Bridge...
- Page 2 Giga Bridge...
- Page 3 The reproduction and distribution of the documentation and software supplied with this product and the use of its contents is subject to written authorization from devolo. We reserve the right to make any alterations that arise as the result of technical de- velopment.
-
Page 4: Table Of Contents
Wiring the devolo Giga Bridge to the router ....... . . - Page 5 Warranty conditions ..............48 devolo Giga Bridge...
-
Page 6: Preface
(SAT/TV) or tele- phone line that is no longer in use. The Description of the icons devolo Giga Bridge uses this wiring to build a high- This section contains a brief description of the speed point-to-point connection with a PHY rate... - Page 7 Indicates a completed course of ac- an error must be continuously con- tion nected to the earth wire. devolo Giga Bridge...
-
Page 8: Intended Use
PLC, data and telephone line (e.g. coaxial or twisted pair) and/or Wi-Fi. * This does not include devolo outdoor devices, which are suit- able for outdoor applications based on their IP classification. The devolo Giga Bridge is only intended to be used on cleared—exclusively available—telephone or... -
Page 9: Ce Conformity
1.3 CE conformity et with a connected earth wire The product corresponds to the basic re- devolo devices may be operated only on a mains quirements of the Directives 2014/35/EU, power supply as described on the rating plate. 2014/30/EU, 2011/65/EU and 2009/ CAUTION! Tripping hazard 125/EC. -
Page 10: Devolo On The Internet
Certain housing components can become if the devolo device is inoperable. very hot in certain situations. Attach device if the housing of the devolo device is damaged. so that it is touch-proof, observing optimal CAUTION! Damage to telephone, DSL positioning... -
Page 11: Introduction
This is why most households have the rout- cable length. So having clean, optimal cabling for a er located in either the living room or a hallway. new fibre-optic connection is not exactly trivial and requires good preparation. devolo Giga Bridge... -
Page 12: The Solution: Devolo Giga Bridge
SISO mode is set to 200 MHz. And the best part is that the devolo Giga Bridge is connected easily by plug and play. G.hn technology explained The devolo Giga Bridge uses G.hn technology for the transmission of the Internet signal over coaxial (TV/SAT) or telephone lines. - Page 13 Due to the high RF perfor- mance of coaxial cables and the very high amount of insulation, long distances of several hundred metres can be bridged at data rates of up to 1 Gbps devolo Giga Bridge...
- Page 14 Introduction 14 Fig. 1 Expansion of the Ethernet WAN connection using a telephone or coaxial line devolo Giga Bridge...
- Page 15 1 Gbps. Fig. 2 Expansion of the internal home network using a telephone or coaxial line devolo Giga Bridge...
-
Page 16: Introducing The Devolo Giga Bridge
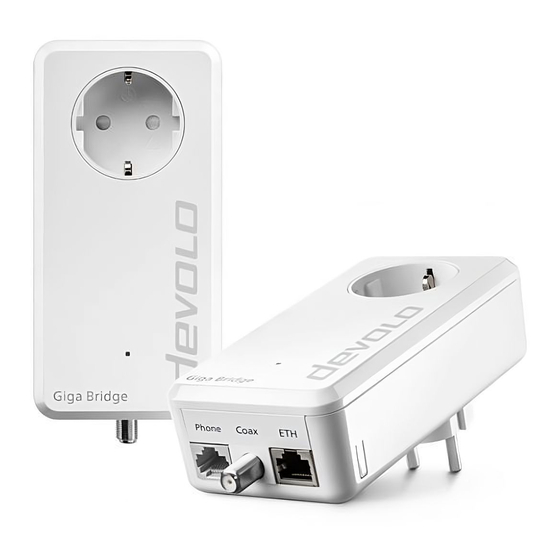
Giga Bridge adapter The integrated electrical socket can be used devolo Giga Bridge adapter to a device with (like a normal power socket) to supply power an Ethernet port in order to establish a con- to an additional network device or a power nection to the router (expansion of the strip. - Page 17 17 Introduction For more information, refer to Chapter 3.3.1 Manual triggering the pairing of a devo- lo Giga Bridge adapter. one integrated electrical socket. Fig. 4: devolo Giga Bridge with country-specific connector and power socket devolo Giga Bridge...
-
Page 18: Reading The Indicator Light
Introduction 18 2.4.1Reading the indicator light The integrated LED indicates the status of the devolo Giga Bridge with flashing and lighting be- haviour: G.hn Flashing behav- Meaning LED status display iour (web interface*) Red LED Lights up for up to... - Page 19 White Status 1: Status 1: Cannot be disabled Flashes at inter- This devolo Giga Bridge adapter is in vals of 0.5 second pairing mode and the system is search- (On/off) ing for new devolo Giga Bridge adapt- ers.
- Page 20 * Information about the web interface can be face is switched on again, your devolo Giga Bridge found in Chapter 4 Configuration. adapter can also be accessed again. Check whether the adapter is connected to...
-
Page 21: Connections
2.4.2Connections For expanding your internal home network: You network connection devolo Giga Bridge adapter to connect it to a PC or television using a standard network cable. 2.4.3Integrated electrical socket Always use the integrated electrical socket on the devolo Giga Bridge when connecting other con- sumers to the mains supply. -
Page 22: Initial Use
This chapter tells you everything you need to know For the permitted voltage range for operat- to set up and use your devolo Giga Bridge. We de- ing the device and the power consumption, scribe how you connect the devolo Giga Bridge,... -
Page 23: Pairing - Establishing A G.hn Connection
(SISO or MIMO mode). devolo Giga Bridge adapters that are in factory de- fault condition, i.e. have been purchased or suc- For an optimal connection in the network, cessfully reset (see Chapter Resetting a... - Page 24 Note: aware that reset devolo Giga Bridge adapters will not be found and integrated automatically if the existing devolo Giga Bridge adapters are in a different mode. Set all devolo Giga Bridge adapters to the devolo Giga Bridge...
-
Page 25: Manual Triggering The Pairing Of A Devolo Giga Bridge Adapter
The data connection of the NT/ONT and router can devolo Giga Bridge adapter take place over a coaxial (SAT/TV) or telephone Plug the devolo Giga Bridge adapter into an cable. available power socket and press the G.hn/ Reset button of an existing devolo Giga Bridge adapter in network for approx. - Page 26 Note the correct pin assignment: nect the existing telephone wiring to the G.hn Pin 4/5 for SISO phone jack of the devolo Giga Bridge. The tele- Pin 4/5 and 3/6 for MIMO phone cable is removed from the demarcation Incorrect pin assignment results in wires point and then split and contacted by means of from different wire pairs being used.
-
Page 27: Wiring The Devolo Giga Bridge To The Router
DSL cable, it can be connected easily to the G.hn phone The connection between the NT/ONT and jack of the devolo Giga Bridge. The DSL cable uses router over the coaxial cable is completed. same... - Page 28 Giga Bridge phone cable are sufficient to connect the adapter to a free power socket next to the devolo Giga Bridge to the NT/ONT. The TAE router. connector uses the pins 1/2 so that the SISO Connect the devolo Giga Bridge adapter using mode of the Giga Bridge is used.
- Page 29 Wiring using coaxial cable into a compatible coaxial connection, an F-connec- tor to an IEC coaxial connector is recommended. Note: The devolo Giga Bridge is only intended to be used on cleared—exclusively available—tele- phone or coaxial cables. Free line availability...
-
Page 30: Expanding Your In-Home Lan Coverage
Set-up of the devolo Giga Bridge is com- Connect the devolo Giga Bridge adapter using pleted. The fibre-optic Internet connection a coaxial (F-type connection) or telephone line is forwarded from the ONT to the router. -
Page 31: Configuration
4 Configuration 4.1 Calling up the built-in web interface The devolo Giga Bridge has a built-in web interface that can be called up using a standard web brows- This enables you to access the built-in web inter- er. Here, you can read out device information and... -
Page 32: Menu Description
The procedure for opening the web You can find the key (Device Password) on interface depends on the router. The router the rear side of the devolo Giga Bridge manual will inform you how to call up the adapters. web interface. - Page 33 Fields that have not been filled in yet contain Follow instructions greyed out help text, which indicates the required devolo Giga Bridge according to your needs. A content for the field. This help text disappears detailed description of the individual menu items immediately once content has been entered.
- Page 34 Configuration 34 Default settings are identified with (default) in drop-down menus. Default settings can of course be replaced by pre- defined entries. Invalid entries Entry errors are either highlighted by a red border or error messages are shown. devolo Giga Bridge...
-
Page 35: Overview
35 Configuration 4.3 Overview find information on the hardware and software and network details. After successfully completing the wizard, you re- turn automatically to the overview. Here, you will devolo Giga Bridge... -
Page 36: G.hn
System G.hn Name: Device name Here, you can view the status information for the devolo Giga Bridge network as well as the con- MT number: Device type number nected devices. Serial number: Device serial number Local device: "Connected" or "Not connected" sta-... - Page 37 37 Configuration 4.3.1G.hn In the G.hn area, you will find functions and infor- mation on the topic of G.hn and adapter pairing. devolo Giga Bridge...
- Page 38 Configuration 38 In order to use a new devolo Giga Bridge adapter word for each devolo Giga Bridge adapter in the in your network, first you have to connect it to your G.hn password field and confirm your entry by existing devolo Giga Bridge adapters device as a clicking on the Disk icon.
- Page 39 SISO You can find more information on the differ- Be aware that new or reset devolo Giga Bridge ence between SISO and MIMO mode in adapters will not be found and integrated Chapter Difference between SISO and automatically if the existing devolo Giga Bridge MIMO mode.
-
Page 40: Lan
You make changes to the ethernet network set- ready been made will be lost! tings in the LAN area. Then, restart the devolo Giga Bridge adapter so that your changes take effect. IPv4 Configuration In the factory default condition, only the DHCP en- abled option for IPv4 is activated. -
Page 41: System
41 Configuration 4.3.3System In the System area, you control the settings for se- curity as well as other device functions of the devolo Giga Bridge adapters. devolo Giga Bridge... - Page 42 Giga Bridge adapters. Device name (hostname) Here, you can read off the current date and time, You can assign the devolo Giga Bridge adapter a the configured time servers, the MAC address and personal device name by which it will appear in...
- Page 43 43 Configuration Deactivate the LED enabled option if the LEDs of the devolo Giga Bridge adapter are to be switched off in normal operation. An error status is indicated by corresponding flashing behaviour regardless of this setting. PowerSave mode If the Power saving mode enabled option has...
-
Page 44: Configuration
Configuration 44 In this mode, the devolo Giga Bridge adapter is not 4.3.4 Configuration accessible over the G.hn network. As soon as the Here, restart the devolo Giga Bridge adapter and/ network device (e.g. computer) connected to the or restore it to the factory default settings. -
Page 45: Wizard
4.3.6Firmware option Regulary check for firmware updates. In the Firmware area, you can find information The devolo Giga Bridge lets you know when a new about the firmware currently installed and also firmware version becomes available and asks if configure various settings. - Page 46 Click on Browse for firmware file… and select the downloaded firmware file. Confirm your settings by clicking the diskette icon. After successful update, devolo Giga Bridge restarts automatically. Ensure that the update procedure is not inter- rupted. devolo Giga Bridge...
-
Page 47: Appendix
110-250 V AC dress and hours of the nearest collection 50/60 Hz point. Ambient temperature -25 °C to 70 °C / (storage/operation) 0 °C to 45 °C Dimensions 143 x 72 x 41 (HxWxD) (in mm, without con- nector) devolo Giga Bridge... -
Page 48: Warranty Conditions
Appendix 48 5.3 Warranty conditions If your devolo device is found to be defective dur- ing initial installation or within the warranty peri- od, please contact the vendor who sold you the product. The vendor will take care of the repair or warranty claim for you. - Page 49 Safety notes 9 Standby 43 DHCP server 40 Standby mode 44 Disposal 47 Starting up a new devolo Giga Bridge network 23 Disposal of old devices 47 Symbol description 6 Factory default settings 24 Factory reset 24 Integrated electrical socket 21...
Need help?
Do you have a question about the Giga Bridge and is the answer not in the manual?
Questions and answers