
Related Manuals for RADWAG WLC 6/F1


Summary of Contents for RADWAG WLC 6/F1
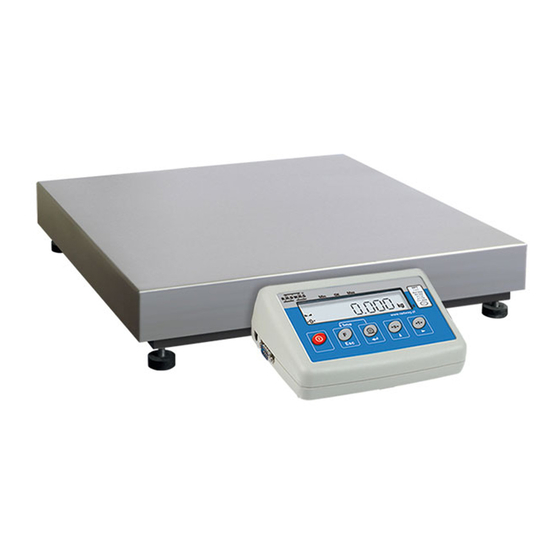
- Page 1 IMMB-07-02-05-22-EN-PL Start up Guide Szybki start Precision Balances Wagi Precyzyjne • WLC F1 • WLC C2...
- Page 2 To view a complete User Manual go to the website or scan QR code: Aby wyświetlić pełną instrukcję obsługi, przejdź do strony internetowej lub zeskanuj kod QR: radwag.com/en/manuals/7022...
- Page 3 1. CONTENT ZAWARTOŚĆ Models: WLC F1 Balance Power adapter* Waga Zasilacz sieciowy* ×1 Models: WLC C2 Balance Power adapter* Waga Zasilacz sieciowy* ×1 *The plug type may vary by country. *Rodzaj wtyczki może się różnić w zależności od kraju. 2. UNPACKING ROZPAKOWANIE Keep the packaging should a warranty claim or service be required.
-
Page 4: Recommendations And Warnings
3. RECOMMENDATIONS AND WARNINGS ZALECENIA I OSTRZEŻENIA Operate the device in a room where the temperature ranges between 15–30 +30°C °C (59–86 °F) and where the relative humidity is below 80%. +86°F Place the balance on a solid surface to ensure stability. To obtain stable and repeatable weighing results, an anti-vibration table is recommended. -
Page 5: Remove Transport Lock
4. ACTIVITIES TO BE DONE PRIOR TO OPERATION CZYNNOŚCI WSTĘPNE 4.1. Remove transport lock Usunięcie blokad transportowych 5. PREPARING FOR WORK PRZYGOTOWANIE WAGI DO PRACY 5.1. Temperature stabilization Stabilizacja temperatury wagi Prior to switching the device on, let it Connect the power adapter to DC connector. Connect the power reach room temperature (estimated adapter to the mains. -
Page 6: Home Screen
5.3. Switching the balance on Włączenie wagi Your balance is ready to use! Twoja waga jest gotowa do użycia! To switch the device on, press ON / OFF key. Aby włączyć urządzenie, naciśnij przycisk ON / OFF. 6. PANEL AND SCREEN KLAWIATURA I EKRAN 6.1. -
Page 7: Basic Operations
Model wagi Wzorzec masy [g] balance type and capacity. WLC 6/F1 5000 Adiustacja zewnętrzna wykonywana jest za pomocą wzorca o odpo- wiedniej dokładności i masie zależnej od typu i udźwigu wagi. - Page 8 Prepare suitable mass standard. Load the weighing pan with the mass standard and press key. Przygotuj odpowiedni wzorzec masy. Postaw wzorzec masy na szalce i naciśnij przycisk Unload the weighing pan. Adjustment completed. Zdejmij wzorzec masy z szalki. Adiustacja zakończona. 7.2.
-
Page 9: Working Modes Accessibility
7.3. Taring Tarowanie With loaded weighing pan: upon stabilisation The balance has been tared. of the weighing result, press key. Przy obciążonej szalce: po uzyskaniu stabilnego Waga została wytarowana. wyniku naciśnij przycisk 7.4. Working modes accessibility Dostępność trybów pracy Simultaneously press keys to enter Using key select “P3.Func”... -
Page 10: Selecting Working Mode
To configure other working modes, follow the above procedure. Postępując zgodnie z powyższą procedurą, mo- żesz skonfigurować inne tryby pracy. Using key select “YES” value and press key to confirm. Za pomocą przycisku wybierz „YES” i naciśnij przycisk , aby zapisać ustawienia. 7.5. -
Page 11: Weighing Unit Selection
7.6. Weighing unit selection Wybór jednostek When the main unit is g (gram), the user has the following units: g (gram), ct (karat), lb (pound).* Gdy jednostką główną jest g (gram), użytkownik ma do dyspozycji następujące jednostki: g (gram), ct (karat), lb (funt). * Simultaneously press keys to enter Using... - Page 12 8. PERIPHERAL DEVICES CONNECTORS PODŁĄCZENIE URZĄDZEŃ PERYFERYJNYCH Zasilacz sieciowy Komputer Dodatkowy Drukarka Skaner kodów wyświetlacz kreskowych Komputer Drukarka ® ® Wi-Fi is a registered trademark of Wi-Fi Alliance. Wi-Fi ® jest zarejestrowanym znakiem towarowym będącym własnością organizacji Wi-Fi Alliance.
-
Page 13: Device Cleaning
9. DEVICE CLEANING CZYSZCZENIE I KONSERWACJA 9.1. General recommendations Zalecenia i ostrzeżenia Prior to cleaning it is necessary Use soft cloth made of either natural Apply the cleanser onto the cloth. to disconnect the device from the or synthetic fiber exclusively. Avoid us- Mind not to apply the cleanser mains! Remove the plug from the ing cloth made of stiff/hard fabric, this... -
Page 14: Cleaning Instructions
9.2. Cleaning instructions Wskazówki dotyczące czyszczenia urządzenia • GLASS PANES AND COMPONENTS can be cleaned using window cleaner. • WEIGHING PANS AND STAINLESS STEEL OR ALUMINIUM COMPONENTS can be cleaned using a cloth slightly soaked in a solution of water and gentle cleanser (e.g. soap or dishwashing liquid). •... - Page 16 www.radwag.com...