Table of Contents
Advertisement
Quick Links
Advertisement
Table of Contents

Subscribe to Our Youtube Channel
Related Manuals for RADWAG XA 4Y.A PLUS


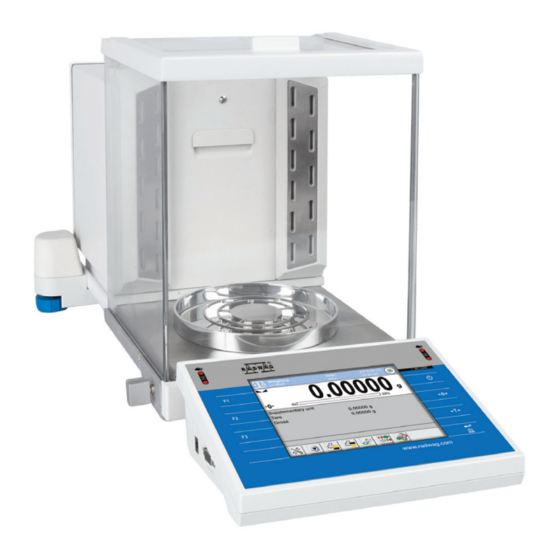
Summary of Contents for RADWAG XA 4Y.A PLUS
- Page 1 Start Up Guide Szybki start Microbalances and Analytical Balances Mikrowagi i wagi analityczne Microbalances: Mikrowagi: • XA 4Y.M.A PLUS • XA 4Y.M.A.P PLUS • XA 4Y.M PLUS Analytical Balances: Wagi analityczne • XA 4Y.A PLUS • XA 4Y PLUS • XA 4Y.F...
- Page 2 To view a complete User Manual go to the website or scan QR code: Aby wyświetlić pełną instrukcję obsługi, przejdź do strony internetowej lub zeskanuj kod QR: radwag.com/en/manuals/3615 1. CONTENT ZAWARTOŚĆ XA 4Y.M.A PLUS Weighing pan Power Microbalance Weighing pan...
- Page 3 XA 4Y.M.A.P PLUS Weighing pan Microbalance Weighing pan Power supply* Fabric dust cover RS232 cable shield Mikrowaga Szalka Osłona szalki Zasilacz sieciowy* Pokrowiec Przewód RS232 ×1 ×1 ×1 ×1 ×1 ×1 Bottom Glass Pipette calibration Base Evaporation ring Glass lid ring vessel adapter...
- Page 4 XA 4Y.A PLUS (d = 0,01 mg) Analytical Weighing pan Weighing pan centring ring Power supply* Brush balance shield Pierścień Waga analityczna Szalka Osłona szalki Zasilacz sieciowy* Pędzelek centrujacy ×1 ×1 ×1 ×1 ×1 ×1 Hook for under- Fabric dust cover...
- Page 5 XA 4Y PLUS (d = 0,01 mg) Analytical Weighing pan Weighing pan Centring ring Bottom cover Power supply* balance shield Pierścień Waga analityczna Szalka Osłona szalki Osłona dolna Zasilacz sieciowy* centrujacy ×1 ×1 ×1 ×1 ×1 ×1 Hook for under-pan Brush Fabric dust cover weighing...
- Page 6 XA 4Y.F (d = 0,01 mg) Analytical Weighing pan Weighing pan Weighing pan Centring ring Bottom cover balance shield shield Pierścień Waga analityczna Szalka Osłona szalki Osłona dolna Osłona szalki centrujacy ×1 ×1 ×1 ×1 ×1 ×1 Hook for under-pan Filter weighing pan Power supply* Brush...
-
Page 7: Recommendations And Warnings
3. RECOMMENDATIONS AND WARNINGS ZALECENIA I OSTRZEŻENIA Operate the device in a room where the temperature ranges between 10–40 °C (50–104 °F) and where the relative humidity is below 80%. Temperature +104 must change slowly and gradually. Using the anti-vibration table is recommended in order to enable the most stable and repeatable measurement. -
Page 8: Components Assembly
4. ACTIVITIES TO BE DONE PRIOR TO OPERATION CZYNNOŚCI WSTĘPNE 4.1. Transport lock removal Usunięcie blokady transportowej Keep the transport lock should a warranty claim or service be required. Przed montażem wagi usuń blokadę transportową. Zachowaj blokady transporto- we do celów gwarancyjnych i serwisowych. - Page 9 Models: XA 4Y.A PLUS (d=0,01 mg) XA 4Y.A PLUS (d=0,1 mg) XA 4Y PLUS (d=0,01 mg) XA 4Y PLUS (d=0,1 mg) XA 4Y.F (assembling the fi lter weighing pan set / składanie zestawu szalki do fi ltrów)
-
Page 10: Preparing For Work
XA 4Y.F (assembling the standard weighing pan set / składanie standardowego zestawu szalki) XA 4Y.M.A.P PLUS 6. PREPARING FOR WORK PRZYGOTOWANIE WAGI DO PRACY Place the device at the workstation, wait untilit reaches room temperature. Ustaw urządzenie w miejscu jego użytkowania i pozostaw je do osiągnięcia temperatury pokojowej. 6.1. -
Page 11: Switching The Balance On
6.2. Switching the balance on Włączenie wagi Automatic adjustment Automatic adjustment To switch the device on, press ON / OFF key. Confi rm or cancel the start of the auto- matic adjustment process. Aby włączyć urządzenie, naciśnij przycisk ON / OFF. Potwierdź... - Page 12 6.3.2. Balance levelling (for models with semi-automatic levelling only) Poziomowanie wagi (tylko dla modeli z półautomatycznym systemem poziomowania) Weighing Log in Leveling Home 0.000000 Levelling 100% Supplementary unit Tare 0.000000 g Gross 0.000000 g Packaging Press “Levelling” icon. Check the balance level state. The Naciśnij ikonę...
-
Page 13: Panel Keys
7. PANEL AND SCREEN KLAWIATURA I EKRAN 7.1. Panel keys Klawiatura Proximity sensor Proximity sensor Czujnik zbliżeniowy Czujnik zbliżeniowy Selecting working mode Switching on / off (programmable button) Włączenie / Wybór trybu pracy wyłączenie wagi (przycisk programowalny) Weighing Log in Home 0.000000 Selecting profi... -
Page 14: Basic Operations
8. BASIC OPERATIONS OPERACJE PODSTAWOWE 8.1. Adjustment Adiustacja Weighing Log in 0.000000 Home 100% Automatic adjustment Supplementary unit Completed Tare 0.000000 g Gross 0.000000 g Packaging Press “Adjustment” button and wait for completion of the Adjustment completed. Press button adjustment proces. for confi... -
Page 15: Working Modes Settings
8.4. Working modes / units selection Tryby pracy / Wybór jednostek Press the icon of the current working mode, to display the list of working modes. Naciśnij ikonę aktualnego trybu pracy, aby wyświetlić listę trybów pracy. Weighing Ważenie Gram [g] Chinese tael [tlc] Dosing Dozowanie... -
Page 16: User Settings
9. SETTINGS USTAWIENIA Some settings are accessible for Administrator exclusively. Prior to balance parameters setup, log in as the Administrator. Niektóre ustawienia wagi są dostępne wyłącznie dla Administratora. Przed ustawieniem parametrów wagi zaloguj się jako Administrator. 9.1. Administrator’s logging in Logowanie administratora Log in Log in... - Page 17 Edit record Operators Name Name Admin Code Password ******* Name ad Surname Acces level User Account active Press “Add” button. Select “Name” parameter. Naciśnij przycisk „Dodaj”. Wybierz parametr „Nazwa” Name Edit record John Smith Name John Smith Code Password ******* Name ad Surname Acces level Operator...
- Page 18 9.3. Proximity sensors setup Konfi guracja czujników zbliżeni owych Prior to proximity sensors setup, log in as Administrator (point 9.1.). Przed konfi guracją czujników zbliżeniowych zaloguj się jako Administrator (patrz krok 9.1.). You can assign the proximity sensors with diff erent functions for each working mode (the sensors will trigger diff...
- Page 19 10. PERIPHERAL DEVICES CONNECTORS PODŁĄCZENIE URZĄDZEŃ PERYFERYJNYCH Barcode Computer Computer Printer PLC controller Stack-light scanner Komputer Komputer Drukarka Kontroler PLC Kolumna Skaner kodów świetlna kreskowych DB15 RFID transponder Barcode card reader scanner Czytnik kart Skaner kodów RFID transponder Barcode Computer Printer RFID kreskowych...
-
Page 20: Device Cleaning
11. DEVICE CLEANING CZYSZCZENIE I KONSERWACJA 11.1. Guidelines and precautions Zalecenia i ostrzeżenia Prior to cleaning it is necessary Use soft cloth made of either natural Apply the cleanser onto the cloth. to disconnect the device from the or synthetic fi ber exclusively. Avoid us- Mind not to apply the cleanser mains! Remove the plug from the ing cloth made of stiff... - Page 21 • Dry sample leftovers can be removed using either brush or handheld vacuum cleaner. • Clean components can be dried using soft cloth or dust-free paper towel, with this the remaining moist will be absorbed. • Install all the components providing they are completely dry. W przypadku konieczności demontażu elementów komory ważenia, postępuj zgodnie z opisem w sekcji 11.3.
- Page 22 Grab the grips of the back pane Pull the top pane out. Pull the back pane up. and pull it out. Wysuń górną szybę. Wyciągnij tylną szybę do góry. Chwyć za wypustki listwy tylnej i wyciągnij ją. Pull the side door out. Wysuń...
- Page 23 Press the latch under the door to release the lock. Pull the side door out. Naciśnij zatrzask pod drzwiami aby zwolnić blokadę. Wysuń drzwi boczne. Remove the hole plugs. Remove the top frame. Pull the front pane up. Wyjmij zaślepki. Wyciągnij ramkę...
- Page 24 www.radwag.com...
Need help?
Do you have a question about the XA 4Y.A PLUS and is the answer not in the manual?
Questions and answers