Table of Contents
Advertisement
Quick Links
Advertisement
Table of Contents

Subscribe to Our Youtube Channel
Related Manuals for RADWAG PM 4Y


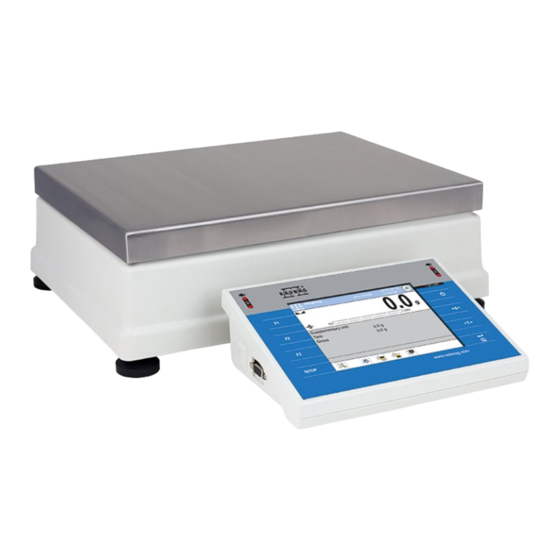
Summary of Contents for RADWAG PM 4Y
- Page 1 IMMB-05-01-09-20-EN Start up Guide Precision Balances • PM 4Y • WLY...
- Page 2 To view a complete User Manual go to the website or scan QR code: PM 4Y radwag.com/en/manuals/3657 radwag.com/en/manuals/3034...
- Page 3 ×1 ×3 ×1 Models: WLY F1 Precision balance Power adapter* ×1 ×1 Models: WLY C2 | PM 4Y (d ≥ 0,5 g) Precision balance Power adapter* ×1 ×1 Models: PM 4Y (d = 0,01 g) Precision balance Weighing pan Power adapter* ×1...
- Page 4 Models: PM 4Y (d = 0,1 g) Precision balance Weighing pan Power adapter* ×1 ×1 ×1 *The plug type may vary by country.
- Page 5 2. UNPACKING Models: WLY D2 Models: WLY F1 Models: WLY C2 | PM 4Y (d ≥ 0,5 g) Models: PM 4Y (d ≤ 0,1 g) Keep the packaging should a warranty claim or service be required.
-
Page 6: Recommendations And Warnings
3. RECOMMENDATIONS AND WARNINGS Operate the device in a room where the temperature ranges between 10–40 °C +104 (50–104 °F) and where the relative humidity is below 80%. Temperature must change slowly and gradually. Using the anti-vibration table is recom-mended in order to enable the most stable and repeatable measurement. - Page 7 Check whether the grounding spring takes its intended Grounding location. foot Make sure that the grounding spring juts slightly out of the hole. In models: PM 4Y | WLY F1 | WLY C2 | PM 4Y (d≥0,5 g) earthing spring is factory pre-instaled...
-
Page 8: Components Assembly
5. COMPONENTS ASSEMBLY Models: WLY D2 Install the grounding foot in a freely selected opening. Models: PM 4Y (d = 0,01 g) Models: PM 4Y (d ≤ 0,1 g) Models: WLY F1 | WLY C2 | PM 4Y (d ≥ 0,5 g) -
Page 9: Preparing For Work
(estimated to DC connector. adapter to the mains. stabilization time: up to 8 hours). Models: WLY D2 | PM 4Y (d = 0,1 g) up to 1- 8 h Prior switching the device on let it Connect the power adapter... -
Page 10: Switching The Balance On
6.2. Switching the balance on Automatic adjustment Automatic adjustment To switch the device on, press ON / OFF key. Confirm or cancel the start of the automatic adjustment process. 6.3. Balance levelling Models: PS 250.3Y.M | PM 50.4Y Weighing Log in Leveling 0.000 Home... - Page 11 Models: WLY F1 | WLY C2 | PM 4Y (d = 0,1 g) Before leveling the balance, remove the weighing pan. After leveling put the weighing pan again. The operation described in pt. 4...
-
Page 12: Panel Keys
7. PANEL AND SCREEN 7.1. Panel keys Proximity sensor Proximity sensor Select working mode Switching on / off (programmable button) Weighing Log in 0.000 Home Select profile 100% Zeroing Supplementary unit (programmable button) Tare 0.000 g Gross 0.000 g Packaging Internal adjustment SETUP Taring... -
Page 13: Basic Operations
8. BASIC OPERATIONS 8.1. Adjustment (for models whit external adjustment) Balance Mass model standard [g] PM 15.4Y 10000 g External adjustment is carried out using an external mass standard of the right PM 60.1.4Y 50000 g accuracy and weight value, which value depends on balance type and capacity. PM 60.05.4Y 50000 g PS 3000.3Y... - Page 14 Adjustment Adjustment Start mass determination Load 50.0000 g Determination of start mass in progress. Load the weighing pan with mass standard Wait for determination completion. and press button for confirmation. Adjustment Adjustment Adjustment Unload the weighing pan Wait for the process completion. Unload the weighing pan and press button for confirmation.
- Page 15 8.3. Zeroing Weighing Log in Home 0.000 Log in Weighing Home 0.129 100% 100% Supplementary unit Supplementary unit Tare 0.185 g Tare 0.000 g Gross 0.129 g Gross 0.000 g Packaging Packaging SETUP Make sure that the weighing pan is empty The balance has been zeroed.
-
Page 16: Working Modes Settings
8.5. Working modes / units selection Press the icon of the current working mode, to display the list of working modes. Weighing Solids density Gram [g] Chinese tael [tlc] Dosing Liquids density Miligram [mg] Momme [m] Checkweighing Peak hold Carat [c] Grain [gr] Formulations Pound [lb]... -
Page 17: User Settings
9. SETTINGS Some balance settings are accessible for Administrator exclusively. Prior balance parameters setup, log in as the Administrator. 9.1. Administrator’s logging in Log in Log in Weighing Home 0.000 Operators Log out 100% Admin Admin Supplementary unit Tare 0.000 g Gross 0.000 g Packaging... - Page 18 Operators Edit record Name Admin Name Code Password ******* Name ad Surname Acces level User Account active Press “Add” button. Select “Name” parameter. Name Edit record John Smith Name John Smith Code Password ******* Name ad Surname Acces level Operator Account active Enter user name and press button to confirm.
- Page 19 9.3. Proximity sensors setup Prior balance proximity sensors setup, log in as Administrator (point 9.1.). You can assign the proximity sensors with different functions for each working mode (the sensors will trigger different operation for each working mode). The diagram presents sensors setup for the weighing mode. Admin Weighing Log in...
- Page 20 10. PERIPHERAL DEVICES CONNECTORS Barcode Computer Computer Printer Stack-light scanner controler DB15 RFID reader Barcode scanner Computer Printer RFID reader Barcode scanner THB ambient Printer conditions sensor Wi-Fi ® is a registered trademark of Wi-Fi Alliance.
-
Page 21: Device Cleaning
11. DEVICE CLEANING 11.1. Guidelines and precautions Prior to cleaning it is necessary to Use soft cloth made of either natural or Apply the cleanser onto the cloth. Mind disconnect the device from the mains! synthetic fiber exclusively. Avoid using not to apply the cleanser directly onto Remove the plug from the outlet, cloth made of stiff/hard fabric, this... - Page 24 www.radwag.com...
Need help?
Do you have a question about the PM 4Y and is the answer not in the manual?
Questions and answers