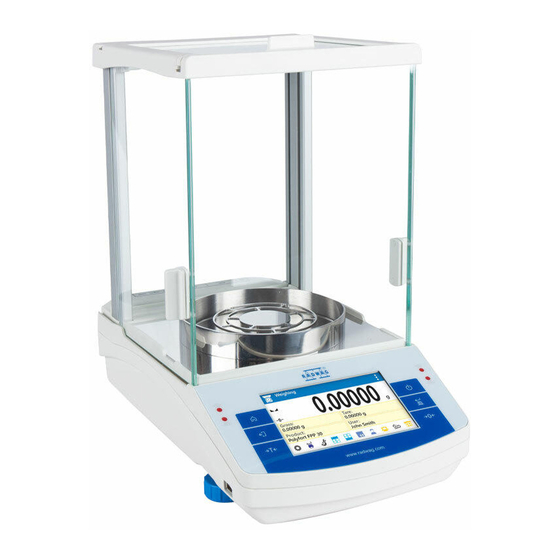
Summary of Contents for RADWAG AS X2 PLUS
- Page 1 IMMB-04-02-11-21-EN Start up Guide Analytical and Precision Balances Analitycal Balances: • AS X2 PLUS Precision Balances: • PS X2 • PS X2.M • WLC X2...
- Page 2 To view a complete User Manual go to the website or scan QR code: radwag.com/en/manuals/6972...
- Page 3 1. CONTENT Model: AS X2 PLUS (d = 0.01 mg) fabric dust Balance Weighing pan Draft shield Centring ring Bottom insert Power adapter* cover ×1 ×1 ×1 ×1 ×1 ×1 ×1 Models: AS X2 PLUS (d = 0.1 mg) Balance...
- Page 4 Models: WLC X2 (d = 10 mg) Balance Weighing pan Grounding foot Foot Power adapter* ×1 ×1 ×1 ×3 ×1 PS X2.M Balance Weighing pan Draft shield Power adapter* ×1 ×1 ×1 ×1 *The plug type may vary by country. 2.
- Page 5 3. RECOMMENDATIONS AND WARNINGS Operate the device in a room where the temperature ranges between 10–40 °C +40 °C (50–104 °F) and where the relative humidity is below 80%. +104°F Place the balance on a solid surface to ensure stability. To obtain stable and +10 °C repeatable weighing results, an anti-vibration table is recommended.
- Page 6 Models: PS X2.M | WLC X2 (d = 1 mg) Keep the transport lock should a warranty claim or service be required. 4.2. Grounding spring check Models: AS X2 (d = 0.01 mg) | AS X2 (d = 0.1 mg) | WLC X2 (d = 0.1 mg) Check whether the grounding spring takes its intended location.
- Page 7 Models: AS X2 (d = 0.1 mg) | WLC X2 (d = 0.1 mg) Models: PS X2 (d = 1 mg) | WLC X2 (d = 1 mg) Install the grounding foot in a freely selected opening. Models: WLC X2 (d = 10 mg) Install the grounding foot in a freely...
- Page 8 6. PREPARING FOR WORK 6.1. Temperature stabilisation S B 2 U S B up to 8 h Prior to switching the device on, let Connect the power adapter Connect the power it reach room temperature (estimated to DC connector. adapter to the mains. stabilisation time: up to 8 hours).
- Page 9 7. PANEL AND SCREEN 7.1. Panel keys Proximity sensor Proximity sensor Home screen Switching ON/OFF Displaying Confirming an operation previous screen or printing a report Taring Zeroing 7.2. Home screen List of current working Working modes list mode functions Status bar Weighing result window Editable information fields (labels, text fields and buttons)
- Page 10 8. BASIC OPERATIONS 8.1.1. Adjustment (for models with an internal adjustment only) Weighing Internal adjustment 0.00000 Adjustment Gross: Tare: 0.00000 g 0.00000 g Product: User: Please wait... Press “Adjustment” button. Wait for the process completion. 8.1.2. Adjustment (for models with an external adjustment only) External adjustment is carried out using an external mass Balance model Mass standard...
- Page 11 Wait for the process completion. Unload the weighing pan. 8.2. Zeroing Make sure that the weighing pan is empty and press The balance has been zeroed. “Zeroing” button. 8.3. Taring With loaded weighing pan: upon stabilisation The balance has been tared. of the weighing result, press “Tare”...
- Page 12 8.4. Working modes / units selection Press the icon of the current working mode, to display the list of working modes. Weighing Solids density Gram [g] Chinese tael [tlc] Dosing Liquids density Miligram [mg] Momme [m] Checkweighing Peak hold Carat [c] Grain [gr] Formulas Pound [lb]...
- Page 13 9.2. User settings Prior to balance users setup, log in as Administrator (point 9.1.). Weighing Databases 0.00000 Products Users Gross: Tare: 0.00000 g 0.00000 g Packaging Product: User: Admin Customers Press “Databases” button. Select “Users” database. Users Name Admin Code Password ****** Permissions...
- Page 14 9.3. Proximity sensors setup Prior balance proximity sensors setup, log in as Administrator (point 9.1.). You can assign the proximity sensors with different functions for each working mode (the sensors will trigger different operation for each working mode). See the below procedure of sensors setup for the weighing mode. Weighing Parameters 0.00000...
- Page 15 10. PERIPHERAL DEVICES CONNECTORS Power adapter Computer Printer Computer Printer Additional Barcode display scanner Keyboard Computer Computer Printer Barcode Printer scanner ® Wi-Fi is a registered trademark of Wi-Fi Alliance.
- Page 16 11. DEVICE CLEANING 11.1. Guidelines and precautions Prior to cleaning it is necessary to Use soft cloth made of either natural or Apply the cleanser onto the cloth. Mind disconnect the device from the mains! synthetic fiber exclusively. Avoid using not to apply the cleanser directly onto Remove the plug from the outlet, cloth made of stiff/hard fabric, this...
- Page 17 11.3. Weighing chamber elements disassembly Prior disassembling weighing chamber elements make sure the balance is turned off and unplugged from the mains. When disassembling the elements, use tweezers that come standard with the instrument. Press the moldings on the housing and lift the movable element up. Now you can take out Press the moldings Now you can take out...
- Page 18 Take out the back glass. Slide out the door. The housing has recesses to facilitate removing the glass. All disassembled elements are prepared to be cleaned. Assembly all weighing chamber elements in an order reverse to the disassembly process.
- Page 20 www.radwag.com...


Need help?
Do you have a question about the AS X2 PLUS and is the answer not in the manual?
Questions and answers