
Related Manuals for RADWAG WLC/C2


Summary of Contents for RADWAG WLC/C2
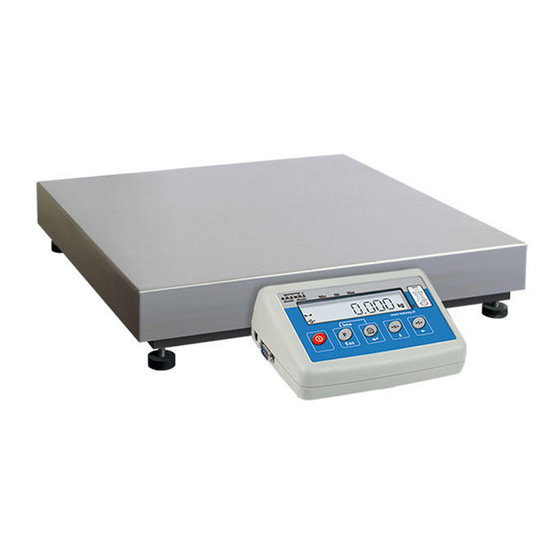
- Page 1 WLC/C2 Precision Scale WLC/F1 Precision Scale USER MANUAL ITKU-103-04-11-18-EN...
- Page 2 NOVEMBER 2018...
-
Page 3: Table Of Contents
CONTENTS 1. GENERAL INFORMATION..........................5 2. PRECAUTIONS ............................. 5 2.1. Operation ..............................5 2.2. Battery Power Supply..........................5 2.2.1. Worn out Batteries Replacement ....................6 3. WARRANTY CONDITIONS ........................... 6 4. DESIGN ................................. 7 4.1. Dimensions ............................. 7 4.2. Connectors Arrangement ........................9 4.3. - Page 4 15.2. Printer ..............................27 15.2.1. Printer Port ..........................27 15.3. Additional Display..........................28 15.3.1. Additional Display Port ......................28 16. PRINTOUTS .............................. 28 16.1. Adjustment Report ..........................28 16.2. GLP Printout ............................29 17. MISCELLANEOUS PARAMETERS......................30 17.1. Backlight ............................. 30 17.2.
-
Page 5: General Information
B. Indicators to be decommissioned must be decommissioned in accordance with valid legal regulations. 2.2. Battery Power Supply WLC/F1, WLC/C2 scales are intended to be supplied by NiMH battery (nikel metal hydride) of 1800 - 2800mAh capacity. Do not let battery discharge in case of prolonged storage of the device in low temperature. -
Page 6: Worn Out Batteries Replacement
2.2.1. Worn out Batteries Replacement Worn out batteries of WLC/C2, WLC/F1 scales can be replaced by a user. Procedure: Open battery container lid. The lid is to be found in the housing base. Take the worn out batteries out of the container, insert new accumulators, pay attention to +/- polarization. -
Page 7: Design
• inappropriate cleaning habits. E. Loss of warranty takes place if: • a repair is carried out outside RADWAG authorized service point, • service claims intrusion into mechanical or electronic construction by unauthorized people, •... - Page 8 Dimensions of WLC/F1/R scale Dimensions of WLC/C2/K scale Dimensions of WLC/C2/R scale...
-
Page 9: Connectors Arrangement
RS232 (2) connector DB9/M (male) Pin4 – 5VDC Pin5 – GND 5. UNPACKING AND INSTALLATION • Unpack the device and place it on a flat and even surface. Keep it far away from any sources of heat. • Remove transport lock. WLC/F1 WLC/C2 Scales... -
Page 10: Start-Up And Operation
• Install the weighing pan, follow the below figures: WLC/F1/R, WLC/C2/R scales WLC/F1/K, WLC/C2/K scales 6. START-UP AND OPERATION 6.1. Levelling To level the weighing instrument turn its feet. Keep turning the feet until the air bubble takes central position: 6.2. -
Page 11: Warm-Up Time
• Display test proceeds (all symbols are backlit for a moment), program name and number is displayed first, ZERO indication with reading unit next (displayed reading unit is conditioned by scale type). • In case the weighing result is not zero after indication stabilisation, press key. -
Page 12: Maintenance Activities
7. MAINTENANCE ACTIVITIES In order to ensure safety in the course of cleaning, it is necessary to disconnect the device from the mains. With this condition met, uninstall the weighing pan and other detachable components. Cleaning the weighing pan while still installed may cause damage of the measuring system. -
Page 13: Cleaning Stainless Steel Components
Avoid drying the panes either using paper towel or forced air circulation since some fibres, grains or contamination of other type could permeate into the panes thus causing weighing errors. We do not recommend using driers when drying measuring glass tools. It is a frequent treatment to leave glass components on a rack to dry. -
Page 14: Operation Panel
8. OPERATION PANEL 9. KEYS Press to switch the weighing device on/off – hold the key for about 1 second. Function key, press to change the working mode. Press to send the weighing result to a printer or computer. Press to zero the scale. Press to tare the scale. -
Page 15: Program Structure
10. PROGRAM STRUCTURE Program menu is divided into function groups. Function group is a group of interrelated parameters. 10.1. Function Groups Function group Function group Description number name User Adjustment. Readout parameters. rEAd Working modes. Func Communication. Conn Peripheral devices. ducE Printouts. -
Page 16: Return To The Weighing Mode
Press to: • enter given submenu. • modify given parameter. Press to confirm modification. Press to: • exit, function remains unmodified. • move one menu level up. 10.3. Return to the Weighing Mode Introduced menu modifications are automatically saved to scale memory upon return to the home screen. -
Page 17: Zeroing
Do not apply concentrated force (total load in one point). Avoid side loading, in particular side shocks. 11.2. Zeroing To zero mass indication press key. Zero indication and the following pictograms are displayed: . The instrument can be zeroed only when the indication is stable. -
Page 18: Entering Tare Value Manually
11.4. Entering Tare Value Manually • Press keys combination, tare value edit box is displayed. • Enter tare value, to do it press keys: Press to select digit that is to be edited. Press to set digit value, 0 - 9 . •... -
Page 19: Temporary Unit
Procedure: • Enter <P9.Unit / 9.1.UnSt> submenu. • Press key, available units are displayed successively one by one. Options in case when the main unit is [kg]: • kg (kilogram), • g (gram), • lb (pound)*, • N (Newton). – unit disabled for verified weighing devices. Options in case when the main unit is [g]: •... -
Page 20: Adjustment
Options in case when the main unit is [g]: • g (gram), • kg (kilogram), • ct (carat), • lb (pound)*. – unit disabled for verified weighing devices. • Select temporary unit and press key, next go back to the home screen. -
Page 21: User Adjustment
• Mass of an empty weighing pan is determined, this is signalled with display of 'dash', < - >. Next, text <LoAd> (load weight) and mass value that is to be loaded, e.g. 200g (conditioned by scale type), are displayed. •... -
Page 22: Scale Parameters
For detailed information concerning report content read later sections of this manual. 13. SCALE PARAMETERS Scale parameters are set to adjust the weighing device to ambient conditions (filters) or individual needs (autozero on/off, tare values memory). These parameters are to be found in <P2.rEAd> submenu. 13.1. -
Page 23: Autozero Function
Procedure: • Enter <P2.rEAd / 2.3.Enut> submenu. • Press key, parameter values are displayed successively one by one: nStAb – unstable, StAb – stable. • Press key to confirm, next go to the home screen. 13.4. Autozero Function 'Autozero' function has been designed to enable automatic control and correction of zero indication. -
Page 24: Tare: Enter Mode
Select this parameter to make the scale automatically tare each accepted EAcH measurement. • Press key to confirm, next go to the home screen. 13.6. Tare: Enter Mode The tare is entered using keys combination from the home screen level. There are two enter modes. Procedure: •... -
Page 25: Selecting Tare Value From Weighing Device Memory
Press to select digit that is to be edited. Press to set digit value, 0 - 9 . • Press key to confirm, <tArE 0> window is displayed. • Now press key to go to the home screen. 13.7.2. Selecting Tare Value From Weighing Device Memory •... -
Page 26: Communication
14. COMMUNICATION Communication between the scale and the peripheral devices is established via the following ports: RS232 (1), RS232 (2). To set the ports go to < > P4.Conn submenu. 14.1. RS232 (1) Port Settings • Enter <P4.Conn / 4.1.rS1> submenu and set respective transmission parameters: Baud rate: 2400, 4800, 9600, 19200, 38400, 57600, 115200 bit/s. -
Page 27: Computer Port
15.1.1. Computer Port • Enter <5.1.PC / 5.1.1.Prt> submenu. • Press key, parameter values are displayed successively one by one: nonE – none; rS1 – RS232 (1); rS2 – RS232 (2). • Press key to confirm, next go to the home screen. 15.1.2. -
Page 28: Additional Display
Procedure: • Enter <5.2.Prtr / 5.2.1.Prt> submenu. • Press key, parameter values are displayed successively one by one: None port selected. nonE Port RS232 (1). Port RS232 (2). • Press key to confirm, next go to the home screen. 15.3. Additional Display The weighing instrument can cooperate with additional WD displays. -
Page 29: Glp Printout
Variables list: Name Description 6.1.1. Performed adjustment type. 6.1.2. Adjustment date. 6.1.3. Adjustment time. 6.1.4. Serial number of the scale. Difference between mass of adjustment weight that was measured 6.1.5. during last adjustment and mass of currently measured adjustment weight. 6.1.6. -
Page 30: Miscellaneous Parameters
6.2.4. Tare weight value in the current unit. 6.2.5. Gross weight value in the current unit. 6.2.6. Current weighing result (net weight) in a current unit. The last adjustment report generated in accordance with settings 6.2.7. declared for the adjustment report printout. Printouts are generated exclusively in English. -
Page 31: Beep' Sound
17.2. 'Beep' Sound Parameter allowing you to enable/disable sound signal informing the operator about pressing panel key(s). Procedure: • Enter <P7.Othr / 7.2.bEEP> submenu. • Press key, parameter values are displayed successively one by one: no – sound signal disabled, YES - sound signal enabled. •... -
Page 32: Default Operator Settings
Parameter Description Enter this parameter to set current date, where the date format <7.4.SdAt> is YYYY.MM.DD*. Enter this parameter to set current time, where the time format <7.5.Stnn> is 24H**. Enter this parameter to select date format. Available values: 1 - DD.MM.YYYY, 2 - MM.DD.YYYY, 3 - YYYY.MM.DD* (set by <7.6.FdAt>... -
Page 33: Working Modes - General Information
19. WORKING MODES – General Information The weighing device features the following working modes: • Weighing, • Parts counting, • +/- control, • Percent weighing %, • Peak Hold, • Totalizing, • Animal weighing. 19.1. Running Working Mode • Go to home screen, press key, name of the first available working mode is displayed. -
Page 34: Working Mode Accessibility
The table presents special function number and name for each of the working modes. Remaining specific functions referring directly to a given working mode are described further down this user manual. 19.2.1. Working Mode Accessibility To enable/disable given working mode, press key. -
Page 35: Automatic Printout Time Interval
• Press key to confirm, next go to the home screen. 19.2.3. Automatic Printout Time Interval Parameter enabling you to set frequency of automatic printout. Printout interval is set in minutes with 1 [min] accuracy within 1 [min] 1440 [min] range. Procedure: •... -
Page 36: Working Mode - Parts Counting
21. WORKING MODE – PARTS COUNTING Parts Counting is a working mode enabling you to determine quantity of small pieces of the same mass, which determination is done on the basis of mass of sample piece (single part), and where the sample piece mass (single part mass) is determined using the weighing device. -
Page 37: Setting Sample Mass By Determining Mass Of A Single Part
If the value of entered single part mass is greater than max capacity value, then message <Err Hi> is displayed. 21.3. Setting Sample Mass by Determining Mass of a Single Part • Enter <3.2.PcS / 3.2.2.UUt> submenu, set < > value. •... -
Page 38: Working Mode - +/- Control
22. WORKING MODE – +/- CONTROL +/- control is a working mode enabling you to enter checkweighing thresholds values (Min, Max). 22.1. Local Settings To go to local settings enter <3.3.HiLo> submenu. Working mode accessibility For detailed description read section 19.2.1. 3.3.1.Acc Save mode For detailed description read section 19.2.2. -
Page 39: Working Mode - Percent Weighing
23. WORKING MODE – PERCENT WEIGHING Percent weighing is a working mode enabling you to compare measured load mass with the reference sample mass. The result is expressed in [%]. Reference sample mass can be either determined by weighing or entered to weighing device memory by an operator. -
Page 40: Reference Sample Mass Determined By Entering The Mass Value
• Mass of the weighed load is automatically set as reference sample mass, the home screen is displayed along with 100.000% value. 23.3. Reference Sample Mass Determined by Entering the Mass Value • Enter <3.4.dEu / 3.4.2.UUt> submenu, set <Suu> value. •... -
Page 41: Working Mode - Totalising
25. WORKING MODE – TOTALISING Totalising is a working mode enabling you to sum mass of all weighed ingredients, and to print (via scale-connected printer) the total mass value. The program allows you to sum up to 30 weighings (ingredients) maximum within one process. -
Page 42: Working Mode - Animal Weighing
Report example: • In order to print the report once again press key. • To exit "report printout mode" press key. As a result home screen of <Add> working mode is displayed and all the data get zeroed automatically. If the display capacity is exceeded (i.e. there is not enough space for all the digits of the weighing result) <Hi>... -
Page 43: Animal Weighing Operation
26.2. Animal Weighing Operation • Enter <AnLS> working mode (Animal Weighing). • First text <tinnE> is displayed for 1 s, next, window for setting duration (in seconds) of animal weighing. • Press key, parameter values are displayed successively one by one: 5[s], 10[s], 20[s], 30[s], 40[s], 50[s], 60[s]. -
Page 44: Troubleshooting
scale - printer cable (EPSON) 28. TROUBLESHOOTING Problem Cause Solution Connect the scale to the mains, Battery discharged. charge the battery (batteries). The scale does not switch batteries (batteries Check if batteries are installed installed or installed incorrectly). correctly (polarization). <7.3.t1>... -
Page 45: Error Messages
29. ERROR MESSAGES - Value beyond zero range. - E r r 2 - - Value beyond tare range. - E r r 3 - - Adjustment weight or start mass out of range (±1% for adjustment weight, ±10 - E r r 4 - for start mass).
Need help?
Do you have a question about the WLC/C2 and is the answer not in the manual?
Questions and answers