Table of Contents
Advertisement
Advertisement
Table of Contents

Related Manuals for RADWAG WLC


Summary of Contents for RADWAG WLC
- Page 2 APRIL 2021...
- Page 3 PRECAUTIONS Prior to installation, use or maintenance activities, carefully read this user manual and follow the provided guidelines. Prior to the first use, carefully read this user manual. Use the weighing device only as intended. Place weighed loads in the centre of the weighing pan. Load the weighing pan with loads of gross weight which does not exceed the maximum capacity.
-
Page 4: Table Of Contents
CONTENTS 1. INTENDED USE ..............................5 2. WARRANTY CONDITIONS ..........................5 3. MAINTENANCE ACTIVITIES ..........................5 3.1. Cleaning ABS Components......................... 6 3.2. Cleaning Glass Components........................6 3.3. Cleaning Stainless Steel Components ......................6 3.4. Cleaning Powder-Coated Components....................... 7 3.5. Cleaning Aluminium Components ....................... 7 4. -
Page 5: Intended Use
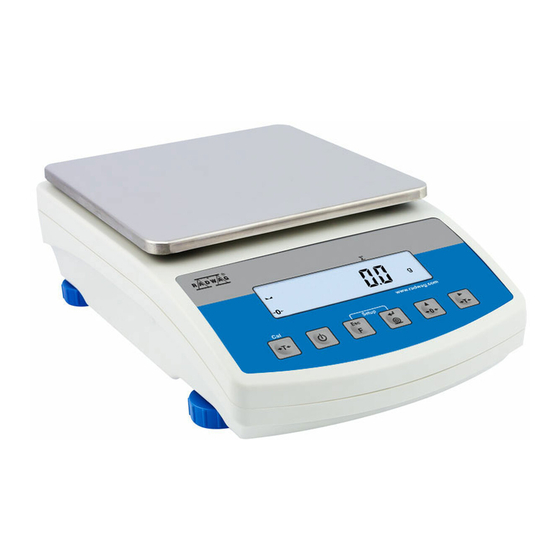
The device is equipped with an internal battery which allows its operation in places where there is no access to the mains. The WLC features a stainless steel weighing pan, and a backlit LCD guaranteeing clear weighing result presentation. -
Page 6: Cleaning Abs Components
3.1. Cleaning ABS Components To clean dry surfaces and avoid smudging, use clean non-colouring cloths made of cellulose or cotton. You can use a solution of water and detergent (soap, dishwashing detergent, glass cleaner). Gently rub the cleaned surface and let it dry. Repeat cleaning process if needed. In the case of hard to remove contamination, e.g. -
Page 7: Cleaning Powder-Coated Components
In case of any sign of damage, it is necessary to disconnect the device form the mains immediately. The damaged component must be replaced or repaired by RADWAG service directly. In case of any problems with correct operation of the scale, contact the closest manufacturer's service point. -
Page 8: Recycling
HY10 scales must be recycled, they are not to be treated as a regular household waste. Scales to be decommissioned must be decommissioned in accordance with valid legal regulations. 6. MECHANICAL DESIGN 6.1. Dimensions Dimensions of WLC/F1/K scale Dimensions of WLC/F1/R scale... -
Page 9: Connectors Arrangement
Dimensions of WLC/C2/K scale Dimensions of WLC/C2/R scale 6.2. Connectors Arrangement 1 – power supply socket 3 – weighing platform cable inlet 2 – RS232 (1) connector 4 – RS232 (2) connector * *) – option. -
Page 10: Pins Overview
6.3. Pins Overview Pin2 – RxD Pin3 – TxD RS232 (1) connector DB9/M (male) Pin4 – 5VDC Pin5 – GND Pin2 – RxD Pin3 – TxD RS232 (2) connector DB9/M (male) Pin4 – 5VDC Pin5 – GND 6.4. Operation panel Keys: Press to switch the weighing device on/off –... -
Page 11: Installation
Unpack the device and place it on a flat and even surface. Keep it far away from any sources of heat. Remove transport lock. WLC/F1 WLC/C2 Scales Install the weighing pan, follow the below figures: WLC/F1/R, WLC/C2/R scales WLC/F1/K, WLC/C2/K scales 7.2. -
Page 12: Start-Up
7.3. Start-Up The weighing device can be connected to the mains only with a power supply that comes standard with the particular model. Nominal voltage of the power supply (specified on the power supply data plate) has to be compatible with the mains nominal voltage. -
Page 13: Battery Charge Status Check
Meaning pictogram display mode No pictogram Battery charged. Regular scale operation. Too low battery charge (the scale is about to shut Pictogram displayed continuously down). Charge the battery immediately. Blinking pictogram, blink frequency: Battery charge in progress. The device is connected to ca. -
Page 14: Return To The Weighing Mode
Press to: enter given submenu. modify given parameter. Press to confirm modification. Press to: exit, function remains unmodified. move one menu level up. 8.1. Return to the Weighing Mode Introduced menu modifications are automatically saved to scale memory upon return to the home screen. -
Page 15: Diagrams Of Connection Cables
Avoid side loading, in particular side shocks. 10. DIAGRAMS OF CONNECTION CABLES scale – computer cable scale - printer cable (EPSON) 11. TECHNICAL SPECIFICATIONS For technical specifications of respective scales go to RADWAG website www.radwag.pl. -
Page 16: Troubleshooting
12. TROUBLESHOOTING Problem Cause Solution Power supply disconnected. Connect the power supply to the scale. Connect the power supply to the mains, Battery discharged. Scale start-up fail. charge the battery. No battery (not installed or Check if the battery is installed correctly installed incorrectly). -
Page 17: Error Messages
13. ERROR MESSAGES - E r r 2 - Value beyond zero range. - E r r 3 - Value beyond tare range. Adjustment weight or start mass out of range (1% for adjustment weight, 10 for - E r r 4 - start mass).
Need help?
Do you have a question about the WLC and is the answer not in the manual?
Questions and answers