Table of Contents
Advertisement
Manual number
PTI-12-03/01/07/A
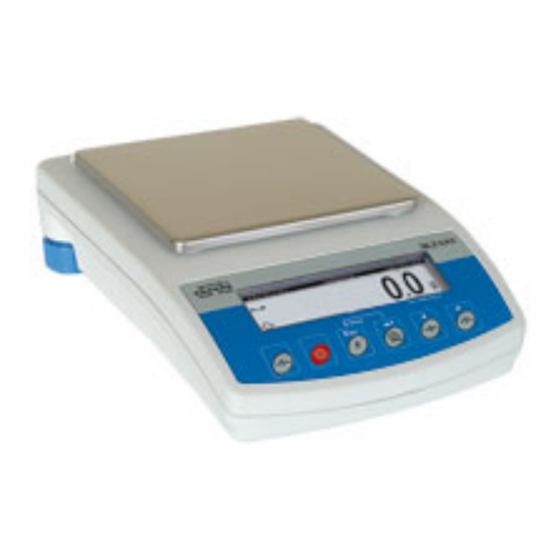
Integrated system for counting pieces and labelling
WLT/L series
WLL series
MANUFACTURER OF ELECTRONIC WEIGHING INSTRUMENTS
RADWAG, 26 – 600 Radom, Bracka 28 Street
POLAND
phone +48 48 38 48 800, phone/fax. +48 48 385 00 10
Sales Department +48 48 366 80 06
www.radwag.com
Advertisement
Table of Contents

Subscribe to Our Youtube Channel
Related Manuals for RADWAG WLT L Series


Summary of Contents for RADWAG WLT L Series
- Page 1 Integrated system for counting pieces and labelling WLT/L series WLL series MANUFACTURER OF ELECTRONIC WEIGHING INSTRUMENTS RADWAG, 26 – 600 Radom, Bracka 28 Street POLAND phone +48 48 38 48 800, phone/fax. +48 48 385 00 10 Sales Department +48 48 366 80 06...
-
Page 2: Table Of Contents
TABLE OF CONTENTS 1. UNPACKING OF THE MAIN BALANCE ............5 2. INTENDED USE ..................... 6 3. GETTING STARTED ..................7 3.1 Conditions of appropriate use................7 3.2 Time of warming-up....................7 3.3. Balance levelling....................8 4. UNDER-FLOOR WEIGHING................8 5. BALANCE DESCRIPTION................9 5.1. - Page 3 17. COUNTING PIECES................... 34 17.1. Databases ......................34 17.1.1. Database of operators..................... 34 17.1.2. Database of labels....................35 17.1.3. Assortment database ....................41 17.1.4. Contractors database ....................42 17.2. Settings of operating for counting pieces............43 17.2.1. Configuration ......................43 17.2.2. Printer settings ......................44 18.
- Page 4 23. PRINTOUTS ....................65 23.1. Standard printout ....................65 23.2. Non-standard printouts ..................66 23.2.1. Inscribing texts ......................69 23.2.2. Choice of non-standard printouts ................73 23.2.3. Changing set of characters for EPSON TM-U220 series (Polish characters)..73 24. COOPERATION WITH PRINTER OR WITH COMPUTER......74 24.1.
-
Page 5: Unpacking Of The Main Balance
1. UNPACKING OF THE MAIN BALANCE Cut open tape protecting the box. Take out the balance of factory package and place it on a stable base. Take out all components and assemble them according to below drawings: Fig 1. The components installation for the balance with pan size 165 x 165mm For balances 300 x 300mm or 410 x 410mm put on the pan and set the scale working according to the chapter 2 of this manual. -
Page 6: Intended Use
Fig 1-2. The balance with pan size 410 x 410mm Balances are supplied from 230 V AC / 11 V AC adapters. Connect to the power source and turn on the balance. 2. INTENDED USE Counting – labelling balances are designed for COUNTING PIECES OF THE SAME MASS. -
Page 7: Getting Started
Software of counting set makes possible: determining mass of single detail on main balance with highest accuracy of weighing owing to application of graphic display, balance software is user- friendly possibility of application PC type PS/2 keyboard simplifies moving in software menu and data accessing printing basic labels, cumulative labels, „cc labels”... -
Page 8: Balance Levelling
3.3. Balance levelling To do the measurements correctly level the scale. Take the pan off carefully (without rapid pulls and hits) and turn the legs in order to level the balance, air bubble should be place in the centre of level condition indicator. Fig. -
Page 9: Balance Description
5. BALANCE DESCRIPTION 5.1. Graphic display Fig. 3. Graphic display 1. displayed mass of currently weighed load 2. unit of mass 3. upper „bargraph” in which description of operating mode, date and time of internal balance clock are displayed 4. lower „bargraph” in which part of mass from range of max capacity used currently is displayed 5. -
Page 10: Balance Keyboard
5.2. Balance keyboard Each key on balance keyboard is dual-function key, its function depends on balance operating mode. Balance Function in Counting pieces Function in weighing mode keyboard mode zeroing zeroing Enter to balance menu Enter to counting pieces menu Enter to choice of operating Enter to choice of operating mode mode... -
Page 11: Pc Keyboard
5.3. PC keyboard PC keyboard is necessary for correct balance operating (moving in balance menu). Without PC keyboard access to some functions is impossible, above that database edition is more convenient and efficient by using PC keyboard. Function in weighing Function in Counting pieces mode keyboard mode... -
Page 12: Connecting Sockets
Deleting counters and statistics Change of weighing Change of weighing platform platform Resignation from Resignation from introduced changes introduced changes 5.4. Connecting sockets Fig. 4. Sockets 1. Adaptor socket (11V AC 50Hz) 2. PC keyboard socket 3. RS 232 socket 4. -
Page 13: User Menu
6. USER MENU User’s menu comprises 9 groups of parameters signed by P. Below you can see listed groups and parameters. P1 Calibration Ext. calibration | * * * * * * * * | function User calibration | * * * * * * * * | function Report printout * * * * * *0.1 | on... - Page 14 P5 RS - 232 Trans. speed * * * * * * * 1 | 4800 Parity * * * * * * * 0 | none Data bits * * * * * * * 2 | 8 bits Stop bits * * * * * * * 1 | 1 bit...
- Page 15 P8 Operating modes Counting pieces * * * * * * * 1 | on Statistic 1 | on Starting mode 1 | counting P9 Other Address ID setting | * * * * * * * * | function ID autoprinting 0| off Signal...
-
Page 16: Menu View
6.1. Menu view While in weighing press F key, display shows main balance menu (display I). Moving by marker up or down, set it next to submenu which contents you want to see. Press → key, display will show contents of submenu (display II) Fig. -
Page 17: Menu Navigating
6.2. Menu navigating Moving in user menu is possible by means of balance keyboard or attached PC keyboard. By means of balance keyboard Balance keyboard Description Exit to one step higher level to menu Enter to parameter edition Moving marker downwards Moving marker upwards Confirmation of introduced value Cancellation of changes, exit from menu... -
Page 18: Return To Weighing
6.3. Return to weighing Introduced changes in settings will be saved after return to weighing mode with procedure of saving changes. Fig. 6. Return to weighing After introducing all changes in parameters settings press several times ESC key. When display indicates message, choose one of two options: ENTER –... -
Page 19: Tarring
Fig. 7. Weighing- choice of weighing platform TAB- by means of PC keyboard11 PRINT+n – by means of balance keyboard 7.1. Tarring For determining net mass place on the pan package of load and when indication is stable press T key. Fig. -
Page 20: Inscribing Tare Value
7.2. Inscribing tare value It is possible to inscribe tare value. To do it in weighing mode follow the below instructions: • Select the platform for tarring, • Using PC keyboard inscribe a tare value (in basic unit) according to display format e.g.: if the basic unit is “kg”... -
Page 21: Zeroing
Enabling function: Fig. 7c. Automatic tare – enabling After setting an appropriate value of the parameter return to weighing 5.3. of this manual. The way of operation: • Press ZERO button when the pan is empty, • Put a package on the pan, •... -
Page 22: Balance Calibration
Notice: Balance zeroing determines a new zero point treated by balance as precise zero. Zeroing is possible only in stable states of the indication. 8. BALANCE CALIBRATION To ensure very high accuracy of weighing, periodical entering to memory correction factor of balance indication referring to standard mass is required; it is so called balance calibration. -
Page 23: Setting Of Printouts Contents For Glp Procedures
9. SETTING OF PRINTOUTS CONTENTS FOR GLP PROCEDURES P2 GLP his group of parameters allows to enable/disable printing some variables on the standard printout and calibration report. For variables: User and project name (max 8 alphanumerical characters) enter names with balance keyboard or with PS/2 keyboard. - Page 24 02 Time format has doublestate choice according to below dependance: time format 12 hours time format 24 hours After choice of appropriate value confirm with ENTER key. Format 12 hours. Is diffrentiated by placing letters PM or AM on printouts. 03 Time With F key enter parameter 03 Time setting according to below scheme.
- Page 25 Confirm set value (last changed digit will stop pulsing) Above activities repeat for next values. After setting new values of time press ENTER key. Balance will return to submenu P3 Date/Time and hour displayed on upper bargraph will change. 04 Date With F key enter parameter 04 Date setting..
-
Page 26: Setting Work Parameters
11. SETTING WORK PARAMETERS User by means of appropriate setting of parameters from menu group <P4 Readout> can adjust the balance to existing operating conditions (filter) and one’s expectations (refreshing, autozero, last digit displaying) Fig. 13. Submenu Readout – internal settings 11.1. -
Page 27: Setting The Time Of Display Refreshment
11.3. Setting the time of display refreshment This parameter determines how often indication of display is refreshed. It is realized by comparing what in given moment is on the display with information sent by balance processor about state of weighed mass placed on the pan. For higher refreshment parameters value display do not indicate intermediate unstable mass indication by placing and removing the load on balance pan, however for low values all changes of mass during weighing are visible –... -
Page 28: Negative
11.6. Negative Possibility to change displaying mode – negative effect (dark background, light signs). 11.7. Two platforms Setting the parameter to YES causes displaying on the display results of weighing from both platforms at the same time. 11.8. Automatic tare This function is useful for quick determining net mass of weighed goods when tare values are different for each weighings (see chapter 7.3. -
Page 29: Printouts
No and name Value of No and name Value of parameters parameters parameters parameters Interval determines stroke (how often) 0 : 2400; balance sends 01 Speed of 1 : 4800; through RS232 joint transmission 2 : 9600; display indication. It 3 : 19200 is determined 07 Interval... -
Page 30: Setting Accessibility Of Weight Units
14. SETTING ACCESSIBILITY OF WEIGHT UNITS In this group of parameters user declares measure units which are accessible for operators directly after pressing the key All units which value of the parameters is set up at 1: yes are accessible from the level of toggling between units. -
Page 31: Setting Accessibility Of Work Modes
15. SETTING ACCESSIBILITY OF WORK MODES In P8 parameters group users can declare work modes that are accessible directly under the Mode key during operation. Fig. 16. Work modes - setting Every operation mode can be enabled/disabled separately. 16. OTHER PARAMETERS. Users can set parameters influence the operation of the balance in group of the parameters P9 Others e.g. - Page 32 04 Beep beep sound for pressing keys 05 Language selection of languages According to software versions (last letter in software version „e” or „w”) following languages are accessible: (e) language versions (w) language versions Polish Polish English English Czech Italian German German Dutch...
- Page 33 Fig. 17 Submenu others - printing settings After a confirmation, parameters are printed via RS 232 port. 12 Reception parameters If the functions are activated all parameters of the balance are received through RS 232. After reception the balance informs user how many parameters are accepted, how many are changed, how many were declared incorrectly and how many were not accepted by the software.
-
Page 34: Counting Pieces
17. COUNTING PIECES 17.1. Databases 17.1.1. Database of operators While in Counting pieces mode press F key on the balance keyboard or F2 on the PC keyboard. Choice of operator is done by arrows up and down, enter to edition by arrow to the right fig.18. -
Page 35: Database Of Labels
17.1.2. Database of labels While in Counting pieces mode press F key on the balance keyboard or F2 on PC keyboard. After pressing arrow to the right list of defined labels will open. Choice of label can be done by arrows up and down, however enter to edition arrow to the right - fig.20. - Page 36 In the field „Selection” you can find. Operator Name of operator Operator Id Identity number of operator Product name Name of operator Product IDt Id code of assortment Product EAN Code assigned to particular assortment Contractor name Name of contractor from contractors base Contractor ID Code of contractor Id from contractors base Country...
- Page 37 Field to place any text designed for printout on label (numbers, digits). Edition – Insert key as V1 As V1 As V1 Constant code (defined by user) Page Up list of six codes„ID”. Code edition like base edition As code1 As code 1 As code 1 As code 1...
- Page 38 Window “Printout” In this window list of chosen variables to print will open. Choice of variable is done by arrows up and down in “variable to choose” window, while confirmation (transfer to “printout” window) arrow to the right. Monitoring (rewinding the variables in “printout”...
- Page 39 Operator Name of operator Operator Id Identity number of operator Product name Name of assortment Product ID Code of assortment Product EAN Code assigned to particular assortment Contractor name Name of contractor from contractors base Contractor ID Code of contractor Id from contractors base Country Contractors country City...
- Page 40 As V1 Constant code (defined by user). In weighing mode press Page Up list of six “ID” codes will occur Codes edition similar to base edition As code 1 As code 1 As code 1 As code 1 As code 1 Printout1 Variables to print defined in submenu “Printouts”...
-
Page 41: Assortment Database
17.1.3. Assortment database While in Counting pieces mode press F key on balance keyboard or F2 on PC keyboard. Set < ►> next to „M1 03 Articles DB”. After pressing right arrow you will see the list of articles (up to 999 records). Choice of article is done by arrows (up down), however enter to edition arrow to the right fig.23. -
Page 42: Contractors Database
Value Addend Tax Tare Value of tare Validity Validity term (number of days 0 -1000) Date+A Constant date assigned to assortment To change any parameter press arrow to the right than inscribe the value. Changes are confirmed by ENTER or canceled by ESC. Leaving editing field by ESC. -
Page 43: Settings Of Operating For Counting Pieces
17.2. Settings of operating for counting pieces 17.2.1. Configuration In this menu way of balance operating in counting pieces mode is defined. After pressing arrow to the right list of parameters will open. Choice is done by arrows up and down however enter to edition arrow to the right. Choice of parameter value arrow up or down. -
Page 44: Printer Settings
Fig. 26. View of screen in counting pieces mode II line Change of any parameter is done by pressing arrow to the right and next using keyboard enter appropriate values. Changes are confirmed with ENTER key or cancelled with ESC key. Exit from edition with ESC key. -
Page 45: Counting Pieces
18. COUNTING PIECES To perform counting of the same details: 1. set appropriate options concerning counting pieces menu “Settings of operating” 2. choose assortment from assortments base (after edition of data base) 18.1. Description of graphic display for Counting pieces mode Fig. -
Page 46: Reference Mass Setting
18.2. Reference mass setting 18.2.1. Inserting known mass of single piece After pressing key F + PCS or PAGE DOWN (keyboard PC) screen will appear as drawing below. By means of PC keyboard insert mass of single sample in basic unit of balance. Fig. - Page 47 It is possible to set quantity of sample as quantities proposed by balance software or in lowest line enter any sample quantity in range 1 – 100000, remember that mass of element declared as sample can not be smaller than 0.1 of reading unit and total mass of all pieces (declared as quantity of pieces) placed on the pan can not be smaller than 1 reading unit.
-
Page 48: Wprowadzenie Masy Detalu Z Bazy Danych Wagi
Quantity of sample can be increased by adding on pan next details. Value of pieces quantity and mass will be automatically increased and corrected by balance software mass of single detail (SMP). In balance software are four conditions of Automatic Accuracy Correction function operating: 1. -
Page 49: Introducing Reference Mass To Balance Memory
18.3. Introducing reference mass to balance memory Mass of single piece sample or multiple can be introduced to assortment base in following way: a) determine reference mass (point 7.2 a, point 7.2 b) b) enter assortment base F or F2 (PC keyboard) c) choose assortment from assortment base (set indicator at given assortment) d) press INSERT key... -
Page 50: Labelling
19. LABELLING Labelling procedure is started from edition of bases of: operators, labels, assortments, contractors. Next set balance operating parameters and printer settings. When configuration is finished start proper labelling. NOTICE: To move in data bases connection of PC keyboard is recommended. Balance operating with PC keyboard makes this operation much more comfortable and easy. -
Page 51: Operator Selection And Logging In
• Press F8, • Software enters the database and sets < ► > next to the searched name, • Press ENTER, • Program comes back to counting pieces with the selected article. NOTICE: Quick search of article name can be performed in database but without editing field. -
Page 52: Regular Labelling
20. REGULAR LABELLING After choice of assortment procedure of counting pieces can be started. When result is stable press PRINT key. Display will indicate value of “n1” labels, cumulative pieces quantity “sums” and cumulative labels “n2” counter. Fig. 36. Screen of labelling mode labels counter number of chosen assortment name of chosen assortment... - Page 53 ♦ After exceeding given quantity of basic labels (after exceeding given state of “n1” counter) ♦ After exceeding given total quantity of assortment „sums” ♦ Printing in any moment - Without deleting “n1” counter Home key - With deleting “n1” counter F10 key To print cumulative label without deleting “n1”...
-
Page 54: Printing Of "Cc" Label
20.2. Printing of “cc” label” “cc label” contains data from whole cycle of given assortment editing. Execution of such label closes given cycle. This label is done e.g. to mark pallet with given assortment . This label can be printed only for assortment for which such “cc label”... -
Page 55: Initiating "Cc Label" By "N2" Counter
Field to introduce any text (digits, letters) to be placed on the label As position 1 As position 1 As position 1 State of counter after which cumulative label will be initiated Value of total quantity of pieces after which cumulative label will be initiated Value of labels counter after which cc label will be printed Value of total quantity of pieces after which cc label will be printed Initial value of n1 counter... -
Page 56: Initiating "C Label" And "Cc Label" By Determined Quantity Of Pieces
20.5. Initiating “c label” and “cc label” by determined quantity of pieces Balance enables initiating cumulative label and “cc label” by determined state of “sums” indicator ♦ In „Operating settings” choose position „c label” (or cc label depending on what is to be initiated) ♦... -
Page 57: Automatic Printout
20.7. Automatic printout Automatic printout enables labels printing without pressing PRINT key. Automatic printout takes place when result is stable . Function works in all labelling modes if all conditions for given operating mode are fulfilled (e.g. by result control quantity of pieces must contain in given thresholds, result must be stable). -
Page 58: Ean Code
Scanning technology for barcodes reading: • laser – longer scanning range (e.g. QS-6000+, Cubit) • diode – durable, faster operation (e.g. Dioder, QS-2500) 21.2. EAN code One of the most popular barcodes are EAN (European Article Numbering), which were approved for common use in retail trade in 1976. American equivalent is UPC. -
Page 59: The Usage Of Ean-128 Barcode In Scales
Barcode technology allows to: • Monitor commercial transactions, • survey stored reserves • supervise warehouse transactions collecting, decomposing, palletization etc. • shorten time of loading and unloading goods • monitor production in real time • monitor reserves 21.5 The usage of EAN-128 barcode in scales. The EAN-128 barcode standard has been created to provide a worldwide standard for exchanging simple data between enter prices. - Page 60 Serial Number Up to 20 characters Lot Number Up to 19 characters Quantity Each Product Net Weight in Kg 310** exactly 6 characters Product Length/1st Dimension 311** exactly 6 characters (Meters) Product Width/Diameter/2nd 312** exactly 6 characters Dimension (Meters) Product Depth/Thickness/3rd 313** exactly 6 characters Dimension (Meters)
-
Page 61: Operating With Barcode Scanners
- Brutto E128 - Cena E128 - Data E128 - Data + E128 - Data +A E128 - Data +V E128 6-character alphanumeric variables AIx can be used as application identifiers. All the rest of variables are variants of other variables present in the program formatted to EAN128 standard requirements. - Page 62 Fig. 41. View of screen for settings of bar code scanner 1 – Value of read bar code Caution: As a rule display indicated 2 or 3 first signs of read code which are not included in bar code e.g. FF500111010 when on the label only 500111010 are visible. Set “Start”...
- Page 63 ♦ Number – searching number of assortment (from 0001 to 0999) ♦ None – no searching , only reading to “Buf. Code 1” and “Buf. Code 2) are read 7. Set parameter Start 2 8. Set parameter Length 2 It is possible to set “Start 1”, “Length” parameters, “Start 2”, “Length 2”...
-
Page 64: Statistics
22. STATISTICS Function enabling Fig. 44. Statistics – function activating First activity after function activating should be deleting results of previous statistics. It is realized through M2 01 Delete option. All statistics data are up to date actualized after introducing next measurement to balance memory. -
Page 65: Printouts
1. mass currently placed on the pan 2. number of measurement in given series of measurement 3. sum of all weighed details in given series of measurements 4. average mass of weighed details in given series of measurements 5. mass of lightest detail in given series of measurement 6. -
Page 66: Non-Standard Printouts
Sample of standard printout: Fig. 47. Sample of standard printout (all options set on YES - printed) Fig. 48. Sample of standard printout 23.2. Non-standard printouts Rules of creating non-standard printouts: − user can create 4 own printouts − for each printout give number of text from which printout should start e.g. - Page 67 Notice: During writing in by hand give all special signs such as CRLF, tabulator, etc. Fig. 49. Menu printouts – function activating Non-standard printout can contain: − variables depending on operating mode and other needs of user (mass, date, project no.) −...
- Page 68 Fig 50 Access to the memory of printouts − Printout destination In accordance to settings the printout can be sent to: • RS 232 port (immediate printout) • The balance memory (saving) • RS 232 port and the balance memory (immediate printout with saving) −...
-
Page 69: Inscribing Texts
23.2.1. Inscribing texts Variables that appear in all modes Variables for all operating modes Gap in printout Net mass in basic unit Gross mass in basic unit Tare mass in basic unit Date Hour Balance no. Software version Name of project (set in GLP menu) User (set in GLP menu) Name of current operating mode Date of last calibration... - Page 70 Variables to use in counting pieces mode Net mass in current unit Name of operator Operator Id Name of article Article Id Article EAN code Name of contractor Contractor Id Labels counter Sum of pieces net Sum of sums of pieces net Price of article VAT of article Net value...
- Page 71 Variables to use in statistics mode Mass in basic unit Quantity average minimum maximum difference Statistics (pieces) – standard deviation Statistics (pieces) – variability factor Additional control characters for MCB software Change of set of characters to Polish in EPSON printers Paper cutting in EPSON printers Notice: For variables comprising weighing results information from currently chosen...
- Page 72 Example 1: Zaklad Mechaniki Precyzyjnej „RADWAG” Date: Time: Load mass: *****Signature:..***<actual work mode>*** Text Parameter number 25 Text 16 26 Text 17 27 Text 18 28 Text 19 „ 29 Text 20 „ 30 Text 21 31 Text 22...
-
Page 73: Choice Of Non-Standard Printouts
Text Parameter number 19 Text 10 20 Text 11 21 Text 12 22 Text 13 23 Text 14 24 Text 15 Method of entering texts − from computer PS/2 keyboard With F2 key enter the main menu and set the indicator of parameter by →... -
Page 74: Cooperation With Printer Or With Computer
24. COOPERATION WITH PRINTER OR WITH COMPUTER Each pressing the < PRINT > key causes sending to computer or to printer signal answering current state of display with mass units. Balance has factory set speed of transmission 9600 bit/sec. If external device (printer, computer) requires different speed of transmission change in balance menu setting of speed of transmission parameter. -
Page 75: Cooperation With Computer Program „Db Editor
25. COOPERATION WITH COMPUTER PROGRAM „DB editor” It is possible to cooperate with „DB editor” program. This piece of software It gives the possibility to download databases to the balance and upload them. Supervising databases of assortment, operators, contractors and labels on a computer is much easier than in the balance. -
Page 76: Transmission Potocol
26. TRANSMISSION POTOCOL 26.1. Some basic information The communication protocol has been designed for exchanging information between RADWAG scales and external devices via RS-232C. The communication protocol has been designed in the form of request response messages. Scales always respond after receiving a command or generated automatically by the program after completing the command. -
Page 77: Transmission Characteristics
26.3. Transmission characteristics Scales with MCB X.XX program use two different ways of transmission: • Continuous transmission or automatic printout (RS 232 and RS 485) • of request-response messages (request messages via RS 232 and response messages via RS 232 or RS 485) 26.4. -
Page 78: Continuous Transmission
26.4.2. Continuous transmission Results are transmitted in basic units. Transmission can be disabled/enabled using RS232 command: C1 CR LF – Switch on continuous transmission in basic unit C0 CR LF – Switch off continuous transmission in basic unit or using the parameter: settings/ RS-232/Aut. printout/continuous The frame length is constant (21 characters). -
Page 79: Survey Of Automatic Printouts
Standard length is 18 characters, but if the parameter digit marking has been enabled, the length increases to 20 characters, because additional brackets are printed e.g.: 383 kg 38[3] kg 3[83] kg It can be set in : Settings/Factory/digit marking Frame format: [space] [sign] [mass] [space] [unit] [CR LF] sign –... -
Page 80: Commands And Responses Syntax
Command - 1-3 characters (repeated command characters) Stability character – [space] if stable [?] if not stable [^] if an indication over the range [v] if an indication below the range sign – [space] for positive values or [-] for negative values mass –... -
Page 81: Response Syntax
26.5.2. Response syntax Response can include parameters or not and additionally can signalize errors. After receiving an appropriate command scales response immediately with: Immediate response Acknowledge of receiving a command Accepting of a received command Not accepting of a received command Overall format: ID _ STATUS CR LF - example of a command without a parameter... -
Page 82: List Of Commands Computer - Balance
26.6. List of commands computer - balance Function RESET INTERFACE Command R CR LF (zero actual orders, restore factory setting) Function SEND ALL COMMANDS FROM THE BALANCE Command PC CR LF (all recorded information in commands in the balance programme are sent from the balance) Function SEND THE RESULT IN BASIC UNIT Command... - Page 83 Function RANGE OF WEIGHIGN Command FS CR LF Function PROGRAM VERSION Command RV CR LF Function WRITE OR CHANGE DATE IN THE BALANCE Command PD CR LF (the balance sends settled date or the date is changed) Function WRITE NEW OR CHANGE TIME IN THE BALANCE Command PT CR LF (the balance sends settled time or this time is changed) Function...
- Page 84 Function LOCK THE KEYPAD Command KL CR LF Function UNLOCK THE KEYPAD Command KU CR LF Function TURN OFF THE KEYPAD ECHO Command E0 CR LF (turns off sending the codes of pressed keys) Function TURN ON THE KEYPAD ECHO Command E1 CR LF Function...
-
Page 85: Error Messages
27. ERROR MESSAGES Error Message Description "checksum error" Errors during date transmission "A/D Error" A/D Converter error " Exceed range " Exceeded max measure range of the balance "A/D Null" No value from A/D converter "A/D Full" Exceeded max value converter intervals "Tara/Zero above the Exceeded tare or zero range range"... -
Page 86: Technical Parameters
28. TECHNICAL PARAMETERS 28.1. WLT/L series Type: 0,6/1,2/L 1,2/3/L 3/6/L Max. capacity 0,6/1,2kg 1,2/3kg 3/6kg Min. capacity 0,4g Readability 0,01/0,02g 0,02/0,05g 0,05/0,1g Verification ------------ ------------ 0,5/1g interval Tare range - 1,2kg - 3kg - 6kg ±0,02/ 0,04g ±0,04/ 0,1g ±0,1/ 0,2g Linearity Pan size 165x165 mm... -
Page 87: Wll Series
28.2. WLL series Type: 1/A1 3/A2 6/A2 10/A2 Max. capacity 1 kg 3 kg 6 kg 10 kg Readability 0,01 g 0,05 g 0,1 g 0,1 g Tare range -1 kg -3 kg -6 kg -10 kg Repeatability 0,02 g 0,1 g 0,1 g 0,1 g... -
Page 88: Appendix A
3. Setting the suffix for WLT balance Label Transmit Configuration, Setting Global Suffix(es) Set Suffix 4. Setting label ID location LABEL I.D. = NONE Notice: RADWAG standard is – no symbology sign in the frame (pure code) (Symbology specification – LABEL I.D. = NONE) -
Page 89: Appendix B
APPENDIX B Setting CITIZEN printers. Speed of transmission – 9600b/sec Parity control – none Bits quantity – 8bit Stop bits – 1 bit Flow control – none IEEE 1284 – on Information on printout from printer regarding RS232: [Interface Menu] RS-232C Baud rate :9600bps RS-232C Parity... - Page 90 MANUFACTURER OF ELECTRONIC WEIGHING INSTRUMENTS RADWAG 26 – 600 Radom Bracka 28 Street POLAND Central phone. +48 48 38 48 800, phone/fax. + 48 48 385 00 10 Sales Department + 48 48 366 80 06 POLAND www.radwag.com...
Need help?
Do you have a question about the WLT L Series and is the answer not in the manual?
Questions and answers