Viavi ONA-800 Getting Started Manual
Hide thumbs
Also See for ONA-800:
- Getting started manual (47 pages) ,
- Software update instructions (15 pages) ,
- Setup (5 pages)
Table of Contents
Advertisement
Quick Links
Advertisement
Chapters
Table of Contents

Subscribe to Our Youtube Channel
Related Manuals for Viavi ONA-800


Summary of Contents for Viavi ONA-800
- Page 1 ONA-800 Getting Started Guide R011...
- Page 3 Copyright/Trademarks © Copyright 2022 Viavi Solutions Inc. All rights reserved. No part of this guide may be reproduced or transmitted, electronically or otherwise, without written permission of the publisher. VIAVI Solutions and the VIAVI logo are trademarks of Viavi Solutions Inc.
- Page 4 ONA-800 Getting Started Guide Page iv 22142812, R011 April 2022...
-
Page 5: Table Of Contents
“EU REACH” on page vii • “EU CE Marking Directives (LV, EMC, RoHS)” on page viii • “Korea Certification” on page viii • “Pollution Degree 2 Category under IEC 61010-1” on page ix ONA-800 Getting Started Guide April 2022 22142812, R011 Page v... -
Page 6: Safety And Compliance Information
For the VIAVI position statement on the use of Proposition 65 chemicals in VIAVI products, see the Hazardous Substance Control section of the VIAVI Policies &... -
Page 7: Eu Weee And Battery Directives
VIAVI has established a take-back process in compliance with the EU Waste Electrical and Electronic Equipment (WEEE) Directive, 2012/19/EU, and the EU Battery Directive, 2006/66/EC. Instructions for returning waste equipment and batteries to VIAVI can be found in the WEEE section of the VIAVI Policies &... -
Page 8: Eu Reach
Substances of Very High Concern (SVHC) is present in an product above a certain threshold. For information about the presence of REACH SVHC in VIAVI products, see the Hazardous Substance Control section of the web page. -
Page 9: Korea Certification
The provisions contained in two standards define the safety procedures to be observed both by users and by manufacturers when utilizing laser products: • IEC 60825-1:2014 – Safety of laser products – Part 1: Classification and requirements ONA-800 Getting Started Guide April 2022 22142812, R011 Page ix... -
Page 10: Laser Classes
In line with the provisions of Article 7.1 of the IEC 60825-1 standard, the laser class identification labels are shown below: Reference IEC 60825-1 FDA 21 CFR § 1040.10 standard Class 1 Class 1M Class 2 ONA-800 Getting Started Guide Page x 22142812, R011 April 2022... - Page 11 The user must take the necessary precautions concerning the optical output of the instrument and follow the manufacturer’s instructions. Additional safety information Safety information is provided in the document Safety Instructions - ONA-800 Base Unit, 22137678, which is shipped with the ONA-800. ONA-800 Getting Started Guide...
- Page 12 Regulatory compliance Additional safety information ONA-800 Getting Started Guide Page xii 22142812, R011 April 2022...
- Page 13 ............6 ONA-800 Getting Started Guide...
- Page 14 Commands of the power meter parameters ....... 39 ONA-800 Getting Started Guide...
- Page 15 Power Expansion Module (PEM)........54 ONA-800 Getting Started Guide...
-
Page 16: About This Guide
This section explains how to use this Getting Started Guide. • “Purpose and scope” on page xv • “Assumptions” on page xv • “Conventions” on page xv • “Technical assistance” on page xvii ONA-800 Getting Started Guide April 2022 22142812, R011 Page xiv... -
Page 17: Purpose And Scope
Purpose and scope The purpose of this manual is to help you successfully use the features and capabilities of the ONA-800 . This manual includes task-based instructions that describe how to configure, use, and troubleshoot the general functions of the base unit. - Page 18 ALERT Indicates that there is an action that must be performed in order to pro- tect equipment and data or to avoid software damage and service inter- ruption. ONA-800 Getting Started Guide April 2022 22142812, R011 Page xvi...
-
Page 19: Technical Assistance
The user must take the necessary precautions concerning the optical output of the instrument and follow the manufacturer’s instructions. Technical assistance For technical assistance, call 1-844-GO-VIAVI. For the latest TAC information, go to http://www.viavisolutions.com/en/services-and-support/support/technical-assistance. ONA-800 Getting Started Guide Page xvii... -
Page 20: Getting Started
Chap ter 1 This chapter explains how to use this Getting Started Guide. The topics discussed in this chapter are as follows: • “About the ONA-800” on page 2 • “Unpacking and inspection” on page 2 • “ONA-800 base” on page 3 •... -
Page 21: About The Ona-800
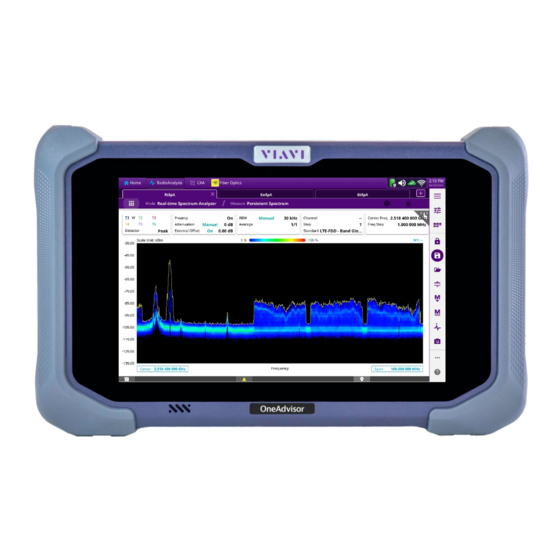
The unit features an 8-inch touchscreen for quick access to the touch-based user interface. Powered by either external AC power or batteries in the field, the ONA-800 is both rugged and portable. Capabilities such as WiFi and Bluetooth are optional. -
Page 22: What's Included With The Base Unit
Chapter 1 Getting started ONA-800 base If any component shows signs of damage, contact VIAVI Customer Care at 1-844-GO- VIAVI. For the latest TAC information, go to http://www.viavisolutions.com/en/services- and-support/support/technical-assistance. For information about returning equipment, see “Returning equipment to VIAVI”. Consider saving shipping boxes and packing materials in case you need to repackage the components for shipment. - Page 23 Modules Cooling fans Battery access door Figure 4 shows the back panel without CAA/OTDR or dummy modules attached. Figure 4 Back panel, no modules Screws ESD ground Module connector ports ONA-800 Getting Started Guide Page 4 22142812, R011 April 2022...
-
Page 24: Additional Modules
The ONA-800A-MF2 supports the addition of the ONA-MF2-PEM Power Extension Module (PEM), allowing you to add additional batteries to the ONA-800 for an extended battery runtime. You can attach up to two PEMs, providing the ONA-800 with 3 batteries (2 external/1 internal) for a total of 244Wh. -
Page 25: Charging The Pem
The following sections describe how to install components to the ONA-800 base. Attaching the screen The following procedure describes how to attach the screen to the ONA-800 base unit. To attach the screen to the base unit Set the screen onto the base, ensuring the mating connectors between the two... -
Page 26: Attaching Modules
Fastener locations Attaching modules This section describes how to attach modules to the ONA-800. Solution and Fiber Module Carrier modules Table 5 lists the Solution modules you can attach to the ONA-800 base. Table 5 Solution Modules Module Description SPA06MA Spectrum Analyzer with 6 GHz RF and 25 Gbps Optical hardware. -
Page 27: Expansion Modules
Insert the hex key in the brass fittings on the rear of the module and tighten the internal captive fasteners to secure the module to the display. Place the ONA-800 base onto the module, ensuring the mating connectors are aligned, as shown in... - Page 28 Timing Expansion Module PEM (ONA-800A-MF2 only) Power Extension Module The following procedure describes how to attach expansion modules to the ONA-800. To attach expansion modules Power down the ONA-800 and disconnect from AC power. Place the unit so that you have access to the back and remove the termination cover by removing the screws that hold it in place.
-
Page 29: Plug-In Modules
The Fiber Module Carrier module must be installed before you can install plug-in modules. See “To attach a Fiber Module carrier or Solution module” on page 7 more information. Table 7 lists the plug-in modules supported on the ONA-800. Table 7 Supported plug-in modules Catalog Number Description OSA modules 2304-8491.027... - Page 30 The following procedure describes how to install a plug-in module into the Fiber Module Carrier attached to the ONA-800. To install a plug-in module Power down the ONA-800 and disconnect from AC power. If you have not already done so, install the Fiber Module Carrier module, as described in “To attach a Fiber Module carrier or Solution module”...
-
Page 31: Powering The Base Unit
AC power adapter, you need to verify that you have the correct adapter. CAUTION: Do not attempt to run the ONA-800 in an enclosure such as the soft-shell travel case. Doing so may damage the unit. Battery Installation The base unit can operate supplied by the AC power adapter shipped with the unit or by battery. -
Page 32: Ac Power Adapter
13) to confirm that it is the correct adapter for use with the unit. AC power adapters supplied with modules might not be compatible for use with the ONA- 800. ONA-800 Getting Started Guide April 2022 22142812, R011 Page 13... - Page 33 Chapter 1 Getting started Powering the base unit Figure 13 ONA-800 AC power adapter label ONA-800 Getting Started Guide Page 14 22142812, R011 April 2022...
-
Page 34: Setting Up The System
• “Enabling software options” on page 22 • “Updating the system software” on page 23 • “Job Manager” on page 26 • “Synchronizing to the StrataSync server” on page 29 ONA-800 Getting Started Guide April 2022 22142812, R011 Page 15... -
Page 35: Home Screen
Chapter 2 Setting up the system Home Screen Home Screen When you first start the ONA-800, the Home Screen appears, as shown in Figure Figure 14 Home Screen The Home screen provides access to the Tests, Job Manager, and System pages. -
Page 36: Editing Favorites
NOTE This procedure is only available on certain solution modules. On the test page you want to add, select the Save button from the side menu, as shown in Figure ONA-800 Getting Started Guide April 2022 22142812, R011 Page 17... - Page 37 Press the Edit favorites list button. The items in Favorites are outlined in purple, signifying they are now able to be edited. Click the X in the top right corner of the item you want to remove. ONA-800 Getting Started Guide Page 18 22142812, R011...
-
Page 38: Tests
The System screen provides access to tools for viewing system information and performing other tasks as required. NOTE Additional tools might be available on the System screen when optional software features are installed. ONA-800 Getting Started Guide April 2022 22142812, R011 Page 19... - Page 39 Set up a reference frequency and timing source. System Info View and manage system information. StrataSync Connect to the StrataSync server for synchronization. Video Player Access the video player on the unit. ONA-800 Getting Started Guide Page 20 22142812, R011 April 2022...
-
Page 40: Setting Up Remote Access
Require password for VNC access check box. Connecting to a Wi-Fi network NOTE Wi-Fi connectivity is optionally available. Contact your VIAVI sales representative for more information. Select System on the menu bar, and then select Network. Select Wi-Fi, and then select the Enable Wireless Adapter check box to display a list of available wireless networks. -
Page 41: Using Smart Access Anywhere
Option is not enabled. Contact the VIAVI Solutions Sales Office for the region for information about enabling it. ONA-800 Getting Started Guide... -
Page 42: Enabling Purchased Software Options
Updating the system software using a USB drive Download the system software to a PC and then extract it to a USB drive with at least 1 GB available space. VIAVI recommends that the USB drive have no other content stored on it. -
Page 43: Performing A Software Update Using A Usb Drive
Select OK to proceed with the software update. Do not unplug the USB drive from the unit during the update. The unit automatically restarts when the update is completed. After the unit has restarted, unplug the USB drive. ONA-800 Getting Started Guide Page 24 22142812, R011 April 2022... -
Page 44: Updating The System Software Over The Network
Updating the system software over the network The system software on the unit can be updated over a network connection to a server where the updated software file is located, such as ona-800.updatemyunit.net. Before beginning the update, review the following recommendations: •... -
Page 45: Job Manager
This file should already be on the instrument. Click Save. Add the test plans to the instrument using StrataSync. See “Synchronizing to the StrataSync server” on page 29 for more information. ONA-800 Getting Started Guide Page 26 22142812, R011 April 2022... -
Page 46: Running Jobs
Press the button for each test you want to run. When the Job is complete, you can create a report. The following procedure describes how to create a Job report. ONA-800 Getting Started Guide April 2022 22142812, R011 Page 27... -
Page 47: Freeform Jobs
The following procedure describes how to use an empty job. To create and use empty jobs Tap Job Manager in the left hand menu. The Job Manager screen appears. ONA-800 Getting Started Guide Page 28 22142812, R011 April 2022... -
Page 48: Synchronizing To The Stratasync Server
NOTE Ensure that network settings are configured on the unit via the Network system tool. VIAVI recommends setting the IP mode to DHCP. Select System on the menu bar, and then select StrataSync. - Page 49 Enter the ID of the unit in the Account ID field. Synchronization cannot occur without the entry of a pre-approved, unique account ID obtained from VIAVI. Ensure that an account ID is available before attempting to access the StrataSync server.
-
Page 50: Powermeter And Vfl
• “Using the power meter” on page 32 • “Storing and reloading results” on page 40 • “VFL function” on page 41 • “Characteristics of the options” on page 42 ONA-800 Getting Started Guide April 2022 22142812, R011 Page 31... -
Page 51: Connection To The Power Meter And Vfl
E2000, etc.) 1.25 mm diameter connectors (LC) are supported with an adapter for the Powermeter. Figure 25 shows the location of the Optical connectors on the ONA-800. Figure 25 Optical connectors Using the power meter The power meter functions an option chosen at the time of order and incorporated into the ONA-800 platform in the factory. -
Page 52: Configuring The Measurement Parameters
– Note: The source must also be in Auto mode – 850, 980, 1300, 1310, 1420, 1450, 1480, 1490, 1510, 1550,1578, 1625 or 1650 nm: Measurement performed at specified wavelength. – User: Choice of wavelength on the next line. ONA-800 Getting Started Guide April 2022 22142812, R011 Page 33... -
Page 53: Configuring The Alarm Parameters
Choice of lower and upper thresholds for each available wavelength, from -60 to +40 Max Threshold dBm (selected with the direction keys.) Configuring the Link parameters In the Setup menu, select Link. ONA-800 Getting Started Guide Page 34 22142812, R011 April 2022... - Page 54 The comment will remain available for the next acqui- sition unless it is deleted. It is also saved when a trace is saved with a comment. ONA-800 Getting Started Guide April 2022 22142812, R011 Page 35...
-
Page 55: Configuring The File Parameters
– Standard — The report is saved in a standard text file. – Consolidated — The results are consolidated and the report is saved in a text and/or PDF file. Report Naming Displays the report naming format. ONA-800 Getting Started Guide Page 36 22142812, R011 April 2022... -
Page 56: Saving The Configuration In A File
Select the desired configuration file. Press Load > Load Trace + Config. Press the Exit key, then select Setup to display the configuration parameters saved in the selected configuration file. ONA-800 Getting Started Guide April 2022 22142812, R011 Page 37... -
Page 57: Results Page
To scroll through the other results, use the direction key. The table shows the power measured in dBm, the relative power in dB, and the reference level in dBm (if units = dB), together with the mode. ONA-800 Getting Started Guide Page 38 22142812, R011... -
Page 58: Commands Of The Power Meter Parameters
Connect the light source to be tested to the Powermeter connector, as described “Connection to the power meter and VFL” on page In the configuration menu, choose the units – – – Watts. ONA-800 Getting Started Guide April 2022 22142812, R011 Page 39... -
Page 59: Optical Link Loss
It can be displayed in the table, as described in “Table of results” on page Storing and reloading results The following sections describe storing and reloading results. ONA-800 Getting Started Guide Page 40 22142812, R011 April 2022... -
Page 60: Storing Results
The Laser On icon appears in the system tray, as shown in Figure Figure 32 Laser On icon To deactivate the VFL, press the VFL button for 3 seconds. The Laser On icon disappears from the system tray. ONA-800 Getting Started Guide April 2022 22142812, R011 Page 41... -
Page 61: Characteristics Of The Options
Length of fiber: up to 5 km • Class 2 laser standards: IEC 60825-1 and FDA 21 CFR part 1040.10 1.Specifications guaranteed to the calibrated wavelengths, except for 1650 nm ONA-800 Getting Started Guide Page 42 22142812, R011 April 2022... -
Page 62: Smart Access Anywhere
“Launching the utility” on page 46 • “Displaying the instrument’s user interface” on page 48 • “Transferring files” on page 48 • “Displaying and modifying connection settings” on page 49 ONA-800 Getting Started Guide April 2022 22142812, R011 Page 43... -
Page 63: About Smart Access Anywhere
You can also rename and delete files, or create, rename, and delete directories. Licensing To use Smart Access Anywhere, you must have a license. Contact your VIAVI sales representative for more information about obtaining a license. Downloading and extracting the utility The Smart Access Anywhere utility must be downloaded and extracted on the work- station that you intend to use to connect remotely to the test instrument. -
Page 64: Wired Ethernet Connection
To connect using WiFi, the WiFi option must be installed on the target test instrument. To order the option, or to determine whether a particular Smartphone has been quali- fied by Viavi for the purpose of establishing remote connections to the instrument, contact VIAVI Customer Care at 1-866-228-3762 or www.viavisolutions.com. -
Page 65: Smartphone With Data Tethering
3) launch the utility on your PC or mobile device, and enter the remote access code that was obtained from the instru- ment. ONA-800 Getting Started Guide Page 46 22142812, R011 April 2022... -
Page 66: Launching The Utility On The Instrument
Launching the utility on your PC or mobile device After you establish a connection to your test instrument, you can launch the Smart Access Anywhere utility to update your instrument. ONA-800 Getting Started Guide April 2022 22142812, R011 Page 47... -
Page 67: Displaying The Instrument's User Interface
In the “destination” pane (the pane with the directory that you want to transfer the file to, select the destination directory for the file. ONA-800 Getting Started Guide Page 48 22142812, R011... -
Page 68: Displaying And Modifying Connection Settings
Alternative port (443) and if HTTPS packing is selected. NOTE: If the default parameters need to be modified, it is recommended you discuss it with your local network administrator. After configuring the settings, select Back to main page. ONA-800 Getting Started Guide April 2022 22142812, R011 Page 49... - Page 69 Chapter 4 Smart Access Anywhere Displaying and modifying connection settings ONA-800 Getting Started Guide Page 50 22142812, R011 April 2022...
- Page 70 Physical Specifications Appendix A This appendix lists the physical specifications of the ONA-800. Topics covered include: • “ONA-800A-MF” on page 52 • “Optional modules” on page 52 ONA-800 Getting Started Guide April 2022 22142812, R011 Page 51...
-
Page 71: Appendix A Physical Specifications Ona-800A-Mf
0 to 40°C (32 to 104°F) AC power condition 10 to 40°C (50 to 104°F) Battery power condition Storage Temperature -20 to 60°C (-4 to 140°F) IMPORTANT: VIAVI strongly recommends storing the battery pack in a low-humidity ≤80% RH, low- temperature <21°C (70°F) environment. Environment... -
Page 72: Solution Modules
For Optical Time Domain Reflectometer (OTDR) and Multi-Fiber Push On (MPO) Switch specifications, refer to the OTDR Functions, Options and Software Applications User Manual. Supporting data sheets are available at www.viavisolutions.com. ONA-800 Getting Started Guide April 2022 22142812, R011 Page 53... -
Page 73: Osa, Ocv, And Occ Modules
Discharging 0 to 60 C (32 to 140 Temperature Storage Temperature -20 to 60°C (-4 to 140°F) IMPORTANT: VIAVI strongly recommends storing the battery pack in a low-humidity ≤80%RH, low-temperature <21°C (70°)F environment. Environment Maximum Humidity 95% RH non-condensing Shock and Vibration... - Page 75 ONA-800 Getting Started Guide 22142812 R011 Viavi Solutions North America: 1.844.GO VIAVI / 1.844.468.4284 Latin America +52 55 5543 6644 EMEA +49 7121 862273 APAC +1 512 201 6534 All Other Regions: viavisolutions.com/contacts email TAC@viavisolutions.com...
Need help?
Do you have a question about the ONA-800 and is the answer not in the manual?
Questions and answers