Satel VERSA INT-TSG2 User Manual
Hide thumbs
Also See for VERSA INT-TSG2:
- Installer manual (38 pages) ,
- User manual (34 pages) ,
- Quick user manual (14 pages)

Subscribe to Our Youtube Channel
Related Manuals for Satel VERSA INT-TSG2


Summary of Contents for Satel VERSA INT-TSG2
- Page 1 SATEL INT-TSG2 INT-TSG2 Keypad User manual VERSA Firmware version 2.00 int-tsg2_ov_en 08/21 SATEL sp. z o.o. • ul. Budowlanych 66 • 80-298 Gdańsk • POLAND tel. +48 58 320 94 00 www.satel.eu...
- Page 2 Warning This is a Class A product. In a domestic environment this product may cause radio frequency interference. The declaration of conformity may be consulted at www.satel.eu/ce Factory default codes: Service code: 12345 Object 1 master user (administrator) code: 1111...
-
Page 3: Table Of Contents
CONTENTS 1. Introduction ........................2 2. LED indicators ........................2 3. Using the touch screen ...................... 2 4. Screensaver ........................4 Slideshow ........................5 Trigger the panic alarm ....................5 5. User screens ........................5 6. Additional screens ......................7 7. -
Page 4: Introduction
In order to control the alarm system, you can use: • user screens and additional screens created for you by the installer, • user menu created by SATEL. After 10 minutes of inactivity, the keypad screen can turn off (this setting is available in the service menu). - Page 5 SATEL INT-TSG2 Tap on an item on the screen. Tap and hold Tap on an item on the screen and hold for 3 seconds. Swipe up / down Tap the screen and slide your finger up or down to: • swipe the screen up / down (move between the screensaver / user screen / user menu home screen), •...
-
Page 6: Screensaver
INT-TSG2 SATEL Swipe right / left Tap the screen and slide your finger right or left to swipe the screen right / left (go to the previous / next screen). When the screensaver is active, swipe right / left to start / end the slideshow. -
Page 7: Slideshow
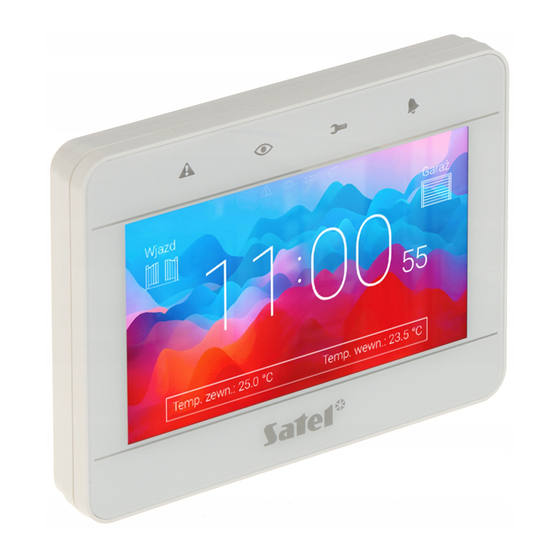
SATEL INT-TSG2 Fig. 1. Screensaver (keypad with factory default settings). The screensaver on a keypad with factory default settings (Fig. 1) shows the date and time. The installer can add to the screen additional widgets that will indicate the alarm system status (see “Widgets”... - Page 8 INT-TSG2 SATEL Fig. 2. User home screen (keypad with factory default settings). To run a function with a widget, you may be required to enter a code. If this is the case, the keypad will be displayed (see p. 10). When you enter the code, the function will be run and you will be logged in.
-
Page 9: Additional Screens
For this reason, the additional screens may be used to display site plans. If pictures other than the ones offered by SATEL are to be displayed, the installer must save them on a memory card and install the card in the keypad. -
Page 10: Zone State
Zone state The widget displays the zone state represented by either: • icons selected by SATEL (indicator) – different states are displayed, • text messages (text) – messages inform only about normal and violated states, • icons selected by the installer (icon) – only normal and violated states are displayed. -
Page 11: Output State
The widget displays the output state represented by either: • icons selected by SATEL (indicator), • text messages (text), • icons selected by the installer (icon). The icons selected by SATEL are described in the table below. Icon Output status deactivated activated “15: Controlled”... -
Page 12: Information
INT-TSG2 SATEL 8.10 Information The widget is represented on the screen by the icon. Tap the widget to view the message prepared by the installer. 8.11 Link The icon for the widget is selected by the installer. Tap the widget to go to the additional screen / return to the user screen from the additional screen. -
Page 13: User Menu Home Screen
SATEL INT-TSG2 10.1 User menu home screen Fig. 5. User menu home screen. The following functions are available on the user menu home screen. tap to go to the “Partitions” screen (p. 12). tap to go to the “Zones” screen (p. 14). -
Page 14: Partitions" Screen
INT-TSG2 SATEL Fig. 6. QWERTY keyboard: letter keys mode. In addition to the typing keys, the following special keys are available. tap to switch the keyboard to the uppercase mode. tap to switch the keyboard to the lowercase mode. tap to exit the QWERTY keyboard. -
Page 15: Arming
SATEL INT-TSG2 Fig. 8. “Partitions” screen (example). The icons in the top right corner allow you to: tap to clear alarm. tap to terminate the exit delay countdown. tap to filter the partition list (see “Filtering the partition list” p. 14). -
Page 16: Disarming
INT-TSG2 SATEL 4. Tap the button with the arming mode you want to activate. 5. Tap the button with the icon. The arming procedure will start. 10.3.2 Disarming 1. Tap the partition you want to disarm. The button with the icon will appear at the bottom of the screen. -
Page 17: Zone Inhibiting
SATEL INT-TSG2 tap to search for zone/zones (see “Searching for zones” p. 16). tap to go back to the user menu home screen. The icon displayed in front of the partition name allows you to: tap to hide the list of zones that belong to the partition. -
Page 18: Zone Unbypassing
INT-TSG2 SATEL 10.4.3 Zone unbypassing 1. Tap the zone you want to unbypass. The button with the icon will appear at the bottom of the screen. 2. If you want unbypass several zones, tap each zone one by one. 3. Tap the button with the icon. -
Page 19: Output Control
SATEL INT-TSG2 If you tap the screen close to the bottom edge and swipe up, the buttons with the icons will appear at the bottom of the screen: tap to increase the size of the icons/names on the list. tap to decrease the size of the icons/names on the list. -
Page 20: Keys
INT-TSG2 SATEL Fig. 11. Terminal. 10.8.1 Keys The number and letter keys allow you to enter the code as well as numbers and names. Other functions of these keys are described below. allows you to trigger the medical (auxiliary) alarm (tap and hold down for 3 seconds). -
Page 21: Using The Terminal
SATEL INT-TSG2 10.8.2 Using the terminal Arming Arming without partition selection Enter the code, and then tap: - to arm in the full mode, - to arm in the day mode, - to arm in the night mode. In the partitions you have access to, the arming procedure will begin. - Page 22 INT-TSG2 SATEL Disarming and alarm clearing If the partition is armed and an alarm is triggered in it, disarming will be accompanied by the alarm clearing. Disarming and alarm clearing without partition selection Enter the code and then tap . Disarming / alarm clearing will take place in the partitions to which you have access.
- Page 23 SATEL INT-TSG2 selected function by entering at once a sequence of some digits (corresponding to the consecutive submenu numbers and the function number) and tapping For example, to start the zone inhibiting function, enter the user menu and then tap Remember that the sequence of digits which starts a function e.g.
-
Page 24: Keypad" Screen
INT-TSG2 SATEL 10.9 “Keypad” screen Fig. 12. “Keypad” screen. The functions available on the “Keypad” screen are described below. tap to set the screen brightness (see “Setting the screen brightness” p. 22). tap to set the keypad volume (see “Setting the keypad volume” p. 23). -
Page 25: Setting The Keypad Volume
SATEL INT-TSG2 Tap the button with the icon to confirm changes. Tap the button with the icon to cancel changes. 10.9.2 Setting the keypad volume Tap the “Loudness” function. The sliders and the buttons will appear at the bottom of the screen.
Need help?
Do you have a question about the VERSA INT-TSG2 and is the answer not in the manual?
Questions and answers