Table of Contents
Advertisement
Quick Links
Help Guide
Data Projector
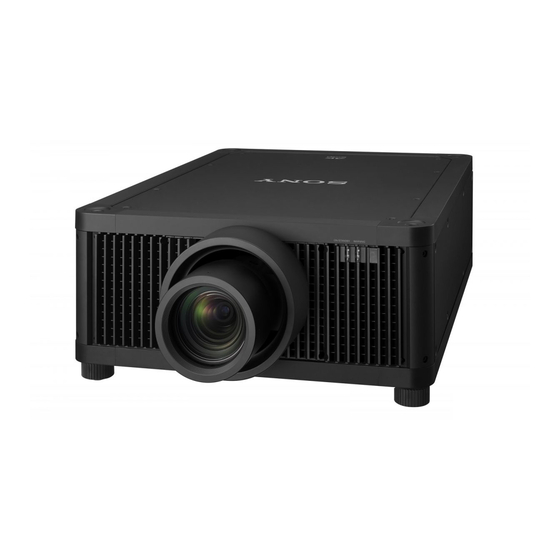
VPL-GTZ380
This manual is for those who encounter issues or have questions when using the Data Projector.
Before Use
Risk Group 3 Safety for the Customers in the U.S.A.
Checking the Supplied Accessories
Inserting the Batteries into the Remote Control (RM-PJ29)
Inserting the Batteries into the Remote Control (RM-PJ24)
Connecting the AC Power Cord
Parts and Controls
Parts and Controls (Main Unit)
Parts and Controls (Remote Control) (RM-PJ29)
Parts and Controls (Remote Control) (RM-PJ24)
Operation With the Remote Control RM-PJ24
Accessibility Features
1
Advertisement
Table of Contents

Related Manuals for Sony VPL-GTZ380


Summary of Contents for Sony VPL-GTZ380
- Page 1 Help Guide Data Projector VPL-GTZ380 This manual is for those who encounter issues or have questions when using the Data Projector. Before Use Risk Group 3 Safety for the Customers in the U.S.A. Checking the Supplied Accessories Inserting the Batteries into the Remote Control (RM-PJ29)
-
Page 2: Installation And Connections
Installation and Connections Installing the Projector Selecting the Menu Language Adjusting the Position of the Projected Image Precautions When Connecting Connecting to Video Equipment Connecting to a Workstation Connecting to a Computer Connecting to a 3D Sync Transmitter Projecting Projecting Images Using the Picture Position Selecting an Aspect Ratio According to an Image Viewing 3D Images... - Page 3 Menu Operation: Color Temp. Menu Operation: Sharpness Menu Operation: Expert Setting > NR (Noise Reduction) Menu Operation: Expert Setting > Smooth Gradation Menu Operation: Expert Setting > Gamma Correction Menu Operation: Expert Setting > Color Correction Menu Operation: Expert Setting > HDR Menu Operation: Expert Setting >...
-
Page 4: Using Network Features
Menu Operation: Settings Lock Installation Menu Menu Operation: Image Flip Menu Operation: Lens Control Menu Operation: Anamorphic Lens Menu Operation: Trigger Select Menu Operation: IR Receiver Menu Operation: ID Mode Menu Operation: Panel Alignment Menu Operation: Network Setting Information Menu Viewing the Projector Information Using Network Features Uses for Network Features... -
Page 5: Error Handling
Unsuitable Conditions Precautions On Inspection of Light Source Related Parts On Heat Dissipation On LCD Projector On condensation Notes on Security Do not place this product close to medical devices Specifications Specifications Preset Signals Input Signals and Setting/Adjustment Items Compatible 3D Signals Aspect Mode Storage Conditions of Setting/Adjustment Items Projection Distance... - Page 6 Web Control UI License (4) Web Control UI License (5) Web Control UI License (6) Web Control UI License (7) Web Control UI License (8) Web Control UI License (9) Web Control UI License (10) Trademark Information 5-023-481-14(1) Copyright 2020 Sony Corporation...
- Page 7 Help Guide Data Projector VPL-GTZ380 Risk Group 3 Safety for the Customers in the U.S.A. WARNING To reduce the risk of fire or electric shock, do not expose this apparatus to rain or moisture. To avoid electrical shock and hazardous radiation exposure, do not open the cabinet. Refer servicing to qualified personnel only.
- Page 8 US owners of RG3 laser projectors must obtain a permit (called a ‘variance’) at time of purchase to possess and use this product. Sony or the Sony distributor will assist purchaser in procuring the variance. Contact a Sony sales representative for additional data.
- Page 9 Caution This unit is equipped with ventilation holes (intake/exhaust). Do not block or place anything near these holes, or internal heat build-up may occur, causing picture degradation or damage to the unit. On repacking Save the original shipping carton and packing material; they will come in handy if you ever have to ship your unit. For maximum protection, repack your unit as it was originally packed at the factory.
-
Page 10: Projector Installation
Provide one or more readily accessible controls to immediately terminate LIP projection light. Safety precautions for installing the unit on a ceiling Never mount the projector on the ceiling or move it by yourself. Be sure to consult with qualified Sony personnel (charged). - Page 11 Hazard Distance and Area Top view A: Hazard Distance B: Hazard Area C: Hazard Distance D: Hazard Area E: ≥ 3.0 METERS Hazard Distance values of each interchangeable lens for the VPL-GTZ380 projector US Region Lens Hazard Distance Throw Ratio VPLL-Z8008 0.8-1.02...
- Page 12 Light source specifications 5.2 W laser diodes × 96 (Wavelength: 449 - 461 nm) 4.2 W laser diodes × 24 (Wavelength: 459 - 471 nm) 1.8 W laser diodes × 48 (Wavelength: 635 - 647 nm) Beam divergence angle from lens of this unit Lens Zoom maximum: α...
- Page 13 Class 1 alternate identification Combined Optical Hazard Warning symbol, Not for Household Use symbol, RG 3 warnings Skin Hazard Warning (IEC 60825-1 section 7.13) & Non Interlocked Protective Housing...
- Page 14 Combined Manufacturers Identification and Certification Black borders and text on yellow background Related Topic Projecting Images 5-023-481-14(1) Copyright 2020 Sony Corporation...
-
Page 15: Checking The Supplied Accessories
Check that the following components are included. The () indicates the quantity of the component. Remote control RM-PJ29 (1) Remote control RM-PJ24 (1) Size AA (R6) manganese batteries (2) AC power cord (1) Plug holder (1) Safety Regulations (1) 5-023-481-14(1) Copyright 2020 Sony Corporation... - Page 16 Handle the remote control with care. Do not drop it, and/or do not step on or spill liquids on it. Do not place the remote control in a location near a heat source, a place subject to direct sunlight, or a damp room. 5-023-481-14(1) Copyright 2020 Sony Corporation...
- Page 17 Handle the remote control with care. Do not drop it, and/or do not step on or spill liquids on it. Do not place the remote control in a location near a heat source, a place subject to direct sunlight, or a damp room. 5-023-481-14(1) Copyright 2020 Sony Corporation...
-
Page 18: Connecting The Ac Power Cord
Plug the AC power cord (C) into the AC IN socket (B), then attach the plug holder (A) to the AC power cord. A: Plug holder (supplied) B: AC IN socket C: AC power cord (supplied) Slide the plug holder over the AC power cord to fix to the unit. 5-023-481-14(1) Copyright 2020 Sony Corporation... -
Page 19: Front/Right Side
Help Guide Data Projector VPL-GTZ380 Parts and Controls (Main Unit) Front/Right Side Control panel ON/STANDBY indicator WARNING indicator Remote control detector Projection lens (not supplied) Feet (adjustable) Ventilation holes (intake) Terminals Note If you look through the projection lens while the unit is projecting, the light may damage your eyes. Take special caution when using the unit around children. - Page 20 (Up/Down/Left/Right)/ENTER (Enter) button MENU button INPUT button (On/Standby) button Hint The buttons on the control panel of the main unit function in the same way as those on the remote control. Terminals AC IN socket 3D SYNC OUT terminal Connects a 3D sync transmitter (not supplied). SYNC IN/SYNC OUT terminal Not available for this unit.
- Page 21 Ventilation holes (exhaust) Remote control detector Feet (adjustable) Related Topic Parts and Controls (Remote Control) (RM-PJ29) Parts and Controls (Remote Control) (RM-PJ24) Reading the Indicator 5-023-481-14(1) Copyright 2020 Sony Corporation...
- Page 22 Help Guide Data Projector VPL-GTZ380 Parts and Controls (Remote Control) (RM-PJ29) Infrared transmitter (On)/ (Standby) button Turns on the power and goes to standby. INPUT (Input selection) buttons Changes the input terminal. A: HDMI 1 B: HDMI 2 C: DisplayPort 1...
- Page 23 Used as a wired remote control by connecting to the IR IN terminal on the unit with a cable (stereo mini plug (not supplied)). You do not need to install batteries in the remote control. Related Topic Projecting Images Adjusting the Position of the Projected Image Using the Picture Position Navigating Menus 5-023-481-14(1) Copyright 2020 Sony Corporation...
- Page 24 Help Guide Data Projector VPL-GTZ380 Parts and Controls (Remote Control) (RM-PJ24) Infrared transmitter LIGHT button Press to illuminate the buttons on the remote control. (On/Standby) button Turns on the power and goes to standby. INPUT (Input selection) button Every time you press the button, the input terminal changes.
- Page 25 Sharpens the outline of the image and reduces the image noise. CONTRAST+/- button Adjusts the contrast of images. BRIGHTNESS+/- button Adjusts the brightness of images. Related Topic Projecting Images Adjusting the Position of the Projected Image Using the Picture Position Navigating Menus 5-023-481-14(1) Copyright 2020 Sony Corporation...
-
Page 26: Operation
Help Guide Data Projector VPL-GTZ380 Operation With the Remote Control RM-PJ24 This help guide explains the operations using the remote control RM-PJ29. If you are using the remote control RM-PJ24, some operations are different. For the differences, see the table below. - Page 27 Menu Operation: Color Temp. Menu Operation: Sharpness Menu Operation: Expert Setting > Gamma Correction Menu Operation: Expert Setting > Color Space Menu Operation: Aspect Menu Operation: 3D Settings > 2D-3D Display Sel. Menu Operation: ID Mode 5-023-481-14(1) Copyright 2020 Sony Corporation...
-
Page 28: Accessibility Features
Help Guide Data Projector VPL-GTZ380 Accessibility Features This unit has functions that allow you to perform menu operations, turn the unit on/off and change the projector’s input source via the Internet using a web browser on your smartphone/computer. You can also use the text-to-speech function on your smartphone/computer to have documents read out loud. - Page 29 For details on how to use text-to-speech software, refer to an instruction manual or website of each text-to-speech software. Only English is available as a display language. If you forget your password, contact qualified Sony personnel. The password will be reconfigured with your permission.
- Page 30 Menu Operation: Network Management Menu Operation: Web Control UI Menu Operation: Network Setting Displaying the Control Window of a Projector with a Web Browser Operating the Control Window Performing Menu Operations from Web Pages 5-023-481-14(1) Copyright 2020 Sony Corporation...
-
Page 31: Installing The Projector
Help Guide Data Projector VPL-GTZ380 Installing the Projector The installation distance between the projector and a screen varies depending on the screen size (projection size) and whether or not you use the lens shift feature. Install the projector according to the screen size. - Page 32 Note that if the unit is tilted up or down, the projected image will be distorted in a trapezoidal shape. Be careful not to pinch your fingers when rotating the feet (adjustable). Related Topic Projection Distance and Lens Shift Range Adjusting the Position of the Projected Image 5-023-481-14(1) Copyright 2020 Sony Corporation...
-
Page 33: Selecting The Menu Language
[Language] (Language), then press the (Right) or ENTER button. Press the (Up/Down/Left/Right) button to select a language, then press the ENTER button. Press the MENU button to turn off the menu window. Related Topic Menu Operation: Language 5-023-481-14(1) Copyright 2020 Sony Corporation... -
Page 34: Adjusting The Position Of The Projected Image
Help Guide Data Projector VPL-GTZ380 Adjusting the Position of the Projected Image Hint The / (On/Standby), INPUT, MENU, and (Up/Down/Left/Right)/ENTER buttons on the control panel of the main unit function in the same way as those on the remote control. The LENS button functions in the same way as the FOCUS, ZOOM, and SHIFT buttons on the remote control. - Page 35 A: One screen width : Image position when moving the image fully to the left : Image position when moving the image fully to the right To adjust the vertical position Press the (Up/Down) button to move the projected image vertically from the center of the lens. Side view A: One screen width : Image position when moving the image fully upward...
- Page 36 The dashed lines show the angle of view of each aspect ratio. Related Topic Parts and Controls (Main Unit) Parts and Controls (Remote Control) (RM-PJ29) Parts and Controls (Remote Control) (RM-PJ24) Menu Operation: Lens Control Menu Operation: Test Pattern Projection Distance and Lens Shift Range 5-023-481-14(1) Copyright 2020 Sony Corporation...
-
Page 37: Precautions When Connecting
Firmly insert the cable plugs. Loose connections may cause a malfunction and/or degradation of image quality. When unplugging a cable, be sure to grip the plug, not the cable itself. Refer to the operating instructions of the device to be connected. 5-023-481-14(1) Copyright 2020 Sony Corporation... -
Page 38: Connecting To Video Equipment
) on the connector of the cable are facing each other. If an image from a device connected with an HDMI cable is not displayed correctly, check the settings of the connected device. Related Topic Parts and Controls (Main Unit) Precautions When Connecting 5-023-481-14(1) Copyright 2020 Sony Corporation... -
Page 39: Connecting To A Workstation
If an image from a workstation connected with a DisplayPort cable is not displayed, check the settings of the connected workstation and graphic board. Related Topic Parts and Controls (Main Unit) Precautions When Connecting Projecting a High Resolution Image (V Split Display) 5-023-481-14(1) Copyright 2020 Sony Corporation... -
Page 40: Connecting To A Computer
Set your computer to output the signal to only the external monitor. For settings of the computer, consult with the manufacturer of the computer. Related Topic Parts and Controls (Main Unit) Precautions When Connecting 5-023-481-14(1) Copyright 2020 Sony Corporation... -
Page 41: Connecting To A 3D Sync Transmitter
To view a 3D image, you need to connect a 3D sync transmitter (commercially available). Connect the 3D SYNC OUT terminal on the projector to the 3-pin mini-DIN connector on the 3D sync transmitter with a connecting cable (not supplied). : Signal flow Related Topic Parts and Controls (Main Unit) Precautions When Connecting 5-023-481-14(1) Copyright 2020 Sony Corporation... -
Page 42: Projecting Images
When [Status] is set to [Off] in the [Setup] menu, the input selection window does not appear. Pressing the INPUT button switches input terminals sequentially. Related Topic Menu Operation: Status Operation With the Remote Control RM-PJ24 5-023-481-14(1) Copyright 2020 Sony Corporation... -
Page 43: Using The Picture Position
Help Guide Data Projector VPL-GTZ380 Using the Picture Position You can store up to five combinations of lens settings (focus, image size, image position), aspect ratio, and blanking. These settings can be recalled. Press the POSITION button. The Picture Position selection window appears. - Page 44 Related Topic Menu Operation: Picture Position Menu Operation: Aspect Menu Operation: Blanking When Projecting in 1.90:1 (Native Full Display 17:9) Format When Projecting in 1.78:1 (16:9) Format When Projecting in 2.35:1 Format 5-023-481-14(1) Copyright 2020 Sony Corporation...
- Page 45 Help Guide Data Projector VPL-GTZ380 Selecting an Aspect Ratio According to an Image You can select an aspect ratio best suited for an image. Press the MENU button. The menu window appears. Press the (Up/Down) button to select the [Screen] menu, then press either the (Right) or ENTER button.
- Page 46 Original image (displayed on 16:9) Recommended settings and resulting images [H Stretch] 16:9 When projecting a 1.78:1 (16:9) image on the entire 2.35:1 screen 1.78:1 (16:9) [Normal] 1.33:1 (4:3) 1.33:1 (4:3) with side panels [V Stretch] 2.35:1 When using an anamorphic lens...
- Page 47 Note Selectable aspect settings vary depending on an input signal. When a computer signal is input, you cannot select the aspect setting. Related Topic Menu Operation: Aspect Aspect Mode Operation With the Remote Control RM-PJ24 5-023-481-14(1) Copyright 2020 Sony Corporation...
-
Page 48: Viewing 3D Images
When the temperature of the usage environment is low, the 3D effect may be diminished. Related Topic Connecting to a 3D Sync Transmitter Menu Operation: 3D Settings > 2D-3D Display Sel. Operation With the Remote Control RM-PJ24 5-023-481-14(1) Copyright 2020 Sony Corporation... - Page 49 When you input signals to DisplayPort 1 and DisplayPort 2, make sure to input the synchronized signals which are output from the same signal system, and input them in the same signal format. Related Topic Connecting to a Workstation 5-023-481-14(1) Copyright 2020 Sony Corporation...
-
Page 50: Navigating Menus
Help Guide Data Projector VPL-GTZ380 Navigating Menus Various settings and adjustments are performed on the menu window of the projector. Selecting an item with an arrow ( ) after the item name will display the items to be set in the next tier. -
Page 51: Setting Menu
Setting menu Adjustment menu Next menu window Set or adjust an item. When changing an item value To increase a value, press the (Up) or (Right) button. To decrease a value, press the (Down) or (Left) button. Press the ENTER button to confirm the setting, then you will return to the previous screen. When changing an item setting Select the desired item with the (Up/Down) button. - Page 52 The RESET button on the remote control is available only while the adjustment menu or the setting menu is selected. Related Topic Parts and Controls (Remote Control) (RM-PJ29) Parts and Controls (Remote Control) (RM-PJ24) Menu Operation: Reset 5-023-481-14(1) Copyright 2020 Sony Corporation...
- Page 53 You can set and adjust the image quality to suit your taste, then you can save the setting. The default setting is the same as [Reference]. Hint When you adjust the image quality, the setting is saved for each input. Related Topic Operation With the Remote Control RM-PJ24 5-023-481-14(1) Copyright 2020 Sony Corporation...
- Page 54 All settings of the currently selected preset mode are reset to the default settings. Press the MENU button. Select [Picture] - [Reset]. Hint Reset does not affect the settings saved for [Custom 1] to [Custom 5] under [Color Temp.]. Related Topic Menu Operation: Color Temp. 5-023-481-14(1) Copyright 2020 Sony Corporation...
- Page 55 [Test: On/Off] Changes [On] and [Off] at a certain frequency to check the effect of Reality Creation. Hint You can also set [Reality Creation] with the REALITY CREATION button on the remote control. 5-023-481-14(1) Copyright 2020 Sony Corporation...
- Page 56 Adjust [Output] according to the brightness of the image and select the setting under [Dynamic Control] to suit your taste. You can also set [Output] with the LIGHT OUTPUT button on the remote control. Related Topic Operation With the Remote Control RM-PJ24 5-023-481-14(1) Copyright 2020 Sony Corporation...
- Page 57 [Picture] - [Cinema Black Pro] - [Dynamic HDR Enhancer] - the desired setting. Settings [High], [Middle], [Low] You can adjust the D.HDR enhancer. [Off] The D.HDR enhancer is turned off. Hint You can also set [Dynamic HDR Enhancer] with the CONTRAST ENHANCER button on the remote control. 5-023-481-14(1) Copyright 2020 Sony Corporation...
- Page 58 You can have images with more contrast by correcting the reduced contrast caused by optical stray light. Press the MENU button. Select [Picture]-[Cinema Black Pro]-[D.Contrast Optimizer]-[On] or [Off]. When you select [On], the image will have more contrast. 5-023-481-14(1) Copyright 2020 Sony Corporation...
- Page 59 Only [Off] or [Impulse 1] to [Impulse 3] is available when a signal with a resolution of 4096 × 2160 is input. Depending on the input signal, all of [Impulse 1] to [Impulse 3] may not be available. You can also set [Motionflow] with the MOTIONFLOW button on the remote control. 5-023-481-14(1) Copyright 2020 Sony Corporation...
- Page 60 When the HDR signal is input while [HDR] is set to [Auto] While [HDR] is set to [HDR10], [HDR Reference], or [HLG] You can also set [Contrast] with the CONTRAST button on the remote control. 5-023-481-14(1) Copyright 2020 Sony Corporation...
- Page 61 Select [Picture] - [Brightness] - Adjust the values. Increasing the value lightens the image, while decreasing the value darkens the image. Hint You can also set [Brightness] with the BRIGHTNESS button on the remote control. 5-023-481-14(1) Copyright 2020 Sony Corporation...
- Page 62 VPL-GTZ380 Menu Operation: Color You can adjust the color saturation. Press the MENU button. Select [Picture] - [Color] - Adjust the values. Higher values increase the color saturation, while lower values decrease the color saturation. 5-023-481-14(1) Copyright 2020 Sony Corporation...
- Page 63 VPL-GTZ380 Menu Operation: Hue You can adjust the color tone. Press the MENU button. Select [Picture] - [Hue] - Adjust the values. Higher values make the image greenish, while lower values make the image reddish. 5-023-481-14(1) Copyright 2020 Sony Corporation...
- Page 64 You can adjust each item to a color temperature according to your preference. DCI is a specification for Digital cinema projection systems, established by the industry standards body DCI (Digital Cinema Initiative), an affiliation of six major Hollywood studios. Related Topic Operation With the Remote Control RM-PJ24 5-023-481-14(1) Copyright 2020 Sony Corporation...
- Page 65 Press the MENU button. Select [Picture] - [Sharpness] - Adjust the values. Higher values sharpen the outline, while lower values reduce the noise by softening the outline. Related Topic Operation With the Remote Control RM-PJ24 5-023-481-14(1) Copyright 2020 Sony Corporation...
- Page 66 NR (noise reduction) is turned off. Hint The noise level may not be detected accurately with [Auto] depending on the input source. If the image is not acceptable with [Auto], select the setting from [High], [Middle], [Low], or [Off] accordingly. 5-023-481-14(1) Copyright 2020 Sony Corporation...
- Page 67 It achieves smooth gradation on the flat area of the image. Press the MENU button. Select [Picture] - [Expert Setting] - [Smooth Gradation] - the desired setting. Settings [High], [Middle], [Low] You can change the smooth gradation effect. [Off] Smooth gradation is turned off. 5-023-481-14(1) Copyright 2020 Sony Corporation...
- Page 68 An image quality lighter than [Gamma 8] is reproduced. [Gamma 10] It sharpens the image quality. Select this when you watch TV programs, etc. in a slightly bright room. [Off] Gamma correction is turned off. Related Topic Operation With the Remote Control RM-PJ24 5-023-481-14(1) Copyright 2020 Sony Corporation...
- Page 69 [Red], [Yellow], [Green], [Cyan], [Blue], or [Magenta]. Press the (Up/Down) button to select [Hue], [Saturation], or [Brightness], then adjust them to suit your taste with the (Left/Right) button, while viewing the projected image. 5-023-481-14(1) Copyright 2020 Sony Corporation...
- Page 70 When you set [HDR10] or [HDR Reference], compare the image quality in both settings, then select the one that optimally displays the average brightness and gradation of the light area. Related Topic Menu Operation: Expert Setting > Color Space 5-023-481-14(1) Copyright 2020 Sony Corporation...
- Page 71 Help Guide Data Projector VPL-GTZ380 Menu Operation: Expert Setting > Color Space You can convert the color space. Press the MENU button. Select [Picture] - [Expert Setting] - [Color Space] - the desired setting. Settings [BT.709] An ITU-R BT.709 color space, which is used for high-definition television broadcast or Blu-ray Disc. The color space is equivalent to sRGB.
- Page 72 5-023-481-14(1) Copyright 2020 Sony Corporation...
- Page 73 When [Input Lag Reduction] is set to [On], you cannot set [Motionflow] (except for [Impulse 1], [Impulse 2], [Impulse 3]) and [NR]. Related Topic Menu Operation: Motionflow Menu Operation: Expert Setting > NR (Noise Reduction) 5-023-481-14(1) Copyright 2020 Sony Corporation...
- Page 74 Help Guide Data Projector VPL-GTZ380 Menu Operation: Picture Position You can save up to five combinations of lens settings, aspect ratio, and blanking. Press the MENU button. Select [Screen] - [Picture Position]. After setting the lens (focus, image size, image position), select the desired position from [1.85:1], [2.35:1], [Custom 1] to [Custom 3] according to the adjusted screen aspect-ratio.
- Page 75 Using the Picture Position Menu Operation: Lens Control 5-023-481-14(1) Copyright 2020 Sony Corporation...
- Page 76 Help Guide Data Projector VPL-GTZ380 Menu Operation: Aspect You can set the aspect ratio of the image to be projected for the current input signal. Press the MENU button. Select [Screen] - [Aspect] - the desired setting. Settings [1.85:1 Zoom] The 1.85:1 image is projected on the entire screen with the aspect ratio maintained so that black bands do not appear at...
- Page 77 Menu Operation: Anamorphic Lens Menu Operation: Trigger Select Aspect Mode Operation With the Remote Control RM-PJ24 5-023-481-14(1) Copyright 2020 Sony Corporation...
- Page 78 (Up/Down) button to select the desired range from [Left], [Right], [Top], or [Bottom]. Press the (Left/Right) button to adjust the amount of blanking. Hint Depending on the aspect setting, right/left blanking may not be available. Related Topic Menu Operation: Picture Position 5-023-481-14(1) Copyright 2020 Sony Corporation...
- Page 79 When [All Off] is selected, a warning message for high temperature is not displayed. Please use at your own risk. Note that Sony is not liable for failure of the unit or any accident caused by selecting [All Off]. 5-023-481-14(1) Copyright 2020 Sony Corporation...
- Page 80 Help Guide Data Projector VPL-GTZ380 Menu Operation: Language You can select the display language used for the on-screen menus and messages. Press the MENU button. Select [Setup] - [Language] - the desired language. 5-023-481-14(1) Copyright 2020 Sony Corporation...
- Page 81 Press the MENU button. Select [Setup] - [Menu Position] - the desired setting. Settings [Bottom Left] The menu is displayed on the bottom left of the screen. [Center] The menu is displayed on the center of the screen. 5-023-481-14(1) Copyright 2020 Sony Corporation...
- Page 82 Select when using the projector in a location at an altitude from 1,000 m (approx. 3,280 ft) to 1,800 m (approx. 5,900 ft). [Off] Select when using the projector on level ground. Hint When [Level 2] or [Level 1] is selected, fan noise becomes slightly louder since the fan rotation speed increases. 5-023-481-14(1) Copyright 2020 Sony Corporation...
- Page 83 It is necessary to configure the network connection correctly and connect the projector to the network in advance. To turn on the projector using the remote start function, it is necessary to send special commands from a computer. For details, consult with qualified Sony personnel. Note When [Remote Start] is set to [On], standby power consumption during standby is increased.
- Page 84 When constantly communicating with the projector control device in a networked environment, select [On]. Note When [Network Management] is set to [On], the network function is always enabled. Select [Off] for normal use. Setting to [On] increases the power consumption. Related Topic Uses for Network Features 5-023-481-14(1) Copyright 2020 Sony Corporation...
- Page 85 You can configure whether to enable the control via the web. Press the MENU button. Select [Setup] - [Web Control UI] - [On] or [Off]. When controlling the projector via the web, set to [On]. Related Topic Uses for Network Features 5-023-481-14(1) Copyright 2020 Sony Corporation...
- Page 86 [Setup] - [Power Saving] - [Standby] or [Off]. When you select [Standby], the projector is turned off automatically if there is no signal input to the projector for 10 minutes or more, then it goes into standby. 5-023-481-14(1) Copyright 2020 Sony Corporation...
- Page 87 Menu Operation: All Reset All the settings configured in the menu of the projector and all the data adjusted by remotely connected devices are reset to the default settings. Press the MENU button. Select [Setup] - [All Reset]. 5-023-481-14(1) Copyright 2020 Sony Corporation...
- Page 88 The menu display may have a ghost image while a 3D image is displayed. In that case, operate the menu with the 3D glasses. Related Topic Compatible 3D Signals Operation With the Remote Control RM-PJ24 5-023-481-14(1) Copyright 2020 Sony Corporation...
- Page 89 Press the MENU button. Select [Function] - [Infrared Settings] - [On] or [Off]. [On]: Projects images that contain infrared wavelengths. [Off]: Projects normal images. When you select [On], adjust the output of infrared wavelengths in [Output]. 5-023-481-14(1) Copyright 2020 Sony Corporation...
- Page 90 Select this when the image input level is equivalent to levels between 0 and 255. Note If the image output setting of the connected HDMI device is not configured correctly, light and dark areas of the image may appear too light or too dark. 5-023-481-14(1) Copyright 2020 Sony Corporation...
- Page 91 Hint The image or sound may not be output correctly when [Enhanced Format] is selected. In that case, select [Standard Format]. It may take time to display an image after changing the image signal format. 5-023-481-14(1) Copyright 2020 Sony Corporation...
- Page 92 50Hz/60Hz (DP2). Hint When you want to display the images of 4k/120P input signals in 3D, select [3D] under [2D-3D Display Sel.] in [3D Settings]. Related Topic Menu Operation: 3D Settings > 2D-3D Display Sel. 5-023-481-14(1) Copyright 2020 Sony Corporation...
- Page 93 Hint While the test pattern is displayed, it is displayed in a green pattern with a blue background so that you can adjust the focus easily. Related Topic Adjusting the Position of the Projected Image 5-023-481-14(1) Copyright 2020 Sony Corporation...
- Page 94 Settings other than [Calib. Preset] in the [Picture] menu Settings other than [All Reset] in the [Setup] menu [Infrared Settings], [Dynamic Range] and [Test Pattern] in the [Function] menu All items in the [Installation] menu 5-023-481-14(1) Copyright 2020 Sony Corporation...
- Page 95 Press the MENU button. Select [Installation] - [Image Flip] - the desired setting. Settings [HV] Images are flipped horizontally and vertically. Images are flipped horizontally. Images are flipped vertically. [Off] Images are not flipped. 5-023-481-14(1) Copyright 2020 Sony Corporation...
- Page 96 This is used to prevent accidental changes to lens-related settings ([Lens Focus], [Lens Zoom], [Lens Shift]). Press the MENU button. Select [Installation] - [Lens Control] - [On] or [Off]. When [Off] is selected, the lens cannot be adjusted. Related Topic Adjusting the Position of the Projected Image 5-023-481-14(1) Copyright 2020 Sony Corporation...
- Page 97 [Installation] - [Anamorphic Lens] - the desired setting. Settings [1.24x] Select this when you use an anamorphic lens with a horizontal rate of 1.24×. [1.32x] Select this when you use an anamorphic lens with a horizontal rate of 1.32×. 5-023-481-14(1) Copyright 2020 Sony Corporation...
- Page 98 1/TRIGGER 2 terminal. [2.35:1 Zoom] Working with the 2.35:1 Zoom setting, when [2.35:1 Zoom] is selected for [Aspect], the 12 V signal is output from the TRIGGER 1/TRIGGER 2 terminal. Related Topic Menu Operation: Aspect 5-023-481-14(1) Copyright 2020 Sony Corporation...
- Page 99 [Installation] - [IR Receiver] - the desired setting. Settings [Front & Rear] Both the front and rear detectors are activated. [Front] Only the front detector is activated. [Rear] Only the rear detector is activated. Related Topic Parts and Controls (Main Unit) 5-023-481-14(1) Copyright 2020 Sony Corporation...
- Page 100 When you select [All], you can control the projector with the remote control independent of the assigned ID Mode. Also refer to the ID MODE switch on the remote control. Related Topic Parts and Controls (Remote Control) (RM-PJ29) Operation With the Remote Control RM-PJ24 5-023-481-14(1) Copyright 2020 Sony Corporation...
- Page 101 Help Guide Data Projector VPL-GTZ380 Menu Operation: Panel Alignment You can slightly adjust color shift on the text or image on the projection screen. Press the MENU button. Select [Installation] - [Panel Alignment] - [On] or [Off]. The correction data has been preset for [Off].
- Page 102 [Reset] The settings are returned to the default settings. Note Depending on the adjustments made above, colors may become uneven or the resolution may change. 5-023-481-14(1) Copyright 2020 Sony Corporation...
- Page 103 [Apply]: It enables the IP address that has been set manually. [IPv6 Information] The IPv6 address information is displayed. Set the IPv6 address from a web browser. Related Topic Configuring the Network Settings of the Projector 5-023-481-14(1) Copyright 2020 Sony Corporation...
- Page 104 Help Guide Data Projector VPL-GTZ380 Viewing the Projector Information You can check information such as model name, serial number, input signal type, and software version of the projector. Press the MENU button. Select [Information]. Available items [Model Name] Displays the model name.
- Page 105 5-023-481-14(1) Copyright 2020 Sony Corporation...
- Page 106 SNMP, AMX DDDP, Crestron Connected, and Control4 are not compatible with IPv6. These network features are available while the projector is turned on. Related Topic Operating the Control Window Notes on Security 5-023-481-14(1) Copyright 2020 Sony Corporation...
- Page 107 Help Guide Data Projector VPL-GTZ380 Displaying the Control Window of a Projector with a Web Browser Display the control window of the projector with a web browser and configure the network settings. Connect the projector and smartphone/computer to a hub or router using LAN cables (straight) (not supplied) or Wi-Fi.
- Page 108 Once the network settings have been configured, the control window will be displayed only by performing Step 5 from the next time. Note If you forget your password, contact qualified Sony personnel. The password will be reconfigured with your permission. Related Topic...
-
Page 109: Operating The Control Window
Check the current state of the projector in the [Status] page by clicking the [Status] page switching button. Operating the Projector You can operate the projector from the [Control] page by clicking the [Control] page switching button. 5-023-481-14(1) Copyright 2020 Sony Corporation... - Page 110 [Information]: displays the information such as the model name, serial number, signal type and signal format of the image when projected, software version, and light usage time. For details on each setting, see “Adjustment and Setting Menus.” 5-023-481-14(1) Copyright 2020 Sony Corporation...
-
Page 111: Entering The Owner Information
Set each item and click the [Apply] button. Settings [Name] Enter the owner name. [Organization] Enter the organization name. [Location] Enter the installation location. [Installation] The information of the installation location is displayed. [Memo] Enter any information as needed. 5-023-481-14(1) Copyright 2020 Sony Corporation... - Page 112 Help Guide Data Projector VPL-GTZ380 Configuring the Network Settings of the Projector You can configure the network settings on the [Network] page in [Advanced Settings]. Note The entered value will not be applied until the [Apply] button is clicked. Select [Advanced Settings] - [Network] and display the [Network] page.
- Page 113 [Auto]: Network settings are automatically assigned. [Manual]: Network settings are configured manually. [IP Address]: The IP address of the projector is set. [Prefix]: The prefix length (bit) is set. [Default Gateway]: The default gateway of the projector is set. 5-023-481-14(1) Copyright 2020 Sony Corporation...
- Page 114 Enter the community names for Advertisement and PJ Talk. If changed, the PJ Talk community name changes as well. Only 4 alphanumeric characters can be entered. The factory default setting is “SONY.” To avoid unauthorized access to the projector from another computer, we recommend changing the community name from the one used in the factory setting.
- Page 115 Enter the IP address that is allowed to be received by the ADCP server. If nothing is entered, commands can be received from any IP address. Once an IP address has been entered, access will only be allowed from the entered IP address. For security purposes, we recommend entering an IP address to restrict access. 5-023-481-14(1) Copyright 2020 Sony Corporation...
- Page 116 Enter the community names for Advertisement and PJ Talk. If changed, the Advertisement community name changes as well. Only 4 alphanumeric characters can be entered. The factory default setting is “SONY.” To avoid unauthorized access to the projector from another computer, we recommend changing the community name from the one used in the factory setting.
-
Page 117: Setting Snmp
Help Guide Data Projector VPL-GTZ380 Setting SNMP You can change the control protocol settings of SNMP on the [SNMP] page in [Advanced Settings]. Note The entered value will not be applied until the [Apply] button is clicked. Select [Advanced Settings] - [SNMP] and display the [SNMP] page. - Page 118 Set the IP address of the host that receives SNMP packets. Select the Add button to add the IP address to Host address list. For security purposes, we recommend entering an IP address to restrict access. 5-023-481-14(1) Copyright 2020 Sony Corporation...
- Page 119 [IP Address] Enter the IP address of the Crestron system server. [IP ID(HEX)] Enter the IP ID(HEX) of the CIP protocol. [Port No.] Enter the CIP protocol server port number. The factory default setting is “41794.” 5-023-481-14(1) Copyright 2020 Sony Corporation...
- Page 120 Set each item and click the [Apply] button. Settings [Start DDDP Service] Turn the DDDP function on or off. For details, refer to the AMX Corporation DDDP protocol specifications. [Start SDDP Service] Turn the SDDP function on or off. 5-023-481-14(1) Copyright 2020 Sony Corporation...
-
Page 121: Resetting The Network Settings
VPL-GTZ380 Resetting the Network Settings Return all items that can be configured on the [Advanced Settings] page to their factory settings. Select [Advanced Settings] - [Reset] and display the [Reset] page. Click the [Reset] button. 5-023-481-14(1) Copyright 2020 Sony Corporation... -
Page 122: Unsuitable Installation
Help Guide Data Projector VPL-GTZ380 Unsuitable Installation Do not place the unit in the following situations, which may cause malfunction or damage to the unit. Near walls To maintain the performance and reliability of the unit, leave space between walls and the unit as illustrated. - Page 123 Installing the unit in such a location may cause a malfunction of the unit due to moisture condensation or rise in temperature. Near a heat or smoke sensor Malfunction of the sensor may occur. Very dusty and extremely smoky locations 5-023-481-14(1) Copyright 2020 Sony Corporation...
-
Page 124: Unsuitable Conditions
When using the unit in a location at an altitude of 1,000 m (approx. 3,280 ft) or higher, appropriately set [High Altitude Mode] in the [Setup] menu. Failing to do so could have adverse effects, such as reducing the reliability of certain components. Related Topic Parts and Controls (Main Unit) Menu Operation: High Altitude Mode 5-023-481-14(1) Copyright 2020 Sony Corporation... - Page 125 On Inspection of Light Source Related Parts Since the unit uses a laser, when adjusting or inspecting the light source related parts, particular attention and a safe environment are necessary. Be sure to consult with qualified Sony personnel (charged). 5-023-481-14(1) Copyright 2020 Sony Corporation...
-
Page 126: On Heat Dissipation
Help Guide Data Projector VPL-GTZ380 On Heat Dissipation The temperature of the projector cabinet may increase during or immediately after use; however, this is not a malfunction. 5-023-481-14(1) Copyright 2020 Sony Corporation... -
Page 127: On Lcd Projector
Also, when you use multiple LCD projectors to project onto a screen, even if they are of the same model, the color reproduction among projectors may vary, since color balance may be set differently from one projector to the next. 5-023-481-14(1) Copyright 2020 Sony Corporation... - Page 128 As the condensation may cause malfunction, be careful in adjusting temperature settings of the air conditioner. If condensation occurs, leave the projector turned on for about two hours before use. 5-023-481-14(1) Copyright 2020 Sony Corporation...
-
Page 129: Notes On Security
Data Projector VPL-GTZ380 Notes on Security SONY WILL NOT BE LIABLE FOR DAMAGES OF ANY KIND RESULTING FROM A FAILURE TO IMPLEMENT PROPER SECURITY MEASURES ON TRANSMISSION DEVICES, UNAVOIDABLE DATA LEAKS RESULTING FROM TRANSMISSION SPECIFICATIONS, OR SECURITY PROBLEMS OF ANY KIND. - Page 130 This product (including accessories) has magnet(s) which may interfere with pacemakers, programmable shunt valves for hydrocephalus treatment, or other medical devices. Do not place this product close to persons who use such medical devices. Consult your doctor before using this product if you use any such medical device. 5-023-481-14(1) Copyright 2020 Sony Corporation...
-
Page 131: Specifications
Help Guide Data Projector VPL-GTZ380 Specifications Projection System 3 LCD system Display Device Size of effective display area: SXRD 0.74-inch (18.8 mm) × 3 Number of pixels: 4096 × 2160 × 3 pixels Projection image size 60-inch to 600-inch (1,524 mm to 15,240 mm) (when using VPLL-Z8014) -
Page 132: Supplied Accessories
Note The values for mass and dimensions are approximates. Not all optional accessories are available in all countries and areas. Please check with your local Sony Authorized Dealer. Information on accessories in this manual is current as of November 2021. -
Page 133: Preset Signals
Help Guide Data Projector VPL-GTZ380 Preset Signals This table shows the signals and formats which you can project using this projector. When a signal other than the preset signals shown below is input, an image may not be displayed properly. - Page 134 HDMI DisplayPort Preset Preset DisplayPort memory Resolution fV (Hz) Sync signals (kHz) HDMI DisplayPort number Neg, 640 × 480 31.469 59.940 – – Pos, 800 × 600 SVGA 37.879 60.317 – – Neg, 1024 × 768 48.363 60.004 – – Pos, 1280 ×...
- Page 135 HDMI DisplayPort Preset Preset DisplayPort memory Resolution fV (Hz) Sync signals (kHz) HDMI DisplayPort number 3840 × 3840 × 2160/60p 135.000 60.000 – 2160/60p (3840 × 2160) 3840 × 3840 × 2160/50p 112.500 50.000 – 2160/50p (3840 × 2160) 4096 × 4096 ×...
- Page 136 2048 × 1536 QXGA/120p 195.120 120.000 – – Pos, 2560 × 1600 WQXGA/120p 203.280 120.000 – – Pos, 2880 × 2160 2880 × 2160/120p 274.440 120.000 – – Pos, 2560 × 1440 WQHD/120p 183.000 120.000 – – 5-023-481-14(1) Copyright 2020 Sony Corporation...
-
Page 137: Screen Menu
Preset memory number: 26, 32, 37, 45, 47, 50, 51, 55, Item to 20, 71 to 79, 93 to 96 59, 99, 100, 121, 122, 160 to 167 Aspect Settable/Adjustable Not settable/Not adjustable Related Topic Menu Operation: Aspect Preset Signals 5-023-481-14(1) Copyright 2020 Sony Corporation... -
Page 138: Compatible 3D Signals
This unit accepts the following types of 3D signals. Resolution 3D signal format 720/60p, 720/50p Side-by-Side format, Over-Under format, Frame packing 1080/60i, 1080/50i Side-by-Side format, Frame packing 1080/24p Side-by-Side format, Over-Under format, Frame packing 1080/60p, 1080/50p Side-by-Side format, Over-Under format 5-023-481-14(1) Copyright 2020 Sony Corporation... -
Page 139: Aspect Mode
Preset memory number 7, 8, 10 to 14 10 to 14 18 to 20, 71, 72 1.85:1 Zoom 2.35:1 Zoom H Stretch Normal V Stretch Squeeze Stretch – – – Related Topic Menu Operation: Aspect 5-023-481-14(1) Copyright 2020 Sony Corporation... -
Page 140: Picture Menu
Help Guide Data Projector VPL-GTZ380 Storage Conditions of Setting/Adjustment Items Each setting/adjustment item is individually stored according to the storage conditions in the following table. For details, refer to the following table. [Picture] Menu Item Storage conditions Calib. Preset For each input terminal and 2D/3D... - Page 141 HDR: When the HDR signal is input while [HDR] is set to [Auto], or when [HDR] is set to [HDR10], [HDR Reference], or [HLG] SDR: Settings other than the above [Screen] Menu Item Storage conditions Aspect For each Picture Position Blanking For each Picture Position 5-023-481-14(1) Copyright 2020 Sony Corporation...
-
Page 142: Projection Distance And Lens Shift Range
Help Guide Data Projector VPL-GTZ380 Projection Distance and Lens Shift Range Projection Distance The projection distance (L) refers to the distance between the front of the lens (B shown in the figure) and the projected surface (A shown in the figure). - Page 143 HS+: Horizontal lens shift range (right) [%] HS–: Horizontal lens shift range (left) [%] Related Topic When Projecting in 1.90:1 (Native Full Display 17:9) Format When Projecting in 1.78:1 (16:9) Format When Projecting in 2.35:1 Format 5-023-481-14(1) Copyright 2020 Sony Corporation...
- Page 144 Help Guide Data Projector VPL-GTZ380 When Projecting in 1.90:1 (Native Full Display 17:9) Format Projection Distance VPLL-Z8008 Projection image size Projection image size Width × Height Projection distance L Diagonal 60" (1.52 m) 1.35 m × 0.71 m (53 inches × 28 inches) 1.05 m –...
- Page 145 Projection image size Projection image size Projection image size Width × Height Projection image size Width × Height Projection distance L Projection distance L Diagonal Diagonal 1.35 m × 0.71 m (53 inches × 28 60" (1.52 m) 1.85 m – 3.63 m (73 inches – 143 inches) inches) 1.80 m ×...
- Page 146 VS− = −80 + 2.581 × (HS+ or HS−) [%] HS+ = HS− = 31 − 0.388 × (VS+) [%] HS+ = HS− = 31 + 0.388 × (VS−) [%] Related Topic Projection Distance and Lens Shift Range 5-023-481-14(1) Copyright 2020 Sony Corporation...
- Page 147 Help Guide Data Projector VPL-GTZ380 When Projecting in 1.78:1 (16:9) Format : Image display area : Projection area Projection Distance VPLL-Z8008 Projection image size Projection image size Width × Height Projection distance L Diagonal 60" (1.52 m) 1.33 m × 0.75 m (52 inches × 29 inches) 1.10 m –...
- Page 148 VPLL-Z8014 Projection image size Projection image size Width × Height Projection distance L Diagonal 1.33 m × 0.75 m (52 inches × 29 60" (1.52 m) 1.95 m – 3.82 m (77 inches – 150 inches) inches) 1.77 m × 1.00 m (70 inches × 39 80"...
- Page 149 VS− = −80 + 2.424 × (HS+ or HS−) [%] HS+ = HS− = 33 − 0.413 × (VS+) [%] HS+ = HS− = 33 + 0.413 × (VS−) [%] Related Topic Projection Distance and Lens Shift Range 5-023-481-14(1) Copyright 2020 Sony Corporation...
- Page 150 Help Guide Data Projector VPL-GTZ380 When Projecting in 2.35:1 Format : Image display area : Projection area Projection Distance VPLL-Z8008 Projection image size Projection image size Width × Height Projection distance L Diagonal 60" (1.52 m) 1.40 m × 0.60 m (55 inches × 23 inches) 1.09 m –...
- Page 151 Projection image size Projection image size Width × Height Projection distance L Diagonal 28.05 m × 11.93 m (1,104 inches × 470 23.10 m – 29.24 m (910 inches – 1,151 1200" (30.48 m) inches) inches) VPLL-Z8014 Projection image size Projection image size Width × Height Projection distance L Diagonal 1.40 m ×...
- Page 152 Projection distance L (minimal length) Projection distance L (maximal length) L = 0.019307 × D − 0.0706 L = 0.024426 × D − 0.0658 (L = 0.760122 × D − 2.7790) (L = 0.760122 × D − 2.7790) VPLL-Z8014 Unit: m (inches) Projection distance L (minimal length) Projection distance L (maximal length) L = 0.033371 ×...
- Page 153 Related Topic Projection Distance and Lens Shift Range 5-023-481-14(1) Copyright 2020 Sony Corporation...
- Page 154 The unit detected a drop impact. If there is abnormality on the unit, consult with qualified Sony personnel. If there are no abnormalities on the unit, disconnect the AC power cord and check that the ON/STANDBY indicator turns off, then connect the AC power cord to turn the unit on.
- Page 155 5-023-481-14(1) Copyright 2020 Sony Corporation...
-
Page 156: Message Lists
Help Guide Data Projector VPL-GTZ380 Message Lists Warning messages Messages Meaning/Solution Turn off the power. Check to ensure that nothing is blocking the ventilation High temp.! Light off in 1 min. holes. Frequency of the input signal is out of range. Input a signal Frequency is out of range! within the acceptable frequency range of the unit. - Page 157 5-023-481-14(1) Copyright 2020 Sony Corporation...
-
Page 158: Power Is Not Turned On
After plugging the AC power cord into an electrical outlet, it may take about 10 seconds until the unit is ready to be turned on. Wait a while then turn on the unit. Related Topic Reading the Indicator 5-023-481-14(1) Copyright 2020 Sony Corporation... -
Page 159: Power Is Suddenly Turned Off
[Setup] menu, the projector will be turned off automatically, then it will go into standby if there is no signal input to the projector for 10 minutes or more. Set [Power Saving] to [Off]. Related Topic Menu Operation: Power Saving 5-023-481-14(1) Copyright 2020 Sony Corporation... -
Page 160: No Image Is Displayed
Check that the computer signal is set for output to an external monitor. If the signal is set to be output to both a laptop display and an external monitor, an image may not be displayed correctly on the external monitor. Set your computer to output the signal only to an external monitor. Related Topic Projecting Images 5-023-481-14(1) Copyright 2020 Sony Corporation... - Page 161 Double images (ghosts) appear. Images are displayed in 3D. View 3D images with 3D glasses. Or set [2D-3D Display Sel.] to [3D]. Related Topic Viewing 3D Images Menu Operation: 3D Settings > 2D-3D Display Sel. 5-023-481-14(1) Copyright 2020 Sony Corporation...
- Page 162 This symptom may occur when a signal level other than those of HDMI standard is input. Switch the output level of the connected device, or set the video input level under [Dynamic Range] in the [Function] menu of the projector. Related Topic Menu Operation: Dynamic Range 5-023-481-14(1) Copyright 2020 Sony Corporation...
- Page 163 Help Guide Data Projector VPL-GTZ380 Projected images are too dark. Set [Contrast] and [Brightness] correctly in the [Picture] menu. Related Topic Menu Operation: Contrast Menu Operation: Brightness 5-023-481-14(1) Copyright 2020 Sony Corporation...
- Page 164 Blurry screen Adjust the screen focus. If dew condensation occurs, the screen may be blurred. Leave the unit for about two hours with the power on. Related Topic Adjusting the Position of the Projected Image 5-023-481-14(1) Copyright 2020 Sony Corporation...
- Page 165 Help Guide Data Projector VPL-GTZ380 Color of characters or images is not appropriate. Adjust the color shift under [Panel Alignment] in the [Installation] menu. Related Topic Menu Operation: Panel Alignment 5-023-481-14(1) Copyright 2020 Sony Corporation...
- Page 166 When a high contrast still image is displayed in the same location of the screen for a long period of time, there may be some image retention on the screen. This is only a temporary condition. Turning off the power for a while will eliminate the retained image. 5-023-481-14(1) Copyright 2020 Sony Corporation...
- Page 167 Check if the ON/STANDBY indicator is not flashing in green. If the indicator is flashing in green, the projector is starting up. Wait until it stops flashing and remains lit in green. Related Topic Menu Operation: Status 5-023-481-14(1) Copyright 2020 Sony Corporation...
-
Page 168: Remote Control Does Not Work
Inserting the Batteries into the Remote Control (RM-PJ29) Inserting the Batteries into the Remote Control (RM-PJ24) Parts and Controls (Main Unit) Parts and Controls (Remote Control) (RM-PJ29) Parts and Controls (Remote Control) (RM-PJ24) Menu Operation: IR Receiver Menu Operation: ID Mode 5-023-481-14(1) Copyright 2020 Sony Corporation... - Page 169 The screen size may not be appropriate. Decrease the zooming magnification, or watch the image away from the screen. Related Topic Viewing 3D Images Menu Operation: 3D Settings > 2D-3D Display Sel. Compatible 3D Signals 5-023-481-14(1) Copyright 2020 Sony Corporation...
- Page 170 The fan noise becomes louder in the room. The approximate normal temperature for the unit is 25°C (77°F). Related Topic Menu Operation: High Altitude Mode 5-023-481-14(1) Copyright 2020 Sony Corporation...
- Page 171 Data Projector VPL-GTZ380 Lens shift cannot be adjusted. The lens shift cannot be adjusted over the range of movement. Adjust the lens shift within the range of movement. Related Topic Projection Distance and Lens Shift Range 5-023-481-14(1) Copyright 2020 Sony Corporation...
-
Page 172: Updating The Software
You are required to have your own USB drive, a computer with internet connection, and an environment to write the update file to the USB drive. The update file can be downloaded from the Sony website. Note Some USB drives may not be supported for use. - Page 173 The images and illustrations used in the Help Guide may differ from your projector. Design and specifications are subject to change without notice for product improvement. Related Topic Updating the Software 5-023-481-14(1) Copyright 2020 Sony Corporation...
Need help?
Do you have a question about the VPL-GTZ380 and is the answer not in the manual?
Questions and answers