Motocaddy S1 Instruction Manual
Electric trolley
Hide thumbs
Also See for S1:
- Instruction manual (21 pages) ,
- Instruction manual (9 pages) ,
- Instruction manual (17 pages)

Related Manuals for Motocaddy S1


Summary of Contents for Motocaddy S1
- Page 1 ORIGINAL VERSION S1 / S1 DHC Electric Trolley Instruction Manual REGISTERONLINE www.motocaddy.com/warranty Visit www.motocaddy.com/instructions for other Motocaddy instructions including translations...
-
Page 2: Locating Your Serial Number / Information About Dhc
Locating your Serial Number / Information about DHC This Motocaddy electric trolley is designed for the transportation of golf bags and clubs contained within. Locating your Serial Number The serial number for this S-Series trolley is located on the trolley underside on top of the motor (fig. 1). -
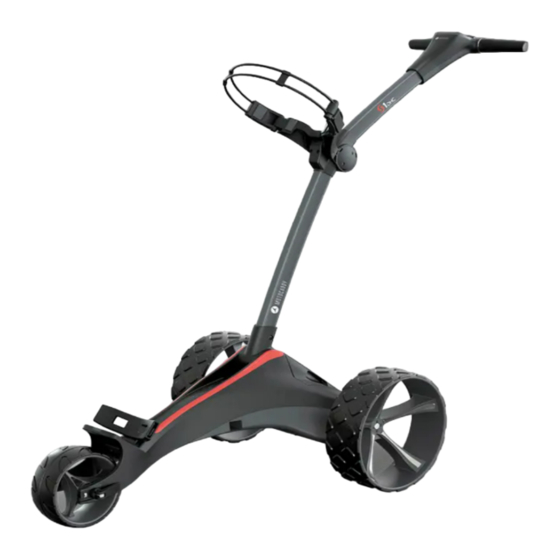
Page 3: Equipment Overview
Equipment Overview Folding Release Latch LCD Display Screen On/Off & Speed Control Button USB Port (on underside of handle) Pop-Up Charging Port Battery Release Catch Battery Rear Wheels Rear Wheel Release Catch 10. Front Wheel 11. Front Wheel Adjuster 12. EASILOCK Lower Bag Support 13. -
Page 4: Safe Use Of Your Trolley
Safety cut-out This Motocaddy trolley is fitted with a timed safety cut-out feature. Once started, the trolley will automatically cut power to the motor after ten minutes to reduce the risk of damage to the trolley. Pressing the On/Off button will restart the trolley. - Page 5 Never use a pressure washer to clean your trolley. To prevent water damage, wipe down with a damp cloth; • Avoid using high pressure air hoses near moving components; This Motocaddy trolley is designed to require very little maintenance. We do however recommend checking your trolley before each use to ensure: •...
- Page 6 WARNING: For the purposes of recharging the battery, only use the detachable supply unit provided with this trolley; • If the supply cord is damaged, it must be replaced by Motocaddy, authorised Service Agents or similarly qualified persons to avoid a hazard;...
- Page 7 Technical Support team for further assistance. Do not attempt to use the battery or charger as this could pose a significant safety risk which could result in fire. We are dedicated to protecting the environment and encourage the recycling of Motocaddy products. Exhausted and damaged batteries should be safely disposed of through a local recycling point (where available).
-
Page 8: Charging Your Lithium Battery
- it can be pulled out manually. Fig 1 Plug the Motocaddy 28V Lithium battery charger into an earthed mains power socket The charger light will be GREEN when not attached to a battery to indicate that it is ready to charge... - Page 9 BMS may switch-off the battery. A full battery charge will rectify this problem. Motocaddy golf trolleys are designed to work with the BMS system installed in the Lithium batteries and the battery meter is also synchronised to work in conjunction with the battery. If for any reason the voltage on the battery falls below the low battery warning on the trolley, then the BMS may disable the battery to protect it.
- Page 10 Attaching the Wheels / Inverting the Wheels Attaching the Wheels This trolley does not have a specific left and right wheel. To attach the rear wheels, follow these simple steps: Push and hold the quick release button in towards the centre of the wheel Slide the wheel onto the trolley axle as far as it will go (onto the inner groove) Once in position, release the button and pull the wheel outwards slightly to lock An audible ‘click’...
-
Page 11: Front Wheel Alignment
Front Wheel Alignment Adjusting the Front Wheel Alignment In the unlikely event that your trolley is not tracking in a straight line, the alignment of the front wheel can be adjusted to rectify the fault. This problem can be caused by a number of factors including a slightly loose bag support or an unevenly packed golf bag. -
Page 12: Unfolding Your Trolley
Unfolding your Trolley Unfolding your Trolley Position the trolley with all three wheels in contact with the ground (fig. 1) Locate the red release latch positioned above the upper bag support (fig. 2) Push the red release latch down while lifting the handle - the trolley will unfold in one motion (fig. 3) You will hear a positive “click”... -
Page 13: Folding Your Trolley
Folding your Trolley Folding your Trolley Position the trolley in its assembled position (fig. 1) Locate the red release latch positioned above the upper bag support Push the red release latch away from you towards the upper bag support straps (fig. 2) Lower the handle while folding the frame down and forward towards the front wheel (fig. - Page 14 Lower Bag Supports Lower Bag Support with EASILOCK™ Bag All Motocaddy electric trolleys are fitted with the EASILOCK™ bag attachment system. This securely attaches the bag, reduces twisting and removes the need to use a lower bag strap. If using an EASILOCK™ compatible bag, please ensure that the supplied pins are fitted to the bag base (fig. 1) If attached, remove the two lower bag support elastic straps by pressing and holding the back of the clip before pulling outwards (fig.
- Page 15 Upper Bag Supports / Adjusting the Bag Supports Upper Bag Supports The upper bag support straps are secured in the same way as the lower straps using the following steps: Stretch the elasticated strap around the bag & loop the rounded bar underneath the hook (fig. 1) Position the two placement straps centrally on your golf bag (fig.
-
Page 16: Starting, Stopping & Changing Speed
Starting, Stopping & Changing Speed Starting, Stopping & Changing Speed The S1 is very simple to control. There is one main button that is used to start and stop the trolley, whilst also controlling the speed, which can be adjusted while the trolley is stationary or in motion. - Page 17 Battery Meter / USB Charging Port Battery Meter The S1 includes an on-screen battery meter which provides an indication of remaining battery capacity. The number of illuminated bars will decrease as the battery capacity reduces. A fully charged battery will show from left to right - two short red bars, two medium orange bars and two larger green bars (fig.
- Page 18 Adjustable Distance Control Adjustable Distance Control The S1 features a basic, easy to use Adjustable Distance Control which will allow you to send your trolley ahead of you from 15 - 45 yards. While stationary, select the speed that you wish your trolley to set off at Hold down the On/Off button for 3 seconds, the number “1”...
- Page 19 Whenever you are looking to move the trolley, even if just to reposition it ready to use, always put it on a low speed setting to make it easier to steer. Fig 1 - S1 DHC Using the DHC Parking Brake DHC models are fitted with an electronic parking brake.
- Page 20 Motocaddy Ltd, Unit 16 Stansted Distribution Centre, Start Hill, Great Hallingbury, Hertfordshire, CM22 7DG, United Kingdom +44 (0)1279 712 370 info@motocaddy.com www.motocaddy.com MC.22.61.003 | EASILOCK™ Patent (GB) - GB2519073 | USB Charging Port Patent (GB) - GB2473845 | USB Charging Port Patent (AUSTRALIA) - 2010224448...
Need help?
Do you have a question about the S1 and is the answer not in the manual?
Questions and answers
How to turn the trolly of? Not only to stop the trolly but to turn of the elektriciy witout taken of the battery
To turn off the Motocaddy S1 trolley without removing the battery, fold the trolley. Folding the trolley automatically disconnects power and makes the charging port accessible.
This answer is automatically generated
underneath my s1 2023 model is a adjuster screw what is this used for and does it need adjusting
The adjuster screw under the Motocaddy S1 is used for front wheel alignment. It allows you to correct the trolley's direction if it veers to one side. Adjustment is only needed if the trolley does not track straight.
This answer is automatically generated