Panasonic KX-TD816AL User Manual
Digital super hybrid system
Hide thumbs
Also See for KX-TD816AL:
- User manual addendum (67 pages) ,
- Installation manual (377 pages)

Related Manuals for Panasonic KX-TD816AL


Summary of Contents for Panasonic KX-TD816AL
- Page 1 Digital Super Hybrid System ANUAL Please read this manual before using the Digital Super Hybrid System. MODEL KX-TD1232AL KX-TD816AL KX-TD816AL / KX-TD1232AL...
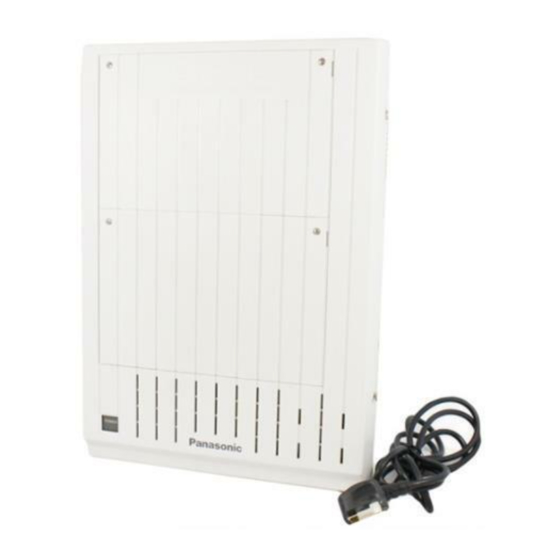
- Page 2 Thank you for purchasing the Panasonic Telephone Systems. System Components Model No. Description Service Unit Digital Super Hybrid System (Main Unit) KX-TD816AL/ KX-TD1232AL Telephone KX-T7220AL Digital Proprietary Telephone with SP-Phone KX-T7230AL Digital Proprietary Telephone with Display KX-T7235AL Digital Proprietary Telephone with Large Display...
- Page 3 • If there is any trouble, unplug the extension line and connect a known working phone. If the known working phone operates properly, have the defective phone repaired by one of the specified Panasonic Factory Service Centers. If the known working phone does not operate properly, check the Digital Super Hybrid System and the Internal extension wiring.
- Page 4 Introduction Who Should Use This Manual This manual is designed for users of the Digital Super Hybrid System, model number KX-TD816 and KX-TD1232. It is to be used after the system is installed and System Programming is completed. The focus is Digital Proprietary Telephones (DPTs);...
- Page 5 Introduction Features and Capabilities KX-TD816 and KX-TD1232 are the sophisticated and powerful systems that satisfy just what you expect of an office communications system. We list some remarkable features below. Automatic Callback Busy (Camp-On) allows you to be informed when the called party becomes idle.
- Page 6 Introduction Expressions in the Descriptions Feature Numbers Feature number is an access code for various functions when programming or executing features using proprietary or single line telephones connected to the system. You can access possible features by dialing the corresponding feature number (and additional number, if required).
-
Page 7: Table Of Contents
Table of Contents Section 1 DPT Overview ............1-1 1.1 Configuration ..................1-2 Location of Controls .......................1-3 Feature Buttons .......................1-9 Fixed Buttons ......................1-9 Flexible Buttons .......................1-12 Line Access Buttons ....................1-13 Initial Setting .........................1-15 Display Contrast Adjustment ...................1-15 When changing the ringing tone of a CO button .............1-15 Volume Control —... - Page 8 Table of Contents Intercom Alerting Assignment ..................2-25 Preferred Line Assignment — Incoming ..............2-26 No Line Preference — Incoming ................2-26 Ringing Line Preference — Incoming ..............2-26 Prime Line (CO Line) Preference — Incoming ............2-27 Preferred Line Assignment — Outgoing ..............2-28 No Line Preference — Outgoing ................2-28 Idle Line Preference —...
- Page 9 Table of Contents Call Hold ........................3-31 Call Hold, Exclusive .....................3-32 Call Hold Retrieve......................3-33 Call Park ........................3-35 Call Pickup, CO Line ....................3-36 Call Pickup, Directed ....................3-37 Call Pickup, Group ......................3-38 Call Pickup Deny ......................3-39 Call Splitting .........................3-40 Call Transfer — to CO Line..................3-41 Call Transfer —...
- Page 10 Table of Contents Night Service .........................3-76 Off-Hook Call Announcement (OHCA) ...............3-77 One-Touch Dialing......................3-78 Operator Call .........................3-79 Outward Dialing, Line Access — SUMMARY ............3-80 Line Access, Automatic ...................3-81 Line Access, CO Line Group ...................3-82 Line Access, Individual ...................3-83 Paging — SUMMARY ....................3-84 Paging —...
- Page 11 Table of Contents 3.3 Operator Service Features ............3-114 Background Music (BGM) — External ..............3-114 CO Incoming Call Information Log Lock Clear ............3-116 Night Service On/Off ....................3-117 Remote Station Lock Control..................3-120 Hotel Application ......................3-121 Check-In/Check-Out ....................3-121 Timed Reminder, Remote (Wake-Up Call) ............3-123 3.4 Special Display Features (—...
- Page 12 Table of Contents Section 5 Single Line Telephone (SLT) ........5-1 5.1 Basic Operation................5-2 Making Calls ........................5-2 Receiving Calls .......................5-3 5.2 SLT Features ...................5-4 Absent Message Capability .....................5-4 Account Code Entry ......................5-8 Alternate Calling — Ring / Voice .................5-10 Automatic Callback Busy (Camp-On) ................5-11 Busy Station Signaling (BSS) ..................5-12 Call Forwarding —...
- Page 13 Table of Contents Electronic Station Lockout ....................5-39 External Feature Access ....................5-41 Intercom Calling......................5-42 Lockout .........................5-42 Message Waiting ......................5-43 Night Service .........................5-45 Off-Hook Call Announcement (OHCA) ...............5-45 Operator Call .........................5-46 Outward Dialing, Line Access — SUMMARY ............5-47 Line Access, Automatic ...................5-48 Line Access, CO Line Group ...................5-48 Paging —...
- Page 14 Table of Contents Timed Reminder......................5-66 Toll Restriction Override ....................5-68 Toll Restriction Override by Account Code Entry ..........5-68 Toll Restriction Override for System Speed Dialing ..........5-68 Trunk (CO Line) Answer From Any Station (TAFAS) ..........5-70 Voice Mail Integration ....................5-71 Section 6 Quick Reference ............6-1 Basic Operation .......................6-2 Station Programming ......................6-2...
- Page 15 Section 1 DPT Overview Contents Configuration ..............1-2 Location of Controls............1-3 Feature buttons ..............1-9 Initial Setting ..............1-15 LED Indication ...............1-18 <Note> All illustrations used in the initial setting are KX-T7235’s.
- Page 16 Configuration Panasonic Digital Proprietary Telephones (DPT) are provided to utilize the various features of the KX-TD816 and the KX-TD1232 systems, in addition to supporting basic telephone service (making and receiving calls). There are four models of DPT. KX-T7220 KX-T7230 KX-T7235 KX-T7250 16 charac./line,...
-
Page 17: Dpt Overview
Configuration Location of Controls KX-T7220 (Back View) MESSAGE Button — See diagram below. FWD/DND Button Flexible CO Buttons (CO 01 through CO 24) CONF Button INTERCOM Button RINGER Volume Selector Used to adjust the ringer volume. TRANSFER Button PROGRAM Button REDIAL Button VOLUME Control Button RECALL Button... - Page 18 Configuration KX-T7230 Display (Liquid Crystal Display) with 16-character/2-line readout: Shows the date, time, dialed number or name, call duration time, etc. In Programming mode, it shows the Programming messages. PROGRAM Button Soft Buttons (S1 through S3) SHIFT Button INTERCOM Button CONF Button Flexible CO Buttons (CO 01 through CO 24)
- Page 19 Configuration (Back View) — See diagram below. VOLUME Control Button REDIAL Button AUTO DIAL/STORE Button RECALL Button AUTO ANSWER/MUTE Button HOLD Button SP-PHONE Button Microphone <Back View> TO EMSS TO TEL Used for XDP or parallel connections with a Single Line Telephone, a Telephone Answering Machine, or a FAX.
- Page 20 Configuration KX-T7235 Display (Liquid Crystal Display) Function Buttons with 24-character/6-line readout: (F1 through F5) Shows the date, time, dialed number or name, call duration time, etc. In PROGRAM Button Programming mode, it shows the Programming messages. Function Buttons (F6 through F10) INTERCOM Button CONF Button FWD/DND Button...
- Page 21 Configuration (Back View) — See diagram below. REDIAL Button VOLUME Control Button RECALL Button AUTO DIAL/STORE Button HOLD Button AUTO ANSWER/MUTE Button Microphone SP-PHONE Button <Back View> LCD ADJ PUSH TO EMSS TO TEL Used for XDP or parallel connections with a Single Line Telephone, a Telephone Answering Machine, or a FAX.
- Page 22 Configuration KX-T7250 Memory Card Pull out the card and write down the names or phone numbers associated with Flexible CO Buttons automatic dialing numbers. (CO 01 through CO 06) (Back View) INTERCOM Button — See diagram below. RINGER Volume Selector Used to adjust the ringer volume.
-
Page 23: Feature Buttons
Configuration Feature Buttons DPTs have the following types of Feature Buttons: • Fixed Buttons • Flexible Buttons Fixed Buttons Fixed buttons have specific functions permanently assigned to them. These default function assignments cannot be changed. The following table lists the fixed buttons located on each DPT model. - Page 24 Configuration Usage AUTO ANSWER/MUTE Button Used for extension auto answer; it turns the microphone off during a conversation. AUTO DIAL/STORE Button Used for System Speed Dialing and for storing program changes. CONF (Conference) Button Used to establish a three-party conference. Function (F1 through F10) Button Used to perform the corresponding displayed function or operation.
- Page 25 Configuration REDIAL Button Used for Last Number or Automatic Redialing. SHIFT Button Used to access the second level of Soft Button functions. Soft (S1 through S3) Button Used to perform the function or operation that appears on the bottom line of the display. SP-PHONE (Speakerphone) Button Used for handsfree speakerphone operation.
-
Page 26: Flexible Buttons
Configuration Flexible Buttons Flexible Buttons do not have specific features permanently assigned to them; features are assigned to Flexible Buttons through System or Station Programming. "Flexible Button Assignment" is addressed in Station Programming (Section 2). The three types of Flexible Buttons are as follows: •... -
Page 27: Line Access Buttons
Configuration Line Access Buttons The following three types of CO button can be used to seize a CO line when making a call. • Group-CO (G-CO) button • Loop-CO (L-CO) button • Single-CO (S-CO) button Conditions • A flexible CO button can be assigned as a Line Access Button (G-CO, L-CO or S-CO) in either System/Station Programming. - Page 28 Configuration Loop-CO (L-CO) button All CO lines can be assigned to a flexible CO button on a proprietary telephone. The assigned button serves as an L-CO button. An incoming call on any CO line arrives at the L-CO button, unless there are S-CO nor G-CO buttons associated with the line or unless the button is already in use.
-
Page 29: Initial Setting
— (contrast volume level 3) When using the headset Panasonic Digital Super Hybrid System supports the use of a headset on a proprietary telephone (PT). When you use the headset, that is an option, you should switch the selection mode first. The way of selection is also explained on "Handset/Headset Selection" in the Station Programming (Section 2). -
Page 30: Volume Control - Handset Receiver/Headset/Ringer/Speaker
Configuration Volume Control — Handset Receiver/Headset/Ringer/Speaker Allows you to adjust the following volumes as desired: — Handset Receiver volume (level 1 through 3) — Headset volume (level 1 through 3) — Ringer volume (level 0 through 3) — Speaker volume (level 1 through 12) If your DPT is provided with the display (display DPT), the volume level is indicated on the display by the number of asterisks. - Page 31 Configuration When the telephone is idle and on-hook; 1. Press the RING (S2) button. • The telephone will ring. RING 2. Press the VOLUME (UP /DOWN ) Control button. • The telephone will stop ringing in about 3 seconds. • When the volume level is 0 (no "*" indication), the display VOLUME shows "RNGOFF."...
-
Page 32: Led Indication
Configuration LED Indication The Light Emitting Diode (LED) button indicators provide the line conditions with lighting patterns. Flashing light patterns Slow flash (60 flash/min.) Moderate flash (120 flash/min.) Rapid flash (240 flash/min.) ← 1 sec. → LED Indication on INTERCOM Button The table below shows the lighting patterns and the intercom line conditions. -
Page 33: Station Programming
Section 2 Station Programming Contents 2.1 Programming Instructions ..........2-2 2.2 Programming (A - Z) ............2-6 <Note> All illustrations used in these operating instructions are KX-T7235’s. -
Page 34: Programming Instructions
Programming Instructions Station Programming allows you, the proprietary telephone (PT) users, to program certain features from your telephone individually. To program, you need to switch your telephone to the Station Programming mode. And during the programming mode, your telephone is put in a busy condition to outside caller. - Page 35 Programming Instructions To confirm the assigned function data — Be sure that you are in the Station Programming mode : Press [PROGRAM] [9] [9]. 1. Enter the programming access number (0 through 9 and #). • Each number corresponds to the data as follows: - 0 : Remote Station Lock Control (—...
- Page 36 Programming Instructions To clear the data on the Flexible button — Be sure that you are in the Station Programming mode : Press [PROGRAM] [9] [9]. 1. Press the desired Flexible (CO, DSS, PF) button that you wish to clear. 2.
- Page 37 Programming Instructions Station Programming Outline PROGRAM (Station Programming) Direct Station Selection (DSS) Button One-Touch Dialing Button Message Waiting (MESSAGE) Button FWD/DND Button SAVE Button Account Button Conference (CONF) Button Voice Mail (VM) Transfer Button Single-CO (S-CO) Button Loop-CO (L-CO) Button Group-CO (G-CO) Button (Ringing Tone Selection for CO Buttons) Function...
-
Page 38: Programming
Programming Call Waiting Tone Type Assignment Allows you to select the call waiting tone type (Tone 1 or Tone 2). — Be sure that you are in the Station Programming mode : Press [PROGRAM] [9] [9]. 1. Dial 5. • The display shows the current tone type. 2. -
Page 39: Charge Fee Reference
Programming Charge Fee Reference Allows you to view, print out and clear charges. Charges are displayed per extension, CO line, account code, or the total of each can be referred to. There are eight corresponding features as follows: [Program]—[99]—[8]—[ID Code] — [1] Extension Charge Fee Reference —... -
Page 40: Extension Charge Fee Reference
Programming Extension Charge Fee Reference Provides you with the display of each extension charge (telephone rate). You can refer and clear the displayed meter and charge. — Be sure that you are in Station Programming mode : Press [PROGRAM] [9] [9]. 1. -
Page 41: Co Line Charge Fee Reference
Programming CO Line Charge Fee Reference Provides you with the display of each CO line charge (telephone rate). You can refer the displayed meter and charge. — Be sure that you are in Station Programming mode : Press [PROGRAM] [9] [9]. 1. -
Page 42: Total Extension Charge Fee Reference
Programming Total Extension Charge Fee Reference Provides you with the display of the total extension charge (telephone rate). You can refer the displayed meter and charge. — Be sure that you are in Station Programming mode : Press [PROGRAM] [9] [9]. 1. -
Page 43: Account Code Charge Fee Reference
Programming Account Code Charge Fee Reference Provides you with the display of each account code charge (telephone rate). You can refer and clear the displayed meter and charge. — Be sure that you are in Station Programming mode : Press [PROGRAM] [9] [9]. 1. -
Page 44: New Rate Set
Programming New Rate Set Allows you to assign how many Charge are equal to a unit of Meter when calculating. — Be sure that you are in Station Programming mode : Press [PROGRAM] [9] [9]. 1. Dial 8. 2. Enter the ID code (4 digits). •... -
Page 45: All Clear
Programming All Clear Allows you to clear all recorded charge for CO line and account code, or extension, and set the new starting time for recording. — Be sure that you are in Station Programming mode : Press [PROGRAM] [9] [9]. To clear all CO line and all account code charge 1. - Page 46 Programming 3. Dial 6. • The display shows: Meter Sum Clear? NEXT 4. Press the NEXT (S3) button. NEXT • The display shows: Meter Ext Clear? NEXT 5. Press the STORE button. AUTO DIAL • Recorded charge will be all cleared and the present time will be STORE displayed.
-
Page 47: Print The Charge Fee
Programming Print the Charge Fee Allows you to print the charge of total telephone charge (total CO charge, each CO charge, each account code, ) all extension charge or each extension charge by SMDR. — Be sure that you are in Station Programming mode : Press [PROGRAM] [9] [9]. 1. -
Page 48: Account Code Set
Programming Account Code Set Allows you to assign the account code. — Be sure that you are in Station Programming mode : Press [PROGRAM] [9] [9]. 1. Dial 8. 2. Enter the ID code (4 digits). • The display shows: Charge Meter •... -
Page 49: Flexible Button Assignment
Programming Flexible Button Assignment Each Flexible (CO, DSS, PF) button on your telephone and on the console can be assigned as various feature buttons such as an Account Button, DSS Button, or FWD/DND Button, etc.. The features assignable are limited by the button type. Please refer to "Flexible Buttons" in Section 1.1, "Feature Buttons."... -
Page 50: Direct Station Selection (Dss) Button
Programming Direct Station Selection (DSS) Button (Assignment) Allows you to assign a Flexible (CO or DSS) button as a DSS button. — Be sure that you are in the Station Programming mode : Press [PROGRAM] [9] [9]. 1. Press the desired Flexible (CO, DSS) button which you wish to assign as a DSS button. -
Page 51: Fwd/Dnd Button
Programming FWD / DND Button (Assignment) Allows you to assign a Flexible (CO, DSS, PF) button as the FWD/DND button. — Be sure that you are in the Station Programming mode : Press [PROGRAM] [9] [9]. 1. Press the desired Flexible (CO, DSS, PF) button which you wish to assign as the FWD/DND button. -
Page 52: Loop-Co (L-Co) Button
Programming Loop-CO (L-CO) Button (Assignment) Allows you to assign a Flexible (CO) button as a Loop-CO button. — Be sure that you are in the Station Programming mode : Press [PROGRAM] [9] [9]. 1. Press the Flexible (CO) button you wish to assign as the L-CO button. -
Page 53: One-Touch Dialing Button
Programming One-Touch Dialing Button (Assignment) Allows you to assign a Flexible (CO, DSS, PF) button as a One-Touch Dialing button. — Be sure that you are in the Station Programming mode : Press [PROGRAM] [9] [9]. 1. Press the desired Flexible (CO, DSS, PF) button which you wish to assign as a One-Touch Dialing button. -
Page 54: Save Button
Programming SAVE Button (Assignment) Allows you to assign a Flexible (CO, DSS, PF) button as the SAVE button. — Be sure that you are in the Station Programming mode : Press [PROGRAM] [9] [9]. 1. Press the desired Flexible (CO, DSS, PF) button which you wish to assign as the SAVE button. -
Page 55: Voice Mail (Vm) Transfer Button
Programming Conditions • You can not assign the same CO line to more than one S-CO button on a proprietary telephone. • You can assign a CO line to a S-CO and a G-CO button. Voice Mail (VM) Transfer Button (Assignment) Allows you to assign a Flexible (CO, DSS, PF) button as the VM Transfer button. -
Page 56: Full One-Touch Dialing Assignment
Programming Full One-Touch Dialing Assignment Allows you to enable or disable the "Full One-Touch Dialing" function. "Handsfree Operation" mode is activated by pressing a One-Touch Dialing button, a DSS button, a REDIAL button or a SAVE button. — Be sure that you are in the Station Programming mode : Press [PROGRAM] [9] [9]. 1. -
Page 57: Intercom Alerting Assignment
Programming 3. Press the STORE button. • The STORE indicator light turns on. AUTO DIAL • The display shows the initial programming mode. STORE — To exit from Station Programming mode : Press [PROGRAM] or lift the handset. Conditions • Default is "Handset" mode. Intercom Alerting Assignment Allows you to select the alerting mode (tone / voice) when receiving an intercom (extension) call. -
Page 58: Preferred Line Assignment - Incoming
Programming Preferred Line Assignment — Incoming Allows you to select the method used to answer incoming calls from the following three line preferences: 1.) No Line Preference 2.) Ringing Line Preference (— default) 3.) Prime Line (CO Line) Preference Follow the appropriate programming procedure for your selection. No Line Preference —... -
Page 59: Prime Line (Co Line) Preference - Incoming
Programming Prime Line (CO Line) Preference — Incoming (Assignment) When you go off-hook, you answer a call on the line which is assigned as the prime line. — Be sure that you are in the Station Programming mode : Press [PROGRAM] [9] [9]. 1. -
Page 60: Preferred Line Assignment - Outgoing
Programming Preferred Line Assignment — Outgoing Allows you to select the desired outgoing line preference to originate calls from the following four line preferences: 1.) No Line Preference 2.) Idle Line Preference 3.) Prime Line (CO line) Preference 4.) Prime Line (INTERCOM) Preference (— default) Follow the programming procedure for your selection. -
Page 61: Prime Line (Co Line) Preference - Outgoing
Programming 3. Press the STORE button. AUTO DIAL • The STORE indicator light turns on. • The display shows the initial programming mode. STORE — To exit from Station Programming mode : Press [PROGRAM] or lift the handset. Prime Line (CO Line) Preference — Outgoing (Assignment) When you go off-hook, you are connected to the pre-assigned line. -
Page 62: Ringing Tone Selection For Co Buttons
Programming Ringing Tone Selection for CO Buttons Allows you to assign a ringer frequency to each CO button. — Be sure that you are in the Station Programming mode : Press [PROGRAM] [9] [9]. 1. Press the desired CO button for which you wish to change the ringing tone. -
Page 63: Self-Extension Number Confirmation
Programming Self-Extension Number Confirmation (KX-T7230 and 7235 only) Allows you to display your jack and extension number on the display. — Be sure that you are in the Station Programming mode : Press [PROGRAM] [9] [9]. 1. Dial 6. • The display shows your jack and extension number. <Example>... -
Page 64: Station Speed Dialing Number/Name Assignment ( Kx-T7235 Only)
Programming Station Speed Dialing Number/Name Assignment (KX-T7235 only) Allows you to assign frequently dialed numbers and names to each Function button of your telephone. To store a number — Be sure that you are in the Station Programming mode : Press [PROGRAM] [9] [9]. 1. - Page 65 Programming 3. Enter the name. • Refer to the Combination Table down below for information on how to enter each character. name 4. Press the STORE button. • The STORE indicator light turns on. AUTO DIAL • The display shows the initial programming mode. STORE —...
- Page 66 Programming <Example> — To enter "Mike" by using the SELECT button; 1. Press 6 and then press the SELECT button once to enter "M." 2. Press 4 and then press the SELECT button six times to enter "i." 3. Press 5 and then press the SELECT button four times to enter "k." 4.
- Page 67 Section 3 DPT Features Contents Basic Operation ..............3-2 Making Calls ..............3-2 Receiving Calls ...............3-3 DPT Features (A - Z) .............3-4 Operator Service Features (— for Operator only) .............3-104 Special Display Features (— for KX-T7235) ............3-111 <Note> When setting "Idle Line Preference — Outgoing," "No Line Preference — Outgoing,"...
-
Page 68: Dpt Features
Basic Operation Making Calls Intercom Calling Allows you to make a call to another extension. 1. Lift the handset or press the SP-PHONE/MONITOR button. 2. Dial the extension number or press the DSS button. extension number Outward Dialing Allows you to make a call to an outside party using one of the following line access methods: 1.) Line Access, Automatic 2.) Line Access, CO Line Group 3.) Line Access, Individual... -
Page 69: Receiving Calls
Basic Operation Programming References • Station Programming (Section 2) Preferred Line Assignment — Outgoing Feature References Extension Dialing (3.4/Special Display Features) Handsfree Operation Intercom Calling Outward Dialing, Line Access Receiving Calls 1. Lift the handset or press the SP-PHONE button. 1. -
Page 70: Dpt Features
DPT Features Absent Message Capability TD816 TD1232 Once this option is set, a message on the display of the calling extension DPT (72**) provides the reason for your absence. Only callers with a display telephone can receive the message. Nine messages are available for every extension user. - Page 71 DPT Features Message 2. "Gone Home" 1. Lift the handset or press the SP-PHONE/MONITOR button. 2. Dial the feature number (750) and 2. • You hear confirmation tone and then dial tone. 3. Hang up or press the SP-PHONE/MONITOR button. Message 3.
- Page 72 DPT Features Message 5. "Out until %% / %%" (month/day) 1. Lift the handset or press the SP-PHONE/MONITOR button. 2. Dial the feature number (750) and 5. 3. Enter the month (01 through 12) and the day (01 through 31). •...
- Page 73 DPT Features 4. Hang up or press the SP-PHONE/MONITOR button. Cancelling 1. Lift the handset or press the SP-PHONE/MONITOR button. 2. Dial the feature number (750) and 0. • You hear confirmation tone and then dial tone. • The display shows: Message Cancel 3.
-
Page 74: Account Code Entry
DPT Features Account Code Entry TD816 TD1232 An Account Code is used to identify incoming and outgoing CO calls for DPT (72**) accounting and billing purposes. The account code is appended to the "Station Message Detail Recording (SMDR)" call record. For incoming CO calls, account codes are not required. - Page 75 DPT Features Standard Operation Entering account codes before dialing 1. Lift the handset or press the SP-PHONE/MONITOR button. 2. Dial the feature number (49), or press the flexible button which is assigned as the Account button. • No tone is returned, if you dial the feature number. •...
- Page 76 DPT Features Conditions In "Verified - All Calls" mode • You must always enter a pre-assigned account code when making any of the following calls unless it has previously been stored in memory: a) Call Forwarding — to CO Line b) Manual Dialing (Selecting a CO line) c) One-Touch Dialing d) Pickup Dialing (Hot Line)
- Page 77 DPT Features Programming References • Station Programming (Section 2) Charge Fee Reference — Account Code Set Flexible Button Assignment — Account Button (System Programming — [005] (Installation Manual) can be used for this assignment.) • System Programming — Installation Manual [508] Account Code Entry Mode [601] Class of Service Feature References...
-
Page 78: Alternate Calling - Ring / Voice
DPT Features Alternate Calling — Ring / Voice TD816 TD1232 Allows you to select ring or voice calling when making an intercom call. In DPT (72**) Ring-Calling mode, you can call the other party with a ring tone. While in Voice-Calling mode, you can talk to the other party immediately after a confirmation tone. -
Page 79: Answering, Direct Co Line
DPT Features Conditions • Default is Ring-Calling mode. • You can switch the desired calling mode only once during a call. • If the party you are calling is using a single line telephone (SLT), only Ring-Calling mode is available. Programming References •... -
Page 80: Automatic Callback Busy (Camp-On)
DPT Features Automatic Callback Busy (Camp-On) TD816 TD1232 When the selected CO line or extension you have dialed is busy, dial the DPT (72**) camp-on code and hang up. Your telephone will ring when the called party is idle. Soft Button Operation Setting If you make a call and hear busy tone;... - Page 81 DPT Features Answering a CO recall If you hear the telephone ringing; • The display shows: <Example> COxx: Free CO line number 1. Lift the handset or press the SP-PHONE/MONITOR button. • You hear dial tone. phone number 2. Dial the phone number of the outside party. Conditions •...
- Page 82 DPT Features Busy Station Signaling (BSS) TD816 TD1232 The busy extension that you called hears three beeps and knows that you are DPT (72**) waiting. Soft Button Operation If you make an intercom call and hear busy tone; 1. Press the BSS (S1) button. •...
-
Page 83: Background Music (Bgm)
DPT Features Background Music (BGM) TD816 TD1232 You hear background music through the built-in speaker of the telephone. DPT (72**) An external music source, such as a radio, must be connected. The music stops whenever a call comes in or when you lift the handset. Soft Button Operation When the handset is on the cradle and the SP-PHONE button is off;... -
Page 84: Call Forwarding - Summary
DPT Features Call Forwarding — SUMMARY TD816 TD1232 Automatically transfers incoming calls to another extension or to an external DPT (72**) destination. The following types are available: Type Description Call Forwarding All incoming calls are forwarded to another extension. — All Calls Call Forwarding All incoming calls are forwarded to another extension when —... -
Page 85: Call Forwarding - All Calls
DPT Features • Setting a new "Call Forwarding" function (All Calls, Busy, Busy/No Answer, etc.) cancels any other "Call Forwarding" functions and the "Do Not Disturb (DND)" feature that has been set. • A floating extension such as MODEM or external pager cannot be programmed as a forwarding destination. - Page 86 DPT Features 3. Press the FWD – All Calls (F3) button. FWD-All Calls (→ ext) 4. Dial the extension number to which you wish to forward the call. • You hear confirmation tone and then dial tone. • The display shows: FWD(All) Extxxxx Extension number to which extension number...
-
Page 87: Call Forwarding - Busy
DPT Features Call Forwarding — Busy You can forward calls to another extension when your extension is busy. Display Operation (— for KX-T7235) Setting 1. Lift the handset or press the SP-PHONE button. 2. Press the FWD/DND button. FWD/DND 3. Press the FWD – Busy (F4) button. FWD-Busy (→... -
Page 88: Call Forwarding - No Answer
DPT Features 5. Hang up or press the SP-PHONE/MONITOR button. Call Forwarding — No Answer Your calls are forwarded to another extension when you do not answer the telephone within a pre-determined time. Display Operation (— for KX-T7235) Setting 1. Lift the handset or press the SP-PHONE button. 2. -
Page 89: Call Forwarding - Busy / No Answer
DPT Features 4. Dial the extension number to which you wish to forward the call. • You hear confirmation tone and then dial tone. • The display shows: FWD(NA) Extxxxx extension number Extension number to which the call is to be forwarded •... - Page 90 DPT Features 6. Hang up or press the SP-PHONE button. Standard Operation Setting 1. Lift the handset or press the SP-PHONE/MONITOR button. 2. Press the FWD/DND button. FWD/DND • You may dial the feature number (710) instead. 3. Dial 5. 4.
-
Page 91: Call Forwarding - To Co Line
DPT Features Call Forwarding — to CO Line You can forward your calls to a CO line. The telephone number of the outside party must be pre-programmed. Display Operation (— for KX-T7235) Setting 1. Lift the handset or press the SP-PHONE button. 2. - Page 92 DPT Features Standard Operation Setting 1. Lift the handset or press the SP-PHONE/MONITOR button. 2. Press the FWD/DND button. FWD/DND • You may dial the feature number (710) instead. 3. Dial 6. 4. Dial the line access code (9 or 81 through 88). line access code 5.
-
Page 93: Call Forwarding - Follow Me
DPT Features Call Forwarding — Follow Me You can set a "Call Forwarding" feature from the destination extension. This is useful if you forget to set "Call Forwarding — All Calls" before you leave your desk. Display Operation (— for KX-T7235) Setting –... - Page 94 DPT Features 4. Dial your own extension number. • You hear confirmation tone and then dial tone. • The display shows: FWD(From)Extxxxx your extension number Your extension number • The FWD/DND indicator light flashes red slowly at your own extension. 5.
-
Page 95: Call Forwarding - Cancel
DPT Features Call Forwarding — CANCEL TD816 TD1232 There are two cancelling methods for "Call Forwarding." The cancellation DPT (72**) depends on the Call Forwarding type that is assigned. Display Operation (— for KX-T7235) Cancelling Call Forwarding at your (original) extension 1. - Page 96 DPT Features 6. Hang up or press the SP-PHONE button. Standard Operation Cancelling Call Forwarding at your (original) extension 1. Lift the handset or press the SP-PHONE/MONITOR button. 2. Press the FWD/DND button. FWD/DND • You may dial the feature number (710) or press the flexible button assigned as the FWD/DND button instead.
-
Page 97: Call Hold
DPT Features Call Hold TD816 TD1232 DPT (72**) Allows you to place an intercom or CO call on hold. To place a call on hold While having a conversation; HOLD 1. Press the HOLD button. • The corresponding CO or INTERCOM indicator light flashes green slowly. -
Page 98: Call Hold, Exclusive
DPT Features Call Hold, Exclusive TD816 TD1232 Allows you to prevent other extension users from retrieving your held call. DPT (72**) Only the user who held it can retrieve the call. To place a call on exclusive hold While having a conversation; HOLD 1. -
Page 99: Call Hold Retrieve
DPT Features Call Hold Retrieve TD816 TD1232 DPT (72**) Allows you to retrieve a call that has been placed on hold by another extension. Retrieving a CO call on hold — at another extension; 1. Press the CO button whose indicator is flashing red slowly. •... - Page 100 DPT Features Programming References • System Programming — Installation Manual [990] System Additional Information, Field (16) Feature References Call Hold 3-34 DPT Features...
-
Page 101: Call Park
DPT Features Call Park TD816 TD1232 Allows you to place a held call into a system parking area. You are released DPT (72**) from the parked call to perform other operations. The parked call can be retrieved by any extension user. If your extension is assigned as an operator, you can perform the operation using the display. -
Page 102: Call Pickup, Co Line
DPT Features Conditions • Up to ten calls can be parked. • If a parked call is not retrieved within the specific period of time (default: 12 rings), "Transfer Recall" occurs. • If a parked call is not retrieved within thirty minutes, it is automatically disconnected. •... -
Page 103: Call Pickup, Directed
DPT Features Call Pickup, Directed TD816 TD1232 Allows you to answer an incoming call ringing at any other extension. DPT (72**) 1. Lift the handset or press the SP-PHONE/ MONITOR button. 2. Dial the feature number (41). 3. Dial the extension number at which a call is ringing. •... -
Page 104: Call Pickup, Group
DPT Features Call Pickup, Group TD816 TD1232 Allows you to answer a call that is ringing at another telephone within your DPT (72**) extension group. 1. Lift the handset or press the SP-PHONE/ MONITOR button. 2. Dial the feature number (40). •... -
Page 105: Call Pickup Deny
DPT Features Call Pickup Deny TD816 TD1232 Allows you to prevent another extension from picking up your calls with the DPT (72**) "Call Pickup" features. Setting 1. Lift the handset or press the SP-PHONE/MONITOR button. 2. Dial the feature number (720) and 1. •... -
Page 106: Call Splitting
DPT Features Call Splitting TD816 TD1232 Allows you to have two callers on a line and alternate between them. If a call DPT (72**) comes in while you are already on the line, you can place the current call on hold and have a conversation with the other party. -
Page 107: Call Transfer - To Co Line
DPT Features Call Transfer — to CO Line TD816 TD1232 Allows you to transfer your call to a CO line by a Screened Call Transfer. DPT (72**) Screened Call Transfer While having a conversation; TRANSFER 1. Press the TRANSFER button. •... -
Page 108: Call Transfer - To Extension
DPT Features Call Transfer — to Extension TD816 TD1232 Allows you to perform a Screened or Unscreened Call Transfer to another DPT (72**) extension. A call can also be transferred to an extension by using the DSS button, if it is programmed. Screened Call Transfer While having a conversation;... - Page 109 DPT Features Call Transfer using a DSS button Allows you to perform a Screened or Unscreened Call Transfer by using a DSS button. There are two operations, depending on whether or not One-Touch Transfer is set. One-Touch Transfer allows you to hold a CO call and transfer it to an extension with one key depression. This feature provides automatic hold and transfer, without pressing the TRANSFER button.
- Page 110 DPT Features • System Programming — Installation Manual [108] One-Touch Transfer by DSS Button [201] Transfer Recall Time Feature References Transfer Recall (→ see Installation Manual) 3-44 DPT Features...
-
Page 111: Call Waiting
DPT Features Call Waiting TD816 TD1232 While in conversation, a Call Waiting tone signals that there is a call waiting. DPT (72**) You can respond to the waiting call by disconnecting from the first call or by placing the first call on hold. Setting 1. - Page 112 DPT Features To talk to the new party by holding the current call While hearing Call Waiting tone and the CO or INTERCOM indicator is flashing rapidly; HOLD 1. Press the HOLD button. • The current call is placed on hold. INTERCOM 2.
-
Page 113: Co Incoming Call Information Display
DPT Features CO Incoming Call Information Display TD816 TD1232 Provides you with the caller's telephone number and the name on the ISDN S0 DPT (72**) line provided with the CLIP feature. You can also record the information. Display Operation (— for KX-T7235) When you receive a CO incoming call, the display shows the caller's 0111111111 telephone number and the name. - Page 114 DPT Features Display Operation (— for KX-T7230) When you receive a CO incoming call, the display shows the caller's 0111111111 telephone number and the name. JOHN WHITE • If you are assigned as an operator, the display shows the CO line number and CO line name, if assigned.
-
Page 115: Co Incoming Call Information Log
DPT Features CO Incoming Call Information Log TD816 TD1232 Allows you to confirm the CO incoming call information on the display from DPT (72**) the ISDN line provided with the CLIP feature*. You can also call back the caller by selecting one of the memorized numbers. Display Operation (—... - Page 116 DPT Features 2. Confirm the information by pressing the NEXT (S3) or PREV (S3) 01:0111111111 INFO NEXT button. • Pressing the SHIFT button provides you with the PREV (S3) button on the display. • Pressing the INFO (S1) button provides you with the further information for one party.
-
Page 117: Co Incoming Call Information Log Lock
DPT Features CO Incoming Call Information Log Lock TD816 TD1232 Allows you to lock the display of your extension so that CO incoming call DPT (72**) information is not shown on the display, if you don't want others to see the information. - Page 118 DPT Features Conditions • The extension assigned as an operator can clear this function for another extension (CO Incoming Call Information Log Lock Clear). Programming References • System Programming — Installation Manual [100] Flexible Numbering, CO incoming call information log mode / CO incoming call information log lock [001] System Speed Dialing Number Set [002] System Speed Dialing Name Set...
-
Page 119: Co Incoming Call Information Log Mode
DPT Features CO Incoming Call Information Log Mode TD816 TD1232 Allows you to control the CO Incoming Call Information Log Mode on your DPT (72**) extension when the information area is full. If you set this mode, new CO incoming call information is retained but old data is discarded. If you cancel this mode, new CO incoming call information is not memorized on your extension. -
Page 120: Conference
DPT Features Conference TD816 TD1232 Allows you to add a third party to a two-party conversation and make a DPT (72**) three-party conference. You can have the following combination of calls on the line: three extensions, two extensions and one CO line or one extension and two CO lines. - Page 121 DPT Features To put both parties on hold 1. Press the HOLD button. HOLD • This feature is available only when at least one party is on a CO line. Conditions • Up to six conference calls are allowed simultaneously. •...
-
Page 122: Conference, Unattended
DPT Features Conference, Unattended TD816 TD1232 When you are in a conference with two outside parties, you can disconnect DPT (72**) from a three-party conference allowing the other two parties to continue their conversation. To establish an Unattended Conference While having a conversation with two outside parties; CONF 1. -
Page 123: Data Line Security
DPT Features TD816 TD1232 Data Line Security DPT (72**) Your extension is protected against interruption from the "Call Waiting" and "Hold Recall" features. Data communication devices, such as computers and facsimiles, operate uninterrupted. Setting 1. Lift the handset or press the SP-PHONE/MONITOR button. 2. -
Page 124: Display Call Information
DPT Features Display Call Information TD816 TD1232 When you have a call with an outside party, you can see the duration of a DPT (72**) telephone call, the meter, the phone charge on the display by pressing the CO button alternately. When you make a call with an outside party;... -
Page 125: Do Not Disturb (Dnd)
DPT Features Do Not Disturb (DND) TD816 TD1232 Allows you to prevent other parties from disturbing you. Your extension DPT (72**) does not receive intercom or CO calls. Display Operation (— for KX-T7235) Setting 1. Lift the handset or press the SP-PHONE button. 2. - Page 126 DPT Features Standard Operation Setting 1. Lift the handset or press the SP-PHONE/MONITOR button. 2. Press the FWD/DND button. FWD/DND • You may dial the feature number (710) instead. 3. Dial 1. • You hear confirmation tone and then dial tone. •...
- Page 127 DPT Features Programming References • Station Programming (Section 2) Flexible Button Assignment — FWD/DND Button (System Programming — [005] (Installation Manual) can be used for this assignment.) Feature References Call Forwarding Do Not Disturb (DND) Override 3-61 DPT Features...
-
Page 128: Do Not Disturb (Dnd) Override
DPT Features Do Not Disturb (DND) Override TD816 TD1232 DPT (72**) Allows you to connect to an extension that has the "Do Not Disturb (DND)" feature set. System Programming is required. Soft Button Operation If you make an intercom call and hear Do Not Disturb (DND) tone; •... -
Page 129: Doorphone Call
DPT Features Doorphone Call TD816 TD1232 Allows you to have a conversation with a visitor at your door. You can DPT (72**) unlock the door from your telephone. Calling an extension from a doorphone 1. Press the Doorphone button. • The visitor hears a beep. •... - Page 130 DPT Features 4. Hang up or press the SP-PHONE/MONITOR button. To unlock the door while talking to the doorphone from any extension 1. Dial 5. • You hear confirmation tone. • The door is left unlocked for 5 seconds. • The display shows: Door 1 Open 2.
-
Page 131: Electronic Station Lockout
DPT Features Electronic Station Lockout TD816 TD1232 Allows you to lock your extension so that other users cannot make outgoing DPT (72**) CO calls from your extension. Locking 1. Lift the handset or press the SP-PHONE/MONITOR button. 2. Dial the feature number (77). 3. - Page 132 DPT Features Conditions • If another user tries to access a CO line from a locked extension, the user hears a reorder tone and "Restricted" is shown on the display. • The extension assigned as an operator can set and cancel this function for another extension (Remote Station Lock Control).
-
Page 133: External Feature Access
DPT Features External Feature Access TD816 TD1232 Allows you to access special features (eg. Call Waiting) offered by a host DPT (72**) PBX, Centrex or Central Office. This feature is effective only during a CO call. You can access the feature by using either the RECALL button or the feature number. -
Page 134: Full One-Touch Dialing
DPT Features Full One-Touch Dialing TD816 TD1232 The handsfree speakerphone is automatically activated. You can enter a DPT (72**) phone number or access a system feature with the touch of a button. 1. Press the flexible button assigned as the One- Touch Dialing, DSS, REDIAL, or SAVE button. -
Page 135: Handsfree Answerback
DPT Features Handsfree Answerback TD816 TD1232 Allows you to answer an intercom call without lifting the handset. DPT (72**) Setting When the SP-PHONE and the AUTO ANSWER/MUTE indicator is off; AUTO ANSWER 1. Press the AUTO ANSWER/MUTE button. MUTE • The AUTO ANSWER/MUTE indicator light turns on. Cancelling When and the AUTO ANSWER/MUTE indicator is on;... -
Page 136: Handsfree Operation
DPT Features Handsfree Operation TD816 TD1232 Allows you to connect to another party without lifting the handset. DPT (72**) 1. Press the SP-PHONE button. SP-PHONE • The microphone and the speaker are now activated and handsfree operation is available. Switching from handset to handsfree mode 1. -
Page 137: Intercom Calling
DPT Features Intercom Calling TD816 TD1232 DPT (72**) Allows you to make a call to another extension. Using the handset 1. Lift the handset. 2. Dial the extension number. 3. Start talking. extension number 4. Hang up after completion of the conversation. Using the Speakerphone 1. -
Page 138: Lockout
DPT Features 2. Press the flexible button which is assigned as the DSS button. 3. Start talking. 4. Hang up or press the SP-PHONE button after completion of the conversation. Conditions • An extension number, and a name if programmed, are shown on the display PT during an intercom call. -
Page 139: Message Waiting
DPT Features Message Waiting TD816 TD1232 Allows you to leave a message at an extension when the called party is DPT (72**) unavailable. The message waiting lamp (MESSAGE indicator) turns on when the message is received. Setting 1. Lift the handset or press the SP-PHONE/MONITOR button. 2. - Page 140 DPT Features Checking and Selecting a message by the receiver If there is any message, the message waiting lamp (MESSAGE indicator) MESSAGE light is on. When the telephone is idle and on-hook; 1. Press the MESSAGE button repeatedly until the desired message appears.
-
Page 141: Microphone Mute
DPT Features Conditions • The system supports a maximum of 128 simultaneous messages. In trying to send the 129th message, you hear reorder tone. • A flexible button on the KX-T7250 (no MESSAGE button provided) can be assigned as the MESSAGE button. -
Page 142: Night Service
DPT Features Night Service TD816 TD1232 This system supports both the NIGHT and DAY modes of operation. The DPT (72**) system operation for originating and receiving calls can be different in night and day modes. "Night Service" can only be set by the extension assigned as an operator. -
Page 143: Off-Hook Call Announcement (Ohca)
DPT Features Off-Hook Call Announcement (OHCA) TD816 TD1232 Allows you to signal to a busy extension that your call is waiting. Your DPT (72**) voice comes through the built-in speaker of the called party's telephone (KX- T7235 only). The called KX-T7235 user can connect to the two parties and carry two independent conversations using the handset. -
Page 144: One-Touch Dialing
DPT Features Conditions • OHCA is performed the same way as the "Busy Station Signaling (BSS)" feature. It depends on the telephone type used by the called party whether BSS or OHCA is activated. If the called telephone is the KX-T7235, OHCA becomes active. •... -
Page 145: Operator Call
DPT Features Operator Call TD816 TD1232 Allows you to call an operator within the system. Two extensions can be DPT (72**) assigned as Operator 1 and 2. 1. Lift the handset or press the SP-PHONE/ MONITOR button. 2. Dial the feature number (0). 3. -
Page 146: Outward Dialing, Line Access - Summary
DPT Features Outward Dialing, Line Access — SUMMARY TD816 TD1232 A CO line can be accessed in the following ways: DPT (72**) Line Access, Automatic Dial the feature number (9). Press a Loop-CO (L-CO) button. Line Access, CO Line group Dial the feature number (8) and a CO line group number (1-8). -
Page 147: Line Access, Automatic
DPT Features Programming References • Station Programming (Section 2) Flexible Button Assignment — Loop-CO (L-CO) Button, Group CO (G-CO) Button, Single-CO (S-CO) Button (System Programming — [005] (Installation Manual) can be used for this assignment.) • System Programming — Installation Manual [103] Automatic Access CO Line Group Assignment —... -
Page 148: Line Access, Co Line Group
DPT Features Line Access, CO Line Group Allows you to select an idle CO line within the designated CO line group. Through programming, CO lines can be divided into eight line groups. 1. Lift the handset or press the SP-PHONE/MONITOR button. 2. -
Page 149: Line Access, Individual
DPT Features Line Access, Individual Allows you to select the desired CO line without dialing the line access code. 1. Lift the handset or press the SP-PHONE/MONITOR button. 2. Press the CO button. • You hear dial tone. • The CO indicator light turns green. 3. -
Page 150: Paging - Summary
DPT Features Paging — SUMMARY TD816 TD1232 Allows you to make a voice announcement to several people at the same DPT (72**) time. Your message is announced over built-in speakers of proprietary telephones (PT) or external speakers (External Pagers). The paged person can answer your page from a nearby telephone. -
Page 151: Paging - All
DPT Features Paging — All Allows you to make a voice announcement to all extensions. Your message is announced over the built-in speakers of the proprietary telephones (PT) and external pagers. 1. Lift the handset or press the SP-PHONE/MONITOR button. 2. - Page 152 DPT Features To access a particular pager only 1. Lift the handset or press the SP-PHONE/MONITOR button. 2. Dial the feature number (62). 3. To select the external pager you wish to use, dial as follows: – : if you are connected to the KX-TD816 –...
-
Page 153: Paging - Group
DPT Features Paging — Group Allows you to select an extension group and make a voice announcement. You can select a maximum of 16 extension groups simultaneously. The announcement can only be heard through the built-in speakers of extensions. To access all groups simultaneously 1. -
Page 154: Paging - Answer
DPT Features Conditions • There is a maximum of 16 extension groups. "Paging — Group" to different groups can be performed simultaneously. Paging — ANSWER TD816 TD1232 Allows you to answer an announced page at any extension within the system. DPT (72**) Answering a page sent to the built-in speaker 1. -
Page 155: Paging And Transfer
DPT Features Paging and Transfer TD816 TD1232 You can transfer a call using the paging function (Paging — All, Paging — DPT (72**) External, or Paging — Group). Using Paging — All While having a conversation; TRANSFER 1. Press the TRANSFER button. •... - Page 156 DPT Features Using Paging — External: to a particular external pager While having a conversation; TRANSFER 1. Press the TRANSFER button. • You hear dial tone. • The other party is placed on hold. 2. Dial the feature number (62). 3.
- Page 157 DPT Features Using Paging — Group: to a particular extension group While having a conversation; TRANSFER 1. Press the TRANSFER button. • You hear dial tone. • The other party is placed on hold. 2. Dial the feature number (63). 3.
-
Page 158: Paralleled Telephone Connection
DPT Features Paralleled Telephone Connection TD816 TD1232 A digital proprietary telephone (DPT) can be connected in parallel with a DPT (72**) standard single line telephone (SLT). When a parallel connection is made, either telephone can be used. Setting To enable SLT ringing; 1. - Page 159 DPT Features • When the SLT is in use, the display and the indicators of the PT will show in the same way as if the PT is in use. • If you go off-hook while your paralleled telephone is in use, the call will switch over to your telephone, and vice versa.
-
Page 160: Pickup Dialing (Hot Line)
DPT Features Pickup Dialing (Hot Line) TD816 TD1232 Allows you to make an outgoing call by going off-hook. DPT (72**) Programming the phone number 1. Lift the handset or press the SP-PHONE/ MONITOR button. 2. Dial the feature number (74) and 2. 3. - Page 161 DPT Features Dialing 1. Lift the handset or press the SP-PHONE/MONITOR button. • Wait for the answer and talk. Conditions • This feature does not work when you answer an incoming call or retrieve a call on hold. • Up to sixteen digits, consisting of "0 through 9" and " ," can be stored. "#" cannot be stored.
-
Page 162: Pulse To Tone Conversion
DPT Features Pulse to Tone Conversion TD816 TD1232 Allows you to change from Pulse to Tone dialing mode so that you can DPT (72**) access special services such as computer-accessed long distance. 1. Dial the phone number (Pulse mode). 2. Dial and #. -
Page 163: Recall
DPT Features Recall TD816 TD1232 Allows you to disconnect from the current call and make another call without DPT (72**) hanging up. While hearing any tone, dialing, or talking; RECALL 1. Press the RECALL button. • You hear dial tone. 2. -
Page 164: Redial, Automatic
DPT Features Redial, Automatic TD816 TD1232 Allows you to access the last dialed or saved number while in handsfree DPT (72**) mode. 1. Press the SP-PHONE button. SP-PHONE 2. Press the REDIAL button. REDIAL Conditions • The default setting for redialing is four redials initiated at two minutes intervals. The setting is changed through System Programming. -
Page 165: Redial, Last Number
DPT Features Redial, Last Number TD816 TD1232 Allows you to automatically re-enter the last CO call number. DPT (72**) 1. Lift the handset or press the SP-PHONE/ MONITOR button. REDIAL 2. Press the REDIAL button. Conditions • Up to twenty-four digits can be stored and redialed; this does not include the CO line access code. -
Page 166: Redial, Saved Number
DPT Features Redial, Saved Number TD816 TD1232 Allows you to store a telephone number, while connected to a CO line, and DPT (72**) automatically redial the number later. The saved number can be redialed many times until another one is stored. Storing While having a conversation or hearing busy tone;... -
Page 167: Secret Dialing
DPT Features Secret Dialing TD816 TD1232 Allows you to conceal all or part(s) of a "System Speed Dialing" or "One- DPT (72**) Touch Dialing" number assigned to a flexible button on your PT and DSS console which normally appears on the display. Additionally, KX-T7235 Model Telephones are capable of Secret Dialing for "Station Speed Dialing"... -
Page 168: Station Feature Clear
DPT Features Station Feature Clear TD816 TD1232 Allows you to reset the following station features to the default settings. DPT (72**) a) Absent Message Capability b) Background Music (BGM) c) Call Forwarding d) Call Pickup Deny e) Call Waiting f) Data Line Security g) Do Not Disturb (DND) h) Message Waiting –... -
Page 169: Station Speed Dialing
DPT Features Station Speed Dialing TD816 TD1232 Allows you to store up to ten speed dial numbers at your extension. These DPT (72**) numbers are available to your extension only. Storing the phone number 1. Lift the handset or press the SP-PHONE/MONITOR button. 2. - Page 170 DPT Features Conditions • You can store an extension number, a telephone number, or a feature number of up to sixteen digits. • To store the telephone number of an outside party, the line access code (9 or 81 through 88) must be stored as the leading digit.
-
Page 171: System Speed Dialing
DPT Features System Speed Dialing TD816 TD1232 Allows you to make a call using speed dial numbers previously programmed. DPT (72**) This system supports five hundred speed dial numbers which are available to all extension users. 1. Lift the handset or press the SP-PHONE/MONITOR button. •... -
Page 172: Timed Reminder
DPT Features Timed Reminder TD816 TD1232 Allows you to set your extension to sound an alarm once or everyday at the DPT (72**) preset time. Setting 1. Lift the handset or press the SP-PHONE/MONITOR button. 2. Dial the feature number (76) and 1. 3. - Page 173 DPT Features Checking the setting time (with a display PT only) 1. Lift the handset or press the SP-PHONE button. 2. Dial the feature number (76) and 2. <Example> If "10:10 AM" has been set, the display shows: — only one time Alarm 10:10AM 10:10AM *...
-
Page 174: Toll Restriction Override
DPT Features Toll Restriction Override TD816 TD1232 There are two types of toll restriction override: DPT (72**) • Toll Restriction Override by Account Code Entry • Toll Restriction Override for System Speed Dialing Toll Restriction Override by Account Code Entry Allows you to temporarily override toll restriction and make a toll call from a toll-restricted telephone. -
Page 175: Toll Restriction Override For System Speed Dialing
DPT Features Toll Restriction Override for System Speed Dialing Allows you to cancel toll restriction on "System Speed Dialing." Normally, calls originated by "System Speed Dialing" are restricted depending on the extension’s toll restriction level. Once this option is set, it permits all extension users to make "System Speed Dialing" calls with no restriction. -
Page 176: Trunk (Co Line) Answer From Any Station (Tafas)
DPT Features Trunk (CO Line) Answer From Any Station TD816 TD1232 (TAFAS) DPT (72**) Allows you to answer an incoming CO call, paged through an external pager, from any extension. While hearing a tone from the external pager; 1. Lift the handset or press the SP-PHONE/MONITOR button. 2. -
Page 177: Voice Mail Integration
DPT Features Voice Mail Integration TD816 TD1232 Allows you to have your calls forwarded to your Voice Processing System DPT (72**) mailbox. Setting Call Forwarding destination to Voice Mail 1. Lift the handset or press the SP-PHONE/MONITOR button. 2. Press the FWD/DND button. FWD/DND •... - Page 178 DPT Features Using no MESSAGE button (— with manual dialing) 1. Lift the handset or press the SP-PHONE/MONITOR button. 2. Dial the extension number of the Voice Mail. • You can listen to the stored message by following the Voice Mail guidance.
-
Page 179: Voice Mail Transfer
DPT Features Voice Mail Transfer TD816 TD1232 You can transfer CO calls to the Voice Processing System so that the callers DPT (72**) can leave their messages in the mailbox of the desired extension. When you forward a CO call to the designated extension; —... -
Page 180: Operator Service Features
Operator Service Features The system supports up to two operators. Any extension can be appointed as an operator. System Programming is necessary to appoint operators. The extension assigned as an operator only has the ability to perform the following features: 1) Background Music (BGM) —... - Page 181 Operator Service Features 5. Press the Extrnl BGM On/Off (F3) button. • Pressing this button alternates between the On and Off modes. Extrn BGM On/Off • The display shows either of the following depending on whether the BGM is on or off: External BGM On External BGM Off •...
-
Page 182: Co Incoming Call Information Log Lock Clear
Operator Service Features CO Incoming Call Information Log Lock Clear TD816 TD1232 The operator can clear the "CO Incoming Call Information Log Lock" feature DPT (72**) on any extension. <Operator only> Programming 1. Press the PROGRAM button. PROGRAM 2. Dial 99. •... -
Page 183: Night Service On/Off
Operator Service Features Night Service On/Off TD816 TD1232 This system supports both the NIGHT and DAY modes of operation. System DPT (72**) operation for originating and receiving calls can be different in day and night modes. Toll restriction calls can be programmed to prevent unauthorized toll <Operator only>... - Page 184 Operator Service Features Standard Operation Switching modes 1. Lift the handset or press the SP-PHONE/MONITOR button. 2. Dial the feature number (78). 3. Dial 1 or 0. -1 : from Day mode to Night mode -0 : from Night mode to Day mode •...
- Page 185 Operator Service Features Feature References CO Line Connection Assignment — Outgoing (→ see Installation Manual) Direct In Lines (DIL) (→ see Installation Manual) Doorphone Call Intercept Routing (→ see Installation Manual) Ringing, Delayed (→ see Installation Manual) Toll Restriction (→ see Installation Manual) 3-119 DPT Features...
-
Page 186: Remote Station Lock Control
Operator Service Features Remote Station Lock Control TD816 TD1232 DPT (72**) The operator can set or clear the "Electronic Station Lockout" feature on any extension. <Operator only> Programming 1. Press the PROGRAM button. PROGRAM 2. Dial 99. • You enter into the Station Programming mode. •... -
Page 187: Hotel Application
Operator Service Features Hotel Application TD816 TD1232 Allows the operator to handle the front/ operator services such as check-in/ DPT (72**) check-out, timed reminder (wake-up call) with the KX-T7235. Hotel application must be enabled by System Programming. <Operator only> Check-In / Check-Out The check-in mode activates the change to primary COS and also clears the charge counter automatically. - Page 188 Operator Service Features Check-Out 1. Press the Hotel (F10) button. Hotel 2. Press the Check-Out (F2) button. • DSS indicator in check-in mode turns red. check in check out 3. Dial the extension number or press the DSS button that you want to check-out.
-
Page 189: Timed Reminder, Remote (Wake-Up Call)
Operator Service Features Conditions • You must assign the Hotel Application feature through System Programming. • While an extension is in check-in mode, you cannot enter check-in mode again on the same extension. • The LCD displays the telephone including the margin. You can enter the margin through System Programming. - Page 190 Operator Service Features 5. Dial 0 to enter AM, or dial 1 to enter PM. 6. Dial 0 for a one-time alarm setting* or dial 1 for a daily alarm setting* You will hear an alarm ringing at the preset time and then the setting is cleared. You will hear an alarm ringing at the preset time every day until the setting is changed or cancelled.
- Page 191 Operator Service Features 3. Dial the desired extension number or DSS button on which you have set the Timed Reminder. <Example> If "10:10" has been set, the display shows: extension number — only one time Alarm 10:10AM — every day Alarm 10:10AM* 4.
-
Page 192: Special Display Features (- For Kx-T7235)
Special Display Features (— for KX-T7235) The KX-T7235 is provided with a large display that allows you to make calls or to access system facilities with ease. The display prompts you with information related to the desired feature. Examples of these special functions are: 1.) CO Outgoing Call Log 2.) Extension Dialing 3.) Station Speed Dialing... - Page 193 Special Display Features (— for KX-T7235) There are three "Features" displays from the Initial There are two further displays to operate the "Call Display. Forwarding " and the "Do Not Disturb (DND)" features. a) The first display a) The first display —...
-
Page 194: Co Outgoing Call Log
Special Display Features (— for KX-T7235) CO Outgoing Call Log Extension Dialing Allows you to redial one of your last five CO Allows you to call another extension by selecting calls. the name. 1. Press the Call Log (F5) button. 1. -
Page 195: Station Speed Dialing
Call Log CONT RING CONT RING 2. Press the desired Fx button. 2. Press the desired Fx button. <Example> To select Panasonic, press the F7 <Example> To select J, press the F5 button. button. OPQR KME-soft Jim Kopp Panasonic Ronald... -
Page 196: System Feature Access Menu
Special Display Features (— for KX-T7235) System Feature Access Menu Absent Message Capability Allows you to set or cancel Absent Message (1-9) with the display function keys. Setting (On) Cancelling (Off) 1. Press the Features (F4) button. 1. Press the Features (F4) button. 1 Jan 3:00PM 1 Jan 3:00PM Extension... -
Page 197: Answering, Paging - Group
Special Display Features (— for KX-T7235) System Feature Access Menu (contd.) Answering, Answering, Paging — External Paging — Group Allows you to answer an External Page with the Allows you to answer a Group Page with the display function keys. display function keys. -
Page 198: Call Pickup, Group
Special Display Features (— for KX-T7235) System Feature Access Menu (contd.) Call Park Retrieving (Operator only) 1. Press the Features (F4) button. Allows Operator 1 to execute the Call Park 2. Press the NEXT (S3) button twice. feature with the display function keys. 3. -
Page 199: Message Waiting
Special Display Features (— for KX-T7235) System Feature Access Menu (contd.) Message Waiting Paging — External Allows you to set or cancel the Message Waiting Allows you to execute the Paging — External feature with the display function keys. feature with the display function keys. Setting (On) 1. -
Page 200: Paging - Group
Special Display Features (— for KX-T7235) System Feature Access Menu (contd.) Paging — Group Paralleled Telephone Connec- tion Allows you to execute the Paging — Group feature with the display function keys. Allows you to set Paralleled Telephone Connection on or off with the display function 1. -
Page 201: Dss Console Features
Section 4 DSS Console Features (KX-T7240) Contents Configuration ..............4-2 Location of Controls............4-3 DSS Console Features ............4-4 Station Programming ............4-4 Direct Station Dialing ............4-7 One-Touch Dialing ............4-7 One-Touch Access for System Features ......4-8 Call Transfer ..............4-8 <Note> All illustrations of the DPT (paired telephone) used in these operating instructions are KX-T7235’s. -
Page 202: Configuration
The DSS Console must be connected to the Panasonic Digital Super Hybrid System and paired with a DPT. System Programming is required to designate the jack numbers of the paired DSS Console and DPT. -
Page 203: Location Of Controls
Configuration Location of Controls DSS Buttons with Busy Lamp Field (BLF) (01 through 32): Used to access extensions. The BLF indicates the busy or idle status of each extension in the system. These buttons can also be changed to the other function buttons. -
Page 204: Dss Console Features
DSS Console Features Station Programming PF buttons are provided with no default setting, while each DSS button has a default setting as follows: DSS 01 - 32 : extension number 201 - 232. To meet your various needs, DSS buttons can be changed to the other function buttons. Every DSS or PF button can be assigned to another extension number, telephone number or feature number through Station Programming. -
Page 205: One-Touch Access Assignment For System Features
DSS Console Features 2. Dial 2 on the paired telephone. 3. Enter the desired number on the paired telephone. • When you assign the outside phone number, you must dial the line access code first. desired number 4. Press the STORE button on the paired telephone. •... - Page 206 DSS Console Features To correct an error while programming 1. Press the CLR (S2) button or the TRANSFER (CLEAR) button on the paired telephone and complete programming. (The TRANSFER button becomes the CLEAR button when using the overlay.) TRANSFER To erase after programming 1.
-
Page 207: Direct Station Dialing
DSS Console Features • When the STORE button is pressed after programming, you will hear beep tones as follows: – One beep : The entry is changed from the one that was previously stored. – Two beeps : The entry is the same as what was previously stored. Programming References •... -
Page 208: One-Touch Access For System Features
DSS Console Features One-Touch Access for System Features You can access system features by pressing a programmed DSS or PF button. 1. Lift the handset or press the SP-PHONE/MONITOR button on the paired telephone. 2. Press the desired DSS or PF button on the console. Call Transfer A call can be transferred to an extension by using the DSS button. - Page 209 Section 5 SLT Features Contents Basic Operation ..............5-2 Making Calls ..............5-2 Receiving Calls ...............5-2 SLT Features (A - Z) ............5-4 <Note> If you use loop disconnect (LD) type single line telephone: It is not possible to have access to the features which have " " or "#" in their feature numbers.
- Page 210 Basic Operation Making Calls Intercom Calling Allows you to make a call to another extension. 1. Lift the handset. 2. Dial the extension number. extension number Outward Dialing Allows you to make a call to an outside party using one of the following line access methods: 1) Line Access, Automatic 2) Line Access, CO Line Group 1.
- Page 211 Basic Operation Receiving Calls 1. Lift the handset. SLT Features...
- Page 212 SLT Features Absent Message Capability Once this option is set, a message on the display of the calling extension provides the reason for your absence. Only callers with display telephones can receive the message. Nine messages are available for every extension user. There are six pre-programmed default messages.
- Page 213 SLT Features Message 2. "Gone Home" 1. Lift the handset. 2. Dial the feature number (750) and 2. • You hear confirmation tone and then dial tone. 3. Hang up. Message 3. "At Ext %%%" (extension number) 1. Lift the handset. 2.
- Page 214 SLT Features 4. Hang up. Message 5. "Out until %% / %%" (month/day) 1. Lift the handset. 2. Dial the feature number (750) and 5. 3. Enter the month (01 through 12) and the day (01 through 31). • You hear confirmation tone and then dial tone. 4.
- Page 215 SLT Features 2. Dial the feature number (750) and a desired message number (7 through 9). 3. Enter the parameters (extension number, time, month/day, etc.), if (X: 7 through 9) required. • You hear confirmation tone and then dial tone. 4.
- Page 216 SLT Features Account Code Entry An Account Code is used to identify incoming and outgoing CO calls for accounting and billing purposes. The account code is appended to the "Station Message Detail Recording (SMDR)" call record. For incoming CO calls, account codes are not required. For outgoing CO calls, account codes are often required.
- Page 217 SLT Features In "Option" mode • You can enter any account code when needed. It is possible to record a calling or called party's account code in the SMDR within fifteen seconds after the other party hangs up. General • It is not possible to enter an account code while having a conversation or hearing reorder tone.
- Page 218 SLT Features Alternate Calling — Ring / Voice Allows you to select ring or voice calling when making an intercom call. In Ring-Calling mode, you can call the other party with a ring tone. While in Voice-Calling mode, you can talk to the other party immediately after a confirmation tone.
- Page 219 SLT Features Automatic Callback Busy (Camp-On) When the selected CO line or extension you have dialed is busy, dial the camp-on code and hang up. Your telephone will ring when the called party is idle. Setting If you make a call and hear busy tone; 1.
- Page 220 SLT Features Busy Station Signaling (BSS) The busy extension that you called hears three beeps and knows that you are waiting. If you make an intercom call and hear busy tone; 1. Dial 2. • Wait for an answer and talk. Conditions •...
- Page 221 SLT Features Call Forwarding — SUMMARY Automatically transfers incoming calls to another extension or to an external destination. The following types are available: Type Description Call Forwarding All incoming calls are forwarded to another extension. — All Calls Call Forwarding All incoming calls are forwarded to another extension when —...
- Page 222 SLT Features • Two extensions can set each other as the destination extension. In this case, the intercom call to the other party while he/she is absent will not be forwarded back to the original extension. • Confirmation tone 2 (two beeps) is sent when the previously programmed data is the same as the new data.
- Page 223 SLT Features Call Forwarding — Busy You can forward calls to another extension when your extension is busy. Setting 1. Lift the handset. 2. Dial the feature number (710) and 3. 3. Dial the extension number to which you wish to forward the call. •...
- Page 224 SLT Features Programming References • System Programming — Installation Manual [202] Call Forwarding — No Answer Time Call Forwarding — Busy / No Answer You can forward your calls to another extension when your extension is busy or when you do not answer the telephone within a pre-determined time.
- Page 225 SLT Features Call Forwarding — to CO Line You can forward your calls to a CO line. The telephone number of the outside party must be pre-programmed. Setting 1. Lift the handset. 2. Dial the feature number (710) and 6. 3.
- Page 226 SLT Features Call Forwarding — Follow Me You can set a "Call Forwarding" feature from the destination extension. This is useful if you forget to set "Call Forwarding — All Calls" before you leave your desk. Setting – at the destination extension; 1.
- Page 227 SLT Features Call Forwarding — CANCEL There are two cancelling methods for "Call Forwarding." The cancellation depends on the Call Forwarding type that is assigned. Cancelling Call Forwarding at your (original) extension 1. Lift the handset. 2. Dial the feature number (710) and 0. •...
- Page 228 SLT Features Call Hold Allows you to place an intercom or a CO call on hold. To place a call on hold While having a conversation; 1. Press the Register Recall button. 2. Dial the feature number (50). • You hear confirmation tone and then dial tone. •...
- Page 229 SLT Features Call Hold Retrieve Allows you to retrieve a call that has been placed on hold by another extension. Retrieving a CO call on hold – at another extension; 1. Lift the handset. 2. Dial the feature number (53). 3.
- Page 230 SLT Features Call Park Allows you to place a held call into a system parking area. You are released from the parked call to perform other operations. The parked call can be retrieved by any extension user. While having a conversation; 1.
- Page 231 SLT Features Programming References • System Programming — Installation Manual [201] Transfer Recall Time [990] System Additional Information, Field (16) Call Pickup, CO Line Allows you to answer an incoming CO call that is ringing at another extension. 1. Lift the handset. 2.
- Page 232 SLT Features Call Pickup, Directed Allows you to answer an incoming call ringing at any other extension. 1. Lift the handset. 2. Dial the feature number (41). 3. Dial the extension number at which a call is ringing. • You hear confirmation tone (optional). •...
- Page 233 SLT Features Call Pickup, Group Allows you to answer a call that is ringing at another telephone within your extension group. 1. Lift the handset. 2. Dial the feature number (40). • You hear confirmation tone (optional). • You can talk to the caller. Conditions •...
- Page 234 SLT Features Call Pickup Deny Allows you to prevent another extension from picking up your calls with the "Call Pickup" features. Setting 1. Lift the handset. 2. Dial the feature number (720) and 1. • You hear confirmation tone and then dial tone. 3.
- Page 235 SLT Features Call Splitting Allows you to have two callers on a line and alternate between them. If a call comes in while you are already on the line, you can place the current call on hold and have a conversation with the other party.
- Page 236 SLT Features Call Transfer — to Extension Allows you to perform a Screened or Unscreened Call Transfer to another extension. Screened Call Transfer While having a conversation; 1. Press the Register Recall button. • The other party is placed on hold. •...
- Page 237 SLT Features • If the destination extension does not answer the call within twelve rings (default), the call returns to you as a "Transfer Recall" call. • If there is no answer for thirty minutes after the "Transfer Recall" starts, the line is disconnected.
- Page 238 SLT Features Call Waiting While in conversation, a Call Waiting tone signals that there is a call waiting. You can respond to the waiting call by disconnecting from the first call or by placing the first call on hold. Setting 1.
- Page 239 SLT Features To talk to the new caller by holding the current call While hearing Call Waiting tone; 1. Press the Register Recall button. 2. Dial the feature number (50). • The current call is placed on hold. • You hear dial tone. 3.
- Page 240 SLT Features Conference Allows you to add a third party to a two-party conversation and make a three-party conference. You can have the following combination of calls on the line: three extensions, two extensions and one CO line or one extension and two CO lines. To establish a conference While having a two-party conversation;...
- Page 241 SLT Features Conditions • You can return to the original party before the third party answers by pressing the Register Recall button. • Up to six conference calls are allowed simultaneously. • When a two-party call is changed to a three-party call and vice versa, a confirmation tone is sent to all three parties.
- Page 242 SLT Features Data Line Security Your extension is protected against interruption from the "Call Waiting" and "Hold Recall" features. Data communication devices, such as computers and facsimiles, operate uninterrupted. Setting 1. Lift the handset. 2. Dial the feature number (730) and 1. •...
- Page 243 SLT Features Do Not Disturb (DND) Allows you to prevent other parties from disturbing you. Your extension does not receive intercom or CO calls. Setting 1. Lift the handset. 2. Dial the feature number (710) and 1. • You hear confirmation tone and then dial tone. 3.
- Page 244 SLT Features Do Not Disturb (DND) Override Allows you to connect to an extension that has the "Do Not Disturb (DND)" feature set. System Programming is required. If you make an intercom call and hear Do Not Disturb (DND) tone; 1.
- Page 245 SLT Features Doorphone Call Allows you to have a conversation with a visitor at your door. You can unlock the door from your telephone. Calling an extension from a doorphone 1. Press the Doorphone button. • The visitor hears a beep. •...
- Page 246 SLT Features 3. To select a door opener, dial as follows: – 1 or 2 : if you are connected to the KX-TD816 – 1 through 4 : if you are connected to the KX-TD1232 • You hear confirmation tone. door opener number •...
- Page 247 SLT Features Electronic Station Lockout Allows you to lock your extension so that other users cannot make outgoing CO calls from your extension. Locking 1. Lift the handset. 2. Dial the feature number (77). 3. Dial the lock code (000 through 999). 4.
- Page 248 SLT Features Conditions • If another user tries to access a CO line from a locked extension, the user hears a reorder tone. • The extension assigned as an operator can set and cancel this function for another extension (Remote Station Lock Control). •...
- Page 249 SLT Features External Feature Access Allows you to access special features (eg. Call Waiting) offered by a host PBX, Centrex or Central Office. This feature is effective only during a CO call. While having a conversation with an outside party; 1.
- Page 250 SLT Features Intercom Calling Allows you to make a call to another extension. 1. Lift the handset. 2. Dial the extension number. 3. Start talking. extension number 4. Hang up after completion of the conversation. Conditions • After dialing an extension number, you will hear one of the following tones: Ringback tone : Indicates that the destination extension is being called.
- Page 251 SLT Features Message Waiting Allows you to leave a message for another extension. If the destination extension is provided with a message waiting lamp, it will be lit. Even if a lamp is not provided, the extension will provide a special dial tone (dial tone 4*) to indicate that a message has been received. Setting 1.
- Page 252 SLT Features Calling back the message sender 1. Lift the handset. • You hear dial tone 4 2. Dial the feature number (70) and 2. • If you have more than one message at your extension, the line is connected to the first message sender. 3.
- Page 253 SLT Features Night Service This system supports both the NIGHT and DAY modes of operation. The system operation for originating and receiving calls can be different in night and day modes. "Night Service" can only be set by the extension assigned as an operator. Conditions •...
- Page 254 SLT Features Operator Call Allows you to call an operator within the system. Two extensions can be assigned as Operator 1 and 2. 1. Lift the handset. 2. Dial the feature number (0). 3. Dial 0 to call Operator 1, or dial 1 to call Operator 2. Conditions •...
- Page 255 SLT Features Outward Dialling, Line Access — SUMMARY A CO line can be accessed in the following ways: Line Access, Automatic Dial the feature number (9). Line Access, CO Line group Dial the feature number (8) and a CO line group number (1-8). Conditions •...
- Page 256 SLT Features Line Access, Automatic Allows you to select an available CO line automatically. 1. Lift the handset. 2. Dial the feature number (9). • You hear dial tone. 3. Dial the phone number. 4. Start talking. phone number 5. Hang up after completion of the conversation. Line Access, CO Line Group Allows you to select an idle CO line within the designated CO line group.
- Page 257 SLT Features 4. Dial the phone number. 5. Start talking. phone number 6. Hang up after completion of the conversation. 5-49 SLT Features...
- Page 258 SLT Features Paging — SUMMARY Allows you to make a voice announcement to several people at the same time. Your message is announced over built-in speakers of proprietary telephones (PT) or external speakers (External Pagers). The paged person can answer your page from a nearby telephone. You cannot be paged at a single line telephone (SLT), but you can answer the page, which is announced over a nearby PT or external pagers, from your SLT.
- Page 259 SLT Features Paging — All Allows you to make a voice announcement to all extensions. Your message is announced over the built-in speakers of the proprietary telephones (PT) and external pagers. 1. Lift the handset. 2. Dial the feature number (62 or 63) and •...
- Page 260 SLT Features 4. Wait for an answer and talk. To access a particular pager only 1. Lift the handset. 2. Dial the feature number (62). 3. To select the external pager you wish to use, dial as follows: – : if you are connected to the KX-TD816 –...
- Page 261 SLT Features Paging — Group Allows you to select an extension group and make a voice announcement. You can select a maximum of 16 extension groups simultaneously. The announcement can only be heard through the built-in speakers of extensions. To access all groups simultaneously 1.
- Page 262 SLT Features 5. Wait for an answer and talk. Conditions • There is a maximum of 16 extension groups. "Paging — Group" to different groups can be performed simultaneously. 5-54 SLT Features...
- Page 263 SLT Features Paging — ANSWER Allows you to answer an announced page at any extension within the system. Answering a page sent to the built-in speaker 1. Lift the handset. 2. Dial the feature number (43). • You hear confirmation tone (optional). •...
- Page 264 SLT Features Paging and Transfer You can transfer a call using the paging function (Paging — All, Paging — External, or Paging — Group). Using Paging — All While having a conversation; 1. Press the Register Recall button. • You hear dial tone. •...
- Page 265 SLT Features 3. Make the announcement after hearing confirmation tone (optional). 4. Wait for the other party to answer. • You hear confirmation tone (optional). 5. Hang up. • The held party and the paged extension are connected and can start a conversation.
- Page 266 SLT Features Using Paging — Group: to all extension groups While having a conversation; 1. Press the Register Recall button. • You hear dial tone. • The other party is placed on hold. 2. Dial the feature number (63) and 00. 3.
- Page 267 SLT Features 6. Hang up. • The held party and the paged extension are connected and can start a conversation. Conditions • Confirmation tone is audible when the page is answered. Eliminating the tone is programmable. Programming References • System Programming — Installation Manual [990] System Additional Information, Field (16) Paralleled Telephone Connection A proprietary telephone (PT) can be connected in parallel with a single line telephone (SLT).
- Page 268 SLT Features Pickup Dialing (Hot Line) Allows you to make an outgoing call by lifting the handset. Programming the phone number 1. Lift the handset. 2. Dial the feature number (74) and 2. 3. Dial the phone number and #. •...
- Page 269 SLT Features 2. Dial the feature number (74) and 0. • You hear confirmation tone and then dial tone. 3. Hang up. Dialing 1. Lift the handset. • Wait for the answer and talk. Conditions • This feature does not work when you answer an incoming call or retrieve a call on hold. •...
- Page 270 SLT Features SLT Features Pulse to Tone Conversion Allows you to change from Pulse to Tone dialing mode so that you can access special services such as computer-accessed long distance. 1. Dial the phone number (Pulse mode). 2. Dial and #. phone number 3.
- Page 271 SLT Features Station Feature Clear Allows you to reset the following station features to the default settings. a) Absent Message Capability b) Call Forwarding c) Call Pickup Deny d) Call Waiting e) Data Line Security f) Do Not Disturb (DND) g) Message Waiting –...
- Page 272 SLT Features Station Speed Dialing Allows you to store up to ten speed dial numbers at your extension. These numbers are available to your extension only. Storing the phone number 1. Lift the handset. 2. Dial the feature number (60). 3.
- Page 273 SLT Features Conditions • You can store an extension number, a telephone number, or a feature number of up to sixteen digits. • To store the telephone number of an outside party, the line access code (9 or 81 through 88) must be stored as the leading digit.
- Page 274 SLT Features Timed Reminder Allows you to set your extension to sound an alarm once or every day at the preset time. Setting 1. Lift the handset. 2. Dial the feature number (76) and 1. 3. Enter the hour (01 through 12) and the minute (00 through 59). 4.
- Page 275 SLT Features Stopping the alarm ringing 1. Lift the handset. Conditions • The system clock must be set before the alarm is set. • The alarm ringing continues for thirty seconds. • If you receive an incoming call during the alarm, ringing starts after the alarm stops. •...
- Page 276 SLT Features Toll Restriction Override There are two types of toll restriction override: • Toll Restriction Override by Account Code Entry • Toll Restriction Override for System Speed Dialing Toll Restriction Override by Account Code Entry Allows you to temporarily override toll restriction and make a toll call from a toll-restricted telephone.
- Page 277 SLT Features Programming References • System Programming — Installation Manual [300] TRS Override for System Speed Dialing Feature References System Speed Dialing Toll Restriction (→ see Installation Manual) 5-69 SLT Features...
- Page 278 SLT Features Trunk (CO Line) Answer From Any Station (TAFAS) Allows you to answer an incoming CO call, paged through an external pager, from any extension. While hearing a tone from the external pager; 1. Lift the handset. 2. Dial the feature number (42). 3.
- Page 279 SLT Features Voice Mail Integration Allows you to have your calls forwarded to your Voice Processing System mailbox. Setting Call Forwarding destination to Voice Mail 1. Lift the handset. 2. Dial the feature number (710) and the Call Forwarding number (2 through 5).
- Page 280 SLT Features Conditions • CO callers can leave their messages in your mailbox. When an incoming CO call arrives, the operator answers the call and forwards it to your extension. And... — If you set a "Call Forwarding" function whose destination is the Voice Mail; The call will be forwarded to the Voice Mail automatically.
- Page 281 Section 6 Quick Reference Contents Basic Operation..............6-2 Station Programming ............6-2 DPT Features ..............6-5 Operator Service Features ..........6-15 Special Display Features ..........6-16 DSS Console Features ............6-17 SLT Features ..............6-18...
-
Page 282: Basic Operation
Quick Reference This list is divided into the following seven sections. Refer to each section as needed. 1.) Basic Operation 2.) Station Programming 3.) DPT Features 4.) Operator Service Features 5.) Special Display Features (— for KX-T7235 users) 6.) DSS Console Features 7.) SLT Features When setting "Idle Line Preference —... - Page 283 Quick Reference — CO Line Charge Fee Reference • Press REDIAL (PREV) or HOLD (END) button. • Enter into programming mode. • Exit from programming mode. • Dial 8. • Enter ID code. • Dial 2 + CO line number as follows. —...
- Page 284 Quick Reference — Acccount Code Set • Press STORE button. • Exit from programming mode. • Enter into programming mode. • Dial 8. — Loop–CO (L-CO) Button • Enter ID code. • Enter into programming mode. • Dial 8 + location number (01 through 40). •...
- Page 285 Quick Reference Full One-Touch Dialing Assignment Preferred Line Assignment • Enter into programming mode. — Outgoing • Dial 3. • Enter into programming mode. • Dial 1 or 2. • Dial 1. - 1: Off mode • Dial 1, 2, 3 + CO line number, or press IN- - 2: On mode TERCOM button.
- Page 286 Quick Reference Station Speed Dialing Number / DPT Features Name Assignment (KX-T7235 only) — To store a number Absent Message Capability • Enter into programming mode. Setting • Press a Function button (F1 through F10). Message 1. "Will Return Soon" •...
- Page 287 Quick Reference Cancelling Alternate Calling — Ring/Voice • Off-hook. Alternating • Dial 7500. — If the called extension is set to Ring- • On-hook. Calling mode; • Dial , when hearing ringback tone. — Confirmation tone is audible. - When using the KX-T7235; (Voice-Calling mode is active.) Setting •...
- Page 288 Quick Reference Answering a CO recall — Busy / No Answer • Off-hook. • Off-hook. • Dial the phone number. • Press FWD/DND button. • Dial 5 + extension number. • On-hook. Background Music (BGM) Setting / Cancelling — to CO Line - Be sure the telephone is on-hook.
- Page 289 Quick Reference — Busy — At the destination extension — "Follow Me (All Calls)" only • Off-hook. • Off-hook. • Press FWD/DND button. • Press FWD/DND button. • Press FWD–Busy (F4) button. • Press NEXT (S3) button. • Dial the extension number. •...
- Page 290 Quick Reference Call Pickup Deny - When using the KX-T7235 (Operator only); Setting / Cancelling While having a conversation; • Off-hook. • Press Features (F4) button. • Dial 720. • Press NEXT (S3) button twice to go to the • Dial 1 or 0. exclusive list.
- Page 291 Quick Reference Call Transfer — to Extension CO Incoming Call Information Log Lock — Screened Call Transfer Locking While having a conversation; • Press TRANSFER button. • Off-hook. • Dial the extension number. • Dial 57 + lock code (000 through 999). •...
- Page 292 Quick Reference Data Line Security Doorphone Call Setting / Cancelling Answering a doorphone call • Off-hook. • Off-hook. • Dial 730. Calling a doorphone • Dial 1 or 0. • Off-hook. - 1 : for setting • Dial 61. - 0 : for cancelling •...
- Page 293 Quick Reference - When using the KX-T7235; External Feature Access • Press Features (F4) button. While having a conversation; • Press NEXT (S3) button to go to the next list. • Press RECALL button. • Press Message Off (F3) button. (OR press TRANSFER button + dial 64.) •...
- Page 294 Quick Reference - When using the KX-T7235; Operator Call • Press Features (F4) button. • Off-hook. • Press External Paging (F1) button. • Dial 0. • Dial 0. • Dial 0 or 1. - 0 : Operator 1 To access a particular pager only - 1 : Operator 2 •...
- Page 295 Quick Reference Paging – ANSWER Pickup Dialing (Hot Line) • Dial 42 + external pager number, or 43. Programming the phone number - 42 : To answer a page sent to the external • Off-hook. pager/TAFAS • Dial 742 + phone number + #. - 43 : To answer a page sent to the built-in —...
- Page 296 Quick Reference Redial System Speed Dialing • Off-hook. — Automatic • Press AUTO DIAL/STORE button. • Off-hook with SP-PHONE button. • Dial the system speed dial number (000 • Press REDIAL button. through 499). — Last Number • Off-hook. - When using the KX-T7235; •...
- Page 297 Quick Reference Voice Mail Integration Operator Service Features Setting Call Forwarding destination to Voice The following features can be performed by the Mail extension assigned as an operator. • Off-hook. • Press FWD/DND button. Background Music (BGM) – External • Dial the Call Forwarding number (2 through Setting / Cancelling - 2 : Call Forwarding –...
- Page 298 Quick Reference — Check-Out - When using the KX-T7235; • Press Features (F4) button. • Press Hotel (F10) button. • Press NEXT (S3) button twice to go to the • Press Check-Out (F2) button. exclusive list. • Press extension number or DSS button. •...
- Page 299 Quick Reference CO Outgoing Call Log Special Display Features 1. Press Call Log [F5]. Special Features — KX-T7235 2. Press the desired [Fx] button. <Example> To select 111, press [F2]. — CO Outgoing Call Log / Extension Dialing / Station Speed Dialing / System Speed Dialing / 1234567890 System Feature Access Menu 0987654...
- Page 300 1. Press STA Speed [F8]. 1. Press Features [F4]. 2. Press the desired [Fx] button. 2. Press the desired [Fx] button. <Example> To select Panasonic, press [F7]. <Example> To select External Paging, press [F1] and dial additional number (0 - 4). KME-soft External Paging (→0-4)
- Page 301 Quick Reference DSS Console Features One-Touch Access for System Fea- tures The DSS Console must always be paired with a PT • Off-hook at the paired telephone. for proper operation. System programming is • Press the desired DSS or PF button on the required.
-
Page 302: Slt Features
Quick Reference Message 7, 8, and 9. (Programmable) SLT Features • Off-hook. • Dial 7507 through 7509. If the "Pickup Dialing (Hot Line)" feature is - 7507 : for Message 7 enabled, any dialing must be done prior to the - 7508 : for Message 8 Pickup Dial Waiting Time (default: 1sec.). - Page 303 Quick Reference — At the destination extension — "Follow Busy Station Signaling (BSS) Me (All Calls)" only While hearing busy tone; • Off-hook. • Dial 2. • Dial 7108 + your extension number. • Wait for an answer. • On-hook. Call Forwarding Call Hold Setting...
- Page 304 Quick Reference Call Pickup Call Waiting — CO Line Setting / Cancelling • Off-hook. • Off-hook. • Dial 4 . • Dial 731. • Dial 1 or 0. — Directed - 1 : for setting • Off-hook. - 0 : for cancelling •...
- Page 305 Quick Reference Doorphone Call External Feature Access While having a conversation; Answering a doorphone call • Press Register Recall button. • Off-hook. • Dial 64 + code for desired service. Calling a doorphone • Off-hook. Intercom Calling • Dial 61. •...
- Page 306 Quick Reference To access a particular group of extensions Outward Dialing • Off-hook. — Line Access, Automatic • Dial 63 + extension group number (01 through • Off-hook. 16). • Dial 9 + phone number. — Confirmation tone is audible (optional). —...
- Page 307 Quick Reference • Dial 0 or 1. Pulse to Tone Conversion - 0 : for a one time setting • Dial the phone number (Pulse mode). - 1 : for a daily setting • Dial + #. • On-hook. • Dial the phone number (Tone mode). Cancelling Redial •Off-hook.
- Page 308 Quick Reference 6-28 Quick Reference...
- Page 309 Section 7 Appendix Contents Display Examples ..............7-2 Feature Number List ..............7-12 Tone List ..................7-15 Troubleshooting ..............7-17...
- Page 310 Appendix Display Examples Examples • Factory setting. Set Time & Date <Blinking> — Shown on the manager's display only. • The current date and time are not set (default). 12:00AM • The current date and time are not set (default). Jan ’94 —...
- Page 311 Appendix → 456: (14) • Destination extension is set to "Do Not Disturb (DND)" after the call is transferred. (15) • Confirm key programming on the Account button. Account (16) • Complete to set or called by "Timed Reminder." Alarm 10:15AM •...
- Page 312 Appendix (27) • The charge of CO line 01 is displayed. CO01 :$00000.23 (28) • Cancel "Call Pickup Deny." C.Pickup Allow (29) • Complete to set "Call Pickup Deny." C.Pickup Deny (30) • Complete to set "Call Park." Call Parked at 1 (31) •...
- Page 313 Appendix • The selected CO line is busy. (42) CO in Use • The desired CO line is restricted (not assigned). (43) CO Not Assigned • Ringer Volume is off. (44) CONT RNGOFF BGM • Display Contrast — Adjustment. (45) Contrast: *** •...
- Page 314 Appendix (57) • Start BGM through external pager. External BGM On — "Background Music (BGM) — External" (58) • Access to "Paging — External" (- to all external pagers). Extrnl Page All (59) • Access to "Paging — External" (- to a specific external pager). Extrnl Page (60) •...
- Page 315 Appendix (72) Headset: ** • Volume Control — headset on headset mode. (73) • Absent Message 6. In a Meeting (74) • Cancel "CO Incoming Call Information Log Mode." Incoming Log Off (75) • "CO Incoming Call Information Log Mode" is set. Incoming Log On (76) •...
- Page 316 Appendix (87) • Cancel "Paralleled Telephone Connection." Parallel (88) • Complete to set "Paralleled Telephone Connection." Parallel (89) • Not complete to set "Call Park." Park at 0 (90) • Called by transfer recall, with name. RCL:Tony Viola — "Call Transfer" (91) •...
- Page 317 Appendix • Available to clear Station Programming data. Clear Ready? • Single-CO (S-CO) button is assigned. CO-01 • The meter of CO line number. CO08:00005 • The charge of CO line number. CO08:$00001.15 • Conference (CONF) button is assigned. Conference (10) •...
- Page 318 Appendix • Loop-CO (L-CO) button is assigned. (21) Loop-CO • Message Waiting (MESSAGE) button is assigned. (22) Message Waiting • Available to clear all extension charge. (23) Meter Ext Clear? • Available to clear all CO line and all account code charge. (24) Meter Sum Clear? •...
- Page 319 Appendix (37) • The charge of the total extension. Sum:$00099.99 (38) • SAVE button is assigned. Save (39) • Select Ring-Calling mode. Tone Call (40) • Select ringing tone for a CO button. Tone Type-2 (41) • The total telephone charge is printed. Total CHG Print (42) •...
- Page 320 Appendix Feature Number List Numbers listed below are the initial factory setting (default value). There are the flexible feature numbers and the fixed feature numbers. To change the flexible feature numbers, follow the procedure described in the "System Programming" section in the Installation Manual.
- Page 321 Appendix Feature Default Required Additional Digits Paging — All 62 or 63 Paging — External (for KX-TD816) 0 / 1 Paging — External (for KX-TD1232) 0 / 1 - 4 Paging — External Answer/TAFAS Answer (for KX-TD816) Paging — External Answer/TAFAS Answer 1 - 4 (for KX-TD1232) Paging —...
- Page 322 Appendix Fixed Feature Numbers Feature Default While busy tone is heard Automatic Callback Busy (Camp-On) Busy Station Signaling (BSS) Off-Hook Call Announcement (OHCA) While Do Not Disturb tone is heard Do Not Disturb (DND) Override While calling or talking Account Code Delimiter #/99 Alternate Calling —...
- Page 323 Appendix Tone List <TONE> 1 sec Confirmation Tone 1 Confirmation Tone 2 Confirmation Tone 3 Confirmation Tone 4 Dial Tone 1 Dial Tone 2 Dial Tone 3 Dial Tone 4 Busy Tone Reorder Tone Ringback Tone Do Not Disturb (DND) Tone 7-15 Appendix...
- Page 324 Appendix <TONE> 15 sec Call Waiting Tone 1 5 sec Call Waiting Tone 2 (intercom) Call Waiting Tone 2 (CO) 15 sec Hold Recall <RING TONE> 1 sec Intercom Calls / Intercom Hold Recall CO Calls / CO Hold Recall Doorphone Calls / Timed Reminder Callback Ringing...
- Page 325 Refer to "Initial "OFF." Setting" (Section 1.1). Consult with an authorized The display blinks with the System internal clock does following message: Panasonic Factory Service not work properly. Center. Set Time & Date 12:00AM Jan ’94 7-17 Appendix...
- Page 326 Appendix 7-18 Appendix...
- Page 328 Matsushita Electric Industrial Co., Ltd. Central P.O. Box 288, Osaka 530-91, Japan Printed in Japan PQQX11289YA S1294MT2076MT...
Need help?
Do you have a question about the KX-TD816AL and is the answer not in the manual?
Questions and answers