
Related Manuals for VWR INCU-Line Premium


Summary of Contents for VWR INCU-Line Premium
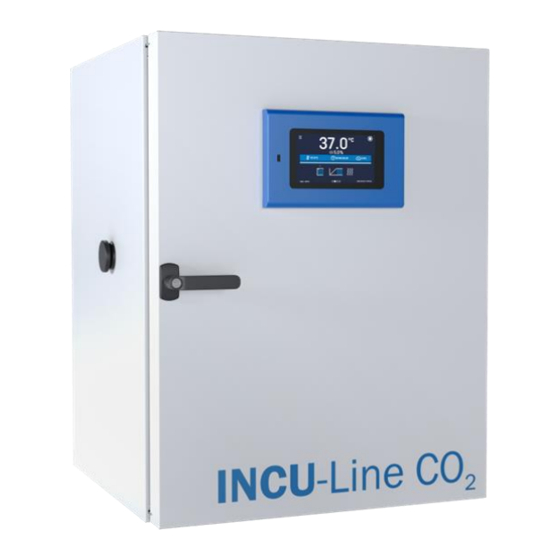
- Page 1 Instruction manual ® INCU-Line Premium incubator EU cat. no: 390-1544 VWR ILCO 180 Premium Version 01 Issue 07/2021...
- Page 2 Legal address of Manufacturer Europe VWR International bv Researchpark Haasrode 2020 Geldenaaksebaan 464 B-3001 Leuven +3216385011 be.vwr.com UK Importer VWR International Ltd Hunter Boulevard, Magna Park Lutterworth, Leicestershire, LE17 4XN uk.vwr.com Country of Origin POLAND ® vwr.com I Instruction manual VWR incubator...
-
Page 3: Table Of Contents
Segments edition ..............................25 10.1.3. Summary of segments .............................. 26 10.1.4. Loop..................................26 10.1.5. Priority ..................................26 10.1.6. Protection class ................................. 27 10.2. Starting the program ..............................27 10.3. Quick change of parameters ............................29 ® vwr.com I Instruction manual VWR incubator... - Page 4 ............................ 56 18. Advice on how to safely store the unit ..........................56 19. Product identification label ..............................57 20. Technical data ..................................58 21. Technical service ................................... 59 22. Warranty ....................................59 ® vwr.com I Instruction manual VWR incubator...
- Page 5 23. Compliance with local laws and regulations ........................59 24. Equipment disposal ................................60 Local VWR offices in Europe and Asia Pacific ........................61 ® vwr.com I Instruction manual VWR incubator...
-
Page 6: Safety Information
The electric installation should meet the following conditions: The unit is powered by AC 220-240V/ 50-60Hz. It must be connected to an earthed mains socket. The electric installation should be secured by a circuit breaker 16 A characteristics B. ® vwr.com I Instruction manual VWR incubator... -
Page 7: General Safety Instructions On Installing And Operating The Co Incubator
Warning signs on the bottle containing CO Non-flammable and non-toxic gases Pressurised gas Product ID: Carbon dioxide (100%) Chemical formula: CO Application of the substance: General industrial applications ® vwr.com I Instruction manual VWR incubator... -
Page 8: Location Requirements
1) be familiar and comply with applicable health and safety rules, regulations for handling CO and to train operators properly, 2) secure the unit against access by unauthorized persons, 3) keep the unit in perfect condition, 4) follow the maintenance schedule, ® vwr.com I Instruction manual VWR incubator... -
Page 9: Package Contents
The base on castors allows the incubator to be easily moved from one location to another, it is also recommended to avoid dirt from the floor potentially contaminating the chamber. The CO gas filter is a replacement item (see 15.1. Replacing the CO2 gas filter). ® vwr.com I Instruction manual VWR incubator... -
Page 10: Installation
Set up the chamber with a spirit level (not included). The unit has been equipped with levelling feet. Please use them to level the unit after it has been placed in its final location (if needed). Adjustable feet ® vwr.com I Instruction manual VWR incubator... -
Page 11: Shelf / Water Pan Installation
3) Connect the part (a) with the connecting rod (c). Note: the pin of the rod must be directed towards the door. 4) Connect the part (b) with the connecting rod (c). Note: to lock the connecting rod rotate the pin downwards. ® vwr.com I Instruction manual VWR incubator... -
Page 12: Water Pan
Fill the water pan only with deionized (demineralized) water up to the filling level marked by the pressed inner edge (volume:1,5 liter). It is recommended to clean and refill the pan 2-3 times a week. For emptying and cleaning remove the water pan. ® vwr.com I Instruction manual VWR incubator... -
Page 13: Placement Of Samples
To open or close the internal glass door use the installed plastic handle. Always use safety gloves to protect yourself and minimise the risk of getting burnt when the temperature inside is high. ® vwr.com I Instruction manual VWR incubator... -
Page 14: Connection Of The Co Gas Cylinder
1,5 – 2,0 bar above the ambient pressure. Only use the supplied hose nozzle to connect to the quick connector. Otherwise, the quick connector may leak, and/or it may become impossible to connect the original hose nozzle. In this case, please contact VWR Service. The CO gas cylinder is NOT supplied with the CO incubator. -
Page 15: Intended Use
CAUTION This symbol indicates important information and the recommendations to follow. CAUTION This symbol indicates risks associated with hot surfaces. This symbol means that a given field / window can be moved in the direction shown in the picture. ® vwr.com I Instruction manual VWR incubator... -
Page 16: Overview
(7) CO infrared sensor (19) 10A fuse (8) CO gas mixing head (20) Main power socket (9) Temperature sensor PT 100 (21) LAN (10) Stainless steel perforated shelves (11) Open door sensor ® vwr.com I Instruction manual VWR incubator... -
Page 17: Main Switch
Elapsed or remaining time of program, to change, press the icon or value (for more information, see 10.3.2. Quick change the set time) Set CO to change, press the icon or value, (for more information, see 10.3.3. Quick change the set concentration) ® vwr.com I Instruction manual VWR incubator... -
Page 18: Alarm Bar
“details” button – displays a preview of all instances of selected alarm (Figure Figure 3 – Alarms panel If there are more alarms, a button appears on the right side of the list that allows you to expand on the entire screen. ® vwr.com I Instruction manual VWR incubator... -
Page 19: Information Panel
The counter is also cancelled during turning on the unit Ramp status: Chamber is currently cooling down or heating up to reach set temperature Set temperature is reached Icon is only visible when the chamber is heating ® vwr.com I Instruction manual VWR incubator... -
Page 20: Status - Description
In the right part there is information about the set alarms (more information on alarms set, see 10.11. Alarms). Separately for overrunning up and down. The value 0 means the alarm is turned off. Figure 7 - Status – protection and alarms ® vwr.com I Instruction manual VWR incubator... -
Page 21: Getting Started
In such cases, the keypad (Figure 9) appears on the display screen. In addition to the standard letters, there are symbols corresponding to the computer keyboard. Figure 9 - Alphanumeric keypad ® vwr.com I Instruction manual VWR incubator... -
Page 22: User Logging In
If the password has been lost, it is necessary to contact service. Resetting the password is not a warranty repair! Information about the types of user accounts (10.8.2. Types of accounts and their limits). Logging out: press in Main Menu. ® vwr.com I Instruction manual VWR incubator... -
Page 23: Operation
Segments number – the number of segments Interval – frequency of saving to data logging Protection class – more information 10.1.6. Protection class Protection temperature – temperature range for the protection class ® vwr.com I Instruction manual VWR incubator... - Page 24 Figure 12 - Program parameters (2) Cancels adding or editing of the program Switching to the edition of program segments With more With more parameters you can scroll the panel up and down. ® vwr.com I Instruction manual VWR incubator...
-
Page 25: Segments Edition
Figure 13 - Program segment edition (1) Figure 14 - Program segment edition (2) The navigation between: segments, program parameters and summary is done by swiping up the segment with the finger or touch the icon ® vwr.com I Instruction manual VWR incubator... -
Page 26: Summary Of Segments
The program with a ramp – first, the unit counts down the time of the ramp and then proceeds to the segment countdown when the set temperature is reached. Regardless of whether the time of ramp elapsed. ® vwr.com I Instruction manual VWR incubator... -
Page 27: Protection Class
You can start the program in two ways: The first way „programs” in main menu Press the icon (Figure 17). Then select the program you want to activate and press „Start” button (Figure 18). ® vwr.com I Instruction manual VWR incubator... - Page 28 Select the program you want to activate (Figure 20), you have got two additional options: Immediate start of the program Scheduled program start according to the set date and time ® vwr.com I Instruction manual VWR incubator...
-
Page 29: Quick Change Of Parameters
(Figure 2). The value of the temperature should be selected by scrolling the list up or down (Figure 21). Confirm the change by pressing Temperature cannot be higher than protection temperature (over temperature) -2°C. ® vwr.com I Instruction manual VWR incubator... -
Page 30: Quick Change The Set Time
- to display the elapsed time - to display the remaining time To change only the way of displaying, you do not have to confirm it by Figure 22 - Quick change of time ® vwr.com I Instruction manual VWR incubator... -
Page 31: Quick Change The Set Co Concentration
Cycle 1/1 – the number of currently overviewing cycle / the number of currently performing or completed segment. Navigating between the cycles is done by swiping up your finger up or down. You cannot overview the segment / cycle data that has not yet started. ® vwr.com I Instruction manual VWR incubator... -
Page 32: Data Record
By pressing the progress bar, you can minimize it (it will appear at the top of the screen) and overview the previously loaded data. Figure 25 – Process bar ® vwr.com I Instruction manual VWR incubator... -
Page 33: Graph
It is possible to generate a graph from the available samples in the data register. Choose the graph to enlarge by double click (Figure 28). Displays the entire graph / back to the list of graphs Back to Data Register ® vwr.com I Instruction manual VWR incubator... - Page 34 Figure 28 – Graph selection Figure 29 - Temperature graph Figure 30 – CO graph ® vwr.com I Instruction manual VWR incubator...
-
Page 35: Event Log
Figure 32 – Event log Saving the data onto USB stick. .csv files are available - semicolon separated by opening e.g. with a spreadsheet, .plkx - opening with the Premium Control application Deleting data ® vwr.com I Instruction manual VWR incubator... -
Page 36: Info
– sterilization start has been cancelled, the door is open Start program cancelled, door is open 10.7. Info The panel contains the following information: software versions, name of the unit, manufacturer’s address, manufacturer’s webstie. ® vwr.com I Instruction manual VWR incubator... -
Page 37: Users
40 programs can be freely distributed among these 5 users. Add a new user Edit the selected user Delete the selected user, along with the user, his programs and data register will be also deleted ® vwr.com I Instruction manual VWR incubator... -
Page 38: User Creating / Edition
– type of account: Super Admin and Admin (users have only access to type account Admin. More information in chapter 10.8.2. Types of accounts and their limits) programs limit – the number of programs that user can create/ the number of available programs. Figure 36 - User edition ® vwr.com I Instruction manual VWR incubator... -
Page 39: Types Of Accounts And Their Limits
Figure 37 - Main menu – Admin Super Admin account Super Admin account has not limits. It has access to the program menu management and to the settings menu. Figure 38 - Main menu – Super Admin (1) ® vwr.com I Instruction manual VWR incubator... -
Page 40: Interface
View available language of the controller Set the time after which the screen will be dimmed Turn on/off the sound, alarm sounds will be still emitted Set the time after which the user will be automatically logged-out ® vwr.com I Instruction manual VWR incubator... -
Page 41: Time
Changing the date/time will interfere with the records in the database. Delete the data from data record and event log first, then change the date/time. You must first delete the data from the “data record” and from “event log” and then change the date/time. Figure 42 - Time settings ® vwr.com I Instruction manual VWR incubator... -
Page 42: Alarms
Cancels the entered changes In the field "lower alarm temp" you can set a value of -1°C to - 5°C and in the field "upper alarm temp" you can set a value of +1°C to +5°C. ® vwr.com I Instruction manual VWR incubator... -
Page 43: Network
DHCP – you can select if the server that allocates IP addresses is running on the local network. You can then skip setting IP, Masks, Gates Icon indicates the connection status. Incubator connected Incubator disconnected Figure 44 - LAN settings Confirms and saves changes Cancels the entered changes ® vwr.com I Instruction manual VWR incubator... -
Page 44: Mail Reports
CO2 alerts - alarms caused by too high or too low CO concentration Programs – events connected with programs (e.g. adding, edition, delete of a program) Users – events connected with users edition settings (adding, edition, delete of a user). ® vwr.com I Instruction manual VWR incubator... - Page 45 (Figure 47) Sender – sender’s e-mail address Recipients – recipient’s e-mail addresses (up to 3) Figure 47 - E-mail – sender and recipients Confirms and saves changes Cancels the entered changes ® vwr.com I Instruction manual VWR incubator...
-
Page 46: Corrections
37°C and the average temperature measured by independent, external sensor indicates 37,5°C, the correction should be set on +0,5°C. The average temperature should be calculated from chosen period of time e.g. 30min. The correction range: -5°C to +5°C. ® vwr.com I Instruction manual VWR incubator... -
Page 47: Hot-Air Sterilization Program
Use protective gloves to avoid burns from hot components. First sterilization processes may cause an odour. It is not a quality defect. It is recommended to ventilate the room well during sterilization. ® vwr.com I Instruction manual VWR incubator... - Page 48 The sterilization setpoint temperature is set to 180°C. The duration of the heating up and holding phase is in total 4 hours. This ensures that the effective sterilization temperature is maintained on all internal surfaces for 2 hours. 3) Cooling down phase: it takes around 10 hours until 37°C is reached. ® vwr.com I Instruction manual VWR incubator...
- Page 49 The total cycle of sterilization finishes when the temperture inside the chamber cools down to 37 C. Then, the information of completed sterilization occurs ( Figure 54). Confirm the message with the icon. ® vwr.com I Instruction manual VWR incubator...
- Page 50 If the door is open when the sterilization program is starting, the program won’t start. The information of cancelled sterilization pops up on the controller display (Figure 56). Close the door and run the sterilization program again. Figure 56 – Sterilization start cancelled ® vwr.com I Instruction manual VWR incubator...
-
Page 51: Components Of The Co Incubator
If you leave the access port open, it may affect temperature variation and fluctuation within the chamber. ® vwr.com I Instruction manual VWR incubator... -
Page 52: Open Door Alarm
It also allows you to make a report of selected data range. Figure 57 – Saved data export ® vwr.com I Instruction manual VWR incubator... -
Page 53: Lan Port
Every Premium unit can be connected to the Ethernet network and controlled remotely using the Premium Control software. The features of the program have been described in a separate instruction manual. Troubleshooting Before you contact VWR Service Department (21.Technical service): Make sure that the operation complies with the instruction manual of the CO incubator. -
Page 54: Service Of The Unit
Check gas connections for leaks (e.g. with leak spray or dilluted soap solution). Run an exemplary program, adjusting 5% CO concentration. When no gas bubbles are observed after few valve openings, that can be heard (max. 1 minute of the program), the hoses are connected properly. Stop the program. ® vwr.com I Instruction manual VWR incubator... -
Page 55: Accessories And Spare Parts
Electrical parts should not be in contact with water or detergent. Clean the touch screen using a soft cloth. USB port can be cleaned with a vacuum cleaner to prevent accumulation of dirt inside the socket. ® vwr.com I Instruction manual VWR incubator... -
Page 56: Interior Cleaning
NEVER spray the disinfectant directly on the CO sensor. Wipe the sensor with a lint-free cloth soaked with the disinfectant. Use only the detergents or disinfectants recommended by VWR. Other products are not approved, since they could in particular damage the CO sensor. -
Page 57: Product Identification Label
The product identification label is located on the left upper corner of the unit. An example of the product label is shown on the figure below. (1) Logo (5) Name and address of the manufacturer (2) Type of the unit (6) Serial number (3) Catalogue number (7) Bar code (4) CE mark (8) UKCA mark ® vwr.com I Instruction manual VWR incubator... -
Page 58: Technical Data
Recovery time after 30 seconds door open at C [min] recovery time after 30 seconds door open at 5 Vol.-% CO [min] Energy consumption at 37 C [Wh/h] Power supply 230V 50-60Hz Sound level [db(A)] Shelves (std./max.) Warranty 24 months ® vwr.com I Instruction manual VWR incubator... -
Page 59: Technical Service
VWR warrants that this product will be free from defects in material and workmanship for a period of two (2) years from date of delivery. If a defect is present, VWR will, at its option and cost, repair, replace, or refund the purchase price of this product to the customer, provided it is returned during the warranty period. - Page 60 By doing so, you will help to conserve natural and environmental resources and you will ensure that your equipment is recycled in a manner that protects human health. Thank you ® vwr.com I Instruction manual VWR incubator...
- Page 61 Local VWR offices in Europe and Asia Pacific Hungary Poland Austria VWR International Kft. VWR International Sp. z o.o. VWR International GmbH Simon László u. 4. Limbowa 5 Graumanngasse 7 4034 Debrecen 80-175 Gdansk 1150 Vienna Tel.: +43 1 97 002 0 Tel.: +36 (52) 521-130...
Need help?
Do you have a question about the INCU-Line Premium and is the answer not in the manual?
Questions and answers