Table of Contents
Advertisement
Quick Links
®
VWR
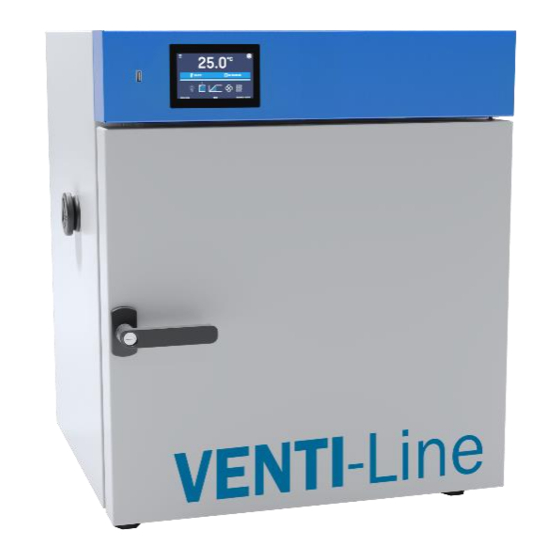
INCU-Line, DRY-Line, VENTI-Line
European Catalogue Number(s):
INCU-Line
IL 56 Prime: 390-1346
IL 112 Prime: 390-1349
IL 180 Prime: 390-1350
Before using the equipment, please read carefully
Prime
Ovens and Incubators
Instruction Manual
DRY-Line
DL 56 Prime: 466-0600
DL 112 Prime: 466-0601
DL 180 Prime: 466-0602
this instruction manual!
Version 2.1
Issued 6.03.2020
VENTI-Line
VL 56 Prime: 466-0603
VL 112 Prime: 466-0604
VL 180 Prime: 466-0605
Advertisement
Table of Contents

Related Manuals for VWR INCU-Line 390-1346


Summary of Contents for VWR INCU-Line 390-1346
- Page 1 ® INCU-Line, DRY-Line, VENTI-Line Prime Ovens and Incubators Instruction Manual European Catalogue Number(s): INCU-Line DRY-Line VENTI-Line DL 56 Prime: 466-0600 VL 56 Prime: 466-0603 IL 56 Prime: 390-1346 DL 112 Prime: 466-0601 VL 112 Prime: 466-0604 IL 112 Prime: 390-1349 DL 180 Prime: 466-0602 VL 180 Prime: 466-0605 IL 180 Prime: 390-1350...
- Page 2 Instruction Manual DL, VL, IL Legal Address of Manufacturer: Country of Origin: Poland Equipment disposal This equipment is marked with the crossed out wheeled bin symbol to indicate that this equipment must not be disposed of with unsorted waste. Instead it's your responsibility to correctly dispose of your equipment at lifecycle -end by handling it over to an authorized facility for separate collection and recycling.
- Page 3 Instruction Manual DL, VL, IL Page 3 / 49...
- Page 4 Instruction Manual DL, VL, IL Page 4 / 49...
-
Page 5: Table Of Contents
Instruction Manual DL, VL, IL Contents INTENDED USE AND IMPORTANT INFORMATION FOR THE USER ......7 PACKAGE CONTENTS ....................8 BEFORE THE FIRST USE ..................... 9 3.1. Installation of shelves ..................... 10 3.2. Wear and tear parts ....................11 3.3. Remarks on the placement of samples .............. - Page 6 Instruction Manual DL, VL, IL 5.11. Interface ......................33 5.12. Time ....................... 33 5.13. Alarms ......................35 5.14. Network ......................36 5.15. Corrections ..................... 37 COMPONENTS OF THE DEVICE ................38 6.1. Internal glass door (only for INCU-Line) ..............38 6.2.
-
Page 7: Intended Use And Important Information For The User
Instruction Manual DL, VL, IL 1. INTENDED USE AND IMPORTANT INFORMATION FOR THE USER The DRY-Line and VENTI-Line drying ovens are designed for all standard drying and tempering tasks as well as sterilizing glassware. They are intended for use in biological, chemical, medical, pharmaceutical and physical laboratories. Any other use is not intended, and can cause damage and be harmful to health. -
Page 8: Package Contents
Instruction Manual DL, VL, IL You should: • place samples in such a way to provide proper air circulation in the chamber • open the door for the shortest period of time to reduce temperature fluctuations • secure samples from being blown out by the chamber fan e.g powdery samples •... -
Page 9: Before The First Use
Instruction Manual DL, VL, IL Additional shelves, a base on castors for all 180 liters Prime models and Premium Control software can be ordered separately: Description Quantity Cat. No. Additional stainless steel shelf for 56 liter models 466-0454 Additional stainless steel shelf for 112 liter models 466-0455 Additional stainless steel shelf for 180 liter models 466-0456... -
Page 10: Installation Of Shelves
Instruction Manual DL, VL, IL The electric installation should meet the following conditions: The device is powered by AC 230V/50Hz. Please connect it to a socket with ground in order to avoid electric shocks in case of the unit’s failure. 3.1. -
Page 11: Wear And Tear Parts
Instruction Manual DL, VL, IL 3.2. Wear and tear parts There are the following wear and tear parts - door gasket. 3.3. Remarks on the placement of samples To provide proper air circulation and stable conditions in which the samples are stored in the chamber, it is necessary to keep the following rules: the max height of the samples should not exceed 1/3 of the space below the shelves the samples should be placed in such a way that so that the horizontal surface between the... -
Page 12: Device Description
Instruction Manual DL, VL, IL 4. DEVICE DESCRIPTION 1) USB socket 2) Electronic controller with 4.3” touch panel 3) Entry port (Ø 30mm) on left side 4) Temperature sensors 5) Chamber fan (only VL) 6) Shelf 7) Internal glass door (only IL) 8) Height adjustable feets 9) LAN 10) Socket (for power cable) -
Page 13: Device Operation
Instruction Manual DL, VL, IL 5. DEVICE OPERATION DRY-Line Prime and VENTI-Line Prime Before the first using, it is recommended to heat the chamber (3 hours at 250°C). turn on the unit and set the temperature at 250°C. Then let the unit work for 3 hours. During the heating, the unit is likely to produce a specific smell. -
Page 14: Main Screen
Instruction Manual DL, VL, IL 5.3. Main Screen After switching on the device, the Main Screen (Figure appears. It contains the information about the device status. Figure 2 - Main Screen 5.3.1. Alarm bar The colour of the bar indicates the status of the device: –... - Page 15 Instruction Manual DL, VL, IL 5.3.2.1. Status Figure 3 - Status - icons Closed door, open door. The number above the icon presents open door counter, press the icon to cancel the counter. The counter is also cancelled during turning on the device Icon for the fan (only for VENTI-Line models).
-
Page 16: Alarms Panel
Instruction Manual DL, VL, IL 5.3.3. Alarms panel In this place appears the list of alarms. With active alarm, the control bar is red. The alarm event is displayed in the list, with the status alarm active. When an alarm event stops, the alarm remains in the list as inactive. •... -
Page 17: Status Panel
Instruction Manual DL, VL, IL 5.3.4. Status panel The status of the device is indicated by description. Figure 7 – Status - description program name The name of program current segment Currently performing segment / total number of segments in the program »... -
Page 18: Programs
Instruction Manual DL, VL, IL 5.4. Programs In this panel (Figure 8) you can run the selected program, add a new one, edit the program or delete it. Menu push buttons: Run the selected program Stop the program Add a new program Edit the selected program Delete the selected program Figure 8 –... -
Page 19: Segments Edition
Instruction Manual DL, VL, IL • Priority – the priority of time or parameters, more information » page 22 • Loop – the number of program repetitions, more information » page 22 Figure 9 - Program parameters Cancels adding or editing of the program Switching to the edition of program segments With more parameters you can scroll the panel up and down. - Page 20 Instruction Manual DL, VL, IL • flap – the level of air-flap opening (0% - closed, 100% - open, adjustable in increments of 1%) • ramp fan – fan efficiency during reaching the set temperature, adjustable in increments of 1% (only for VENTI-Line models) •...
-
Page 21: Summary Of Segments
Instruction Manual DL, VL, IL Figure 11 - Program segment edition The navigation between: segments, program parameters and summary is done by swiping up the segment with the finger or touch the icon 5.4.3. Summary of segments In the summary in the figure all segments (Figure 12) are visible along with the entered settings: •... -
Page 22: Loop
Instruction Manual DL, VL, IL Confirms and saves the changes Cancels the entered changes to segments and goes into program parameters. With more parameters you can scroll the panel up and down. 5.4.4. Loop The option is available if the number of segments is equal to 2 or more. When the program finishes the last segment, the device starts the program again from the first segment. -
Page 23: Protection Class
Instruction Manual DL, VL, IL It may happen that the time of reaching was too short and the device failed to reach the set temperature within the set time. Then the countdown of the segment time will start before reach- ing the set temperature. -
Page 24: Starting The Program
Instruction Manual DL, VL, IL 5.5. Starting the program You can start the program in two ways: The first way • „programs” in main menu Press the icon (Figure 13). • Then select the program you want to activate and press „Start” button (Figure 14). - Page 25 Instruction Manual DL, VL, IL The second way • In the main panel (Figure press the icon in the upper right corner. • By pressing the icon you will go to the program selection window (Figure 16). • Select the program you want to activate, you have got two additional options: Immediate start of the program Scheduled program start according to the set date and time Figure 15 - Main screen...
-
Page 26: Quick Change Of Parameters
Instruction Manual DL, VL, IL It’s possible to start a backdated scheduled program but only for programs with time priority and scheduled max. 7 days back. It is possible for time priority programs. Program segments which last for a total period from the set date to the current date will be skipped. -
Page 27: Quick Change The Set Time
Instruction Manual DL, VL, IL 5.6.2. Quick change the set time In order to quickly change the duration time of the program, press the icon in main screen (Figure Select the number of days, hours and minutes by scrolling the list up or down (Figure 18). -
Page 28: Quick Change Of Other Parameters
Instruction Manual DL, VL, IL 5.6.3. Quick change of other parameters In order to quickly change of other parameters of the program, press the icon in main screen (Figure Select the parameter you want to change and make changes by strolling the list up or down (Figure 19). -
Page 29: Data Record
Instruction Manual DL, VL, IL You cannot overview the segment / cycle data that has not yet started. Figure 20 - Statistic Data record 5.8. Register window (Figure 22) contains the following information: • Time of sample registration [date], • Temperature value from the main sensor in the chamber [temp.]. -
Page 30: Event Log
Instruction Manual DL, VL, IL Figure 21 – Progress bar Figure 22 – Data Register Data recording onto the USB flash drive. .csv files are available - semicolon separated by opening eg with a spreadsheet, .plkx - opening with the Premium Control applica- tion Deleting data. - Page 31 Instruction Manual DL, VL, IL Figure 23 – Events Register Saving the data onto USB flash drive. .csv files are available - semicolon separated by opening eg with a spreadsheet, .plkx - opening with the Premium Control applica- tion Deleting data Information event Alarm event Error...
-
Page 32: Info
Instruction Manual DL, VL, IL Program Stop stopping the program Lower temp. alarm Start lower temperature alarm has been activated Lower temp. alarm End lower temperature alarm has been finished Upper temp. alarm Start upper temperature alarm has been activated Upper temp. -
Page 33: Interface
Instruction Manual DL, VL, IL Interface 5.11. In this panel (Figure 25) you can: Change the language of device Set the time after which the screen will be dimmed Turn on/off the sound, alarm sounds will be still emitted Figure 25 – Interface settings Confirms and saves changes Cancels the entered changes Time... - Page 34 Instruction Manual DL, VL, IL To change the system date or time, press the button (Figure 26). In the next window (Figure 27) you can change settings. Figure 26 – Time Figure 27 – Date settings Confirms and saves changes Cancels the entered changes The same time zones are required for correct operation of programs on the device and com- puter.
-
Page 35: Alarms
Instruction Manual DL, VL, IL Alarms 5.13. You can set parameters related to alarms. • lower alarm – an alarm will be generated if the temperature drops below the value given in this field • upper alarm – an alarm will be generated if the temperature rises above the value given in this field The lower and upper alarm can only be generated after reaching the set temperature. -
Page 36: Network
Instruction Manual DL, VL, IL Network 5.14. In this panel (Figure 29) you can change the settings for the LAN: • IP – the device’s IP address • Mask – an Ethernet network mask to which the device is connected •... -
Page 37: Corrections
Instruction Manual DL, VL, IL Corrections 5.15. In this window (Figure 30) you can set correct: • The temperature indicated on the display by adding the correction value. The set correction value is taken in the whole temperature range operation of the device. For example, if the average tempera- ture displayed by the device indicates 100°C and the average temperature measured by independ- ent, external sensor indicates 100,5°C, the correction should be set on +0,5°C. -
Page 38: Components Of The Device
Instruction Manual DL, VL, IL 6. COMPONENTS OF THE DEVICE 6.1. Internal glass door (only for INCU-Line) To open or close the internal glass door use the plastic handle installed on the glass. While operating the unit at high temperatures, do not touch the glass door or inner parts of the chamber. Always use safety gloves to protect yourself and minimise the risk of getting burnt. -
Page 39: Open Door Alarm
Instruction Manual DL, VL, IL 6.4. Open door alarm All incubators have been equipped with an open door sensor. If you open the door, icon: appear on the display. If you leave the door open for more than 60 seconds, an alarm will sound and the control bar will be red. The alarm event “door open”... -
Page 40: Temperature Protection
Instruction Manual DL, VL, IL 7. TEMPERATURE PROTECTION Temperature protection is included as standard, if damage occurs to the temperature controller or the User changes the temperature settings outside of the limit, temperature protection will activate. Protection class 3.1 is a standard. The figure below shows how this works. Protection Class 3.1 according to DIN 12880 norm is called protecting sample function. -
Page 41: Cleaning And Maintenance Of The Device
Instruction Manual DL, VL, IL 9. CLEANING AND MAINTENANCE OF THE DEVICE Before cleaning the device, it needs to be disconnected from the electrical supply! Always use safety gloves while cleaning to avoid the risk of injury due to any sharp edges. - Page 42 Instruction Manual DL, VL, IL Open the door of the device and wait till the chamber has cooled down, take out the shelves and start cleaning the device. Only water or water with mild detergent should be used. Having finished cleaning, you should allow the device to dry fully and fit all parts removed before cleaning.
-
Page 43: Advice On How To Safely Store The Device
• Complete technical service contact information • Access to VWR’s Online Catalogue, and information about accessories and related products • Additional product information and special offers Contact us for information or technical assistance contact your local VWR representative or visit www.vwr.com Page 43 / 49... -
Page 44: Possible Defects
VWR International warrants that this product will be free from defects in material and workmanship for a period of two (2) years from date of delivery. If a defect is present, VWR will, at its option and cost, repair, replace, or refund the purchase price of this product to the customer, provided it is returned during the war- ranty period. -
Page 45: Product Identification Label
The customer is responsible for applying for and obtaining the necessary regulatory approvals or other au- thorizations necessary to run or use the Product in its local environment. VWR will not be held liable for any related omission or for not obtaining the required approval or authorization, unless any refusal is due to a defect of the product. -
Page 46: Technical Details
Instruction Manual DL, VL, IL 14. TECHNICAL DETAILS DL 56 PRIME DL 112 PRIME DL 180 PRIME Air convection Natural Chamber capacity [l] Door type solid Temperature range [ºC] +50...+300 Temperature resolution [ºC] Every 0,1 Microprocessor with a 4,3” full colour touch screen Controller Interior Stainless steel to DIN 1.4301... - Page 47 Instruction Manual DL, VL, IL VL 56 PRIME VL 112 PRIME VL 180 PRIME Air convection forced Chamber capacity [l] Door type solid Temperature range [ºC] +50...+300 Temperature resolution [ºC] Every 0,1 Microprocessor with a 4,3“ full colour touch screen Controller Interior Stainless steel to DIN 1.4301...
- Page 48 Instruction Manual DL, VL, IL IL 56 PRIME IL 112 PRIME IL 180 PRIME Air convection Natural Chamber capacity [l] Door type Double (external solid, internal glass) Temperature range [ºC] +5 above ambient temperature…+100 Temperature resolution [ºC] Every 0,1 Microprocessor with a large 4,3“ full colour touch screen Controller Interior Stainless steel to DIN 1.4016...
- Page 49 Instruction Manual DL, VL, IL Page 49 / 49...
Need help?
Do you have a question about the INCU-Line 390-1346 and is the answer not in the manual?
Questions and answers