Advertisement
Quick Links
Advertisement

Subscribe to Our Youtube Channel
Related Manuals for fantastic furniture Bridge Buffet 3 Door Mk2 Oak


Summary of Contents for fantastic furniture Bridge Buffet 3 Door Mk2 Oak
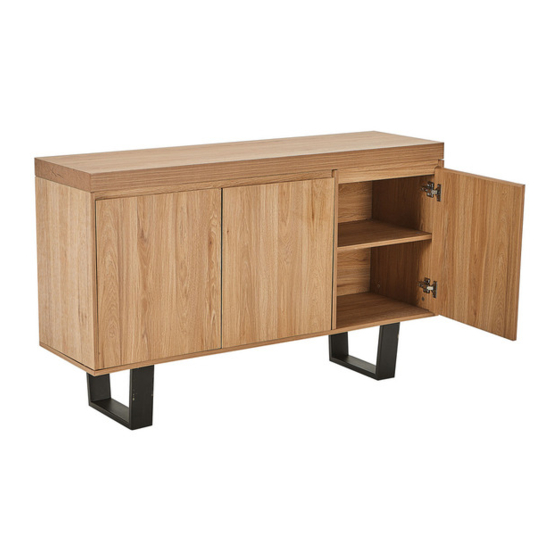
- Page 1 Bridge Buffet 3 Door Mk2 Oak...
-
Page 4: Hardware Pack
Top(P1) Bottom(P2) Right Panel(P3) Left Panel(P4) Middle Panel(P5) Long Support(P6) Short Support(P7) Long Shelf(P8) Connector (P14) Short Shelf(P9) (P15) 2 x Long Back Panels(P10) Short Back Panel(P11) Left Door(P12) 2 x Right Door(P13) 2 x Connector(P14) 2 x Legs(P15) Hardware Pack 4 x Bolts 20 x Cam Bolts 20 x Cam Nuts... - Page 5 2 x Bolts 1 x Support Leg (H14) (H13) 1 x Allen Key (H9) Using 2 x Bolts(H14) secure the Support Leg(H13) to the Unit Bottom(P2) by tightening with Allen Key(H9). 8 x Washers 8 x Bolts (H7) (H8) 4 x Levelling Feet 1 x Allen Key (H10) (H9)
- Page 6 H 1 8 H 1 8 8 x Washers 4 x Bolts (H7) (H6) H 18 H 1 8 4 x Bolts 1 x Allen Key (H18) (H9) Align the 2 x Connectors(P14) onto the Bottom(P2) as shown. Use 4 x Bolts(H6) and 4 x Washers(H7) to secure the 2 x Connectors(P14) to the Leg(P15) and Bottom(P2).
- Page 7 (P5) (P5) 8 x Dowels 8 x Cam Bolts (H3) (H1) (P4) Phillips Head Screwdriver (P3) Insert 2 x Dowels(H3) into Right Panel(P3) and secure 2 x Cam Bolts(H1) to Right Panel(P3) by tightening with the Phillips Head Screwdriver. Repeat previous step for Left Panel (P4) Insert 2 x Dowels(H3) into Middle Panel(P5) and secure 2 x Cam Bolts(H1) to Middle Panel(P5) by tightening with the Phillips Head Screwdriver, Then turn over, repeat previous step for another side of Middle Panel(P5)
- Page 8 2 x Dowels (H3) (P3) Insert 2 x Dowels(H3)into Right Panel(P3) and connect Short Support(P7) to Right Panel(P3). (P7) 2 x Dowels 2 x Cam Nuts (H15) (H2) (P9) Phillips Head Screwdriver (P5) Insert 2 x Dowels(H15) into Middle Panel(P5) Insert 2 x Cam Nuts(H2) into Short Shelf(P9) as shown.
- Page 9 2 x Cam Nuts Phillips Head (H2) Screwdriver (P5) Insert 2 x Cam Nuts(H2) into Long Shelf(P8) as shown. Rotate the cam nuts so the arrows point towards the incoming cam bolts. Attach Long Shelf(P8) to Middle Panel(P5) by tightening the Cam Nuts(H2) with the Phillips Head Screwdriver (H3) (P6)
- Page 10 TWO PEOPLE REQUIRED With assistance, carefully turn the buffet upright. Slide Long Back Panel(P10) into the groove of Left Panel(P4) and Middle Panel(P5) as shown. 6 x Cam Bolts 6 x Dowels (H1) (H3) (P1) Insert 6 x Dowels(H3) into Unit Top(P1) and secure 6 x Cam Bolts(H1) into Unit Top(P1) by tightening with the Phillips Head Screwdriver.
- Page 11 TWO PEOPLE REQUIRED 6 x Cam Nuts Phillips Head (H2) Screwdriver Insert 6 x Cam Nuts(H2) into Panel(P3&P4&P5) as shown.Rotate the cam nuts so the arrows point towards the incoming cam bolts. With assistance, attach Top(P1) to Panel(P3&P4&P5) by tightening the Cam Nuts(H2) with the Phillips Head Screwdriver TWO PEOPLE REQUIRED...
- Page 12 TWO PEOPLE REQUIRED 6 x Cam Nuts Phillips Head (H2) Screwdriver (P2) Insert 6 x Cam Nuts(H2) into Panel(P3&P4&P5) as shown. Rotate the cam nuts so the arrows point towards the incoming cam bolts. With assistance, attach Bottom(P2) to Panel(P3&P4&P5) by tightening the Cam Nuts(H2) with the Phillips Head Screwdriver 6 x Hinges 12 x Short Screws...
- Page 13 TWO PEOPLE REQUIRED With assistance, carefully turn the unit upright. Note: Avoid using the centre support leg as a handle or pivoting point when turning the buffet over TWO PEOPLE REQUIRED 24 x Short Bolts (H5) Using 8 x Short Screws(H5) to connect Right Door(P13) to Buffet by tightening with a Phillips head screwdriver.
- Page 14 STEP 19.1 STEP 19.2 STEP 19.3 STEP 19.4 Page 14...
- Page 15 12 x Wedges 12 x Short Screws (H11) (H5) Phillips Head Screwdriver Insert 12 x Wedges(H11) into all corners of the back of the assembled unit as shown. Secure Wedges(H11) by tightening 12 x Short Screws(H5) with the Phillips Head Screwdriver. 1 x Long Screw 1 x Washers (H12)
- Page 16 TWO PEOPLE REQUIRED (H16) 1 x Washers (H16) With assistance, move furniture to its final position,then Page 16...
Need help?
Do you have a question about the Bridge Buffet 3 Door Mk2 Oak and is the answer not in the manual?
Questions and answers
I have assembled the buffet as per the instructions but it is not completely rigid. I noticed the one in Fantastic furniture wasn't rigid but assumed that it was just put together a bit sloppily just for display. Is this normal and if not what is the remedy