
Subscribe to Our Youtube Channel
Related Manuals for fantastic furniture MONACO Lowline Large


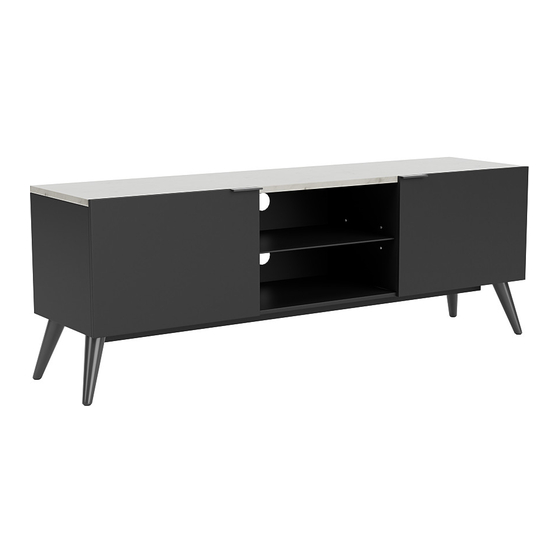
Summary of Contents for fantastic furniture MONACO Lowline Large
- Page 1 Version 1.0 MONACO TWO PEOPLE Lowline Large www.fantasticfurniture.com.au REQUIRED...
- Page 2 Enjoy Your purchase from Australia's Best Value Furniture Store GLASS SHOULD ALWAYS BE HANDLED WITH CARE Scratches, chips, sudden changes in temperature and hairline fractures may cause the glass to break. This glass is designed to break into small, relatively harmless pieces and not sharp fragments.
-
Page 3: Assembly Checklist
Assembly checklist Read through the instructions carefully Make sure you have all the required tools. Never use power tools unless instructed. before you begin. Identify and lay out all of the components Unless instructed, do not fully tighten screws before you begin assembly. until the item is fully assembled. -
Page 4: What You Need
What you need to assemble the product Top Panel Other tools you need (P1) Flat head screwdriver; Phillips head screwdriver; Mallet Right Side Panel (P4) Back Panel (P10) Right Door Right Divider (P9) Panel (P6) Glass Shelf (P11) Shelf (P7) Left Divider Panel (P5) Left Side... - Page 5 Step 1 You will need 8 x Cam 1 x Wall Bracket (H12) Bolt (H1) 1 x Screw Phillips head (H6) screwdriver (P1) Screw 8 x Cam Bolts (H1) into Top Panel (P1) as shown. Fasten Wall Bracket (H12) on Top Panel (P1) with screw (H6).
- Page 6 Step 3 You will need 8 x Wood Mallet Dowels (H4) (P6) (P5) Insert 4 x Wood Dowels (H4) into Left Divider Panel (P5). Insert 4 x Wood Dowels (H4) into Right Divider Panel (P6). Step 4 You will need 4 x Wood Mallet Dowels (H4)
- Page 7 Step 5 You will need 4 x Screw Allen Key (H8) (H17) Position the Left Divider Panel (P5) and the Right Divider Panels (P6) to the Bottom Panel (P2), so that their bare edges are aligned with Bottom Panels Groove Edge, and cam nut holes are furthest away from Bottom Panel as shown.
- Page 8 Step 7 You will need (P13) 12 x Bolt Allen Key (H13) (H17) (P2) (P13) (P3) (P13) Fix each Metal Leg (P13) to Bottom Panel (P2) with 3 x Bolts (H13) using Allen Key (H17). Step 8 You will need 6 x Bolt Allen Key (H14)
- Page 9 Step 9 You will need Cut Slot (P4) 18 x Black Cover (H3) (P10) (P5) (P2) (P3) Slide the Back Panel (P10) into the grooves of Side Panels (P3) & (P4) and Bottom Panel (P2). Paste 18 x Black Cover (H3) on the holes of Bottom Panel (P2).
- Page 10 Step 11 You will need XX = YY 4 x Screw 4 x Back Panel Connector (H15) (H16) (P1) Phillips head screwdriver (P10) (P4) If necessary, gently adjust the Top Panel (P1) sideway in either direction until XX and YY are equal. Fix the Back Panel Connectors (H15) with Screws (H16) as shown.
- Page 11 Step 13 Attach 2 x Hinges (H5) to Left Door (P8) You will need with 4 x Screws (H6). Attach 2 x Hinges (H5) to Right Door (P9) with (P9) 4 x Hinge 8 x Screw 4 x Screws (H6). (H5) (H6) Phillips head...
- Page 12 Step 15 Attach Metal Handles (H11) to Doors (P8) & (P9) with Screws (H7). Do not over-tighten the screws (H7). You will need 2 x Metal 4 x Screw Handle (H11) (H7) (P9) Phillips head screwdriver (P8) Step 16 Paste Plastic Bumper (H18) on Doors edge as shown. You will need 4 x Shelf Pin 4 x Plastic...
- Page 13 Step 17 You will need 4 x Glass Phillips head Shelf Pin (H10) screwdriver (P11) Insert 4x Shelf Pins (H10) into Divider Panels (P5) & (P6). Insert Glass Shelf (P11) into Glass Shelf Pins (H10), gently tighten the Plastic bolt underneath of Glass Shelf Pins (H11) with Phillips Head Screwdriver as shown .
- Page 14 Step 19 TO ADJUST YOUR DOORS TO MAKE THE GAPS MORE EVEN (OPTIONAL). You will need STEP 19.1 panel Open the door. Phillips head screwdriver Side Door panel MOVE DOOR UPWARD OR DOWNWARD STEP 19.2 Unscrew 2 screws in round holes Tighten 2 screws in oval holes.
-
Page 15: Job Complete
Step 20 4 KG Job Complete ! In the interest of our environment Please dispose of all packaging thoughtfully. www.fantasticfurniture.com.au PAGE 15... - Page 16 THIS TOP IS FINISHED WITH A CLEAR PU LACQUER Avoid placing hot items directly onto the surface unless using a thick insulation material such as placemats or coasters. Heat may lead to discolouration or other damage to the surface of the product. Use a soft cloth that has been dampened in water to clean the surface of this product.
Need help?
Do you have a question about the MONACO Lowline Large and is the answer not in the manual?
Questions and answers