
Subscribe to Our Youtube Channel
Related Manuals for Halton Rex Expander


Summary of Contents for Halton Rex Expander
- Page 1 Halton Rex Expander (RXP) - Installation, commissioning, and maintenance guide Enabling Wellbeing All rights reserved ©Halton...
-
Page 2: Table Of Contents
Halton Rex Expander (RXP) - Installation, commissioning, and maintenance guide Contents 1 Introduction ................................4 1.1 Copyright and disclaimers ..........................4 1.2 About this document ............................. 4 1.3 Summary of changes ........................... 4 1.4 Safety notes ..............................5 1.5 Contact information ............................5 2 Product description ............................... - Page 3 Halton Rex Expander (RXP) - Installation, commissioning, and maintenance guide 6 Maintenance ............................... 22 6.1 Before you start ............................22 6.1.1 Safety during maintenance ........................ 22 6.1.2 Checks before maintenance ......................22 6.1.3 Maintenance information ........................22 6.2 Maintenance schedule ..........................22 6.3 Step by step instructions ..........................
-
Page 4: Introduction
Halton disclaims any and all liability related to this document. Halton gives no explicit or implied warranties in terms of this document. Any permitted use of the information included herein is at your own risk. Halton may amend or replace the information included in this document at its sole discretion without further notice and liability. -
Page 5: Safety Notes
Halton Rex Expander (RXP) - Installation, commissioning, and maintenance guide 1.4 Safety notes All information in this section is important and relevant for your safety. Pay special attention to these icons and the related safety texts when used later in context in this document. -
Page 6: Product Description
2.2 Operating principle The primary supply air enters the plenum of the Halton Rex Expander chilled beam, from which it is diffused into the room through the nozzles and supply slots. The air jets from the nozzles induce ambient room air efficiently through the heat exchanger, where the air is cooled by means of the cool water circulating in the heat exchanger. - Page 7 Halton Air Quality (HAQ) control Halton Air Quality (HAQ) control is used for adjusting or controlling the rate of the additional supply airflow in a room space. In normal conditions, fresh supply air is provided through the nozzles. Whenever additional air is needed (boost/VAV function), the HAQ control opens and provides more air.
- Page 8 Halton Rex Expander (RXP) - Installation, commissioning, and maintenance guide Figure 4. VAV function with HAQ control: Supply air from nozzles and HAQ control (boost mode) Figure 5. Manual actuator of HAQ control Figure 6. Electric actuator of HAQ control...
-
Page 9: Structure And Materials
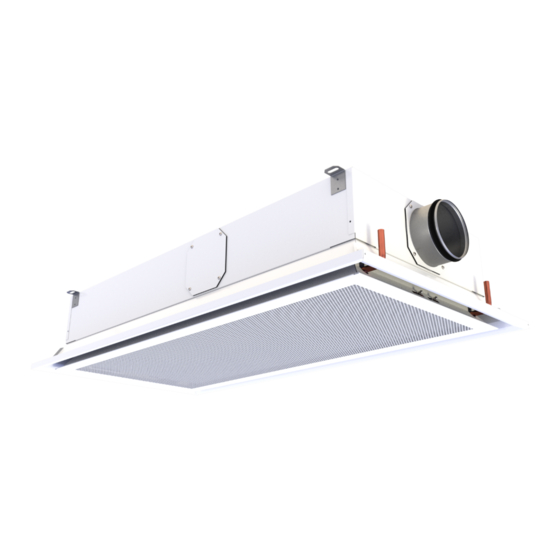
Halton Rex Expander (RXP) - Installation, commissioning, and maintenance guide 2.3 Structure and materials Figure 7. Halton Rex Expander parts All rights reserved ©Halton... - Page 10 Halton Rex Expander (RXP) - Installation, commissioning, and maintenance guide Part Description Front panel Pre-painted galvanised steel Polyester-painted, white (RAL 9003), with special colours available. Nozzles Nozzle plate: galvanised steel HAQ control Painted galvanised steel (optional) Actuator of HAQ Electric actuator (shown in the figure): connecting cable length 0.9 m...
-
Page 11: Dimensions And Weight
Halton Rex Expander (RXP) - Installation, commissioning, and maintenance guide 2.4 Dimensions and weight The dimensions are given in millimetres (mm). Figure 8. Halton Rex Expander dimensions (RXP-600) Figure 9. Halton Rex Expander dimensions (RXP-1200) Weight: Product AQ model Dry mass (excl. water) [kg]... -
Page 12: Transport, Storage And Handling
3 Transport, storage and handling 3.1 Pre-packing and packing Prior to packing, Halton inspects all products fully for any damages or physical faults. Halton inspects all nameplates and identification tags against the purchase order and the Halton order confirmation to eliminate the possibility of any mistakes or issues. -
Page 13: Lifting The Equipment
Halton Rex Expander (RXP) - Installation, commissioning, and maintenance guide 3.5 Lifting the equipment CAUTION PERSONAL INJURY HAZARD Do not lift objects over 20 kg (44 lbs) alone. Use a lift or seek assistance. Note: For information on the weight of the product, see Dimensions and weight. -
Page 14: Installation
Halton Rex Expander (RXP) - Installation, commissioning, and maintenance guide 4 Installation 4.1 Before you start 4.1.1 Safety during installation CAUTION FALLING HAZARD Pay special attention and use proper equipment when working at height. CAUTION PERSONAL INJURY HAZARD Do not lift objects over 20 kg (44 lbs) alone. Use a lift or seek assistance. -
Page 15: Installation Requirements
The actuator is located in the middle of the left side of the unit. The Halton Rex Expander chilled beam can be attached directly to the ceiling surface (H = 220 mm) or suspended using threaded drop rods (8 mm). The brackets for ceiling installation are located at the sides of the unit. -
Page 16: Checks Before Installation
Halton Rex Expander (RXP) - Installation, commissioning, and maintenance guide 4.1.4 Checks before installation Make sure you have all the needed materials: ▪ The unit to be installed. ▪ Instructions (this document, design drawings) ▪ The needed tools, for example: ▪... -
Page 17: Connecting The Water Circuit Connections
Halton Rex Expander (RXP) - Installation, commissioning, and maintenance guide Figure 11. Connecting the duct Figure 12. Securing the duct with blind rivets 4.2.3 Connecting the water circuit connections If there are two connection pipes, the unit can be used for cooling or heating. If there are four connection pipes, the outer pipes are used for cooling and the inner pipes for heating. -
Page 18: Checks After Installation
Halton Rex Expander (RXP) - Installation, commissioning, and maintenance guide Figure 13. Connecting the pipes. Left: Push-fit fitting. Right: Compression fitting. 4.3 Checks after installation Before commissioning can start, make sure the following has been taken care of: ▪ The unit is installed correctly. -
Page 19: Commissioning
The water mass flow rates of the Halton Rex Expander chilled beam are balanced with adjustment valves installed on the outlet side of the cooling water loops. The cooling capacity of the Halton Rex Expander chilled beam is controlled by regulating the water mass flow rate. - Page 20 Halton Rex Expander (RXP) - Installation, commissioning, and maintenance guide Airflow rate [l/s] or [m³/h] Δp Measured static chamber pressure [Pa] Determined according to the table below [l/s]. If calculating m³/h, multiply by 3.6. Position of RXP/C-600 RXP/D-600 RXP/E-600 RXP/C-1200...
-
Page 21: Step By Step Instructions
Halton Rex Expander (RXP) - Installation, commissioning, and maintenance guide 5.2 Step by step instructions 5.2.1 Adjusting the position of the manual actuator of HAQ control Note: By default, the manual actuator of HAQ control is closed. Adjust the position of the manual actuator of HAQ control according to the HVAC plan of the building. -
Page 22: Maintenance
▪ Access to the units 6.1.3 Maintenance information The front panel of the Halton Rex Expander chilled beam is removable to allow general maintenance and cleaning. 6.2 Maintenance schedule Carry out scheduled maintenance according to the maintenance plan of the building. -
Page 23: Opening The Front Panel
Halton Rex Expander (RXP) - Installation, commissioning, and maintenance guide 6.3.2 Opening the front panel The latches for opening the front panel are located at both ends of the front panel. Figure 15. Front panel latches To open the front panel, press the latches towards each other. -
Page 24: End Of Life
Halton Rex Expander (RXP) - Installation, commissioning, and maintenance guide 7 End of life 7.1 Removing the product from use NOTICE NOTICE All installation, commissioning, and maintenance work must only be carried out by qualified personnel. NOTICE NOTICE All electrical work must only be carried out by qualified personnel. - Page 25 Halton Rex Expander (RXP) - Installation, commissioning, and maintenance guide ▪ Recycle the steel frame and steel parts in accordance with steel recycling provisions. If you require more details for recycling and waste disposal concerning a product, contact Halton. All rights reserved ©Halton...
-
Page 26: Troubleshooting And Repairs
Halton Rex Expander (RXP) - Installation, commissioning, and maintenance guide 8 Troubleshooting and repairs 8.1 Troubleshooting Problem Possible cause Possible solution Poor air quality in the room. The airflow rate is too Check and, if needed, adjust the chamber low. -
Page 27: Technical Reference Data
Halton Rex Expander (RXP) - Installation, commissioning, and maintenance guide 9 Technical reference data 9.1 Connections: Electric actuator of HAQ control Figure 16. Connection diagram: Electric actuator of HAQ control Connection Colour Comment 24 V AC / 24…48 V DC... - Page 28 Halton Rex Expander (RXP) - Installation, commissioning, and maintenance guide k-factor (total) Position of Control signal RXP/ RXP/ RXP/ RXP/ RXP/ RXP/ control voltage [V] C-600 D-600 E-600 C-1200 D-1200 E-1200 0 / closed / no HAQ All rights reserved ©Halton...
Need help?
Do you have a question about the Rex Expander and is the answer not in the manual?
Questions and answers