Table of Contents
Advertisement
Quick Links
Advertisement
Table of Contents

Related Manuals for ACME Solar Flare


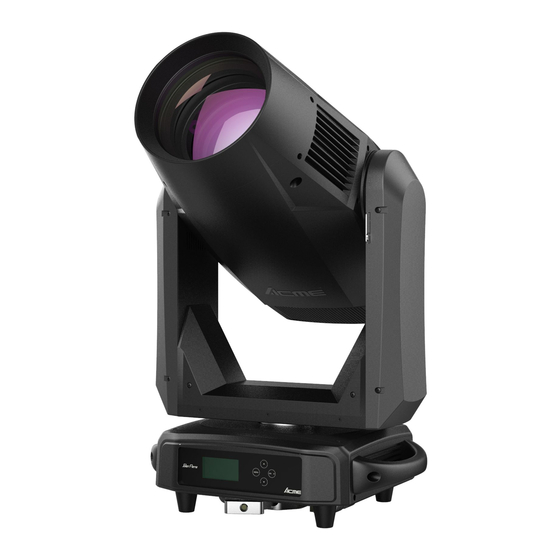
Summary of Contents for ACME Solar Flare
-
Page 2: Table Of Contents
CONTENTS 1. Safety Instructions ..................2 2. Technical Specifications ................. 4 3. Control Panel ....................6 4. Color/Gobo ....................7 5. How To Set The Unit ..................7 5.1 Main Function ..................7 5.2 Home Position Adjustment ..............15 6. Control By Universal DMX Controller ............20 6.1 DMX512 Connection ................ -
Page 3: Safety Instructions
1. Safety Instructions Please read the instruction carefully which includes important information about the installation, usage and maintenance. WARNING Please keep this User Guide for future consultation. If you sell the unit to another user, be sure that they also receive this instruction manual. Important: Damages caused by the disregard of this user manual are not subject to warranty. - Page 4 off the mains power immediately. DO NOT operate in dirty or dusty environment, do clean fixtures regularly. DO NOT touch any wire during operation as there might be a hazard of electric shock. Avoid power wires together twist other cables. ...
-
Page 5: Technical Specifications
2. Technical Specifications Power Voltage: AC 100~240V, 50/60Hz Power Consumption: 1370W Light Source: SUL1000X Color temperature: 6500K Beam Angle: 5° 50° CRI: Ra>70 Ra>90: Switch to high CRI mode with high CRI filter (Setting in 17channel of 34/25CH, 12channel of 29/20CH) Prism: 4 facet prism rotating in both directions... - Page 6 Construction: Display: LCD display Battery backup for user setup without mains connection Data In/Out: 3-pin and 5-pin XLR Power In/Out: PowerCON in Protection Rating: IP20 Features: Linear CMY color mixing + Linear CTO color correction 2 new material frost filters (mild & moderate), effectively improve the brightness under frost mode Motorized linear iris 4 fast and smooth framing shutters, each shutter blade position and angle can be controlled individually;...
-
Page 7: Control Panel
3. Control Panel Wire Version: Powercon Version: 1. Display: To show the various menus and the selected function 2. Button: MENU To enter into move backward or leave the menu To go backward to move up in the menu DOWN To go forward to move down in the menu ENTER To perform the desired functions... -
Page 8: Color/Gobo
4. Color/Gobo GREEN BLUE PINK ORANGE DANGER! Install the color wheel/gobo wheel with the device switched off only. Unplug from mains before changing the color wheel/gobo wheel! CAUTION: Never unscrew the screws of the rotating gobo as the ball bearing will otherwise be opened! 5. - Page 10 DMX Setting To select DMX Setting, press the ENTER button to confirm, use the UP/DOWN button to select Address, Channel Mode, Connect Option, Offline Mode, Network, Art-Net, Repeat On DMX or View DMX Value. Address To select Address, press the ENTER button to confirm. Use the UP/DOWN button to adjust the address from 001 to 479/488/484/493, press the ENTER button to store.
- Page 11 Offline Mode To select Offline Mode, press the ENTER button to confirm. Use the UP/DOWN button to select Hold or Blackout, press the ENTER button to store. Press the MENU button back to the last menu or let the unit idle 30 seconds to exit menu mode. Network To select Network, press the ENTER button to confirm.
- Page 12 Tilt Inverse To select Tilt Inverse, press the ENTER button to confirm. Use the UP/DOWN button to select No (normal) or Yes (tilt inverse), press the ENTER button to store. Press the MENU button back to the last menu or let the unit idle 30 seconds to exit menu mode. P/T Feedback To select P/T Feedback, press the ENTER button to confirm.
- Page 13 Power Mode To select Power Mode, press the ENTER button to confirm. Use the UP/DOWN button to select Standard, Quiet or Compatible, press the ENTER button to store. Press the MENU button back to the last menu or let the unit idle 30 seconds to exit menu mode. Bright Calibration Select Bright Calibration, press the ENTER button to confirm, present mode will blink on the display, use the UP/DOWN button to adjust the value from 50 to 100, press the ENTER button to store.
- Page 14 Fixture Test Enter menu mode, select Fixture Test, press the ENTER button to confirm, use the UP/DOWN button to select Auto Test or Manual Test Auto Test Select Auto Test, press the ENTER button to confirm, the unit will run built-in programs to automatically test pan, tilt, color, gobo, gobo rotation, prism, prism rotation, frost, iris, focus, zoom, etc.
- Page 15 Upgrade Files Select Upgrade Files, press the ENTER button to confirm, upgrade files will show on the display, press the MENU button to exit. Firmware Version Select Firmware Version, press the ENTER button to confirm, firmware version will show on the display, press the MENU button back to exit.
-
Page 16: Home Position Adjustment
RDM FUNCTIONS Select the MANUFACTURER menu to display the manufacturer of the fixture. Select the SOFTWARE VERSION menu and the program version number of the fixture will be displayed. Select the DMX START ADDRESS menu to change the DMX 512 address (001-512). Select the DEVICE MODEL DESCRIPTION menu to display the model of the fixture. - Page 18 Dimming Start Enter offset mode, Select Dimming Start, press the ENTER button to confirm, the present position will blink on the display, use the UP/DOWN button to offset the value from 0 to 9999, press the ENTER button to store. Press the MENU button to exit. LED Frequency(Hz) Enter offset mode, Select LED Frequency(Hz), press the ENTER button to confirm, the present position will blink on the display, use the UP/DOWN button to offset the value from 1072 to 1327,...
- Page 19 Color Enter offset mode, Select Color, press the ENTER button to confirm, the present position will blink on the display, use the UP/DOWN button to offset the value from -128 to 127, press the ENTER button to store. Press the MENU button to exit. Gobo1 Enter offset mode, Select Gobo1, press the ENTER button to confirm, the present position will blink on the display, use the UP/DOWN button to offset the value from -128 to 127, press the ENTER...
- Page 20 Iris Enter offset mode, Select Iris, press the ENTER button to confirm, the present position will blink on the display, use the UP/DOWN button to offset the value from -128 to 127, press the ENTER button to store. Press the MENU button to exit. Focus Enter offset mode, Select Focus, press the ENTER button to confirm, the present position will blink on the display, use the UP/DOWN button to offset the value from -128 to 127, press the ENTER...
-
Page 21: Control By Universal Dmx Controller
BladeLF1 Enter offset mode, Select BladeLF1, press the ENTER button to confirm, the present position will blink on the display, use the UP/DOWN button to offset the value from 000 to 255, press the ENTER button to store. Press the MENU button to exit. BladeLF2 Enter offset mode, Select BladeLF2, press the ENTER button to confirm, the present position will blink on the display, use the UP/DOWN button to offset the value from 000 to 255, press the ENTER... -
Page 22: Address Setting
1. At last unit, the DMX cable has to be terminated with a terminator. Solder a 120-ohm 1/4W resistor between pin 2(DMX-) and pin 3(DMX+) into a 3-pin XLR-plug and plug it in the DMX-output of the last unit. 2. Connect the unit together in a “daisy chain” by XLR plug cable from the output of the unit to the input of the next unit. -
Page 23: Dmx512 Configuration
Please refer to the following diagram to address your DMX512 channel for the first 4 units. Unit 1 Unit 2 Unit 3 Unit 4 Channel mode Address Address Address Address 34 channels 25 channels 29 channels 20 channels 6.3 DMX512 Configuration Please refer to below configurations to control the fixtures Attentions: 1. - Page 24 019-027 Color2 028-036 Color3 037-045 Color4 046-063 Color5 064-127 Color Index 128-189 Fast to Slow 190-193 Stop 194-255 Slow to Fast Gobo1 000-009 Open 010-018 Gobo1 019-027 Gobo2 028-036 Gobo3 037-045 Gobo4 046-054 Gobo5 055-063 Gobo6 064-074 Gobo1 Shaking 075-085 Gobo2 Shaking 086-096 Gobo3 Shaking...
- Page 25 112-119 Gobo7 Shaking 120-127 Gobo8 Shaking 128-189 Fast to Slow 190-193 Stop 194-255 Slow to Fast Iris 000-255 100%0% Prism 000-007 Open 008-255 Prism R-Prism 000-127 Index 0°360° 128-189 Fast to Slow 190-193 Stop 194-255 Slow to Fast 000-007 Close 008-255 Open Frost1(Light)
- Page 26 Blade DW 2 000-255 0%100% Blade UP 1 000-255 0%100% Blade UP 2 000-255 0%100% Blade LF 1 000-255 0%100% Blade LF 2 000-255 0%100% Blade RG 1 000-255 0%100% Blade RG 2 000-255 0%100% SPECIAL FUNCTION 000-029 Null 030-039 Dimmer Curve Square Law 040-049 Dimmer Curve INV Square Law...
- Page 27 25 Channels (Mode 2): CHANNEL VALUE FUNCTION 000-255 0°540° Pan Fine 000-255 TILT 000-255 0°270° 000-255 Tilt Fine X/Y Time 000-255 Fast to Slow Cyan 000-255 0%100% Magenta 000-255 0%100% Yellow 000-255 0%100% 000-255 0%100% Color 000-009 Open 010-018 Color1 019-027 Color2 028-036...
- Page 28 128-189 Fast to Slow 190-193 Stop 194-255 Slow to Fast RGobo1 000-127 Index 0°360° 128-189 Fast to Slow 190-193 Stop 194-255 Slow to Fast Gobo2 000-007 Open 008-014 Gobo1 015-021 Gobo2 022-028 Gobo3 029-035 Gobo4 036-042 Gobo5 043-049 Gobo6 050-056 Gobo7 057-063 Gobo8...
- Page 29 Zoom 000-255 100%0% Focus 000-255 0%100% Strobe 000-007 Close 008-015 Open 016-131 Strobe Slow to Fast 132-139 Open 140-181 Fast Open Slow Close 182-189 Open 190-231 Fast Close Slow Open 232-239 Open 240-247 Random Strobe 248-255 Open Dimmer 000-255 0%100% 000-255 Dimmer Fine SPECIAL FUNCTION...
- Page 30 29 Channels (Mode 3): CHANNEL VALUE FUNCTION 000-255 0°540° Pan Fine 000-255 TILT 000-255 0°270° 000-255 Tilt Fine X/Y Time 000-255 Fast to Slow Cyan 000-255 0%100% Magenta 000-255 0%100% Yellow 000-255 0%100% 000-255 0%100% Color 000-009 Open 010-018 Color1 019-027 Color2 028-036...
- Page 31 Strobe 000-007 Close 008-015 Open 016-131 Strobe Slow to Fast 132-139 Open 140-181 Fast Open Slow Close 182-189 Open 190-231 Fast Close Slow Open 232-239 Open 240-247 Random Strobe 248-255 Open Dimmer 000-255 0%100% Dimmer Fine 000-255 Blade 000-255 0°180° Blade DW 1 000-255 0%100%...
- Page 32 140-149 Focus Compensate Near 150-159 Focus Compensate Medium 160-169 Focus Compensate Far 170-179 Null 180-189 Dimmer Speed Fast 190-199 Dimmer Speed Smooth 200-209 Reset All 210-219 Reset Effect 220-229 Reset Pan/Tilt 230-255 Null 20 Channels (Mode 4): CHANNEL VALUE FUNCTION 000-255 0°540°...
- Page 33 000-255 100%0% 000-007 Close 008-255 Open Frost1(Light) 000-255 0%100% Frost2(Heavy) 000-255 0%100% Zoom 000-255 100%0% Focus 000-255 0%100% Strobe 000-007 Close 008-015 Open 016-131 Strobe Slow to Fast 132-139 Open 140-181 Fast Open Slow Close 182-189 Open 190-231 Fast Close Slow Open 232-239 Open 240-247...
-
Page 34: Error Information
200-209 Reset All 210-219 Reset Effect 220-229 Reset Pan/Tilt 230-255 Null 7. Error Information 1. Pan Reset Error Check if the position of the pan mounting magnetic steel falls off or is damaged. Check if there are other interference items in the pan operating range. Check if the pan Hall elements is damaged. - Page 35 6. Cyan Reset Error Check if the position of the cyan color wheel mounting magnetic steel falls off or is damaged. Check if there are other interference items in the cyan color wheel operating range. Check if the cyan color wheel Hall elements is damaged. Check if the cyan color wheel Hall elements is in poor contact with the lead of the PCB board or disconnected.
- Page 36 10. Gobo1/2 Reset Error Check if the position of the gobo wheel1/2 mounting magnetic steel falls off or is damaged. Check if there are other interference items in the gobo wheel1/2 operating range. Check if the gobo wheel1/2 Hall elements is damaged. Check if the gobo wheel1/2 Hall elements is in poor contact with the lead of the PCB board or disconnected.
-
Page 37: Troubleshooting
14. Focus Reset Error Check if the position of the focus mounting magnetic steel falls off or is damaged. Check if there are other interference items in the focus operating range. Check if the focus Hall elements is damaged. Check if the focus Hall elements is in poor contact with the lead of the PCB board or disconnected. Check if the focus motor is damaged. -
Page 38: Fixture Cleaning
B. Not responding to DMX controller 1. DMX LED should be on. If not, check DMX connectors, cables to see if they are linked properly. 2. If the DMX LED is on and no response to the channel, check the address settings and DMX polarity. - Page 39 Declaration of Conformity We declare that our products (lighting equipments) comply with the following specification and bears CE mark in accordance with the provision of the Electromagnetic Compatibility (EMC) Directive 2014/30/EU. EN 55032: 2015; EN 61000-3-2: 2014; EN 61000-3-3: 2013; EN 55103-2: 2009. &...
- Page 40 Innovation, Quality, Performance...
Need help?
Do you have a question about the Solar Flare and is the answer not in the manual?
Questions and answers