Henny Penny FlexFusion FPE-615 Service Instructions Manual
Platinum combi incl. grease collection
Hide thumbs
Also See for FlexFusion FPE-615:
- Service instructions manual (124 pages) ,
- Operator's manual (82 pages) ,
- Installation manual (56 pages)

Subscribe to Our Youtube Channel
Related Manuals for Henny Penny FlexFusion FPE-615


Summary of Contents for Henny Penny FlexFusion FPE-615
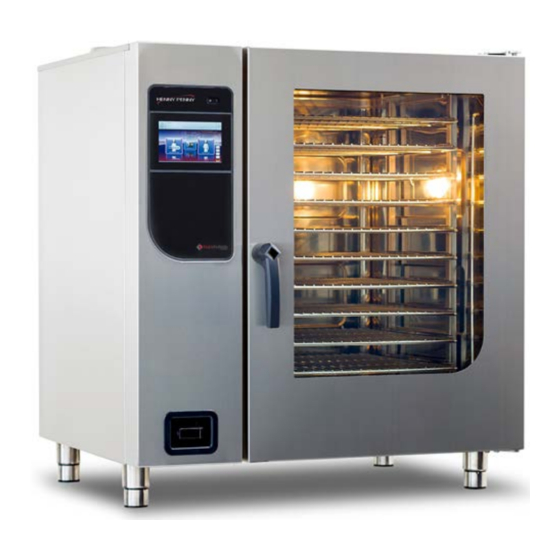
- Page 1 Service-in- structions FlexFusion® PLATINUM COMBI incl. grease collection Model FPE-615 FPG-615 FPE-621 FPG-621 FPE-115 FPG-115 FPE-121 FPG-121 FPE-215 FPG-215 FPE-221 FPG-221 FM06-138 en-US...
- Page 2 Henny Penny Corporation P.O.Box 60 Eaton,OH 45320 Phone +1 937 456-8400 Fax +1 937 456-8402 Toll free in USA Phone +1 937 417-8417 Fax +1 937 417-8434 www.hennypenny.com Service-instructions...
-
Page 3: Table Of Contents
Directory of contents 1 Introduction ................. 5 1.1 About this manual ................ 5 1.2 Warranty .................... 5 2 Safety instructions ............. 6 3 Description of operation ............ 7 3.1 Grease collection system .............. 7 3.2 Automatic flushing ................ 7 4 Opening and closing the unit .......... 8 4.1 Side wall .................... 8 4.1.1 Removing the side wall ... - Page 4 Directory of contents Service-instructions...
-
Page 5: 1 Introduction
Introduction 1 Introduction 1.1 About this manual This service manual contains information needed by the service technician for professional and correct fault isolation, repair and maintenance of the unit. The service technician must also observe the contents of the installation instructions and the user manual. Target group Target group for this service manual is qualified personnel who are familiar with the technical functioning and operation of the unit. -
Page 6: 2 Safety Instructions
Safety instructions 2 Safety instructions For servicing tasks, the service technician must be familiar with and observe regional regulations. In addition, the notes in the service manual must be observed. Danger to life due to electric current DANGER ü Disconnect power prior to performing gas and electrical work. •... -
Page 7: 3 Description Of Operation
Description of operation 3 Description of operation 3.1 Grease collection system The grease collection system must be activated for each cooking step as required. During a cooking step with activated grease collection system, the fat pump is switched on in intervals. The intervals as well as the duty cycle are controlled by fixed software parameters. -
Page 8: 4 Opening And Closing The Unit
Opening and closing the unit 4 Opening and closing the unit 4.1 Side wall Image: A Sizes 6.x and 10.x; B Size 20.x 4.1.1 Removing the side wall 1. Unscrew the screws in the side wall. 2. Pull the bottom edge of the side wall forwards. 3. -
Page 9: 5 Component Overview Grease Collection System
Component overview grease collection system 5 Component overview grease collection system Image: Overview grease collection system a Riser pipe, MM10031053 b Grease drain from siphon box to grease pump c Grease pump with condenser d Water hose for flushing grease separator e Grease drain hose f Double solenoid valve... - Page 10 Component overview grease collection system Image: Overview grease pump a Reduction, MM10030670 b Hose 20 x 5mm, MM10011567 (sold by the meter) c Hose clamp, MM10012751 d Supply line from siphon box e Hose clamp, MM10012751 f Hose 20 x 5mm, MM10011567 (sold by the meter) g Pipe bend, MM10031306 h Hose 20 x 5mm, MM10011567...
-
Page 11: 6 Circuit Diagram Overview Grease Collection System
Circuit diagram overview grease collection system 6 Circuit diagram overview grease collection system STEUERPLATINE CONTROL PCB K13 K14 3 4 5 /4.5 -K40 -G40 -C40 -K40 -K41 Image: Circuit diagram grease separator A1 Control board, MM10013404 C40 Capacitor, MM10031308 F1 Fuse, 10A, MM202643 G40 Grease pump 130V, MM10029936 K40 Relay, 120V, MM10017207... -
Page 12: 7 Service Menu - Appliance Test
Service menu - appliance test 7 Service menu - appliance test 7.1 Service menu Description • Functional testing of individual components • Error analysis • Maintenance • Change basic settings • Software update The graphics shown may deviate due to changes and different software versions. -
Page 13: Relay Test
Service menu - appliance test 7.2 Relay test Overview Image: Relay test page 1 Image: Relay test page 2 Activating relay test Tap the field of relays to be tested. The relay is active. Field of active relays is highlighted in green. Deactivating relay Tap the green highlighted field of the field to be deactivated. -
Page 14: 8 Cleaning And Maintenance
Cleaning and maintenance 8 Cleaning and maintenance 8.1 Clean grease collection system Prerequisite Cooking program has ended Container with 2 liters of warm water is ready. Sufficient funnel is ready. Visual inspection Grease drain hose has a slope to the grease collector. There is no puddle of grease under the unit. -
Page 15: Fat Poopme
Troubleshooting 9 Troubleshooting 9.1 Fat Poopme Before testing, spray water into the cooking chamber with the hand shower. Repeat this during troubleshooting if necessary. Switch on grease pump G40 via relay test (K13) in the service menu. Does the pump switch on (noise)? Is 120V present at relay K40 between terminals A1 Check hose and piping for blockage. -
Page 16: Solenoid Valve Flushing
Troubleshooting 9.2 Solenoid valve flushing Before checking the solenoid valve, make sure that the grease pump is working properly. Switch on solenoid valve K41 via relay test (K14) in the service menu. After approx. 30 seconds, additionally switch on grease pump G40 in the relay test (K13). - Page 20 Henny Penny Corporation P.O.Box 60 Eaton,OH 45320 Phone +1 937 456-8400 Fax +1 937 456-8402 *FM06-138* Toll free in USA Phone +1 937 417-8417 Henny Penny Corp., Eaton, Ohio 45320, Revised 10/29/2021 Fax +1 937 417-8434 www.hennypenny.com...
Need help?
Do you have a question about the FlexFusion FPE-615 and is the answer not in the manual?
Questions and answers