Table of Contents
Advertisement
Quick Links
Advertisement
Table of Contents

Related Manuals for AV Access 4KSW41-KVM-Pro


Summary of Contents for AV Access 4KSW41-KVM-Pro
- Page 1 4KSW41-KVM-Pro 4x1 HDMI 2.0 KVM Switcher with Hotkey Switch User Manual...
- Page 3 AV Access Technology Limited assumes no responsibility for any inaccuracies that may be contained in this document. AV Access Technology Limited also makes no commitment to update or to keep current the information contained in this document.
- Page 4 Important Safety Instructions Do not expose this device to rain, moisture, dripping or splashing. No objects filled with liquids, such as vases, shall be placed on the device. Do not install or place this unit in a bookcase, built-in cabinet, or in another ...
-
Page 5: Table Of Contents
Table of Contents Introduction ......................2 Overview ..........................2 Features ............................ 2 Package Contents ........................3 Panel ............................4 Front Panel........................4 Rear Panel ........................5 Installation and Application................. 6 Brackets Installation ......................6 Steps to install the device in a suitable location ..........6 Application .......................... -
Page 6: Introduction
Introduction Introduction Overview 4KSW41-KVM-Pro is a 4x1 HDMI KVM Switcher with Hotkey Switch. It supports HDMI 2.0 and HDCP 2.2 compatibility, and supports resolutions up to 4K@60Hz 4:4:4 8bit. The four USB port KVM switcher allows users controls four source devices/computers with only one set of USB devices (e.g. -
Page 7: Package Contents
Introduction No driver required, plug and play. Package Contents Before you start the installation of the product, please check the package contents: Switcher x 1 Power Adapter (DC 12V 1A) with US Pins x 1 IR Remote x 1 ... -
Page 8: Panel
Introduction Panel Front Panel Name Description On: The device is powered on. Power LED Off: The device is powered off. HDMI Input Selection Button 1~4: Press the HDMI Input button to select HDMI In 1~4 as input. Selection Buttons LED: LED is located on the right of the button. On: The corresponding HDMI In is selected. -
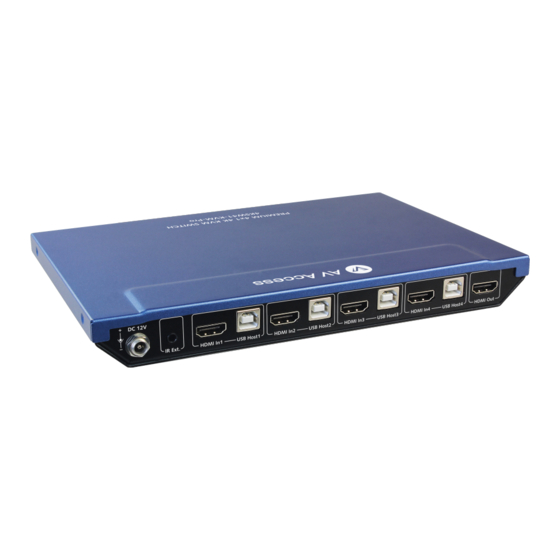
Page 9: Rear Panel
Introduction Rear Panel Name Description DC 12V Connect to the power adapter provided. IR Ext. Connect to the IR receive cable provided. HDMI In (1~4) Connect to HDMI sources. HDMI Out Connect to an HDMI display. Connect to USB Host devices. The USB Host 1~4 is bound with HDMI In 1~4 USB Host respectively. -
Page 10: Installation And Application
Installation and Application Installation and Application Brackets Installation Note: Before installation, please ensure the switcher is disconnected from the power source. Steps to install the device in a suitable location Attach the installation bracket to the enclosure using the screws that were provided in the package separately. -
Page 11: Application
Installation and Application Application Warnings: Before wiring, disconnect the power from all devices. During wiring, connect and disconnect the cables gently. Earphone Removable Keyboard Mouse Hard Disk Connect USB keyboard to Connect a USB 1.1 port on front Microphone panel and other USB devices and an earphone... -
Page 12: Control Of The Switcher
Control of the Switcher Control of the Switcher You can choose to switch input sources at your convenience through front panel buttons, IR remote or Hotkey function. Front Panel Control Users can choose to use front panel buttons to do basic switching operations. Connect the switcher as required and power on all the attached devices. - Page 13 Control of the Switcher Turn on Turn off a CEC-enabled display device a CEC-enabled display device Select the previous source input Select the next source input Select a specific source input Button IR Codes Description 0x1D Turn on the connected CEC-enabled display. 0x1F Turn off the connected CEC-enabled display.
-
Page 14: Hotkey Function
Control of the Switcher Hotkey Function One USB 1.1 port on front panel of the switcher supports keypad Hotkey function. Connect a keypad to USB 1.1 port, and users can use the following hotkey key combinations on the connected keypad to switch input sources for output. Key Combination Function “Tab”... -
Page 15: Specifications
Specifications Specifications Technical Video Signal HDMI with 4K@60Hz 4:4:4, HDCP 2.2 SMPTE: 1280x720P 1,2,3,4,5,6,7,8 , 1920x1080I 1,2,3,4,5,6,7,8,9 1920x1080P , 2560x1080 , 3840x1080 2,3,5,6,8 2,3,5,6,8 3840x2160 , 4096x2160 VESA: Input/Output Resolution 800x600 , 1024x768 , 1280x768 , 1280x800 Support 1280x960 , 1280x1024 , 1360x768 , 1366x768 1400x1050... - Page 16 Specifications Transmission Distance Cable Range Supported Video Input/Output:15m/50ft 1080P@60Hz 24bpp Input: 10m/33ft 4K@30Hz 4:4:4 24bpp HDMI Output: 15m/50ft 4K@60Hz 4:2:0 24bpp Input/Output: 5m/16ft 4K@60Hz 4:4:4 24bpp www.avaccess.com services@avaccess.com...
-
Page 17: Trouble Shooting
Trouble Shooting Trouble Shooting Steps of Regular Troubleshooting Routine Power: Please make sure all devices are powered on. (source, switcher, display devices) Indicator: Please make sure LED indicators are normal according to user manual. Devices: Please make sure picture can be shown normally when connecting source to display devices directly. -
Page 18: Warranty
The warranty has expired. The defects are caused by the fact that the product is repaired, dismantled or altered by anyone that is not from an AV Access Technology Limited authorized service partner. The defects are caused by the fact that the product is used or handled improperly, roughly or not as instructed in the applicable User Guide. - Page 20 AV Access Technology Limited V1.0.0...
Need help?
Do you have a question about the 4KSW41-KVM-Pro and is the answer not in the manual?
Questions and answers