
Subscribe to Our Youtube Channel
Related Manuals for Robam CXW-260-A676


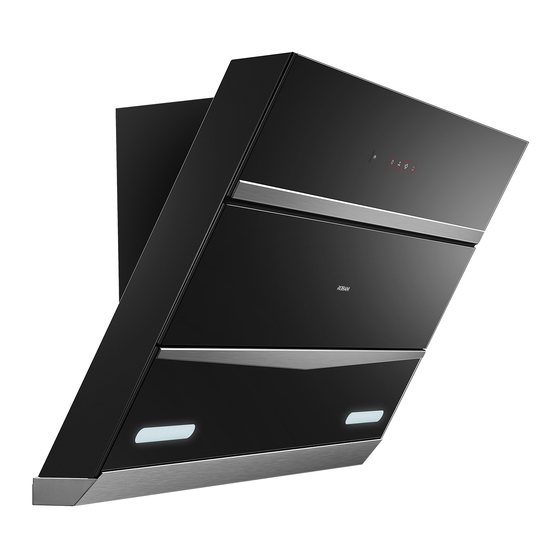
Summary of Contents for Robam CXW-260-A676
- Page 1 User Manual Before operating this unit, please read the user manual completely and keep it. If the manual is lost, you can send e-mail to overseas@robam.com, request for an electronic manual. CXW-260-A676 Range Hood...
-
Page 2: Table Of Contents
CONTENTS Safety Precaution........................1 Important Information......................4 Product Description .........................5 Packing List..........................5 Installation..........................6 User Manual..........................8 Maintenance.........................9 Removal of Components.......................10 Circuit Diagram........................12 Troubleshooting of General faults..................12... -
Page 3: Safety Precaution
Touch Disassembly Execution Earthed Electric Shock Please use this product according to manual strictly, or ROBAM shall not take any responsible Warning caused by improper operation. Danger t allow children or weakling to use range hood separately, or it may cause electric shock or other accident. - Page 4 Range Hood Danger Please turn off range hood immediately if pan got fire (range hood shall aggravate fire if it’s working) and extinguish fire by effective action. Strict For example, cover flame by metal cover, turn off gas valve immediately Execution and remove inflammable things.
- Page 5 Range Hood Warning This appliance just for household use only.And it’s not allowed to exhaust dangerous or explosive matter or air. It should be put under dry and Strict ventilation environment without dangerous air. Execution The range hood and electric circuit must be installed by skilled and trained personnel with required qualification.
-
Page 6: Important Information
Range Hood Notice Because the installation is difficult and hood is heavy, the installation Strict shall be executed by professional person based on manul. Execution Don't break electric wire or other invisible equipment when cutting Strict something or drilling holes on ceiling. Execution When range hood is using in well sealed building, it should have air inlet Strict... -
Page 7: Product Description
Range Hood Product Description Technical Data 54dB(A) Model CXW-260-A676 Noise Power Supply Rated Power Input 268W 220-240V~ 50Hz Total Pressure Efficiency ≥23% Rated Main Motor Power Input 260W Lamp Power(max) ≤4W×2 380Pa Nominal Wind Pressure × × Dimension (L (895×410×551)mm... -
Page 8: Installation
Range Hood Installation If the flue aperture is less than air duct aperture, it will influence the fume suction effect and the too long air duct will influence the fume suction effect, too. Preparation for installation Notice ● Installation and circuit setting must be done by experienced professionals. Only a professionally trained person with an installation qualification can install the hood. - Page 9 Range Hood Installation Hole size of the Figure Wall exhaust pipe Ø200 Note: All data units in the following diagram are expressed in mm. Movable decorative panels (homemade) Ceiling hole sizes(Projection size of the hood top) ●Determine the position: Installation hole spacing as in Figure 3, keep the level between the two holes, ceiling drilling size as above.
-
Page 10: User Manual
Range Hood Drill hole through the wall: Determine the location of the aluminum exhaust pipe against the wall and draw the drilling range (i.e. a circle slightly larger than the pipe OD). Then use a long drill bit to drill through the wall. Pay attention to the wall structure and material, so as not to destroy other parts of the wall. -
Page 11: Maintenance
Range Hood Press the "Low" button in standby or running state, the impeller will rotate smoking at low speed (i.e. low gear open). Press the " Turbo/High " button to run the fry function, the icon flashes, press this button again to switch to strong, if the fry function is running without any operation, it will automatically switch to strong after 3 minutes, the icon is always on when running the strong function. -
Page 12: Removal Of Components
Range Hood Removal of Components Note: The installation procedures of the following components are in reverse with the removal. Please wear protective gloves during operation to prevent the sharp edge of metal hurting your hands. Unplug before installing or disassembling, avoiding from electric shock. Romoval of lamp Top cover plate Remove the top cover plate by unscrewing the screws... - Page 13 Range Hood Romoval of filter Slot Hold the two handle holes on the filter with both hands Start the hood so that the smoke guide is open and then and apply slight outward pressure so that the filter is no unplug the power supply.
-
Page 14: Circuit Diagram
Range Hood Circuit Diagram Terminal box blue Control circuit blue blue yellow brown orange Yellow/Green gray black blue brown blue 220-240V~ Yellow/Green E Troubleshooting of General faults Fault Cause Solution Warning No response after pressing any icon The power plug is not connected (e.g. - Page 15 Edition: A/0 Publication Date: July, 20, 2021...
Need help?
Do you have a question about the CXW-260-A676 and is the answer not in the manual?
Questions and answers