Table of Contents
Advertisement
Quick Links
Advertisement
Chapters
Table of Contents

Subscribe to Our Youtube Channel
Related Manuals for Robam CXW-200-A837


Summary of Contents for Robam CXW-200-A837
- Page 1 User Manual 使用产品前请仔细阅读本使用说明书,并妥善保管。如果说明书丢失,您可以发送邮件至 overseas@robam.com, 获取电子版说明书。 Before operating this unit, please read the user manual completely and keep it. If the manual is lost, you can send e-mail to overseas@robam.com, request for an electronic manual. CXW-200-A837 吸油烟机 Range Hood...
-
Page 2: Table Of Contents
目 录 安全注意事项 ........................1 重要信息 ..........................3 产品简介 ..........................4 装箱单 ............................ 4 安装说明 ..........................5 使用说明 ..........................8 维护与保养 ..........................9 部件拆卸 ..........................10 线路图 ..........................12 一般故障的排除 ........................12... -
Page 3: 安全注意事项
吸油烟机 亲爱的用户 承蒙您的厚爱,购买了老板吸油烟机,借此机会,向您表示深深的谢意! 在使用本产品前,请您仔细阅读本说明书,并妥善保管,以备将来参考。 *本说明书中的图片为示意图,仅供参考,若图片与实物不符,以实物为准。本公司产品外观结构不断改 进,对于产品改进所引起的内容更改,恕不另行通知。 安全注意事项 为了避免给使用者及其他人员造成危害或者财产损害,特作如下区分及标志。 以下均为有关安全的重要事项,敬请严格遵守,并在充分理解内容的基础上正确使用。 根据危害、损害程度进行的内容区分 危险 若忽视这一标志,并进行错误操作,极有可能导致人员危险、重伤或引起火灾。 警告 若忽视这一标志,并进行错误操作,有可能导致人员危险、重伤或引起火灾。 注意 若忽视这一标志,并进行错误操作,有可能导致人员受伤或造成物品的损害。 注意、禁止内容的图标 禁 止 禁止触摸 禁止用潮湿 小心烫伤 禁止拆卸 严格执行 需要接地 当心触电 禁止明火 的手操作 请严格按照本说明书规定使用,由于本产品使用不当造成的任何财产损失、人身伤害,本公司不 警告 承担责任。 危险 请不要让无人监护的儿童及体弱者单独使用吸油烟机,否则有可能导致触电或其他意外伤害。 禁 止 严禁电机、开关、接插件等电器部件沾水;禁止用水冲洗吸油烟机。吸油烟机被水淋湿后,请 不要使用;如果使用会导致漏电、触电等事故。 禁 止 请不要对电源线进行改制、拉伸、结扣以及施加重物、挤压等,否则易导致电源线破损而发生 触电和火灾事故。... - Page 4 吸油烟机 警告 非专业人员请勿拆卸、安装及维修吸油烟机。 禁止拆卸 炉火在不使用时应及时熄灭,禁止炉火直接烘烤吸油烟机。禁止在吸油烟机下直接烧烤食物, 以免损坏吸油烟机及发生意外。 禁 止 请勿触摸已经开启或者刚关闭不久的灯泡,以免烫伤。 禁止触摸 为确保安全和安装顺利,请使用随机附件进行安装(特别是膨胀管和木螺钉,必须使用随机附 件,否则吸油烟机有掉下来的危险); 安装金属膨胀管时,管径与孔径的配合必须紧密,严禁 严格执行 钻孔过大,以免膨胀管松动,造成吸油烟机意外跌落。 吸油烟机应使用专用电源插座,并且专用电源插座可靠接地;因电源线中途连接、使用延长线 以及多口配线器时易发生触电、插头插座发热以及火灾。请确保由专业的电工来进行,并且要 严格按照所有适用的国家和地方的电力法规;在接线以前,请先关闭电源并采取合理措施防止 严格执行 电源开关自动闭合。 如果电源软线损坏,为了避免危险,必须由制造商、其维修部或类似部门的专业人员更换。 严格执行 遵照加热设备厂家的安全指南,同时要遵照消防等管理部门颁布的安全标准进行。 严格执行 当吸油烟机与燃烧燃气或其它燃料的炉灶同时使用时,房间必须通风良好。 严格执行 本产品仅供家庭日常使用,请不要在特殊环境中使用(例如:室外);也不能用来排出有危险的 或者容易爆炸的物质或者气体。产品在安装前应安放在干燥、通风、周围无腐蚀性及有害气体 严格执行 的环境中。 吸油烟机的安装以及电路设置必须要由有经验的专业人员进行,非专业人员请勿安装。在安装 时要遵守所有相关的法规、标准,包括与火灾有关的说明。用户自行安装易发生触电、脱落、 严格执行 起火等危险。 出风管必须确保接到室外。为了避免火灾的发生并保持空气清新,请将废气排到室外。请不要 将废气排到墙内、阁楼或车库中。 严格执行 如果不按说明书规定的方法清洗,吸油烟机有起火的危险。 严格执行 请养成外出、就寝或使用后及时关闭灶具开关按钮及燃气总阀门,定期更换、检查煤气管道的 习惯,煤气泄漏报警装置不能完全避免煤气泄漏事故。...
-
Page 5: 重要信息
吸油烟机 注意 吸油烟机排出的气体不应排到用于排出燃烧燃气或其它燃料的烟雾使用的热烟道中。 禁 止 在移动吸油烟机进行安装、清洁或者修理前,务必切断电源,以免触电;在进行安装、清洁或 修理时,应佩戴防护手套,以防被吸油烟机内金属锐边伤手。 严格执行 吸油烟机使用的环境温度不能超过 40℃ 。 严格执行 由于本吸油烟机的安装程序比较复杂,且重量较重,因此最好由专业安装维修人员按照说明书 进行安装。 严格执行 当进行切割或者在墙壁房顶上或者天花板上钻孔时,请注意不要损坏电线以及其它隐藏设备。 严格执行 在密封性良好的建筑物中使用吸油烟机时,应保证有一空气入口,或将门稍打开一些,保证空 气流通。 严格执行 当油杯内的积油超过三分之二或即将到达刻度线时,请及时清理,防止溢出。油杯中所收集的 废油请勿食用。 严格执行 安装吸油烟机的墙壁要有足够的支撑强度,对于中空墙壁,中空板实心层的厚度必须大于 30mm 以上,对于混凝土墙壁可直接打安装孔。整机必须牢固安装在墙壁上。 严格执行 当使用烹饪器具时,易触及部件可能会发烫。 严格执行 处置:请勿将本产品作为未分类的城市垃圾处置。需要单独收集这些废物进行特殊处理。本产品不 得与生活垃圾一起处理。本产品必须在授权的地方处理,以回收电气和电子设备。通过收集和回收 废物,有助于节约自然资源,并确保产品以环保和健康的方式处理。 重要信息 吸油烟机的包装 请以环保的态度处置这些包装材料,以保持一个良好的环境。 请勿让儿童玩耍塑料薄膜和包装箱,这可能会产生窒息事故,所以请让包装材料远离儿童,包装材料不是玩具。 使用吸油烟机前 该吸油烟机的排烟方式是外排式。 在您着手安装和使用本产品前,请充分阅读此说明书及随机附带的各个 文件,并严格遵守,必要时请同时阅读你所购买的灶具使用说明书,并将他们妥善保存好,以备将来参考。 如发现吸油烟机有明显的损坏,请勿通电,并立即与当地的经销商或服务中心联系。... -
Page 6: 产品简介
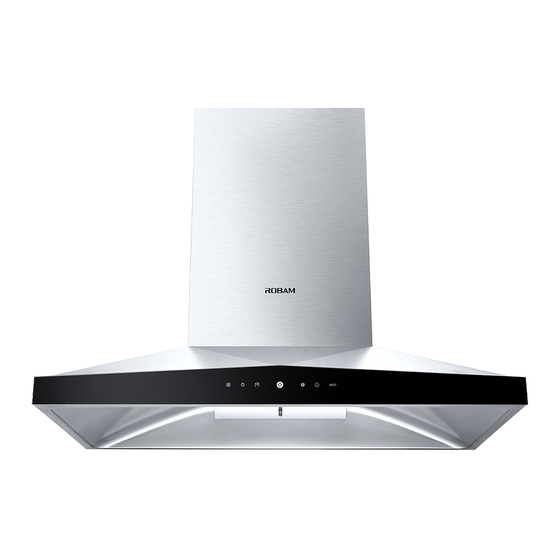
吸油烟机 技术参数 CXW-200-A837 型号 噪声 ≤53dB(A) 220-240V~ 50Hz 204W 电源 整机额定输入功率 200W 全压效率 ≥32% 主电机额定输入功率 680Pa 标称风压 照明灯最大输入功率 ≤4W (895×504×684)mm 1200 爆炒风量 外形尺寸(长×宽×高) 800Pa 25.5kg 最大静压 主机净重 常态气味降低度 ≥98% 油脂分离度 ≥91% 注:1. 以上数据是在230V~50Hz测试环境下测得。其中风量按照IEC61591,噪声按照IEC60704标准进行测试; 2. 表中风量、标称风压、最大静压的明示值与实测值误差小于10%; 3. 所示噪声值为A计权声压级; 机体尺寸 标注的尺寸仅供参考, 括号内的尺寸为主机... -
Page 7: 安装说明
吸油烟机 安装说明 警 告 吸油烟机排出的气体不应排到用于排出燃烧煤气或其它燃料的烟雾使用的热烟道中。 安装金属膨胀管时,管径与孔径的配合必须紧密,严禁钻孔过大,以免膨胀管松动,造成吸油烟机意外跌落。 当吸油烟机与燃烧燃气或其它燃料的炉灶同时使用时,房间必须通风良好。 烟道口径小于风管口径会影响吸烟效果,风管过长也会影响吸烟效果。 本产品仅供家庭日常使用,请不要在特殊环境中使用(例如:室外);也不能用来排出有危险的或者容易爆炸的 物质或者气体。产品在安装前应安放在干燥、通风、周围无腐蚀性及有害气体的环境中。 安装前准备 ●周围环境 吸油烟机应避免安装在门窗过多的地方,形成太大空气对流,而影响其除油排烟效果。 ●工具准备 安装吸油烟机应准备以下工具: 1、冲击电钻(带钻头) 2、扳手 3、螺丝刀 4、尺 注意事项 ●吸油烟机的安装及电路设置必须由有经验的专业人员进行,只有经过专业培训的,并具有安装资质的人员, 才能对吸油烟机进行安装,非专业人员请勿安装、拆卸及维修吸油烟机。 ●安装前请勿接通吸油烟机电源,以免触电。 ●如果您的厨房正处于装修状态,请勿将吸油烟机暴露在外,因为建筑材料、灰尘、油漆、涂料以及它们所挥 发的气体,会使吸油烟机表面产生腐蚀和失去光泽。因此建议您在装修完毕后再安装吸油烟机。 ●如果在安装吸油烟机前,需要移动燃气灶,则在移动燃气灶前,请先关闭燃气总阀门。 ●请勿将吸油烟机安装在木质等易燃物的墙面上,安装吸油烟机的墙面应为有足够强度的不可燃物,且表面平 直。 ●吸油烟机可能有非常锋利的边,在移动吸油烟机进行安装、清洁或修理时,请佩戴防护手套。 ●在墙壁或天花板等上面钻孔时,应避开墙内埋设的电线及其它隐藏设备,以免引起触电及火灾。 ●吸油烟机不要装得太高,也不要受外界气流干扰,以免降低吸烟效果。 ●制作橱柜时,请给机体留下装取空间,以利维护保养与检修。 ●装机时,请使机体保持水平。 ●请使用单相带接地插座,并良好接地(自来水管接地不可靠,煤气管道接地有引发火灾与爆炸的危险)。 ●为保证安全和安装顺利,请使用随机附件进行安装,否则吸油烟机可能会有掉下来的危险。 ●如电源软线损坏,为了避免危险,必须由制造商、其维修部或类似部门的专业人员更换。请不要对电源线 进行改制、拉伸、结扣以及施加重物、挤压等,否则易导致电源线破损而发生触电和火灾等事故。 ●安装完毕后,请先对吸油烟机表面进行清洁,然后接通电源,进行试运行操作。... - Page 8 吸油烟机 安装 ●确定位置: 可拆卸挡板根据实际安装情况适当调整。安装孔距如图2所示,机体应垂直居中和保持水平,吊顶钻孔尺 寸如图3。 吸油烟机安装于炉灶正上方,炉灶上烹调器具的支承面与吸油烟机最低部位的最小距离为650mm(如煤气 炉灶安装说明规定了较大的安装距离者,对此应予考虑。电灶可视实际情况适当降低)。 注:以下示意图的所有数据单位均以mm表示。 图1 可拆卸面板 吊顶 吊顶 主机附面 板 主机面板 可拆卸挡板 (图1-2有拆卸挡板的安装方法) (图1-1无拆卸挡板的安装方法) 挂脚限位块 图2 图 35±2 风管钻孔尺寸Ø 墙体 挂脚 447.5 吊顶钻孔尺寸图 (烟机顶部投影尺寸) 安装挂脚 ● 按照挂脚的尺寸在墙壁的相应位置上,用直径为10mm的钻头钻深度为60-70mm的四个孔(不可过于 大),将膨胀管压入孔内,再用随机配备的4枚4×60mm的木螺钉将挂脚可靠固定。在距离四孔高度65mm处, 钻出一个直径为10mm(不可过大),深度为50-55mm的孔,将M6金属膨胀管塞入孔内。(如图2)...
- Page 9 吸油烟机 ●安装主机附面板扭簧(注意:此步骤请在机体固定前安装) 图 4-1 图 4-2 图 4-3 扭簧橡胶套 主机附面板扭簧 固定 固定 主机附面板扭簧 螺钉 铆螺母 松开 扭簧衬套 松开 扭簧保护套 先在主机附面板扭簧上 a.先将主机附面板扭簧套入铆螺母内; 将主机附面板两端的主机附面板钮簧 套入扭簧橡胶套,然后 如图从虚线位置推到实线位置进行固 b.再将扭簧衬套套在铆螺母上; 套入扭簧保护套。 定。 c.最后用M4×10螺钉把扭簧衬套与铆 螺母固定。 ●安装机体 先将止回阀如图6所示固定,再按照图2所示将机体后部的挂孔对准挂脚的挂钩按压滑入,用手晃动机体 看是否挂牢。待机体安装到位后,在M6金属膨胀管上装入挂脚限位块、垫片,旋紧螺母(防止机体在外力作 用下意外脱钩)。 ●固定主机附面板 如图1-1的安装方法,此时主机附面板与顶板之间还有一定的间隙,应如图4-3所示松开主机附面板扭簧, 再将主机附面板推到与顶板接触,然后将主机附面板扭簧进行固定,最后撕去保护膜。 (图1-2安装方法中无需调节与固定主机附面板) 安装铝箔风管 铝箔风管钻孔位置(公共烟道不需要钻孔) ● 铝箔风管与炉台正对窗户之安装:拆下一方玻璃,安装一块有排风孔的胶合板,或直接在玻璃上开洞。...
-
Page 10: 使用说明
吸油烟机 图5 图6 Ø185铝箔风管 止回阀接口 风管胶带 风管接口(选购) 风管胶带 卡扣 T 4.2 × 18螺钉 卡槽 ST4.2 ×8 螺钉 接线盒 止回阀 止回阀密封圈 机体 剪去小于墙孔的多余部分 注意: 安装时请将铝箔风管拉直, 以免铝箔风管在半拉 请注意将止回阀斜口朝向接线盒方向 伸状态时产生噪音, 多余部分可用钢丝钳剪去。 排风墙孔直径应与风管直径相近,不应太小。否则会造成排烟不畅、噪音升高、风量降低等情况。出风管与 墙孔或公共烟道接口连接处必须严格进行密封,确保出风管与止回阀或公共烟道接口连接牢固,必须保证止 回阀或公共烟道接口处的叶片开合灵活。 使用说明 开关控制面板 定时显示区 风量显示区 清洗提示 照明 风量 定时 爆炒 电源... -
Page 11: 维护与保养
吸油烟机 在开机状态下,按一下“定时” 键,定时显示区显示“ 1 ”,表示定时时间为 10 分钟, 10 分钟后油烟机将会发出提示音来提醒定时时间已到。若按 2 下,则定 时显示区显示“ 2 ”,表示定时时间为 20 分钟,依次循环,最长为 60 分钟。定时 定时 时间到后,按下任意键,取消提示音。 按“照明”键,照明灯亮,再按”照明“键,则关闭照明灯。”照明”键只控 制照明灯。 照明 本机具有清洗提示功能,当吸油烟机运作 60 小时后,清洗提示图标长亮,同时蜂 鸣器响 1 声,提醒用户清理油网。此时,用户可长按此键取消提示,若不取消, 则清洗提示图标长亮 1 小时后自动熄灭。用户也可以在关状态下长按“爆炒”键 查询电机运行时间, 定时显示区显示十位,风量显示区显示个位,单位为 1 小 清洗提示 时,最高为 60 小时,显示 5 秒后熄灭。 维护与保养... -
Page 12: 部件拆卸
吸油烟机 部件拆卸 警 告 1.机体在一般情况下不需要拆卸,拆卸工作需由专业维修人员来完成,非专业人员请勿拆卸、安装及维修 吸油烟机。 2.在清洗吸油烟机、提供安装或维修服务之前,必须切断电源,以免触电。 注:以下部件的安装步骤与拆卸步骤相反,为防止金属锐边伤手,请在操作时佩戴好防护手套。 灯拆卸 用小的一字螺丝刀或比较尖小的东西嵌入灯罩 用力往外翘,把射灯从烟罩上取出,拔出连接 与烟罩安装之间的缝隙中。 器,即可更换射灯。 照明灯图形 照明灯信息 长方形 LED 照明灯类型 最大功率 电压 12VDC 见照明灯图形 尺寸 网罩拆卸 先取下油杯,接着用手托住集油槽后侧,另一 用十字螺丝刀对准螺钉孔,逆时针旋转 度左 只手拉住集油槽上的手把,稍用力向下拉,使 右,同时另一只手托住网罩,待网罩脱离集烟 集油槽脱离卡扣,然后取出集油槽。取出时请 罩后,往斜下方取出网罩。 小心,以免油槽内的积油溅出。... - Page 13 吸油烟机 开关拆卸 取下灯后,用十字螺丝刀拧下开关上的两颗螺 钉,往斜上方移动开关组件,从灯孔部位取出, 即可进行维修更换。 开关组件 整机拆卸 1、拔下电源插头; 2、取下油杯; 3、按图4-3的方法松开主机附面板扭簧,将主机附面板插回主机面板内; 4、拧下主机面板后部的四枚螺钉,将主机面板及主机附面板取出; 5、取下两侧降噪棉; 6、用十字螺丝刀旋下降噪板上端及左右两端的4颗螺钉,取下降噪板; 7、旋下挡圈上的紧固螺钉,取出挡圈; 8、顺时针旋下盖帽,垂直取出叶轮; 9、按照网罩拆卸方法取下网罩组合。 装上步骤与拆卸步骤相反(装上叶轮时,请在叶轮的轴孔中抹一些润滑油。) 主机附面板 注:如没有安装主机附面板则无须步骤3。 主机面板 降噪板 吸声海棉 降噪板 叶轮 电机 吸声海棉 挡圈 盖帽 网罩 集油槽 油杯...
-
Page 14: 线路图
吸油烟机 线路图 接线盒 控制电路 蓝 蓝 红 红 操 作 白W 电 红 V 高压 黑 U 模块 路 棕 蓝 220-240V 黄/绿 E 一般故障的排除 序号 故障现象 故障原因 排除方法 按任何键都无反应 电源插头未插好或停电 插紧电源插头 (如叶轮不转动、照明灯不亮) 按照明开关,照明灯不亮 照明灯损坏或照明灯接触不良 更换照明灯或插紧电源插头 使用单相三极插座 机体表面有感应电,麻手 电源插座没有良好接地 并良好接地 叶轮运转有异常声... - Page 16 CONTENTS Safety Precaution..........................Important Information.......................... Product Overview..........................Packing List............................Installation............................Use Instruction............................. Maintenance and Services......................Prats Removal............................ Circuit Diagram..........................General Troubleshooting.........................
-
Page 17: Safety Precaution
Wet Hand Disassembly Execution Earthed Electric Shock Please use this product according to manual strictly, or ROBAM shall not take any responsible Warning caused by improper operation. Danger Don't allow children or weakling to use range hood separately, or it may cause electric shock or other accident. - Page 18 Range Hood Danger Please turn off range hood immediately if pan got fire (range hood shall aggravate fire if it’s working) and extinguish fire by effective action. Strict For example, cover flame by metal cover, turn off gas valve immediately Execution and remove inflammable things.
- Page 19 Range Hood Warning There shall be adequate ventilation of the room when the range hood is Strict used at the same time as appliances burning gas or other fuels. Execution This appliance just for household use only.And it’s not allowed to exhaust dangerous or explosive matter or air.
-
Page 20: Important Information
Range Hood Notice Because the installation is difficult and hood is heavy, the installation Strict shall be executed by professional person based on manul. Execution Don't break electric wire or other invisible equipment when cutting Strict something or drilling holes on ceiling. Execution When range hood is using in well sealed building, it should have air inlet Strict... -
Page 21: Product Overview
Range Hood Product Overview Product Parameter Model CXW-200-A837 Noise ≤53dB(A) Power Supply Rated Power Input 220-240V~ 50Hz 204W Total Pressure Efficiency Rated Main Motor Power Input 200W ≥32% Nominal Wind Pressure 680Pa Lamp Power(max) ≤4W Dimension (L×W×H) Turbo Airflow 1200m (895×504×684)mm... -
Page 22: Installation
Range Hood Installation Warning The air must not be discharged into a flue that is used for exhausting fumes from appliances burning gas or other fuels, the discharge of air must fulfill the requirements of local regulations. Note that when installing the metal expansion pipe, the pipe shall match with the hole in size. Overlarge hole is prohibited, as it will result in loose pipe and accidental drops. - Page 23 Range Hood Installation Determine the position ● The size of removable baffle can be adjusted according to the actual situations. The installation pitch of holes is shown in Figure 2. The hook body shall be centered vertically and kept level. Ceiling hole size is shown in Figure 3. The hood shall be installed right above the hob.
- Page 24 Range Hood Install drawing panel torsional spring ( note:this installation steps before the hood body is fixed) ● Figure 4-1 Figure 4-2 Figure 4-3 Torsional spring rubber sleeve Drawing panel torsional spring Screw Drawing panel Torsional spring lining torsional spring loosen loosen Nut-insert...
-
Page 25: Use Instruction
Range Hood Figure 5 Figure 6 Ø185ALUM-NOD Check valve Adhesive tape Adhesive tape Ø175Air duct interface of air duct of air duct interface Fastener ST4.2×18screw Slot ST4.2×8 screw Terminal box Check valve Seal ring of check valve Machine body Cut the surplus part smaller than wall hole Note: Please straighten the ALUM-NOD while assembling so as to prevent ALUM-NOD from producing noise at semi-stretching state;... -
Page 26: Maintenance And Services
Range Hood At the power-on state, press the “Timer” button once, the timer display area displays “1”, indicating that the timing is 10 minutes. The range hood will give the tone to remind the user the time set is up. If the button is pressed twice, the timer display area displays “2”, indicating that the timing is 20 minutes by that analogy. -
Page 27: Prats Removal
Range Hood Parts Removal Warning The machine body needs not to be disassembled in ordinary conditions. Disassembly shall be operated by professional serviceman. Before cleaning, installation or maintenance for the range hood, cut off the power supply to avoid electric shock. Note: The assembly steps are opposite with the disassembly steps. - Page 28 Range Hood Switch Removal After removing the light, use a Phillips screwdriver to remove the two screws on the switch. Push the switch assembly diagonally upward to take it out from the lamp hole for repair and replacement. Switch accessory Removal Steps of Body 1.
-
Page 29: Circuit Diagram
Range Hood Circuit Diagram Terminal box Control circuit blue blue whiteW high red V voltage black U module brown blue 220-240V Yellow/Green E General Troubleshooting Fault Phenomenon Fault Cause Elimination Methods No response by pressing any switch Power plug is not well connected Well connect the power plug (e.g. - Page 30 版次: A/0 出版日期:2019年8月1日 Edition: A/0 Publication Date:August,1,2019...
Need help?
Do you have a question about the CXW-200-A837 and is the answer not in the manual?
Questions and answers