Page 1
User Manual 使用产品前请仔细阅读本使用说明书,并妥善保管。如果说明书丢失,你可以发送邮件至 overseas@robam.com, 获取电子版说明书。 Before operating this unit, please read the user manual completely and keep it. If the manual is lost, you can send e-mail to overseas@robam.com, request for an electronic manual.
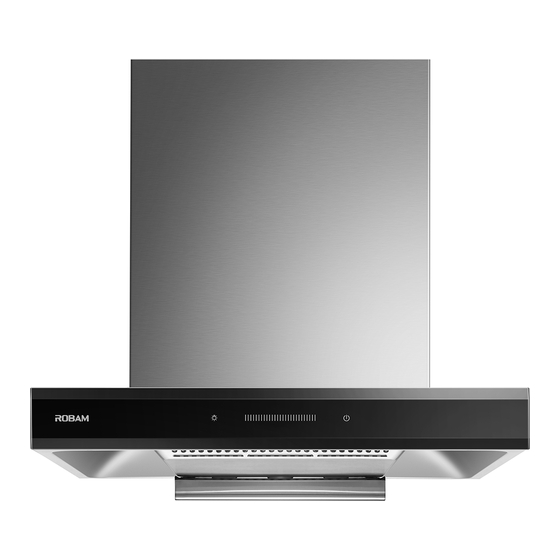
 CXW-200-A830 CXW-200-A832 吸油烟机 Range Hood...
CONTENTS Safety Precaution........................1 Important Information......................4 Product Description .........................5 Packing List..........................5 Installation..........................6 User Manual..........................14 Maintenance.........................14 Removal of Components.......................15 Circuit Diagram........................17 Troubleshooting of General faults..................17...
Touch Disassembly Execution Earthed Electric Shock Please use this product according to manual strictly, or ROBAM shall not take any responsible Warning caused by improper operation. Danger Don't allow children or weakling to use range hood separately, or it may cause electric shock or other accident.
Page 4
Range Hood Danger Please turn off range hood immediately if pan got fire (range hood shall aggravate fire if it’s working) and extinguish fire by effective action. Strict For example, cover flame by metal cover, turn off gas valve immediately Execution and remove inflammable things.
Page 5
Range Hood Warning This appliance just for household use only.And it’s not allowed to exhaust dangerous or explosive matter or air. It should be put under dry and Strict ventilation environment without dangerous air. Execution The range hood and electric circuit must be installed by skilled and trained personnel with required qualification.
Range Hood Notice Because the installation is difficult and hood is heavy, the installation Strict shall be executed by professional person based on manul. Execution Don't break electric wire or other invisible equipment when cutting Strict something or drilling holes on ceiling. Execution When range hood is using in well sealed building, it should have air inlet Strict...
Range Hood Product Description Technical Data Rated Power Input 202W CXW-200-A830 Model CXW-200-A832 Rated Main Motor Power Input 200W Power Supply 220~240V~ 50Hz A830:595×510×560(mm) × × Dimension (L A832:895×510×560(mm) Nominal Wind Pressure 500Pa A830:21kg A832:26.7kg Max static pressure Net Weight...
Range Hood Plastic expansion pipe Check valve Oil cup 4×60wood screw ST4.2×18 self tapping screw Hitching leg ST4.2×8 self tapping screw Hitching leg stop block M6M6 metal expansion pipe Note: Please mount the oil cup in the container on the mesh enclosure when to use the machine. Installation Warning 1.The air must not be discharged into a flue that is used for exhausting fumes from appliances burning gas or other fuels,...
Page 9
Range Hood Hammer Ruler Cross screwdriver Scissors Pencil Level meter Beam detector Goggles Cutting pliers Art knife Notice ● Installation and circuit setting must be done by experienced professionals. Only a professionally trained person with an installation qualification can install the hood. Non-professionals are not allowed to install, dismantle and repair the hood. ●Please do not power on the hood before installation to avoid electric shock.
Page 10
Range Hood Installation The range hood should be installed directly above the stove. In order to ensure the safety and the best effect of oil fume suction, it is suggested that the minimum distance between the lowest installation section of the range hood and the cooker supporting surface on the stove should be 650mm and the maximum should not be greater than 750mm.
Page 11
Range Hood 4. Drill a hole 60mm-70mm deep (not too large) at the mark with a drill bit with a diameter of 8mm, press the expansion pipe into the hole, Drill a hole with a diameter of 10mm(not too large) and a depth of 50mm-55mm at the fixing hole mark of the hitching leg stop block, and insert the M6 metal expansion pipe into the hole.
Page 12
Range Hood 8. After the machine is installed in place, install the hitching leg stop block and the gasket on the M6 metal expansion pipe, and tighten the nut (to prevent the machine from decoupling accidentally under external force). 50-55 9.
Page 13
Range Hood 11. After installation, the whole machine must be kept horizontal. In the end, insert the oil cup into the hitching leg on the bottom of the mesh enclosure and power it for trial operation. ●Installation with an upper cabinet 1.
Page 14
Range Hood 4. Drill a hole 60mm-70mmdeep (not too large) at the mark with a drill bit with a diameter of 8mm, press the expansion pipe into the hole, Drill a hole with a diameter of 10mm(not too large) and a depth of 50mm-55mm at the fixing hole mark of the hitching leg stop block, and insert the M6 metal expansion pipe into the hole.
Page 15
Range Hood 8. Fix the check valve on the range hood as shown in the figure, then lift the range hood and hang the back hook hole up at the hitching leg on the wall at an angle, and use a level ruler to ensure that the machine is installed horizontally. Check valve connection Buckle...
Range Hood 11. After installation, the whole machine must be kept horizontal. In the end, insert the oil cup into the hitching leg on the bottom of the mesh enclosure and power it for trial operation. User Manual Switch control panel Lighting Airflow control strip Power...
Range Hood Considerations ●The hood shall be cleaned and maintained regularly depending on the surroundings, so as to keep its cleanness & efficiency and extend its service life. We recommend that: Clean the outer surface of range hood after each cooking. ●It is recommended to use a neutral detergent to clean instead of strong detergents, and dry with a soft cloth.
Page 18
Range Hood Remove of switch Unscrew the two screws on the small cover and remove Unscrew the two screws on the switch cover and rotate the small cover. the switch cover.The switch assembly can be withdrawn and repaired or replaced. Removal and installation of the whole body Removal steps: 1.
Range Hood Circuit Diagram Terminal box Control circuit blue blue white W high voltage black U module brown blue 220-240V~ Green/Yellow E Troubleshooting of General faults Serial Solution Fault Cause number No response after pressing any icon The power plug is not connected (e.g.
Need help?
Do you have a question about the CXW-200-A830 and is the answer not in the manual?
Questions and answers