
Subscribe to Our Youtube Channel
Related Manuals for Robam CXW-260-76H1S


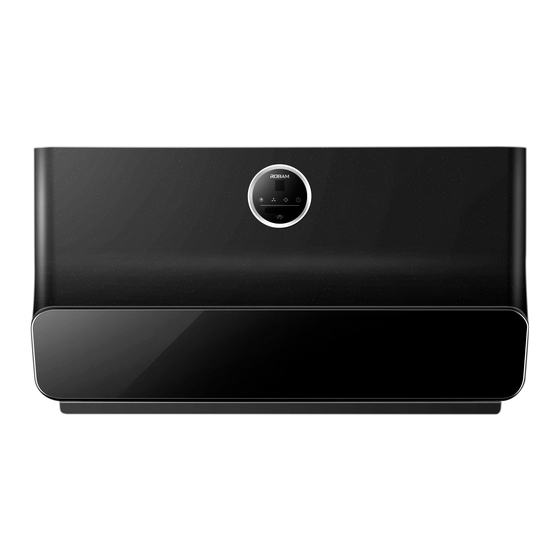
Summary of Contents for Robam CXW-260-76H1S
- Page 1 User Manual Before operating this unit, please read the user manual completely and keep it. If the manual is lost, you can send e-mail to overseas@robam.com, request for an electronic manual. CXW-260-76H1S Range Hood...
-
Page 2: Table Of Contents
CONTENTS Safety Precaution........................1 Important Information......................4 Product Description .........................5 Packing List..........................5 Installation..........................6 User Manual..........................10 Maintenance........................11 Removal of Components.......................12 Circuit Diagram........................14 Troubleshooting of General faults..................14... -
Page 3: Safety Precaution
Touch Disassembly Execution Earthed Electric Shock Please use this product according to manual strictly, or ROBAM shall not take any responsible Warning caused by improper operation. Danger t allow children or weakling to use range hood separately, or it may cause electric shock or other accident. - Page 4 Range Hood Danger Please turn off range hood immediately if pan got fire (range hood shall aggravate fire if it’s working) and extinguish fire by effective action. Strict For example, cover flame by metal cover, turn off gas valve immediately Execution and remove inflammable things.
- Page 5 Range Hood Warning The range hood and electric circuit must be installed by skilled and trained personnel with required qualification. When installation, the related regulation, standard or instruction on fire must be complied. It may cause Strict danger because of improper installation, for example, electric shock, drop or Execution fire accident.
-
Page 6: Important Information
Range Hood Notice The temperature for range hood working can’t exceed 40℃. Strict Execution Because the installation is difficult and hood is heavy, the installation Strict shall be executed by professional person based on manul. Execution Don't break electric wire or other invisible equipment when cutting Strict something or drilling holes on ceiling. -
Page 7: Product Description
Range Hood Product Description Technical Data 44dB(A) Model CXW-260-76H1S Noise Rated Voltage High 54dB(A) 220-240V~ Rated Frequency 50Hz Rated Power Input 264W 500Pa Rated Main Motor Power Input 260W Nominal Wind Pressure High Lamp Power(max) 2W×2 1080m /h Airflow ×... -
Page 8: Installation
Range Hood Installation If the flue aperture is less than air duct aperture, it will influence the fume suction effect and the too long air duct will influence the fume suction effect, too. Preparation for installation Notice ● Installation and circuit setting must be done by experienced professionals. Only a professionally trained person with an installation qualification can install the hood. - Page 9 Range Hood Installation Note: All data in synoptic diagram below are recommended dimensions, and units are expressed in mm. ●Determine the location: To ensure a good operating experience, it is recommended that the top of the fume hood be flush with the bottom of the hanging cabinet.
- Page 10 Range Hood b. Installation method when there is no hanging cabinet The size of the cabinet reservation is shown in Figure 4, the size of the ceiling opening is shown in Figure 3, and the socket location is recommended to be installed above the ceiling. Figure 4 main hood panel (Selection) c.
- Page 11 Range Hood Figure 6 Cabinets removable bottom openings dimensional drawing ●Install hitching feet According to the size of the hitching feet, drill four 60-70mm-deep holes on the wall accordingly with an 10mm-diameter drill bit (overlarge holes are prohibited). Press the expansion pipe into the holes, and then fix the hitching feet with 4 accompanying 4 ×...
-
Page 12: User Manual
Range Hood Figure 8 Figure 9 Air outlet holder connection Exhaust pipe tape Exhaust pipe tape Buckle aluminum Ø185 exhaust pipe Air outlet holder Ø185 Slot exhaust pipe connection (Selection) Pressing strips M4×9 screw Air outlet S T4.2×18 holder seal screw Hood body Cut the excess part smaller than the hole... -
Page 13: Maintenance
Range Hood In the power-on state: ① Press the low/mid button , the low/mid icon lights up (the display shows "1") and the fan starts working in the low gear; ② Then press the low/mid button again, the low/mid icon flashes (the display shows "2"), and it enters Low/Mid the medium work;... -
Page 14: Removal Of Components
Range Hood Removal of Components Note: The installation procedures of the following components are in reverse with the removal. Please wear protective gloves during operation to prevent the sharp edge of metal hurting your hands. Disassembly must be carried out by professionals, and users are not allowed to carry out disassembly. Unplug before installing or disassembling, avoiding from electric shock. - Page 15 Range Hood Romoval of filter ●Long press the low/mid button + lighting button to make the air guide open, then unplug the power supply. ●Remove the screws on the left and right sides of the screen by rotating 90° counterclockwise with a screwdriver against the screw holes.
-
Page 16: Circuit Diagram
Range Hood Circuit Diagram Terminal box Control circuit black blue black blue white W high voltage black U module brown blue 220-240V~ Green/Yellow E Troubleshooting of General faults Serial Solution Fault Cause number No response after pressing any icon The power plug is not connected (e.g. - Page 17 Edition: A/0 Publication Date: October, 25, 2022...
Need help?
Do you have a question about the CXW-260-76H1S and is the answer not in the manual?
Questions and answers