Table of Contents
Advertisement
Quick Links
Advertisement
Table of Contents
Troubleshooting

Subscribe to Our Youtube Channel
Related Manuals for Taylor 142


Summary of Contents for Taylor 142
- Page 1 Model 142 Little Softy Soft Serve Freezer Operating Instructions 039709-M 3/00...
- Page 2 All rights reserved. 039709-M Taylor Company a division of Carrier Commercial Refrigeration, Inc. The word Taylor and the Crown design 750 N. Blackhawk Blvd. are registered trademarks in the United States Rockton, IL 61072 of America and certain other countries.
-
Page 3: Table Of Contents
............Note: Continuing research results in steady improvements; therefore, information in this manual is subject to change without notice. Model 142 Table of Contents... - Page 4 Notes: Table of Contents Model 142...
-
Page 5: To The Installer
The installation location is FOLLOW YOUR LOCAL ELECTRICAL CODES! marked by the equipotential bonding symbol (5021 of IEC 60417-1) on the removable panel and the frame. 080328 Model 142 To the Installer... -
Page 6: To The Operator
It should also be noted that Taylor does not warrant the If you require technical assistance, please contact refrigerant used in its equipment. For example, if the your authorized Taylor Distributor. -
Page 7: Safety
Section 3 Safety We at Taylor are concerned about the safety of the operator when he or she comes in contact with the freezer and its parts. Taylor has gone to extreme efforts to design and manufacture built‐in safety features to protect both you and the service technician. -
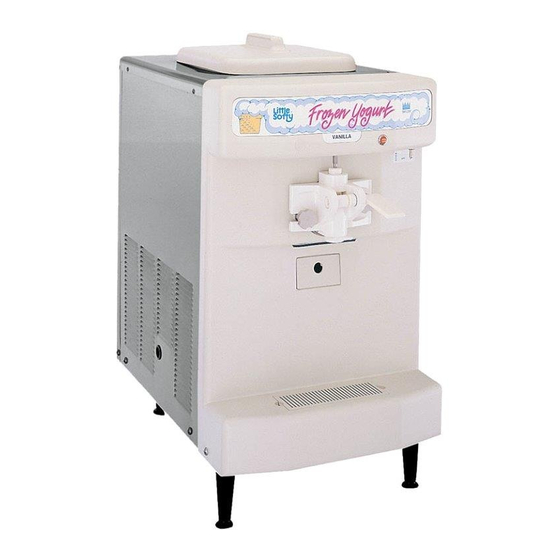
Page 8: Operator Parts Identification
Drip Pan X43474 Valve Lifter Arm 024761 O‐Ring 021278 O‐Ring 3/4 OD x .103 015835 Beater X24689 Door Handle 024762 Front Bearing 023262 Design Cap 014218 O‐Ring 2‐3/4 OD x .139W 019998 Stud Nut 034829 Operator Parts Identification Model 142... -
Page 9: Important: To The Operator
The center position is the OFF position. The left have symbols to indicate their functions. Your Taylor position is WASH which activates the beater motor equipment is designed with these International only. -
Page 10: Indicator Light - Mix Low
Standby Switch door. Depending upon the product being run, you may wish to contact your local authorized Taylor Distributor This push button switch determines which mode of to make a slight adjustment in the feed tube. -
Page 11: Operating Procedures
Taylor Lube. groove, then slide the small, thick o‐ring into the groove on the drive shaft of the beater assembly. Apply an even coat of Taylor Lube to the o‐ring and shaft. Do not lubricate the hex end. Figure 3... - Page 12 Place the white Install the draw valve. Slide the two o‐rings into the plastic guide bearing on the end of the baffle rod. Do grooves on the draw valve and lubricate with Taylor not lubricate the front bearing or guide bearing. Lube.
- Page 13 Note: The draw valve is installed correctly when the Slide the o‐ring into the groove on the draw valve slotted opening in the draw valve is visible through the handle and lubricate with Taylor Lube. “window” of the freezer door. Figure 12...
-
Page 14: Sanitizing
Figure 15 Step 7 Lay the feed tube and mix level float in the bottom of the mix hopper. Figure 17 080328 Operating Procedures Model 142... - Page 15 Place the mix level float on the mix level float stem. Figure 19 Step 4 Place the toggle switch in the WASH position. This will cause the sanitizing solution in the freezing cylinder to be agitated. Allow to agitate for five minutes. Figure 21 Model 142 Operating Procedures...
-
Page 16: Priming
Slide the rear drip pan into the hole in the front panel. Figure 23 Step 3 Place the toggle switch in the AUTO position. When the unit cycles off, the product will be ready to serve. Figure 26 Operating Procedures Model 142... -
Page 17: Standby
Sanitized stainless steel rerun can with lid in the OFF position. Necessary brushes (provided with freezer) Cleaner Repeat this procedure until the rinse water being Single service towels drawn from the freezing cylinder is clear. Model 142 Operating Procedures... -
Page 18: Cleaning
Note: If the drip pan is filled with an excessive amount of mix, this is an indication that the drive shaft o‐ring of the beater assembly should be replaced or lubricated properly. 080328 Operating Procedures Model 142... - Page 19 Return to the freezer with a small amount of cleaning Clean all exterior surfaces of the freezer. solution. With the black bristle brush, brush clean the rear shell bearing at the back of the freezing cylinder. Figure 27 Model 142 Operating Procedures...
-
Page 20: Important: Operator Checklist
DO NOT Never use screwdrivers or other metal prime the machine with rerun. When using probes to clean between the fins. 080110 Important: Operator Checklist Model 142... -
Page 21: Winter Storage
Winter Storage If the place of business is to be closed during the winter Your local Taylor Distributor can perform this service months, it is important to protect the freezer by for you. following certain precautions, particularly if the Wrap detachable parts of the freezer such as beater, building is subject to freezing conditions. -
Page 22: Troubleshooting Guide
Reset the toggle switch. beater motor. Place toggle switch in the AUTO position. - - - 3. Product is too stiff. a. The temperature control is a. Call service technician. set too cold. Troubleshooting Guide Model 142... - Page 23 - - - b. Worn rear shell bearing. b. Contact service technician. c. Incorrect lubricant. c. Use food grade lubricant (example: Taylor Lube). d. Inadequate lubrication of d. Lubricate properly. beater drive shaft. 7. Draw valve leaking. a. Incorrect lubricant.
-
Page 24: Parts Replacement Schedule
Necessary Double Ended Brush Inspect & Minimum Replace if Necessary White Bristle Brush, 3” x 7” Inspect & Minimum Replace if Necessary Refer to Parts List on the next page when ordering the above parts. Parts Replacement Schedule Model 142... -
Page 25: Parts List
J5052919/Up HP62 - w/Standby DESCRIPTION PART WARR. REMARKS PARTS NUMBER QTY. CLASS UPDATE BEARING-FRONT 023262 BEARING-GUIDE 014496 BEARING-REAR SHELL *150-52-68* 023648 +COLLAR-REAR BEARING *150-2-68* 025564 +NUT-REAR BEARING *150-52-68* 023647 +TAB-BEARING LOCK *150-2-68* 025027 BEARING-UNIT REAR 024764 +COUPLING-SERVICE 034147 FOR REAR BEARING UNIT - 024764 BEATER A. - Page 26 +O-RING-3/4 OD X .103W 015835 +VALVE-DRAW *150-2* 024763 +O-RING-7/8 OD X .103W 014402 DRYER-FILTER 1/4 X 1/4 SOLDER 048878 FLOAT A.-MIX LEVEL *142* X39690 GUIDE A.-DRIP PAN *142* X43491 HARNESS-WIRE-UPPER-HI VOLT 043581 INCLUDES 039534 TOGGLE SWITCH KIT A.-TUNE UP*150-152* X25802...
- Page 27 039709-M MOTOR-BEATER 039563- MOTOR-FAN 50 WATT 029770- +FAN-5 BLADE 12” PUSH 22DEG CCW 049009 NUT-STUD *150-152-162-168* 034829 HANDSCREW PAN A.-WHITE FRONT DRIP*142* X43474 J0125321/UP (Replaces Side Mt - 039635) PANEL-FRONT-PLASTIC 042933 PANEL-REAR *142*STANDBY 049001 PANEL-SIDE *142* RIGHT 048879 PANEL-SIDE *142*LEFT 048999 PCB A.-STANDBY CONTROL-HOPPER...
- Page 28 ROD-SWITCH-SQUARE *142* 039617 SPRING-COMP.720X.063X2.00 023664 SWITCH-ACTUATOR 035609 SWITCH-LEVER-SPDT-15A-125-250V 027214 SWITCH-PRESSURE 440 PSI-SOLDER 048230 SWITCH-STAND BY SPST-LIGHTED 043279 +BULB-LIGHT 14V 142 043279-1 SWITCH-TOGGLE 039534 POWER SWITCH (SEE HARNESS-WIRE) TUBE-CAPILLARY .049 X 7FT 049172 TUBE-FEED-150-DANFOSS-.166HOLE 035819 VALVE-ACCESS 1/4FL X 1/4SOLDER 044404 SUCTION LINE...
- Page 29 +CAPACITOR-RUN 027087 +CAPACITOR-START 039567 +RELAY-START-COMPRESSOR 041064 COMPRESSOR AK9462Z 048628-40 J5052919 thru J6012925 +CAPACITOR-RUN- 15UF/370V 027087 +CAPACITOR-START- 72-88UF/ 039567 +RELAY-START-COMPRESSOR 041064 CORD-POWER-250V-15A-95”L 042936-27 MOTOR-BEATER 039563-34 +SWITCH-CENTRIFUGAL-MOTOR START 039563-001 50 Hz Only PANEL-SIDE *142* LEFT 50HZ 049003 PULLEY-AK20X5/8 041162 VIDEO-TRAIN FILM-SS-TAYLOR 037665-PAL...
-
Page 30: Wiring Diagram
Model 142 049264...
Need help?
Do you have a question about the 142 and is the answer not in the manual?
Questions and answers