
Subscribe to Our Youtube Channel
Related Manuals for Taylor PH90


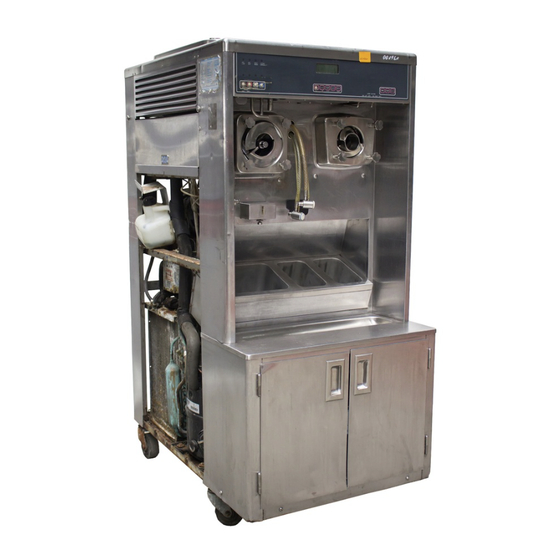
Summary of Contents for Taylor PH90
- Page 1 OPERATOR’S MANUAL Model PH90 Combination Shake/Soft Serve Freezer Original Operating Instructions 047772- M 2/00 (Original Publication) (Updated 8/4/15)
- Page 2 Minimum Wire Ampacity: Amps Part Number: E 2000 Taylor Company 047772- M Any unauthorized reproduction, disclosure, or distribution of copies by any person of any portion of this work may be a violation of Copyright Law of the United States of America and other countries, could result in the awarding of Statutory Damages of up to $250,000 (17 USC 504) for infringement, and may result in further civil and criminal penalties.
-
Page 3: Table Of Contents
............. . Table of Contents Model PH90... - Page 4 Note: Only instructions originating from the factory or its authorized translation representative(s) are considered to be the original set of instructions. E 2000 Taylor Company (Original Publication) (Updated August, 2015) 047772- M...
-
Page 5: To The Installer
Taylor equipment. Only authorized Taylor service personnel This unit must NOT be installed in an area should perform installation and repairs on the where a water jet or hose can be used. NEVER use a equipment. -
Page 6: Air Cooled Units
GFI to protect against the existing local codes. Please contact your local leakage of current, installed by authorized authorities. personnel to the local codes. To the Installer Model PH90... -
Page 7: Beater Rotation
Taylor service technician. Taylor reminds technicians to be cautious of To correct rotation on a three- phase unit, interchange government laws regarding refrigerant recovery, any two incoming power supply lines at freezer main recycling, and reclaiming systems. If you have any terminal block only. -
Page 8: To The Operator
Distributor, and the required service work is provided by an authorized Taylor service technician. Taylor It should also be noted that Taylor does not warrant the reserves the right to deny warranty claims on refrigerant used in its equipment. For example, if the... -
Page 9: Safety
We at Taylor Company are concerned about the safety of the operator when he or she comes in contact with the freezer and its parts. Taylor has gone to extreme efforts to design and manufacture built- in safety All repairs must be performed by an features to protect both you and the service technician. - Page 10 1.6 meters from the floor. 130702 Safety Model PH90...
- Page 11 Notes: Model PH90 Safety...
-
Page 12: Operator Parts Identification
Section 4 Operator Parts Identification Figure 1 130724 Operator Parts Identification Model PH90... - Page 13 PH90 Exploded View Parts Identification ITEM DESCRIPTION PART NO. ITEM DESCRIPTION PART NO. KIT A.- COVER- HOPPER X65369 TRAY- DRIP 028542 AGITATOR X44797 SHIELD- SPLASH 028548 TRIM- REAR CORNER LEFT 044051 LADLE- 1 FL. OZ. (30 ML) 033637- 1 PIN- RETAINING- HOPPER...
-
Page 14: Beater Door Assembly - Shake Side
BEATER A.- 7QT- FLUTED X50958 O- RING- 1- 1/16 OD X.139W 020571 BLADE- SCRAPER- FCB 16L 041103 SEAL- SPINNER SHAFT 036053 SHAFT- BEATER*7QT FLUTED 050985 SPINNER 034054 SEAL- DRIVE SHAFT 032560 BLADE A.- SPINNER X41985 150306 Operator Parts Identification Model PH90... -
Page 15: Beater Door Assembly - Soft Serve Side
NUT- STUD 021508 GASKET- DOOR HT 4” 048926 VALVE A.- DRAW X33582 FREEZER DOOR A. X51531- 9 O- RING- 7/8 OD X .103W 014402 HANDLE A.- DRAW X55095 CAP- DESIGN 1.010”ID 014218 ADJUSTABLE- COMPLETE 130724 Model PH90 Operator Parts Identification... - Page 16 O- RING- 1- 3/4 OD X .139W 008904 GASKET- SIMPLIFIED PUMP 053527 CLIP- RETAINER- MIX PUMP 044641 VALVE TUBE A.- FEED- HOPPER X56522 ADAPTOR- MIX INLET- SHAKE 054944 RING- CHECK- FEED- TUBE 056524 O- RING- 11/16ODX.103W- RED 016132 120724 Operator Parts Identification Model PH90...
- Page 17 O- RING- 1- 3/4 OD X .139W 008904 GASKET- SIMPLIFIED PUMP 053527 CLIP- RETAINER- MIX PUMP 044641 VALVE TUBE A.- FEED- HOPPER S.S. X56521 ADAPTOR- MIX INLET- SS- RED 054825 RING- CHECK- FEED- TUBE 056524 O- RING- 11/16ODX.103W- RED 016132 120724 Model PH90 Operator Parts Identification...
- Page 18 TUBE- PLUNGER 032757 INSERT- PLUNGER 032758 SPRING- PLUNGER 032761 WASHER- NYLON 032760 PLUNGER 036578 SEAL A. X33057 NUT- PLUNGER 036577 NUT- LOCK- SYRUP PUMP 039680 PUMP A.- SYRUP HEATED X53798- SER *SHALLOW* 036579 Figure 6 Operator Parts Identification Model PH90...
-
Page 19: Syrup Tank
VALVE A.- QD PLUG 021081- 2 INSERT 021081- 1 DECAL- SET OF 4 FLAVORS 021523 DECAL- INST- SYRUP TANK 045533- 1 GASKET- RUBBER 023551 *DUAL SUPPLIER - ORDER AS NEEDED **NOT USED ON CHOCOLATE Figure 7 Model PH90 Operator Parts Identification... - Page 20 013071 unit. For reorders, order Kay- 5 part no. 041082 (200 packs) or Stera Sheen part no. 055492 (100 2 oz. BRUSH- DOUBLE ENDED 013072 packs). BRUSH- DRAW VALVE 013073 BRUSH- DRAW VALVE 014753 140815 Operator Parts Identification Model PH90...
-
Page 21: Important: To The Operator
= MIX OUT To better communicate in the International arena, the words on many of our operator switches and buttons = HEAT MODE have symbols to indicate their functions. Your Taylor equipment is designed with these International = CLEAN MANUALLY/BRUSH CLEAN symbols. -
Page 22: Power Switch
Flavor Selector Keypad button. Failure to follow this instruction may result in electrocution. Four shake flavors are offered from the Model PH90 If it is turning properly, press the WASH keypad to freezer: chocolate, strawberry, vanilla (unflavored cancel the cycle. Press the AUTO keypad on both product), and an optional flavor. -
Page 23: Adjustable Draw Handle
SAFETY TIMEOUT ANY KEY ABORTS :MODE: :MIX: 40.0F HOPPER 40.0F This screen will be displayed, with the alarm on, for 60 BRUSH CLEAN ON: MM/DD seconds or until any keypad is pressed. Model PH90 Important: To the Operator... - Page 24 FREEZER LOCKED PRESS SEL KEY HEAT :MODE: HEAT HOLD :PHASE: HOLD 151.0F HOPPER 151.0F BRUSH CLEAN ON: MM/DD All four LED’s on the front of the freezer will light. Press the SEL keypad. 010917 Important: To the Operator Model PH90...
- Page 25 (AUTO HEAT TIME was advanced, or a power ALLOWED. PRESS loss was experienced at the time the cycle was AUTO FOR HEAT CYCLE WASH TO BRUSH CLEAN to occur, or a heat cycle failure not due to a thermistor failure.) Model PH90 Important: To the Operator...
-
Page 26: Operator Menu
NO FAULT FOUND: There was no fault found FAULT DESCRIPTION in the freezer. Nothing will appear on the screen L: VARIABLE MESSAGE after this variable message appears. R: VARIABLE MESSAGE BEATER OVERLOAD: Press the reset button firmly. Clear the tone. Important: To the Operator Model PH90... - Page 27 The SERVINGS COUNTER screen indicates the SOFTWARE VERSION number of times the draw switch has closed (number PH90 Control UVC2 of draws) since the last brush cleaning or since the last Version 2.00 serving counter reset. A maximum of 32,767 draws can be recorded;...
- Page 28 HOPPER BARREL GLYCOL 151.0 134.5 98.1 153.0 136.0 PHASE TIME: 1:20 Important: To the Operator Model PH90...
-
Page 29: Operating Procedures
If any nicks are present, replace the blades. fits onto the rear shell bearing. Note: When lubricating parts, use an approved food Note: Scraper blades should be replaced every 6 grade lubricant (example: Taylor Lube HP). months. Model PH90 Operating Procedures... - Page 30 Do not over- tighten. Figure 14 Note: When properly seated, the beater will not protrude beyond the front of the freezing cylinder. Figure 16 Operating Procedures Model PH90...
- Page 31 A worn, missing, or improperly installed spinner shaft seal will cause Figure 20 product leakage out the top of the draw valve. Step 12 Lubricate the inside of the freezer door spout, top and bottom. Figure 18 Figure 21 Model PH90 Operating Procedures...
- Page 32 Figure 22 Figure 24 Step 16 Step 14 Lubricate the shaft of the spinner blade up to the Install and lubricate the pivot pin o- ring. groove. Figure 23 Figure 25 Operating Procedures Model PH90...
-
Page 33: Freezing Cylinder Assembly - Soft Serve Side
Apply an even coat of lubricant to the shaft. DO NOT lubricate the hex end. Figure 29 Note: When lubricating parts, use an approved food Figure 27 grade lubricant (example: Taylor Lube Performance). Model PH90 Operating Procedures... - Page 34 Install the beater shoes. Note: Scraper blades should be replaced every 3 months. Figure 31 Note: The hole on the scraper blade must fit securely over the pin to prevent costly damage. Figure 33 Operating Procedures Model PH90...
- Page 35 Slide the front bearing over the baffle rod so the flanged edge is against the door. DO NOT lubricate the gasket or bearing. Figure 35 Figure 37 Model PH90 Operating Procedures...
- Page 36 Install the draw handle. Slide the fork of the draw Insert the draw valve from the bottom until the slot in handle in the slot of the draw valve. Secure with pivot the draw valve comes into view. pin. Figure 39 Figure 41 Operating Procedures Model PH90...
- Page 37 Step 14 Slide the long drip pan into the hole in the front panel above the syrup topping dispensers. Slide the two shorter drip pans into the holes in the rear panel. Figure 45 Figure 43 Model PH90 Operating Procedures...
-
Page 38: Mix Hopper Assembly
Apply a thin layer of lubricant to the inside of the pump Step 6 cylinder at the retaining pin hole end. Slide the pump valve gasket into the holes on the cap. DO NOT lubricate the gasket. Figure 47 Figure 50 Operating Procedures Model PH90... - Page 39 Assemble the feed tube assembly. Slide the check ring into the groove of the feed tube. Figure 52 The adapter must be positioned into the notch located at the end of the pump cylinder. Figure 54 Model PH90 Operating Procedures...
- Page 40 Note: For ease in installing the pump, position the ball crank of the drive shaft in the 3 o’clock position. Step 15 Repeat steps 1 through 14 for the soft serve side of the Figure 56 machine. Operating Procedures Model PH90...
-
Page 41: Sanitizing - Shake Side
With a pail beneath the door spout, open and close the draw valve six times. Step 11 Press the PUMP keypad to sanitize the inside of the air/mix pump. Step 12 Open the draw valve and draw off the remaining Figure 59 sanitizing solution. 081210 Model PH90 Operating Procedures... - Page 42 This action will force solution out of the adjacent port and down around the spinner. This procedure should be performed for at least 10 seconds per port. Step 19 Figure 62 Install syrup valves and the restrictor cap. Operating Procedures Model PH90...
-
Page 43: Sanitizing - Soft Serve Side
Press the WASH and PUMP keypads to stop the pump clip over the collar of the pump, making sure the WASH and PUMP modes. Close the draw valve. clip fits into the grooves in the collar. Figure 63 Figure 64 081210 Model PH90 Operating Procedures... -
Page 44: Priming - Shake Side
60 seconds, repeatedly dipping the brush in sanitizing solution. Step 16 Install the design cap. Note: You have just sanitized all food contact surfaces of the freezer. Figure 66 140815 Operating Procedures Model PH90... -
Page 45: Priming - Soft Serve Side
Note: Use only FRESH mix when priming the freezer. CAUTION: Allow the draw handle to close automatically. Manually closing the draw handle will damage the syrup valve and cause serious syrup flavor carryover. 140815 Model PH90 Operating Procedures... -
Page 46: Daily Closing Procedures
Remove the hopper cover. Remove the shake cup holder, front drip tray, splash shield, and all five drip pans (two from the rear panel, one from the front panel, and two from the side panels). Figure 70 080221 Operating Procedures Model PH90... - Page 47 This will cause sanitizing solution to With the syrup port brush, brush each syrup port hole back flow through the syrup ports. 10 to 15 times. Dip the brush in the cleaning solution before brushing each port. Figure 72 Figure 74 Model PH90 Operating Procedures...
- Page 48 Step 6 Important: Install the agitator back onto the Both sides of the freezer must be in the AUTO mode agitator drive shaft housing. Replace the hopper before the HEAT cycle may be started. cover. 010917 Operating Procedures Model PH90...
- Page 49 CYCLE FAILURE - FREEZER LOCKED - PRESS SEL KEY. The product may not be safe to serve. The freezer will be locked out of the AUTO mode. Discard Figure 78 the product and brush clean the machine. Model PH90 Operating Procedures...
-
Page 50: Daily Opening Procedures
Sanitize the restrictor temperature. The water level in the wells should cap, syrup hole plugs, spout cap and o- ring, shake cup be checked daily. holder, front drip tray, and splash shield in this solution. 080221 Operating Procedures Model PH90... - Page 51 10 to 15 times. Dip the brush in sanitizing solution area around the bottom of the freezer door. Install the before brushing each port. shake cup holder. Figure 82 Figure 84 Model PH90 Operating Procedures...
- Page 52 Install the front drip tray and the draw valve. splash shield. 080221 Operating Procedures Model PH90...
-
Page 53: Syrup System
The syrup lines are color spiral Disconnect the syrup line after the air line is wrapped. Be sure to match the color wrapped syrup disconnected. line to the correct syrup flavor. Figure 89 Figure 91 Model PH90 Operating Procedures... - Page 54 The proper rate of syrup flow is 1 fl. oz. (30 ml.) of syrup in 5 seconds. Once this rate is set, the correct amount of syrup will be blended with the shake base regardless of the size of shake served. Figure 95 Operating Procedures Model PH90...
- Page 55 Press the AUTO keypad to check the rate of syrup flow. After 5 seconds the flow of syrup will automatically stop. If the amount of syrup received is 1 fl. oz. (30 ml.), the syrup is properly calibrated. Figure 99 Model PH90 Operating Procedures...
- Page 56 Insert the syrup hole plug and turn slightly to lock in place. Step 11 Clean the calibration cup and syrup sampler. Figure 100 This Procedure Must be Performed Daily! Operating Procedures Model PH90...
-
Page 57: Syrup Pump
Compress it enough to grab Step 9 onto the plunger with your hand for support. Begin Remove the seal assembly from the plunger removing the knob with your other hand. assembly. Figure 103 Figure 106 Model PH90 Operating Procedures... - Page 58 Insert the brush through the tip of the discharge tube. Step 13 Move the brush back and forth to scrub the tip of the Remove the cylinder from the valve body. discharge tube. Figure 109 Figure 111 Operating Procedures Model PH90...
- Page 59 Advance the brush completely, and pull Insert the brush into the top side of the outlet valve. the brush out of the valve body. Scrub this area, specifically around the steel ball. Figure 113 Figure 115 Model PH90 Operating Procedures...
- Page 60 Lubricate and install the seal o- ring into the seal. end of the stem projects through the smaller opening on the plunger tube and the insert. Figure 117 Step 2 Install the seal assembly onto the piston end of the plunger assembly. Figure 119 Operating Procedures Model PH90...
- Page 61 Push down the discharge tube until it is seated into the valve body opening. Turn the discharge tube clockwise to fully engage it into locking grooves on the valve body. Figure 123 Model PH90 Operating Procedures...
-
Page 62: Manual Brush Cleaning
ALWAYS FOLLOW LOCAL HEALTH CODES. Step 5 With a pail under the door spout, press the WASH and To disassemble the Model PH90, the following items PUMP keypads. Open the draw valve and start to drain will be needed: the product from the freezing cylinder and mix hopper. -
Page 63: Rinsing
Note: Do not brush clean the mix inlet hole while the the outside of the agitator drive shaft housing, and the machine is in the WASH mode. mix inlet hole. 081210 Model PH90 Operating Procedures... -
Page 64: Disassembly - Shake Side
Remove the drive shaft from the drive hub in the rear wall of the mix hopper. Remove the two small o- rings and one large o- ring from the drive shaft. Figure 129 081210 Operating Procedures Model PH90... -
Page 65: Disassembly - Soft Serve Side
Remove the pivot pin and draw handle. Step 5 From the soft serve pump cylinder, remove the retaining pin, valve body, piston, spring and poppet, and the mix inlet tube. Remove all o- rings and check rings. Figure 131 Model PH90 Operating Procedures... -
Page 66: Brush Cleaning
STRONG of a solution can cause parts damage, while too MILD of a solution will not provide adequate cleaning.) Make sure all brushes provided with the freezer are available for brush cleaning. Figure 133 080221 Operating Procedures Model PH90... -
Page 67: Sanitizing The Syrup System
Pour off all the sanitizing solution and place the tank in an upside- down position on a clean, dry surface to air dry. Step 11 Wipe clean all exterior surfaces of the freezer. Repeat this procedure for all the syrup tanks. 080221 Model PH90 Operating Procedures... - Page 68 Install the syrup sampler to the fitting of the syrup line. Repeat this procedure for all syrup lines. Press the corresponding flavor button for the syrup line Step 3 being sanitized. Place the power switch in the OFF position. Operating Procedures Model PH90...
-
Page 69: Important: Operator Checklist
Deteriorated j 8. Temperature of mix in mix hopper and walk- in cracked water lines should be replaced only by cooler should be below 40_F. (4.4_C.). an authorized Taylor mechanic. Model PH90 Important: Operator Checklist... -
Page 70: Winter Storage
Winter Storage If the place of business is to be closed during the winter Your local Taylor Distributor can perform this service months, it is important to protect the freezer by for you. following certain precautions, particularly if the Wrap detachable parts of the freezer such as beater... -
Page 71: Troubleshooting Guide
Section 8 Troubleshooting Guide Troubleshooting Guide Model PH90... - Page 72 Model PH90 Troubleshooting Guide...
- Page 73 Troubleshooting Guide Model PH90...
- Page 74 Model PH90 Troubleshooting Guide...
- Page 75 Troubleshooting Guide Model PH90...
- Page 76 Model PH90 Troubleshooting Guide...
- Page 77 Troubleshooting Guide Model PH90...
- Page 78 Model PH90 Troubleshooting Guide...
- Page 79 Troubleshooting Guide Model PH90...
- Page 80 Model PH90 Troubleshooting Guide...
- Page 81 Troubleshooting Guide Model PH90...
- Page 82 Model PH90 Troubleshooting Guide...
-
Page 83: Parts Replacement Schedule
Black Bristle Brush, 1” x 2” Inspect & Replace Minimum if Necessary Double- Ended Brush Inspect & Replace Minimum if Necessary Door Spout Brush Inspect & Replace Minimum if Necessary Syrup Port Brush Inspect & Replace Minimum if Necessary Model PH90 Parts Replacement Schedule...
Need help?
Do you have a question about the PH90 and is the answer not in the manual?
Questions and answers