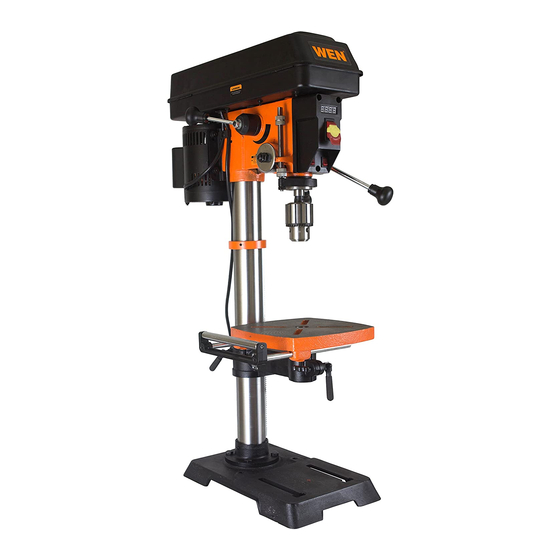
Wen 4214 Replacement Manual
Motor replacement guide
Hide thumbs
Also See for 4214:
- User manual ,
- Instruction manual (32 pages) ,
- Operator's manual (32 pages)
Advertisement
Quick Links
Last Updated: 10/27/2021
This a guide for replacing the motor on a WEN 4214/4214T drill press. If at any point you need
assistance, have questions, or want to order parts, call WEN customer service at 1-800-232-1195,
M-F, 8-5 Central Time, or email techsupport@wenproducts.com.
If replacing any parts, use only genuine replacement parts purchased from WEN Products.
Use of replacement parts not sold by WEN Products will void the product's warranty and
could lead to decreased performance or injury.
TOOLS NEEDED
• Phillips-head screwdriver
• Circlip pliers
• Needle-nosed pliers
• #3 metric hex wrench
• 13mm wrench
• Adjustable head wrench
• Rubber mallet
• Level
PREPARING THE DRILL PRESS
1. To prepare the drill press for the motor removal procedure, turn the drill press on and
adjust it to maximum speed. Turn off the unit and unplug it from the power source. At
the pulley's maximum speed setting, it will be easier to remove the belt and the motor
pulley assembly.
ENSURE THAT THE DRILL PRESS IS TURNED OFF AND UNPLUGGED FROM THE
POWER SOURCE BEFORE BEGINNING ANY MAINTENANCE OR REPAIR. FOLLOW
ALL SAFETY PROCEDURES LISTED IN YOUR OWNER'S MANUAL. USE COMMON
SENSE. AVOID INJURY.
REMOVING THE MOTOR PULLEY ASSEMBLY
1. Open the drill press lid by removing the screw circled in yellow in Figure 1.
WEN 4214T Motor Replacement Guide
Advertisement

Summary of Contents for Wen 4214
- Page 1 Last Updated: 10/27/2021 WEN 4214T Motor Replacement Guide This a guide for replacing the motor on a WEN 4214/4214T drill press. If at any point you need assistance, have questions, or want to order parts, call WEN customer service at 1-800-232-1195, M-F, 8-5 Central Time, or email techsupport@wenproducts.com.
- Page 2 Figure 1. Lid Screw 2. Remove the circlip at the top of the motor pulley assembly using circlip pliers as shown in Figure 2. Figure 2. Removing the Circlip 3. Once the circlip is removed, loosen the set screws using a #3 metric hex wrench as seen in Figure 3.
- Page 3 Figure 3. Loosening the Set Screws 4. Once the pulleys are removed, the motor shaft will be fully exposed as shown in Figure 4. Remove the spring (circled in yellow) and store it in safe place. You will need to put the spring back in place once the motor has been swapped out.
- Page 4 UNWIRING THE MOTOR 1. Once the pulley assembly is removed, the motor will need to be unwired. Start by un- screwing the wire clipped located next to the motor, as shown in Figure 5. Figure 5. External Motor Cable Clip 2.
- Page 5 Figure 6. Internal Cable Clips 3. Next, open up the switch box by removing the three switch box screws as circled in yellow in Figure 7. MAKE SURE THE DRILL PRESS IS UNPLUGGED BEFORE OPENING THE SWITCH BOX. Figure 7. Switchbox Screws...
- Page 6 4. Inside the switch box, you will need to disconnect the motor wires. Start by unscrewing the green ground wire from the body of the drill press, as circled in yellow in Figure 8. Make sure not to lose the ground screw, as you will need to re- attach the ground wire of the new motor to the drill press body.
-
Page 7: Replacing The Motor
6. Once the wire cap is removed, untwist the motor wire from the other wires. 7. Next remove the black motor wire from its terminal location on the switch, as shown in Figure 10. Using needle-nose pliers, gently and firmly pull the motor wire connector from the switch terminal. - Page 8 Figure 11. Unbolting the Motor 2. Once the motor is unbolted and fully removed from the drill press, bolt the new motor onto the drill press in the same fashion. Using a level, make sure that the motor (and the motor shaft) is vertical and not skewed to the left or right.
- Page 9 5. Re-wire the white motor wire with the other white wires from which the plastic cap was removed. As shown in Figure 12, securely re-twist these white wires together. It is important that all the wires have the exposed metal strands touching each other so that the connection is strong.
-
Page 10: Questions? Problems
5. Using circlip pliers, put the circlip back on the motor shaft. Make sure the circlip fits into the circlip groove on the motor shaft. The pulley assembly may have to pushed lower on the shaft. QUESTIONS? PROBLEMS? Contact WEN Customer Service at 1-800-232-1195, M-F, 8-5 CST, or email techsupport@wenproducts.com...


Need help?
Do you have a question about the 4214 and is the answer not in the manual?
Questions and answers