
Related Manuals for Banner EZ-SCREEN SLSP14-450Q88


Summary of Contents for Banner EZ-SCREEN SLSP14-450Q88
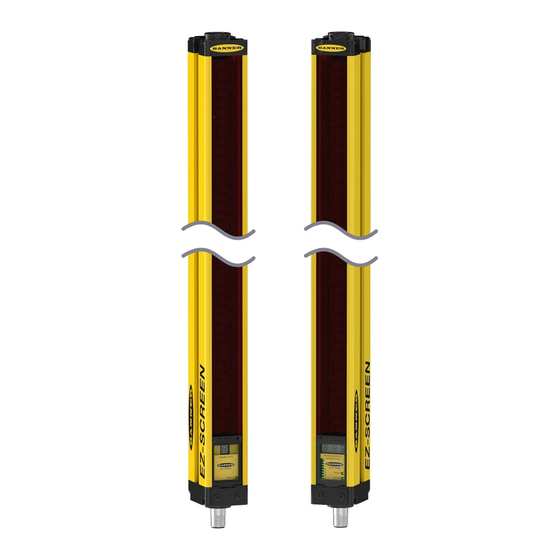
- Page 1 ® EZ-SCREEN Type 2 Light Screen Instruction Manual Original Instructions 122452 Rev. F 25 January 2017 © Banner Engineering Corp. All rights reserved 122452...
-
Page 2: Table Of Contents
1.1 Important . . . Read This Before Proceeding! ............................4 1.1.1 Use of Warnings and Cautions ..............................4 1.2 EU Declaration of Conformity (DoC) ..............................4 1.3 Banner Engineering Corp Limited Warranty ............................4 1.4 Contact Us ......................................5 2 Introduction ..................................6 2.1 Features... - Page 3 ..............................39 6.3.2 Sources of Optical Noise ................................. 39 6.4 Servicing and Maintenance .................................. 40 6.4.1 Cleaning ....................................40 6.4.2 Banner Engineering Corp Limited Warranty .......................... 40 6.4.3 Warranty Service ..................................40 6.4.4 Manufacturing Date ................................40 6.4.5 Disposal ....................................40 7 Checkout Procedures ..............................41...
-
Page 4: About This Document
1.3 Banner Engineering Corp Limited Warranty Banner Engineering Corp. warrants its products to be free from defects in material and workmanship for one year following the date of shipment. Banner Engineering Corp. will repair or replace, free of charge, any product of its manufacture which, at the time it is returned to the factory, is found to have been defective during the warranty period. -
Page 5: Contact Us
Email: salesindia@bannerengineering.com Pune 411016, India Mexico Address: Phone: +52 81 8363 2714 or 01 800 BANNERE (toll free) Banner Engineering de Mexico Monterrey Head Office Website: www.bannerengineering.com.mx Edificio VAO Av. David Alfaro Siqueiros No.103 Col. Valle Oriente C.P.66269 Email: mexico@bannerengineering.com... -
Page 6: Introduction
Note: This manual refers to an emitter and its receiver, and their cabling as "a System". Banner EZ-SCREEN Type 2 emitters and receivers provide a redundant, microprocessor-controlled, opposed-mode optoelectronic "curtain of light", or "light screen". EZ-SCREEN Type 2 typically is used for point-of-operation safeguarding, and is suited to safeguard a variety of lower-risk machinery. -
Page 7: Appropriate Applications And Limitations
CAUTION: Install System Only on Appropriate Applications Banner EZ-SCREEN Type 2 is for use only on machinery that can be stopped immediately after a stop signal is issued at any point in the machine's stroke or cycle, such as part-revolution clutched machines. Under no circumstances may the EZ-SCREEN Type 2 be used on full-revolution clutched machinery or in unsuitable applications as those listed. -
Page 8: Examples: Appropriate Applications
® EZ-SCREEN Type 2 Light Screen CAUTION: Use of EZ-SCREEN Type 2 EZ-SCREEN Type 2 meets the Type 2 requirements of IEC 61496 and Category 2 PLc requirements of EN ISO 13849-1. DO NOT use EZ-SCREEN Type 2 unless it is installed, tested, and inspected in accordance with this manual. -
Page 9: Operating Features
WARNING: Use of Trip/Latch Output Application of power to the Banner device, the clearing of the defined area, or the reset of a Latch condition MUST NOT initiate dangerous machine motion. Machine control circuitry must be designed so that one or more initiation devices must be engaged (in a conscious act) to start the machine –... -
Page 10: Manual Reset/Remote Test Input And Edm
® EZ-SCREEN Type 2 Light Screen Individual Cordsets Splitter Cordsets +24V dc Or/Bk n.c. n.c. OSSD2 OSSD1 0V dc Gn/Ye Ground Reset/Test & EDM Description Description Emitter Emitter Receiver Receiver QDE-8..D Cordsets DEE2R.. Cordsets CSB.. Cordsets 2.5.3 Manual Reset/Remote Test Input and EDM A single input provides the means to reset the system from a latch or lockout condition, to externally test the light screen and its interface, and to monitor external devices (EDM) for proper operation. -
Page 11: Mechanical Installation
Ensure that all legal requirements have been met and that all technical installation and maintenance instructions contained in this manual are followed. The user has the sole responsibility to ensure that this Banner device is installed and interfaced to the guarded machine by Qualified Persons , in accordance with this manual and applicable safety regulations. - Page 12 ® EZ-SCREEN Type 2 Light Screen Figure 3. Safety distance (minimum distance) and hard (fixed) guarding EZ-SCREEN Type 2 Models With Response Times Models (see note below) Defined Area Height Number of Beams Response Time (Tr) LS2..30-150Q8 150 mm (5.9 in) 11 ms LS2..30-300Q8 300 mm (11.8 in)
- Page 13 ® EZ-SCREEN Type 2 Light Screen U.S. Applications European Applications the Safety Distance, in inches the Minimum Distance, in mm, from danger zone to light screen center line; minimum allowable distance is 100 mm ( 175 mm for non-industrial applications), regardless of calculated value 1600 mm per second (or 63 in per second), the OSHA 29CFR1910.217, and ANSI B11.19 recommended hand-speed constant (see Note 1 below) hand-speed constant (see Note 2 below);...
-
Page 14: Reducing Or Eliminating Pass-Through Hazards
WARNING: Use of the Banner device for Perimeter Guarding If a Banner device is installed in an application that results in a pass-through hazard (for example, perimeter guarding), either the Banner device System or the Machine Primary Control Elements (MPCEs) of the guarded machine must cause a Latched response following an interruption of the defined area. -
Page 15: Supplemental Safeguarding
® EZ-SCREEN Type 2 Light Screen 3.1.3 Supplemental Safeguarding As described in Calculating the Safety Distance (Minimum Distance) on page 11, the EZ-SCREEN Type 2 must be properly positioned such that an individual cannot reach through the defined area and access the hazard point before the machine has stopped. - Page 16 ® EZ-SCREEN Type 2 Light Screen Important: Resetting a safeguard must not initiate hazardous motion. Safe work procedures require a start-up procedure to be followed and the individual performing the reset to verify that the entire hazardous area is clear of all personnel before each reset of the safeguard is performed.
- Page 17 ® EZ-SCREEN Type 2 Light Screen SSM and MSM Series Glass-Surface Mirrors Corner Mirrors Max. Emitter / Receiver Range 10.8 m (35 ft) If mirrors are used, the difference between the angle of incidence from the emitter to the mirror and from the mirror to the receiver must be between 45°...
- Page 18 ® EZ-SCREEN Type 2 Light Screen Receiver Emitter Receiver Receiver Emitter Emitter Both cable ends down Both cable ends up Orientation parallel to floor with both cable ends pointing in the same direction Figure 7. Examples of Correct Emitter/Receiver Orientation Receiver Receiver Emitter...
-
Page 19: Mounting System Components
® EZ-SCREEN Type 2 Light Screen Receiver Receiver Scan Code 1 Scan Code 1 Emitter Emitter Receiver Emitter Scan Code 2 Scan Code 2 Receiver Emitter b. Two or three systems stacked (or alternate receiver/emitter a. Two systems in a horizontal plane positions) Receiver 3 Emitter... -
Page 20: Mounting And Initial Alignment Of Emitter/Receiver Pairs
® EZ-SCREEN Type 2 Light Screen Mounting Hardware The EZ-SCREEN standard end-cap mounting bracket hardware is supplied with each emitter and receiver. Brackets are designed to mount directly to MSA Series stands using the hardware with the supplied stands. Figure 10. Emitter and Receiver End-Cap Mounting Brackets Using Center Mounting Brackets Center mounting brackets are supplied with longer sensors and must be used whenever the sensors are subject to shock or... - Page 21 ® EZ-SCREEN Type 2 Light Screen Important: The connector ends of both sensors must point in the same direction (see Emitter and Receiver Orientation on page 17 ). 2. Mount the emitter and receiver mounting brackets using the supplied M6 bolts and Keps nuts, or user-supplied hardware. 3.
- Page 22 ® EZ-SCREEN Type 2 Light Screen Note: Make sure that the emitter and receiver are not tilted front-to-back or side-to-side as shown. www.bannerengineering.com - Tel: 763.544.3164...
-
Page 23: Electrical Installation And Testing
Ensure that all legal requirements have been met and that all technical installation and maintenance instructions contained in this manual are followed. The user has the sole responsibility to ensure that this Banner device is installed and interfaced to the guarded machine by Qualified Persons , in accordance with this manual and applicable safety regulations. -
Page 24: Sensor Interchangeability
® EZ-SCREEN Type 2 Light Screen Emitter Cordset Receiver Cordset EZ-SCREEN Type 2 emitters have an 8-pin cordset, but only three conductors are Do not connect any wires to the machine control circuits (that is, OSSD outputs) required: at this time. •... -
Page 25: Initial Checkout Procedure
® EZ-SCREEN Type 2 Light Screen Individual Cordsets Splitter Cordsets +24V dc Or/Bk n.c. n.c. OSSD2 OSSD1 0V dc Gn/Ye Ground Reset/Test & EDM Description Description Emitter Emitter Receiver Receiver QDE-8..D Cordsets DEE2R.. Cordsets CSB.. Cordsets 4.3 Initial Checkout Procedure The initial checkout procedure must be performed by a Qualified Person. -
Page 26: Optical Alignment
® EZ-SCREEN Type 2 Light Screen 2. Eliminate the reflective surfaces as much possible by relocating, painting, masking, or roughening them. Remaining problem reflections will become apparent during the trip test. 3. Verify that power is removed from the EZ-SCREEN Type 2 System and from the guarded machine and that the OSSD safety outputs are not connected. - Page 27 ® EZ-SCREEN Type 2 Light Screen 1. Verify the sensor mounting. 2. Verify the optimal alignment, adjusting sensor rotation with power ON: a. Verify that the emitter and the receiver are pointed squarely at each other. Use a straight edge (for example, a level) to determine the direction the sensor is facing.
-
Page 28: Optical Alignment Procedure With Mirrors
Note: A LAT-1-LSLaser Alignment Tool is very helpful by providing a visible red dot along the optical axis. See Figure 14 on page 28 and Banner Safety Applications Note SA104 (p/n 57477) for further information. Component 2 (Mirror) Component 3 (Mirror) -
Page 29: Electrical Connections To The Guarded Machine
• MPCE/EDM CAUTION: Shock Hazard Always disconnect power from the Banner device and the guarded machine before making any connections or replacing any component. Use extreme caution to avoid electrical shock at all times. 4.4.1 OSSD Output Connections Refer to the output specifications in... -
Page 30: Fsd Interfacing Connections
WARNING: OSSD Interfacing To ensure proper operation, the Banner device output parameters and machine input parameters must be considered when interfacing the Banner device OSSD outputs to machine inputs. Machine control circuitry must be designed so that the maximum load resistance value is not exceeded and that the maximum specified OSSD Off-state voltage does not result in an On condition. -
Page 31: Machine Primary Control Elements And Edm Input
® EZ-SCREEN Type 2 Light Screen • Using positive-opening or direct-drive components, installed and mounted in a positive mode 4.4.3 Machine Primary Control Elements and EDM Input Each of the two Machine Primary Control Elements (MPCE1 and MPCE2) must be capable of immediately stopping the dangerous machine motion, irrespective of the state of the other. -
Page 32: Preparing For System Operation
® EZ-SCREEN Type 2 Light Screen • Power Monitoring is a series-parallel connection of monitor contacts that are forced-guided (mechanically linked) from each device controlled by the EZ-SCREEN. The monitoring contacts should transition within 200 milliseconds of the OSSD outputs switching ON or OFF. -
Page 33: Generic Wiring To Fsds (Manual Reset)
® EZ-SCREEN Type 2 Light Screen 4.5.2 Generic Wiring to FSDs (manual reset) +24V dc 0V dc Receiver Bn (Pin #1) +24V dc 8-pin male Euro-style face view Gn/Ye (#7) Ground Bu (#6) 0V dc Bk (#5) OSSD1 Wh (#4) OSSD2 Manual Test Automatic... -
Page 34: Generic Wiring - Interface Module (2-Channel Edm, Manual Reset)
® EZ-SCREEN Type 2 Light Screen 4.5.3 Generic Wiring — Interface Module (2-Channel EDM, Manual Reset) Receiver 8-pin male Euro-style face view +24V dc 0V dc Bn (Pin #1) +24V dc Gn/Ye (#7) Ground Bu (#6) 0V dc Bk (#5) OSSD 1 IM-T-9A** Wh (#4) -
Page 35: System Operation
® EZ-SCREEN Type 2 Light Screen 5 System Operation 5.1 Security Protocol Certain procedures for installing, maintaining, and operating the EZ-SCREEN Type 2 must be performed by either Designated Persons or Qualified Persons. A Designated Person is identified and designated in writing, by the employer, as being appropriately trained and qualified to perform system resets and the specified checkout procedures on the EZ-SCREEN Type 2. -
Page 36: Receiver
® EZ-SCREEN Type 2 Light Screen 5.3.1 Receiver Alignment Indicators Two Yellow Alignment indicators (Top and Bottom) tell the alignment status of the top and bottom beams in the light screen. This is helpful for sensor alignment: first align the Top beam (the sync beam), then the bottom beam. The Alignment indicators also flash together to indicate a manual reset is needed (Latch output models). -
Page 37: Normal Operation
® EZ-SCREEN Type 2 Light Screen 5.4 Normal Operation 5.4.1 System Power-Up Trip Output Systems: When power is applied, each sensor will conduct self-tests to detect critical internal faults and prepare for operation. If either sensor detects a critical fault, scanning ceases, the receiver outputs remain Off and diagnostic information is displayed via the LEDs;... -
Page 38: Troubleshooting And Maintenance
® EZ-SCREEN Type 2 Light Screen 6 Troubleshooting and Maintenance 6.1 Troubleshooting and Lockout Conditions Evaluate status indicators per Status Indicators on page 35. A Lockout condition causes all the EZ-SCREEN Type 2 OSSD outputs to turn or remain OFF, sending a stop signal to the guarded machine. Each sensor provides diagnostic information, via the LEDs, to assist in the identification of the cause(s) of lockouts. -
Page 39: Electrical And Optical Noise
The noise caused by switching of the inductive loads should be addressed by installing proper transient suppression across the load. 6.3.2 Sources of Optical Noise Checking for sources of optical noise: Turn off the emitter, completely block the emitter, or open the Test input, then use a Banner BT-1 Beam Tracker (see Alignment Aids on page 52 ) to check for light at the receiver. -
Page 40: Servicing And Maintenance
6.4.2 Banner Engineering Corp Limited Warranty Banner Engineering Corp. warrants its products to be free from defects in material and workmanship for one year following the date of shipment. Banner Engineering Corp. will repair or replace, free of charge, any product of its manufacture which, at the time it is returned to the factory, is found to have been defective during the warranty period. -
Page 41: Checkout Procedures
WARNING: Do Not Use Machine Until System Is Working Properly If all of these checks cannot be verified, do not attempt to use the safety system that includes the Banner device and the guarded machine until the defect or problem has been corrected. Attempts to use the guarded machine under such conditions may result in serious bodily injury or death. - Page 42 17. Test the machine stopping response time, using an instrument designed for that purpose, to verify that it is the same or less than the overall system response time specified by the machine manufacturer. A Banner Applications Engineer can recommend a suitable instrument.
-
Page 43: Specifications And Accessories
Switching Device) safety outputs. (Use optional interface modules for ac or 20 ms, as specified in IEC/EN 60204-1. larger dc loads.) Not capable of the Banner "Safety Handshake". ON-State voltage: ≥ Vin-1.5 V dc Supply Current (no load) OFF-State voltage: 0 V dc typical, 0.5 V dc maximum (no load) -
Page 44: Bracket Dimensions
® EZ-SCREEN Type 2 Light Screen 31.8 mm (1.25") 25.4 mm (0.96") 10.8 mm (0.43") 43.0 mm (1.69") 16.9 mm (0.66") R13 mm (0.5") 10.0 mm minimum bend (0.39") 65 mm (2.6") 31.8 mm (1.25") Defined Area 4 Y Emitter or Receiver Model Housing Length Distance Between Bracket Holes L2 L3... -
Page 45: Accessories
® EZ-SCREEN Type 2 Light Screen Standard End Cap Brackets Model USMB-1 Slots have clearance for M3 screws (supplied) and 10.7 mm 12.7 mm allow for ±30° rotation (0.42") (0.50") 15.7 mm 5.8 mm (0.62") (0.23") 15.7 mm (0.62") 23.2 mm 20.0 mm 31.9 mm (0.91") -
Page 46: Cordsets
® EZ-SCREEN Type 2 Light Screen 8.2.1 Cordsets Single-Ended (Machine Interface) Cordsets Single-Ended (Machine Interface) Cordsets (one cable for each emitter and receiver). Overmold and cables are PVC-jacketed. Cables are unterminated on one end to interface with guarded machine. 8-Pin Threaded M12/Euro-Style Cordsets Model Length Style... - Page 47 13.0 mm 7.0 mm (0.51") (0.28") 8-pin Euro-style female connector 3 m (10 PMEF-810D ft) wires, cut to length (Banner color code); 22 AWG/0.33 mm² 1/4-18NPT M12 x 1 O-Ring Splitter Cordsets Model CSB splitter cordsets allow easy interconnection between an EZ-SCREEN Type 2 8-pin receiver and its 8-pin emitter, providing a single “homerun”...
-
Page 48: Interface Modules
Pin #6 (0V dc) Pin #7 (GND) Pin #8 (RESET) M12 Female 8.2.2 Interface Modules Interface modules provide forced-guided, mechanically-linked relay (safety) outputs for the EZ-SCREEN Type 2 System. See Banner data sheet p/n 62822 for more information. Model Description IM-T-9A Interface module, 3 N.O. -
Page 49: Lens Shield
® EZ-SCREEN Type 2 Light Screen Model Description BF1801L024 18 amp positive-guided contactor, 3 N.O., 1 N.C. (N.C. contact rated at 10 amps) 8.2.4 Lens Shield Constructed of 1.5 mm (0.06 in) clear polycarbonate; attach to sensor using supplied adhesive-backed Neoprene foam strips. Note: The total range decreases by approximately 10% per shield. -
Page 50: Msa Series Stands
® EZ-SCREEN Type 2 Light Screen Models Construction Connector/LED Function/Inputs Polycarbonate housing, 50 mm thermoplastic dome, 30 mm base mount K50LRGX8PQ8 Fully encapsulated, IP67 Polycarbonate housing, 50 mm thermoplastic dome, flat or DIN mount K80LRGX8PQ8 Encapsulated electronics, IP67 8.2.6 MSA Series Stands Base included. -
Page 51: Accessory Mounting Brackets
® EZ-SCREEN Type 2 Light Screen • Stainless steel reflective surface models are also available. See datasheet p/n 67200. • Robust construction, two mounting brackets and hardware included. • EZA-MBK-2 adapter bracket is required for use with MSA Series stand, see Accessory Mounting Brackets on page 51 . -
Page 52: Alignment Aids
® EZ-SCREEN Type 2 Light Screen 8.2.10 Alignment Aids Model Description Self-contained visible-beam laser tool for aligning any EZ-SCREEN Type 2 emitter/ LAT-1-LS receiver pair. Includes retroreflective target material and mounting clip. LSA-LAT-2 Replacement adaptor (clip) hardware for EZ-SCREEN Type 2 models LSA-LAT-1 Clip-on retroreflective LAT target BRT-THG-2-100... -
Page 53: Standards And Regulations
9 Standards and Regulations The list of standards below is included as a convenience for users of this Banner device. Inclusion of the standards below does not imply that the device complies specifically with any standard, other than those specified in the Specifications section of this manual. - Page 54 Email: salesindia@bannerengineering.com Pune 411016, India Mexico Address: Phone: +52 81 8363 2714 or 01 800 BANNERE (toll free) Banner Engineering de Mexico Monterrey Head Office Website: www.bannerengineering.com.mx Edificio VAO Av. David Alfaro Siqueiros No.103 Col. Valle Oriente C.P.66269 Email: mexico@bannerengineering.com...
-
Page 55: Glossary
10 Glossary The following terms are used in this manual. Where possible, definitions are from the U.S. and international product performance standards that govern the design of the Banner device. For more definitions, visit www.bannerengineering.com. ANSI (American National Standards Institute) - Page 56 (a failure to danger) Final Switching Device (FSD) are not. Banner safety products are extensively FMEA tested. The component of the machine’s safety-related control system that interrupts the circuit to the machine primary control element (MPCE) when the output signal switching device (OSSD) goes to the OFF-state.
- Page 57 (after the operation) by the operator. PSDI is commonly confused with "Trip Initiate." PSDI is defined in OSHA CFR1910.217. Banner safety light screen systems may not be used as PSDI devices on mechanical power presses, per OSHA regulation 29 CFR 1910.217.
- Page 58 Trip or Latch condition. Self-Checking (Circuitry) Banner supplies specified test pieces with each system. See also A circuit with the capability to electronically verify that all of its own Minimum Object Sensitivity.
- Page 59 Index indicator applications Emitter Power/Fault 36 suitable 8 reset switch initial power-up 25 location 15 routing corsets 23 LEDs control reliability 8 emitter 35 corsets receiver 35 routing 23 sensor swapability 9 light-emitting diodes 35 Standards and Regulations 53 See also LEDs status indicators 10 suitable applications 8 DIP Switches 9, 10...
Need help?
Do you have a question about the EZ-SCREEN SLSP14-450Q88 and is the answer not in the manual?
Questions and answers