
Subscribe to Our Youtube Channel
Related Manuals for Opticon OPL 972X


Summary of Contents for Opticon OPL 972X
- Page 1 OPL 972X DCL-1530 CRD 972X USER'S MANUAL Opticon Article Code O0220000410 OPL972X/CRD972X OPTICON - 1...
- Page 2 Opticon Sensors Serial number A serial number appears on all Opticon products. This offi- Europe. cial registration number is strictly related to the device pur- chased. Make sure that the serial number appearing on THE GENERAL USE AND FUNCTIONING OF your Opticon device has not been removed.
-
Page 3: Table Of Contents
How to (re)place the battery ....11 Installation instructions ......12 Connect charging cradle....12 Connect RS232 cradle.......13 Connect RS232 multicradle ....14 Connect USB ........15 Connect RS485 multicradle network .16 DIP Switch settings......17 Bluetooth installation......18 Set or search Bluetooth device address: Security..........19 OPL972X/CRD972X OPTICON - 3... -
Page 4: Introduction
User's applications can be downloaded to the bar data collector is placed. code data collector to adapt it to the user's situa- tion. As a tool to develop an application Opticon • Multicradle, multiple communication, multiple can supply a compiler and a development kit. -
Page 5: Unpacking
• Power supply, supplied as separate item (c) Do not remove the product label! On the back of every unit you will find a product label. This is attached by the manufacturer and includes product information and serial number. Do not remove it. OPL972X/CRD972X OPTICON - 5... -
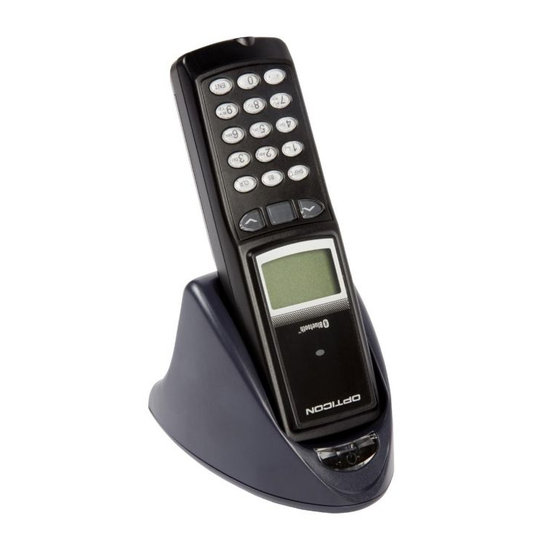
Page 6: Detailed View
Contains product information and serial number. LED indicator or buzzer can be used to indicate Do not remove it! results, for example bar code reading / status of communication / status of charging 3. LCD Display For displaying information 6 - OPTICON OPL972X/CRD972X... -
Page 7: Cradle Details
8. Optical window tion to second device Optical communication interface for data transmis- sion 3. USB socket For connecting to PC, through Opticon USB cable 9. LED indicator Show current status. Read more at the installation 4. RS 485 socket instructions. -
Page 8: Handling Instructions
Using the bar code data type bar code data collector in the CRD972X cra- collector while condensation is present can cause dle. malfunction. Always wait until the condensation clears naturally before attempting operation. 8 - OPTICON OPL972X/CRD972X... -
Page 9: Get Started
The icon on the product or package indicates that the product should not be thrown in the home waste bin. The product must be recycled as an electronic product. For proper treatment of end-of- life products consult the section for Environmental care on www.opticon.com. OPL972X/CRD972X OPTICON - 9... -
Page 10: Fix Hand Strap
If you have data stored, make sure the data is transmitted to the host system. Use proper battery Only use the battery as specified from Opticon. Insert the battery correctly. The bar code data collector may be damaged by 2.1 FIX HAND STRAP... -
Page 11: How To (Re)Place The Battery
• Position the case cover into the savings and latch direction of the nose and then lift up the case. it by pressing slightly. Install Opticon battery: (ref. 2.) • Remove the old battery. Insert AAA batteries tak- ing care of the polarity. Insert the rechargeable battery as instructed on the battery. -
Page 12: Installation Instructions
(ref. 2.) Connect power Connect the power supply. Switch on the power of the host computer. Place the bar code data collector in the cradle. LED indicator Typical LED indication: red: power is on 12 - OPTICON OPL972X/CRD972X... -
Page 13: Connect Rs232 Cradle
Place the bar code data collector in the cradle. LED indicator Typical LED indications are: red: power is on flashing green: collector sends to host flashing yellow: host sends to collector FOR CONNECTING A NETWORK OF CRADLES SEE RS485 DESCRIPTION. OPL972X/CRD972X OPTICON - 13... -
Page 14: Connect Rs232 Multicradle
Place the bar code data collector(s) in the multicra- dle. LED indicator Typical LED indications are: red: power is on flashing green: collector sends to host flashing yellow: host sends to collector FOR CONNECTING A NETWORK OF MULTI- CRADLES SEE RS485 DESCRIPTION. 14 - OPTICON OPL972X/CRD972X... -
Page 15: Connect Usb
• Save the file on your hard disk in a separate directory and unpack the contents of the file. Procedure for Windows: Connect the Opticon device. After successful con- nection install the driver. See instructions ‘Add New Hardware’. Procedure for MAC: Click the installer button of the package and follow the instruction wizard. -
Page 16: Connect Rs485 Multicradle Network
1). Through this connection all multicradles can communicate to the PC. Connect RS485 A maximum of 16 multicradles can be connected in a network through RS485 cables. MASTER SLAVE SLAVE RS232/RS485 RS232/RS485 RS232/RS485 TERMINATE TERMINATE 16 - OPTICON OPL972X/CRD972X... -
Page 17: Dip Switch Settings
SW 3 Baud rate * Baud rate * SW 4 RS232/ RS232 only RS485 SW 5 Cascade ** SW 6 RS485 termi- RS485 Ter- nation ON mination SW 7 Factory set- ting SW 8 Factory set- ting OPL972X/CRD972X OPTICON - 17... -
Page 18: Bluetooth Installation
[Q1] is pressed the value of the digit is incremented by one hexadecimal value. When the proper value is displayed move the marker to the next digit with the right key [Q2]. When the setting of the device address is done, confirm with the middle [Trigger]key. 18 - OPTICON OPL972X/CRD972X... -
Page 19: Security
[Q2]. When the setting of the code is done, confirm by the middle [Trigger]key. Delete PIN-code The PIN-code is seen as not set when all digits are set to none (…………….) OPL972X/CRD972X OPTICON - 19... -
Page 20: Communication
2.6.1 RS32 INTERFACE Check if the chosen COM port matches the COM port in the user’s application program. Check if the baud rate of the Opticon device and the host computer are matching. 2.6.2 USB INTERFACE Check if the defined COM port in Windows matches the COM port in the user’s application... -
Page 21: Reading Bar Codes
• Check that the width of the bar code label does not exceed the width of the light beam. • Change the angle between the bar code and the scanner. • Change the distance between the bar code and the scanner. OPL972X/CRD972X OPTICON - 21... -
Page 22: Trouble Shooting
• Check if the mains socket has power. ? No data transmitted, or corrupted data. • Check if the interface cable is undamaged, and properly connected to the Opticon device and the host computer. • Check the COM port and baud rate settings, and try again. -
Page 23: Read Operation Malfunctioning
Barcode data collector does not respond to key presses, while the display stays on. ? Message “Application halted” or “No application installed” is shown. • There is no proper user’s application loaded in the bar code data collector. Contact your sup- plier. OPL972X/CRD972X OPTICON - 23...
Need help?
Do you have a question about the OPL 972X and is the answer not in the manual?
Questions and answers