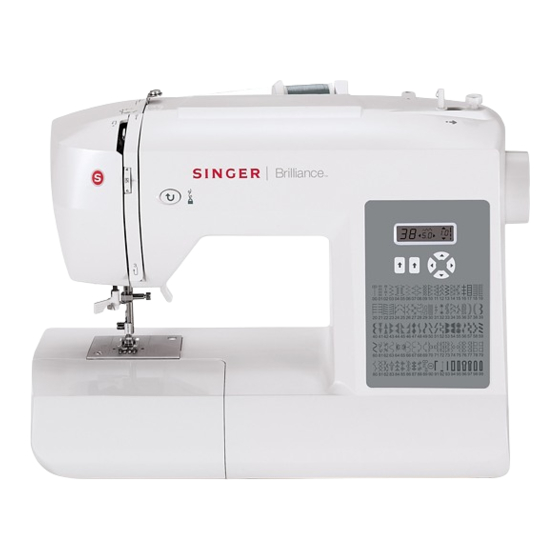
Singer 6199 Instruction Manual
Hide thumbs
Also See for 6199:
- Instruction manual (64 pages) ,
- Instruction manual (64 pages) ,
- Instruction manual (52 pages)
Table of Contents
Advertisement
Advertisement
Table of Contents

Related Manuals for Singer 6199


Summary of Contents for Singer 6199
- Page 1 6199/6180/6160 INSTRUCTION MANUAL 使用说明书 MANUAL INSTRUKSI...
- Page 2 “IMPORTANT SAFETY INSTRUCTIONS” “When using an electrical appliance, basic safety precautions should always be followed, including the following.” “Read all instructions before using this sewing machine.” “DANGER-- To reduce the risk of electric shock:” 1. “ This sewing machine should never be left unattended when plugged in. Always unplug this sewing machine from the electric outlet immediately after using and before cleaning.”...
- Page 3 National legislation relating to electrical/ electronic products. If in doubt please contact your retailer for guidance. SINGER is a registered trademark of The Singer Company Limited or its affiliates. ©2010 The Singer Company Limited or its affiliates. All rights reserved.
- Page 4 重要的安全注意事项 使用缝纫机前请详细阅读本说明书,务必遵循下列安全警告 : 危险 为了减少触电危险 1. 当缝纫机接上电源后,请不要离开。 2. 机器在使用后或清洁前,请关闭电源、拔下电源插头。 警告 为了减少燃烧、火灾、电击对人体的伤害 : 1. 不要将缝纫机充当玩具使用。当正在使用中有儿童接近时须特别注意。 2. 缝纫机不适合精神状态不佳或缺乏使用缝纫机经验与常识的人使用 (包括儿童) ; 除非有人指导或遵循使用说明书操作。 3. 请按照说明书操作缝纫机,并使用说明书上建议使用的附件。 4. 当电线或插头损坏、机器不小心掉落损坏或掉入水中, 请将本品送到最近的授权经销商或维修点做检查或维修。 5. 当脚踏控制器损坏,请即刻将本品送到最近的授权经销商或维修点维修。 6. 保持缝纫机及脚踏控制器的通气孔畅通。 7. 不得插入或掉落异物在缝纫机的任何开口部位。 8. 本缝纫机仅供室内使用。 9. 有喷剂时,请不要使用机器。 10. 请将电源开关按至“O”时,再将插头从插座中拔出。 11. 缝纫机在维修或更换灯泡前,请关闭电源,拔掉插头。 12. 不能以拉电线的方式拔开插头。 13.
- Page 5 请妥善保存本使用说明书 本产品仅限家用 脚踏控制器 本产品使用 YC-485 EC 或 JF-1000 电器。 本产品符合欧共体指令 2004/108/EC 涵盖电磁兼容性。 请注意,本产品必须按照国家相关回收有关电气 / 电子产品的法律法规 进行回收。如有疑问,请联系你的零售商提供指导。 SINGER 是胜家公司及其子公司的注册商标胜家公司拥有全球之版权。...
- Page 6 “PETUNJUK KESELAMATAN PENTING” “Ketika menggunakan peralatan listrik, tindakan keselamatan dasar harus selalu dijalankan, termasuk berikut ini:” “Baca semua petunjuk sebelum menggunakan mesin jahit ini. “BAHAYA - Untuk mengurangi resiko tersetrum: 1. “Mesin jahit ini tidak boleh ditinggalkan tanpa pengawasan dalam kondisi tersambung aliran listrik.
- Page 7 Jika anda ragu, harap hubungi distributor anda untuk mendapat petunjuk. ® SINGER adalah merek dagang terdaftar dari The Singer Company Ltd atau afiliasinya © 2010 The Singer Company Ltd atau afiliasinya. Semua Hak Dilindungi...
-
Page 8: Table Of Contents
Large extension table ------------------------ 58 5. PERFORMANCE CHECKLIST 2. STARTING TO SEW ------------------------------------------- 59-61 Quick reference table of stitch length 6. 6199/6180 ONLY and width ------------------------------------- 31-34 Roller foot --------------------------------------- 62 Pattern number reference guide ------------ 35 Invisible zipper foot ---------------------- 62-63... - Page 9 倒缝按钮 ----------------------------- 30 4. 附件 2. 开始缝纫 大扩展台------------------------------ 58 针距和针幅速查表------------------- 31-34 线迹及编号查阅表---------------------- 35 5. 故障检查表 直线线迹--------------------------- 36-37 ------------------------------- 59-61 保持缝份整齐 6. 仅限于 6180 和 6199 型 仿手工珠边缝----------------------- 38-39 滚柱压脚------------------------------ 62 拉链缝和嵌线滚边缝 隐形拉链压脚------------------------ 62-63 曲折缝线迹---------------------------- 40 钉扣压脚--------------------------- 63-64 调节针幅和针距 暗缝压脚--------------------------- 64-65 布边缝压脚---------------------------- 65 按照欧洲标准...
- Page 10 5. DAFTAR PERIKSA KERJA MESIN -------------------------------------------- 59-61 2. MULAI MENJAHIT 6. HANYA UNTUK MODEL Tabel acuan cepat untuk panjang dan 6199 DAN 6180 lebar jahitan ----------------------------------- 31-34 Sepatu gelinding ---------------------------------62 Panduan acuan nomor pola ----------------------35 Sepatu resliting tak tampak ----------------- 62-63...
-
Page 11: Knowing Your Sewing Machine
1. KNOWING YOUR SEWING MACHINE 1. 了解你的机器 1. MENGENAL MESIN JAHIT ANDA MACHINE IDENTIFICATION 1. Bobbin winding tension disk 2. Thread take-up 3. Thread tension control 4. Face cover 5. Thread cutter 6. Removable extension table / Accessory box 7. Bobbin winder shaft 8. -
Page 12: Gambaran Mesin
GAMBARAN MESIN 机器零件名称 1. Cakram keketatan penggulung spul 1. 绕线张力器 2. Penarik benang 2. 挑线杆 3. Pengatur keketatan benang 3. 上线张力调节器 4. Penutup muka 4. 面板 5. Pemotong benang 5. 割线器 6. Meja perpanjangan/Kotak aksesoris 6. 辅助缝台 / 附件盒 7. Batang penggulung spul 7. -
Page 13: Accessories
ACCESSORIES 机器附件 AKSESORIS 1. Needles 8. Darning plate 2. Bobbins 9. Zipper foot 3. Auxiliary spool pin 10. Buttonhole foot 4. Spool pin felt discs 5. Spool pin cap 6. Buttonhole opener/Seam Ripper and Brush 7. Screwdriver for needle plate The Foot that comes on your Sewing machine is called the General Purpose Foot and will be used for the majority of your sewing. -
Page 14: Setting Up Your Machine
SETTING UP YOUR MACHINE 移动机器时,必须关闭电源开关, 缝纫前的准备 拔去电源插头 MERANGKAI MESIN Peringatan: Selalu putuskan A l w a y s d i s c o n n e c t t h e sambungan mesin dari catu machine from power supply daya dengan mencabut steker by removing the plug from dari stopkontak di dinding. -
Page 15: Spool Pins, Presser Foot Lifter
SPOOL PINS Spool 线团 线柱 Spul PIN SPUL (TIANG BENANG) Spool pin felt discs 毛毡垫 Cakram kempa spin spul HORIZONTAL SPOOL PIN Vertical spool pin 水平线柱 备用线柱 PIN SPUL HORIZONTAL Pin spul vertikal Pull the spool pin towards you. Thread retaining slot Place thread spool on the pin and secure with 线团留线槽... -
Page 16: Darning Plate
DARNING PLATE 绣花板 PLAT TISIK Use the darning plate when you need to control fabric feeding for button sewing, free motion work and free motion darning. Raise needle and presser foot, and position darning plate onto the needle plate with the two pins on the back inserted to the holes of needle plate. -
Page 17: Winding The Bobbin
WINDING THE BOBBIN 绕梭芯 MENGGULUNG BENANG SPUL Be sure to use Class 15 bobbins. 1.Place a spool of thread on the spool pin, and secure it with the spool pin cap. Pull the thread out from the spool and place it through thread guides as shown in illustration.Be sure to pull thread securely into the bobbin winding tension disk. -
Page 18: Removing Bobbin Case From Shuttle
REMOVING BOBBIN CASE FROM SHUTTLE 取梭芯套 MENGELUARKAN SEKOCI DARI PUNTAL 1. Raise the needle to its highest position by rotating the hand wheel toward you (counter-clockwise). 2. Open the bobbin access cover by pulling it down. With your fingers, pull open the bobbin case latch as shown, and take out the bobbin case from the shuttle. -
Page 19: Inserting Bobbin Case Into Shuttle
INSERTING BOBBIN CASE INTO SHUTTLE 放梭芯套 MEMASUKKAN SEKOCI KE PUNTAL Locating groove 定位槽 Lokasi Alur 1. Hold the latch open, with locating pin straight up. 2. Slide the bobbin case onto the center spindle of the shuttle, keeping the thread toward you. NOTE: Be sure the locating pin fits into the locating groove at the top of the shuttle. - Page 20 C.Thread the machine with your left hand while firmly gripping the thread with your right hand in the following order as illustrated. *Pass the thread through the thread take-up (3) from right to left. *Pass the thread through the eye of the needle (5) from front to back. (See following page for instructions on operation of the Automatic Needle Threader.) IMPORTANT: To verify that the machine is threaded properly in the tension discs, do this simple check:...
-
Page 21: Using Automatic Needle Threader
USING AUTOMATIC NEEDLE THREADER 自动穿线器 MENGGUNAKAN PEMASANG BENANG OTOMATIS Raise the needle to its highest position by rotating the hand wheel towards you (counter-clockwise). 1. Hook thread into thread guide as illustrated. 2. Pull down lever while holding the end of thread. 3. -
Page 22: Picking Up Bobbin Thread
PICKING UP BOBBIN THREAD 引下线 MENAIKKAN BENANG SPUL 1. Raise the presser foot lifter. 2. Holding needle thread loosely with your left hand, turn hand wheel toward you (counter-clockwise) with your right hand, first lowering the needle and continuing until the needle comes to its highest position. -
Page 23: Needle, Thread And Fabric Chart
Bonded Knits 2045 Polyester blue band Knits Double Knit yellow shank Nylon Jersey / Tricot 16/100 purple band * For best sewing results, always use a SINGER branded needle. 机针、线和布料之间的关系图 根据不同的布料选择机针和线。下表是关于针和线的选择,非常实用。每次新的缝纫前都要进 行针和线的选择,确保在梭芯内使用与上线是相同类型和规格的线。 布料类型 线 机针 下列布料可由任何成分制成 : 棉布、亚麻、丝绸、羊毛、 合成纤维、人造丝、混纺。 下面举例说明他们的厚度和种类。 类型... -
Page 24: Tabel Jarum, Benang Dan Kain
Sailcloth Heavy Duty* yellow band 11/80 Cotton-wrapped orange band Bonded Knits Polyester 2045 14/90 Rajutan Double Knit Polyester yellow shank blue band Jersey / Tricot Nylon 16/100 purple band * Untuk memperoleh hasil jahitan terbaik, selalu gunakan Jarum Merek Singer. -
Page 25: Changing The Needle
CHANGING THE NEEDLE Flat side 针柄平面 更换机针 Sisi datar Needle MENGGANTI JARUM 机针 Jarum Always disconnect the machine from power supply by removing the plug from the wall-outlet. Stop pin 1. Raise the needle bar to its highest position by turning 限位销... -
Page 26: Adjusting Top Thread Tension
ADJUSTING TOP THREAD TENSION 调整上线张力 MENGATUR KEKETATAN BENANG ATAS Under side 反面 Sisi bawah Top side 正面 Sisi atas Top stitch too tight Top stitch too loose 上线太紧 上线太松 Well balanced Jahitan atas terlalu ketat Jahitan atas terlalu longgar 好的线迹 Keseimbangan yang bagus Decrease tension Increase tension... - Page 27 STRAIGHT STITCHING 直线线迹 JAHITAN LURUS The correct appearance of your stitching is largely determined by the balanced tension of both top and bobbin threads. The tension is well balanced when these two threads ‘lock’ in the middle of layers of the fabric you are sewing. If, when you start to sew, you find that the stitching is irregular, you will need to adjust the tension control.
-
Page 28: Functions Of Control Panel
FUNCTIONS OF CONTROL PANEL 操作面板功能 FUNGSI PANEL KONTROL Stitch width/needle position of straight stitch Stitch length 针距 针幅 / 直线针位 Panjang jahitan Lebar jahitan/posisi jarum pada jahitan lurus LCD display Stitch pattern number LCD 显示屏 线迹编号 LCD dispay Nomor pola jahitan M a n u a l a d j u s t m e n t buttons for stitch width/ Buttons for pattern number... -
Page 29: Straight Stitch Needle Position
Manual adjustment buttons for stitch width/needle position Manual adjustment buttons for stitch length 针幅 / 针位调节钮 针距调节钮 Tombol penyesuaian manual Tombol penyesuaian manual untuk lebar jahitan/posisi jarum untuk panjang jahitan STITCH LENGTH AND STITCH WIDTH / NEEDLE POSITION ADJUSTMENT BUTTONS Your sewing machine will produce your stitching requirements at an 5/Default stitch Length and Width. -
Page 30: Adjusting Bobbin Thread Tension
ADJUSTING BOBBIN THREAD TENSION 调节梭芯套张力 MENYESUAIKAN KEKETATAN BENANG SPUL BOBBIN THREAD TENSION REQUIRES ADJUSTMENT LESS Fabric puckers FREQUENTLY THAN THE TOP THREAD TENSION. 布料起皱 If the tension is well balanced, but the fabric puckers badly, both top and Kain mengerut bobbin thread tensions may be too tight and have to be adjusted. -
Page 31: Helpful Messages
HELPFUL MESSAGES 信息提示 PESAN BERGUNA If an incorrect operation is made, a helpful message will be displayed. When a helpful message is displayed, fix the problem following the instructions below. 如果操作错误,机器将显示信息提示。当出现信息提示,请按照以下方法解除错误。 Jika terjadi kesalahan pengoperasian, maka pesan berguna akan ditampilkan. Jika pesan berguna ampil, perbaiki masalah dengan mengikuti petunjuk di bawah ini. -
Page 32: Reverse Operation Button
REVERSE OPERATION BUTTON 倒缝按钮 TOMBOL MENJAHIT MUNDUR DUAL PURPOSE REVERSE/TACKING STITCH BUTTON 此按钮有倒缝和打结两个功能。 TOMBOL FUNGSI GANDA MENJAHIT MUNDUR/PENGUAT * Reverse stitch function for straight and zigzag stitches ( Reverse sewing is carried out while the reverse stitch button is pushed. The machine will continue to sew in reverse as long as the reverse button is pressed. -
Page 33: Starting To Sew
2. STARTING TO SEW QUICK REFERENCE TABLE OF STITCH LENGTH AND WIDTH 2. 开始缝纫 针距和针幅速查表 TABEL ACUAN CEPAT UNTUK PANJANG DAN 2. MULAI MENJAHIT LEBAR JAHITAN PATTERN No. NEEDLE POSITION LENGTH 线迹编号 针位(毫米) 针距(毫米) POLA No. POSISI JARUM PANJANG 线 迹... - Page 34 PATTERN No. PATTERN No. 线迹编号 线迹编号 POLA No. POLA No. WIDTH LENGTH WIDTH LENGTH 针幅(毫米) 针距(毫米) 针幅(毫米) 针距(毫米) 线 线 LEBAR PANJANG LEBAR PANJANG 迹 迹 图 图 AUTO MANUAL AUTO MANUAL AUTO MANUAL AUTO MANUAL 自动 手动 自动 手动 自动...
- Page 35 PATTERN No. PATTERN No. 线迹编号 线迹编号 WIDTH LENGTH WIDTH LENGTH POLA No. POLA No. 针幅(毫米) 针距(毫米) 针幅(毫米) 针距(毫米) LEBAR PANJANG LEBAR PANJANG 线 线 迹 迹 图 图 MANUAL MANUAL MANUAL MANUAL AUTO AUTO AUTO AUTO 自动 手动 自动 手动 自动...
- Page 36 PATTERN No. PATTERN No. 线迹编号 线迹编号 WIDTH LENGTH WIDTH LENGTH POLA No. POLA No. 针幅(毫米) 针距(毫米) 针幅(毫米) 针距(毫米) LEBAR PANJANG LEBAR PANJANG 线 线 迹 迹 图 图 AUTO MANUAL AUTO MANUAL AUTO MANUAL AUTO MANUAL 自动 手动 自动 手动 自动...
-
Page 37: Pattern Number Reference Guide
Pattern number reference guide 线迹及编号查阅表 PANDUAN ACUAN NOMOR POLA 60 stitch model 6160 型缝纫机 60 种线迹。 60 model jahitan 80 stitch model 6180 型缝纫机80种线迹。 80 model jahitan 100 stitch model 6199 型缝纫机 100 种线迹。 100 model jahitan... -
Page 38: Straight Stitching
STRAIGHT STITCHING 100 stitch model : 直线线迹 80 stitch model : 60 stitch model : MENJAHIT LURUS Straight stitch is most frequently used for all types of sewing. Let’s begin by following the steps below. NOTE: Based upon the weight of the fabric, slight “fine tuning” of the tension may be desired. 1.SETTINGS A.Thread tension control Presser foot - General Purpose Foot B. -
Page 39: Keeping Seams Straight
Jahitan lurus paling sering digunakan untuk semua tipe jahitan. Mari kita belajar cara menjahit dengan mengikuti langkah-langkah berikut ini. CATATAN: Berdasarkan berat kain, sedikit “penyesuaian” keketatan bisa diperlukan. A. Pengatur keketatan benang 1. PENGATURAN B. Tombol menjahit mundur Sepatu penindas - Sepatu Serbaguna C. -
Page 40: Hand-Look Quilt Stitch
HAND-LOOK QUILT STITCH 100 stitch model : 80 stitch model : 仿手工珠边缝 60 stitch model : JAHITAN HAND-LOOK QUILT This stitch is designed to look like hand sewing for topstitching and quilting. 该线迹是一种仿手工缝和绗缝线迹。 Jahitan ini didesain agar tampak mirip jahitan tangan untuk topstiching dan quilting. - Page 41 INSERTING ZIPPERS To sew down the right side, attach left side of zipper foot to presser foot holder so that the needle passes through the opening on the left side of the foot. To sew down the left side, attach right side of foot to foot holder.
-
Page 42: Zigzag Stitching
ZIGZAG STITCHING Under side 100 stitch model : 80 stitch model : 反面 曲折缝线迹 Sisi bawah 60 stitch model : JAHITAN ZIG-ZAG SETTINGS :Presser foot - General Purpose Foot Top side :Thread tension control - 5 正面 Sisi atas 配置设定 : 安装压脚 - 万能压脚 : 上线张力... -
Page 43: Multi-Stitch Zigzag, Shell Stitch
MULTI-STITCH ZIGZAG 100 stitch model : 80 stitch model : 四点曲折缝线迹 60 stitch model : MULTI-STITCH ZIGZAG SETTINGS :Presser foot - General Purpose Foot :Thread tension control - 5 配置设定 : 安装压脚 - 万能压脚 : 上线张力 -5 Pengaturan :Sepatu penindas - Sepatu Serbaguna :Pengatur keketatan benang - 5 This is a strong stitch because as its name implies, it makes three short stitches where the normal zig-zag makes only one. - Page 44 SATIN STITCH 缎纹线迹 JAHITAN SATIN This is a closely spaced stitch for appliqué, bar- tacking, etc. Slightly loosen the top thread tension and manually adjust the stitch length between 0.5 and 2.0 for satin stitching. Use a backing of stabilizer or interfacing to avoid puckering.
-
Page 45: Sewing On A Button
SEWING ON A BUTTON 100 stitch model : 80 stitch model : 钉纽扣 60 stitch model : MENJAHIT DIATAS KANCING SETTINGS : Presser foot - General purpose foot : Darning plate 配置设定 : 安装压脚 - 万能压脚或钉扣压脚 : 装上绣花板 PENGATURAN : Sepatu penindas - Sepatu serbaguna : Plat tisik Position your fabric and button under the presser foot. -
Page 46: Blindhem Stitch
BLINDHEM STITCH 100 stitch model : 04, 05, 07 80 stitch model : 04, 05, 07 暗缝线迹 60 stitch model : 04, 05, 07 JAHITAN BLINDHEM The blindhem stitch is primarily used for creating nearly invisible hems on curtains, trousers, skirts, etc. - Page 47 1. With matching thread finish the raw edge. On fine fabric turn up and press a small ½” or less hem. On medium to heavyweight fabrics overcast the fabric’s raw edge. 2. Now fold the fabric as illustrated with the wrong side up. 3.
-
Page 48: Decorative And Stretch Stitches
DECORATIVE AND STRETCH STITCHES 伸缩缝装饰线迹 JAHITAN DEOKRATIF DAN STRETCH Settings : Presser foot - General Purpose Foot : Thread tension control - 5 配置设定 : 安装压脚 - 万能压脚 : 上线张力 -5 Pengaturan : Sepatu penindas - Sepatu serbaguna : Pengatur keketatan benang - 5 Stretch stitches are mainly for use on knit, or stretchable fabrics, but can also be used on woven materials. - Page 49 OVEREDGE STITCH 100 stitch model : 10, 11 80 stitch model : 10, 11 包边缝线迹 60 stitch model : 10, 11 JAHITAN OVEREDGE This is the same type stitch used by the garment industry in making sportswear - it forms and finishes the seam in one operation.
- Page 50 友情提示 : 在使用翅针时,轻微调节增强上线张力,布料上的小洞会拉大,形成较好的拉花 效果。 Jahitan ini berguna untuk jahitan dekoratif diatas pinggiran dan jahitan heirloom. Jahitan entredeux paling sering dijahit dengan Jarum Bersayap (Singer Style 2040) untuk membuat lubang pada pola jahitan. CATATAN: Sedikit penyesuaian + pada keketatan akan meningkatkan ukuran lubang ketika menggunakan Jarum Bersayap.
- Page 51 PIN STITCH 100 stitch model : 18, 19 80 stitch model : 18, 19 平行线迹 60 stitch model : 18, 19 JAHITAN PENITI The Pin stitch is a traditional stitch pattern used for picot-like edges and for applique work. 平行线迹是传统的线迹花样 , 适用于饰边或贴布 缝纫。...
- Page 52 SLANT OVEREDGE STITCH 100 stitch model : 24, 25 80 stitch model : 24, 25 斜点针线迹 60 stitch model : 24, 25 JAHITAN OVEREDGE MIRING Seams and overcasts in one operation to produce a narrow, supple seam, particularly suited to swimwear, sportswear, T-shirts, babywear in stretch nylon, jersey and cotton jersey.
-
Page 53: Reinforced Overedge Stitch
THORN STITCH 100 stitch model : 80 stitch model : 荆棘形线迹 60 stitch model : JAHITAN DURI It is a versatile stitch used for joining fabric pieces as well as for decorative machine stitching. 这是一种多用途线迹,可用于拼缝,也可以作为装饰性点缀。 Jahitan ini serbaguna digunakan untuk menyambung potongan kain dan jahitan mesin dekoratif. REINFORCED OVEREDGE STITCH 加固包边线迹... -
Page 54: More Decorative Stitches & Ideas For Decorative Machine Stitching
MORE DECORATIVE STITCHES & IDEAS FOR DECORATIVE MACHINE STITCHING 装饰缝线迹 BEBERAPA JAHITAN DEKORATIF DAN IDE LAIN UNTUK MENJAHIT DENGAN MESIN DEKORATIF SETTINGS : Presser foot - General Purpose Foot : Thread tension control - 5 or -1 配置设定 : 安装压脚 - 万能压脚或密针缝压脚 : 上线张力... -
Page 55: Buttonhole Making
BUTTONHOLE MAKING Tab A 锁纽孔 挡块 A Tab B Tab A 挡块 B MEMBUAT LUBANG KANCING Tab B AUTOMATIC BUTTONHOLE 自动锁纽孔 LUBANG KANCING OTOMATIS USING BUTTONHOLE FOOT 使用锁纽孔压脚 MENGGUNAKAN SEPATU LUBANG KANCING Your machine offers you two different widths of bartack, keyhole and round end buttonholes sewn by a system that measures the size of the button and calculates the size of buttonhole required. - Page 56 1. Select one of the buttonhole patterns. 2. Replace the presser foot with the buttonhole foot. (Refer to “Changing presser foot” on page 28.) 3. Insert the button into the buttonhole foot. (Refer to “Using buttonhole foot” above.) 4. Lower the buttonhole lever (C) so that it drops down vertically between the stoppers (A) and (B).
-
Page 57: Lubang Kancing Bertali
* Sewing will be completed automatically in the following order. * 锁纽孔将按照下图所示步骤自动完成。 * Menjahit akan selesai secara otomatis dengan urutan berikut ini. Buttonhole foot alignment position 锁孔起针位置 Posisi sejar sepatu lubang kancing Fabric marking 布料上标的纽孔起针位置 Tanda kain 9. When sewing is finished, use a buttonhole opener/ seam ripper to open up the fabric in the center of the buttonhole. -
Page 58: Caring For Your Machine
3. CARING FOR YOUR MACHINE 3. 保养好你的机器 3. MERAWAT MESIN ANDA To ensure the best possible operation of your machine, it is necessary to keep the essential parts clean at all times. Always disconnect the machine from power supply by removing the plug from the socket-outlet. 为了确保机器以最好的状态运转,保持机器关键部位的清洁是十分必要的。... - Page 59 CLEANING THE FEED DOGS AND SHUTTLE AREA 清洗送布牙和梭床 MEMBERSIHKAN GIGI PENGUMPAN DAN AREA PUNTAL Raise the needle to its highest position. 1.Remove the bobbin case from the shuttle. 2.Push aside the two shuttle keepers. 3.Remove the shuttle race cover and shuttle. Clean the feed dogs and shuttle area with the lint brush.
-
Page 60: Option Accessories
4.OPTION ACCESSORIES 4. 附件 4.AKSESORIS PILIHAN LARGE EXTENSION TABLE 大扩展台 MEJA PERPANJANGAN BESAR To place onto the machine, lift the supporting leg of the extension table, and slide the table into place while fitting the guide pins A, B, C and D into machine as illustrated. 先将辅助缝台向左移出。... -
Page 61: Performance Checklist
5. PERFORMANCE CHECKLIST GENERAL PROBLEMS Machine does not sew. * Power switch is turned off. - Turn on the switch. * Buttonhole lever is not raised when sewing stitch patterns. – Raise buttonhole lever. * Buttonhole lever is not lowered when sewing buttonhole. –... - Page 62 5. 故障检查表 一般故障 机器不运作。 * 电源开关处于关闭状态。 ‐ 打开开关。 * 一般缝纫时,锁纽孔控制杆在下面。 ‐ 提起控制杆。 * 锁纽孔时,锁纽孔控制杆没有拉下。 ‐拉下控制杆。 * 绕线轴右靠。 ‐ 把绕线轴推回左边(见第 15 页) 。 机器死机。 * 线被摆梭勾住。 ‐ 清洁摆梭(见第 56 ‐ 57 页) * 机针损坏。 ‐ 更换机针(见第 23 页) 。 布料不移动。 * 压脚没有放下。 ‐...
-
Page 63: Daftar Periksa Kerja Mesin
5. DAFTAR PERIKSA KERJA MESIN MASALAH UMUM Mesin tidak bisa menjahit. * Saklar listrik mati. - nyalakan saklar. * Tuas lubang kancing tidak terangkat ketika menjahit pola jahitan. - Angkat tuas lubang kancing. * Tuas lubang kancing tidak turun ketika menjahit lubang kancing. - Turunkan tuas lubang kancing. -
Page 64: 9/6180 Only
6. 6199/6180 ONLY 6. 仅限于 6180 和 6199 型 6. HANYA UNTUK MODEL 6199 DAN 6180 ROLLER FOOT 滚柱压脚 SEPATU GELINDING When sewing leather, suede, plastic and velvet, fit the roller foot to aid the smooth flow of fabric. However, especially when sewing softer leather and suede, better results may be achieved by using the normal zigzag foot. -
Page 65: Button Sewing Foot
Sepatu Resliting Tak Tampak menyediakan Persiapan Mesin penutup tersembunyi pada berbagai pakaian • Pasang Sepatu Resliting Tak Tampak • Atur mesin untuk menjahit lurus dan aksesoris. Penutup ini biasanya tampak di • Atur panjang jahitan sedang samping atau belakang rok dan gaun. •... -
Page 66: Blind Stitch Foot
Sepatu menjahit kancing di design untuk Persiapan mesin menahan kancing dengan kuat ditempat dimana • Turunkan atau tutup gigi pengumpan kancing akan dipasang pada kain atau bahan. • Sepatu: Pasang Sepatu Menjahit Kancing bersekrup • Jahitan: Jahitan Lurus Petunjuk Menjahit 1. -
Page 67: Overcasting Foot
Sepatu Jahitan Buta digunakan utamanya untuk Persiapan Mesin membuat kelim hampir tak tampak pada tirai, • Pasang Sepatu Jahitan Buta celana panjang, rok, dan lain-lain. • Pilih Jahitan: 04 atau 07 • Keketatan diatur pada 5 Petunjuk Menjahit Obras tepi kasar dengan benang yang sesuai. Pada kain halus, balikkan ke atas dan tekan kelim selebar ½ inci atau kurang. Kini lipat kain seperti ditunjukkan gambar dengan sisi bawah di atas. - Page 68 ENGLISH / CHINESE / INDONESIA © Part No. 82487 2 /11...
Need help?
Do you have a question about the 6199 and is the answer not in the manual?
Questions and answers