Table of Contents
Advertisement
Quick Links
Advertisement
Table of Contents

Related Manuals for Labconco RapidVap 73200 Series


Summary of Contents for Labconco RapidVap 73200 Series
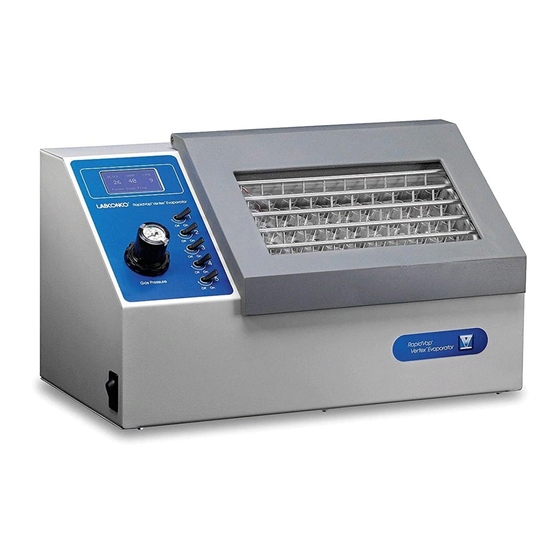
- Page 1 RapidVap Vertex Evaporator Models 73200 Series...
- Page 2 Warranty Labconco Corporation provides a warranty to the original buyer for the repair or replacement of parts and reasonable labor as a result of normal and proper use of the equipment with compatible chemicals. Broken glassware and maintenance items, such as filters, gaskets, light bulbs, finishes and lubrication are not warranted.
-
Page 3: Table Of Contents
CHAPTER 1: INTRODUCTION Typographical Conventions CHAPTER 2: PREREQUISITES Electrical Requirements Location and Exhaust Requirements Nitrogen Supply Requirements Space Requirements Tools Required CHAPTER 3: GETTING STARTED Unpacking Your RapidVap Vertex Evaporator RapidVap Vertex Evaporator Components Setting Up Your RapidVap Vertex Evaporator Sample Block Nitrogen Gas Connection Exhaust Port... - Page 4 CHAPTER 6: TROUBLESHOOTING APPENDIX A: RAPIDVAP VERTEX EVAPORATOR COMPONENTS APPENDIX B: RAPIDVAP VERTEX EVAPORATOR DIMENSIONS APPENDIX C: RAPIDVAP VERTEX EVAPORATOR SPECIFICATIONS Evaporation Rates APPENDIX D: RAPIDVAP VERTEX EVAPORATOR ACCESSORIES...
- Page 5 Congratulations on your purchase of a Labconco RapidVap Vertex Evaporator. Models are available for operation on 115V or 230V. Superior evaporation rates are achieved by the unique blending of several gentle forces on the sample. The vials containing the sample are held at an angle to increase the surface area of the sample thereby increasing the evaporation rate.
-
Page 6: Chapter 1: Introduction
Chapter 1: Introduction Typographical Conventions Recognizing the following typographical conventions will help you understand and use this manual: Book, chapter, and section titles are shown in italic type (e.g., Chapter 3: Getting Started). Steps required to perform a task are presented in a numbered format. ... - Page 7 Before you install your RapidVap Vertex Evaporator, you need to prepare your site for installation. Carefully examine the location where you intend to install your RapidVap Vertex Evaporator. You must be certain that the area is level and of solid construction. In addition, an exhaust means must be provided and a source of nitrogen or dry gas must be available.
-
Page 8: Chapter 2: Prerequisites
Chapter 2: Prerequisites Electrical Requirements A dedicated electrical outlet is required. Minimum requirements for an outlet is a 15 Amp circuit breaker or fuse for models rated at 115V (60 Hz) or an 8 Amp circuit breaker or fuse is required for 230V (50/60 Hz) models. 115V models are equipped with a 15 Amp NEMA 5-15P plug. - Page 9 Now that the site for your RapidVap Vertex Evaporator is properly prepared, you are ready to unpack, inspect, install, and test your RapidVap Vertex Evaporator. Read this chapter to learn how to: unpack and move your RapidVap Vertex Evaporator. ...
-
Page 10: Chapter 3: Getting Started
IF YOUR RAPIDVAP VERTEX EVAPORATOR WAS DAMAGED IN TRANSIT, YOU MUST FILE A CLAIM DIRECTLY WITH THE FREIGHT CARRIER. LABCONCO CORPORATION AND ITS DEALERS ARE NOT RESPONSIBLE FOR SHIPPING DAMAGES. Do not discard the carton or packing material for your RapidVap Vertex Evaporator until you have checked all of the components and installed and tested the RapidVap Vertex Evaporator. - Page 11 Evaporator Accessories for block selection. If you do not receive one or more of the components listed for your RapidVap Vertex Evaporator, or if any of the components are damaged, contact Labconco Corporation immediately for further instructions. Product Service 1-800-522-7658...
-
Page 12: Setting Up Your Rapidvap Vertex Evaporator
Chapter 3: Getting Started Setting Up Your RapidVap Vertex Evaporator After you verify the RapidVap Vertex Evaporator components, move your RapidVap Vertex Evaporator to the location where you want to install it. Then, follow the steps listed below. Sample Block The RapidVap Vertex Evaporator was shipped without the sample block installed. -
Page 13: Nitrogen Gas Connection
Chapter 3: Getting Started Nitrogen Gas Connection Mark the gas supply hose 3/4" (19 mm) from the end and push the hose into the fitting in the back of the RapidVap Vertex Evaporator. Attach the other end of the hose to user supplied nitrogen supply. ... -
Page 14: Electrical Connection
Chapter 3: Getting Started Electrical Connection Plug the power cord into the receptacle on the back of the RapidVap Vertex Evaporator and plug the other end into a suitable wall power receptacle. Chemical Attack on RapidVap Vertex Evaporator Components Your RapidVap Vertex Evaporator is designed to be chemical resistant to most compounds that are commonly used in the concentration processes that are performed in it. - Page 15 Warranty on the affected parts will be void if maintenance has obviously been neglected. If you have questions about using specific compounds in your RapidVap Vertex Evaporator, contact Labconco Technical Service at 1-800-821-5525 or 816-333-8811 or e-mail labconco@labconco.com.
- Page 16 Do not wear loose fitting clothes that can catch on internal surfaces. After service, verify safe state of use before using the product. Contact Labconco’s Product Service Department for questions on determining safe state of this product. Verify protective earth ground continuity before using equipment.
- Page 17 After your RapidVap Vertex Evaporator has been installed as detailed in Chapter 3: Getting Started, you are ready to begin using your RapidVap Vertex Evaporator. Read this chapter to learn how to: set operating parameters. operate the controls. ...
-
Page 18: Chapter 4: Using Your Rapidvap Vertex Evaporator
Chapter 4: Using Your RapidVap Vertex Evaporator Planning Thoroughly understand procedures and the equipment operation prior to beginning work. The unique performance of the RapidVap Vertex Evaporator is dependent upon the proper balance of heat and nitrogen flow. If the proper balance is not established, it is possible to damage or lose a portion of the sample. -
Page 19: Operating The Rapidvap Vertex Evaporator Controls
Chapter 4: Using Your RapidVap Vertex Evaporator Nitrogen Control Valves – Used to turn nitrogen flow ON or OFF to the nozzles above the sample vials. The top valve controls the 10 nozzles on the top row. The second valve controls the second row of 10 nozzles. The third valve controls the middle row of 10 nozzles. - Page 20 Chapter 4: Using Your RapidVap Vertex Evaporator Program: To enter a new program while in the opening display press “PROG” and the display will show: PROG TEMP TIME Back Press “Back” to return to the opening display, press “Run” to start this program.
- Page 21 Chapter 4: Using Your RapidVap Vertex Evaporator Pre-Heat: If it is necessary to pre-heat the chamber before starting a run, press Pre-Heat. This display will show: BLOCK SAMP TEMP Stop Press “Stop” to return to the opening display and turn off the heater or press “SET TEMP”...
- Page 22 Chapter 4: Using Your RapidVap Vertex Evaporator Run: To re-run the last program while in the opening display, press “Run.” The heater will be powered, the master nitrogen control valve will open, the time will start to count down and the display will show: BLOCK SAMP TIME...
- Page 23 Chapter 4: Using Your RapidVap Vertex Evaporator If “PROG” is pressed in the middle of a run, the display will show the programmed parameters for that run. PROG TEMP TIME Back Parameters may not be altered. Press “Back” to return to the operating screen.
-
Page 24: Operational Notes
Chapter 4: Using Your RapidVap Vertex Evaporator Operational Notes The LCD display conveys various pieces of information. When the RapidVap Vertex Evaporator is turned ON, the RapidVap Vertex Evaporator will return to the same mode (RUN or STOP) that it was in when the power was turned off. -
Page 25: Evaporator
Under normal operation, the RapidVap Vertex Evaporator requires little maintenance. The following maintenance schedule is recommended: As needed: 1. Clean up all spills; remove liquids from chamber. 2. Clean lid and viewing window using soft cloth, sponge or chamois and a mild, non-abrasive soap or detergent. - Page 26 Refer to the following if your RapidVap Vertex Evaporator fails to operate properly. If the suggested corrective actions do not solve your problem, contact Labconco for additional assistance. PROBLEM CAUSE CORRECTIVE ACTION Unit will not operate Unit not connected to...
-
Page 27: Chapter 6: Troubleshooting
PROBLEM CAUSE CORRECTIVE ACTION Evaporation rate is Gas supply depleted Replenish gas supply. reduced Heater inoperable Contact Labconco. No gas flow Gas depleted Install new supply of gas. Sample position not activated Activate position per operating instructions. Nozzle clogged Unplug nozzle with fine wire. - Page 28 Chapter 6: Troubleshooting Product Service 1-800-522-7658...
- Page 29 The following pages list components that are available for your RapidVap Vertex Evaporator. The parts shown are the most common replacement parts. If other parts are required, contact Product Service. Product Service 1-800-522-7658...
-
Page 30: Appendix A: Rapidvap Vertex Evaporator Components
Appendix A: RapidVap Vertex Evaporator Components RapidVap Vertex Evaporator Components Item Quantity Part No. Description 7320400 Manifold 7323700 Blower 7353300 Temperature Sensor Lower 7325100 Over Temperature Cut Out 1544600 Inlet Fitting 7322200 Control Valve 115V 7322201 Control Valve 230V 3823803 Power Supply 1289310 Circuit Breaker 10A (115V) -
Page 31: Appendix B: Rapidvap Vertex Evaporator
Appendix A: RapidVap Vertex Evaporator Components Product Service 1-800-522-7658... -
Page 32: Dimensions
Product Service 1-800-522-7658... - Page 33 This Appendix contains technical information about the RapidVap Vertex Evaporator including specifications, environmental operations conditions, wiring diagrams and evaporation rates. Electrical Specifications Nominal amperage for 115V RapidVap Vertex Evaporator (model 7320020): 8A Nominal amperage for 230V RapidVap Vertex Evaporator Vacuum (models 7320030, 7320035, 7320037, 7320040): 4A ...
-
Page 34: Appendix C: Rapidvap Vertex Evaporator Specifications
Appendix C: RapidVap Vertex Evaporator Specifications Used in an environment of Pollution degrees 2 (i.e., where normally only non-conductive atmospheres are present). Occasionally, however, a temporary conductivity caused by condensation must be expected, in accordance with IEC 664. Nitrogen Consumption ... -
Page 35: Evaporation Rates
Appendix C: RapidVap Vertex Evaporator Specifications Evaporation Rates Solvent Tube Size Number of Sample Temp (C) Pressure *Avg. Time to (mm) Samples Size (ml) Dry (min.) Acetonitrile 12 x 75 < 19 12 x 75 <15 12 x 75 <11 12 x 75 <8 Methanol... -
Page 36: Accessories
PART # DESCRIPTION 7324100 Block. 10 mm dia. x 75 mm long tubes. Holds 50. 7321200 Block. 12 mm dia. x 75 mm long tubes. Holds 50. 7321300 Block. 13 mm dia. x 100 mm long tubes. Holds 50. 7321600 Block.
Need help?
Do you have a question about the RapidVap 73200 Series and is the answer not in the manual?
Questions and answers