Table of Contents
Advertisement
Quick Links
Advertisement
Table of Contents

Subscribe to Our Youtube Channel
Related Manuals for Labconco CentriVap DNA Systems


Summary of Contents for Labconco CentriVap DNA Systems
- Page 1 CentriVap DNA Systems Models 7970010 7970011 7970030 7970035 7970037...
- Page 2 Warranty Labconco Corporation provides a warranty to the original buyer for the repair or replacement of parts and reasonable labor as a result of normal and proper use of the equipment with compatible chemicals. Broken glassware and maintenance items, such as filters, gaskets, light bulbs, finishes and lubrication are not warranted.
-
Page 3: Table Of Contents
ABLE ONTENTS CHAPTER 1: INTRODUCTION Safety Symbols CHAPTER 2: PREREQUISITES Electrical Requirements Location and Exhaust Requirements Space Requirements CHAPTER 3: GETTING STARTED Unpacking Your CentriVap CentriVap Components Setting Up Your CentriVap Emergency Access Into the Chamber Exhaust Port Electrical Connection Rotor Installation Chemical Resistance of CentriVap Components Solvent Safety Precautions... - Page 4 CHAPTER 6: ACCESSORIES FOR YOUR CENTRIVAP Installing a Glass Lid Installing a Secondary Chemical Trap Installing a Vacuum Gauge Installing a CentriZap Strobe Light CHAPTER 7: TROUBLESHOOTING APPENDIX A: CENTRIVAP COMPONENTS APPENDIX B: CENTRIVAP DIMENSIONS APPENDIX C: CENTRIVAP SPECIFICATIONS Electrical Specifications Environmental Conditions Evaporation Rates...
-
Page 5: Chapter 1: Introduction
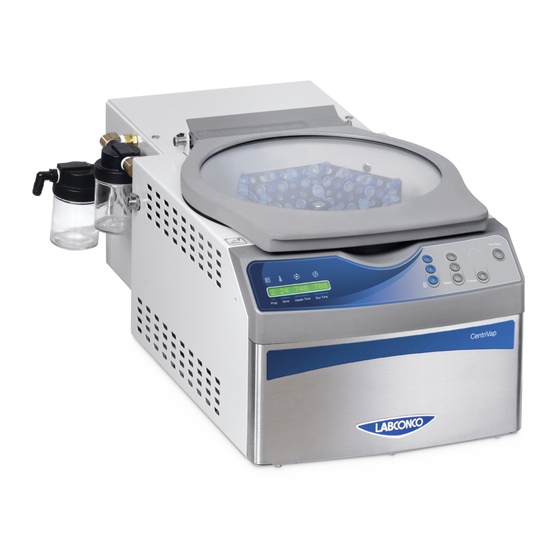
Chapter 1: Introduction Congratulations on your purchase of a Labconco CentriVap DNA Centrifugal Concentrator . Models are available for operation on 115V or 230V. The CentriVap Concentrator uses centrifugal force with heat and vacuum to rapidly dry precipitates of DNA and RNA samples. Centrifugation eliminates bumping and foaming as vacuum is applied and also concentrates the solute in the bottom of the vial. -
Page 6: Safety Symbols
Chapter 1: Introduction Safety Symbols Your CentriVap Concentrator was designed with safety in mind, however conditions may exist that could be hazardous. Throughout this manual potentially hazardous conditions are identified using the following words and symbols. It is important that you understand the warnings listed throughout this manual before you operate the CentriVap Concentrator Product Service 1-800-522-7658... -
Page 7: Chapter 2: Prerequisites
Chapter 2: Prerequisites Before you install your CentriVap, you need to prepare your site for installation. Carefully examine the location where you intend to install your CentriVap. You must be certain that the area is level and of solid construction. In addition, an exhaust means must be provided. -
Page 8: Location And Exhaust Requirements
Chapter 2: Prerequisites Location and Exhaust Requirements The CentriVap Concentrator should be located on a surface that is stable, flat and level. WARNING: The CentriVap System should be located within a fume hood if hazardous or flammable solvents are used. Heating of materials could lead to the liberation of hazardous gases. -
Page 9: Chapter 3: Getting Started
Chapter 3: Getting Started Now that the site for your CentriVap is properly prepared, you are ready to unpack, inspect, install, and test your CentriVap. Read this chapter to learn how Unpack and move your CentriVap. Set up your CentriVap. ... -
Page 10: Unpacking Your Centrivap
NOTE: Do not return goods without the prior authorization of Labconco. Unauthorized returns will not be accepted. If your CentriVap was damaged in transit, you must file a claim directly with the freight carrier. Labconco Corporation and its dealers are not responsible for shipping damage. -
Page 11: Setting Up Your Centrivap
Chapter 3: Getting Started Setting Up Your CentriVap After you verify receipt of the proper components, move your CentriVap to the level and sturdy location where you want to install it. There is no need to secure the CentriVap DNA Concentrator to the work surface. Then, follow the steps listed below. -
Page 12: Chemical Resistance Of Centrivap Components
Chapter 3: Getting Started Chemical Resistance of CentriVap Components Your CentriVap DNA Centrifugal Concentrator is designed to be chemical resistant to most compounds that are commonly used in the concentration processes that are performed in it. However, by necessity, the CentriVap is comprised of a number of different materials, some of which may be attacked and degraded by certain chemicals. -
Page 13: Solvent Safety Precautions
Chapter 3: Getting Started Diaphragm vacuum pumps sold by Labconco have wetted parts either made from PTFE or protected by PTFE coatings and are suitable for nearly all procedures. When using compounds in the CentriVap that are hostile to the materials of construction, it is imperative that the equipment is appropriately maintained. - Page 14 Chapter 3: Getting Started CAUTION: Solvents used in the CentriVap may be flammable or hazardous. Use extreme caution and keep sources of ignition away from the solvents. When using flammable or hazardous solvents, both the CentriVap and the vacuum pump should be operated inside a fume hood. If a sample is spilled in the chamber it must immediately be cleaned up.
-
Page 15: Chapter 4: Using Your Centrivap
Chapter 4: Using Your CentriVap After your CentriVap has been installed as detailed in Chapter 3: Getting Started, you are ready to begin using your CentriVap. Read this chapter to learn how to: Set operating parameters. Operate the controls. ... -
Page 16: Planning
Chapter 4: Using Your CentriVap Planning Thoroughly understand procedures and the equipment operation prior to beginning work. The unique performance of the CentriVap is dependent upon the proper balance of heat, vacuum and centrifugal force. If the proper balance is not established, it is possible to damage or lose a portion of the sample. -
Page 17: Centrivap Controls
Chapter 4: Using Your CentriVap The tables in Appendix C: CentriVap Specifications indicate approximate times required to evaporate various common solvents. Actual times must be determined by the user. The CentriVap can be set to alarm after a preset period of operation. When the time expires, the CentriVap will give an audible alarm and turn itself off. -
Page 18: Operating The Centrivap Controls
Chapter 4: Using Your CentriVap Operating the CentriVap Controls Preheat: To preheat the chamber, press the “PREHEAT” button. The display will show: XXX ACT: XXX Press the increase or decrease button until the desired set point (SP) is displayed. The actual chamber temperature, (ACT) is displayed to the right. When power is being supplied to the heaters, a bar under the actual temperature will illuminate. -
Page 19: Operating The Centrivap
Chapter 4: Using Your CentriVap To reset the timers to the original set point time when running programs other than program 1, program 2 or program 3, press the start button and hold it for five seconds. The display will indicate that the timer is reset. Operating the CentriVap CAUTION: To avoid personnel injury;... -
Page 20: Operational Notes
Chapter 4: Using Your CentriVap 10. Press “STOP” to terminate operation if the CentriVap has not already stopped itself. 11. When the evaporation is complete, allow the rotor to stop moving, lift the lid and remove the samples. Operational Notes When the CentriVap is turned on, the CentriVap returns to the same mode (“RUN”... -
Page 21: Safety Precautions
Chapter 4: Using Your CentriVap Safety Precautions Special precautions must be observed if the materials used in the CentriVap Concentrator are known to be hazardous, toxic, radioactive, or contaminated with pathogenic micro organisms. These actions should include but are not limited to the following: ... -
Page 22: Chapter 5: Maintaining Your Centrivap
Call Labconco if defects exist. 7. Check the continuity of the protective earth between the ground terminal on the power inlet and a bare metal housing panel. Contact Labconco if there is no continuity. 8. Repair any defects to the surface where the CentriVap is installed. - Page 23 Chapter 5: Maintaining Your CentriVap Daily: 1. To prolong the life of the DNA vacuum pump and to optimize its performance, it is important to purge all liquid from within it. When the DNA concentration process is completed, open the CentriVap lid and push the rotor switch ON.
-
Page 24: Chapter 6: Accessories For Your Centrivap
Chapter 6: Accessories for Your CentriVap The configuration of your CentriVap can be changed to accommodate your needs. If the solvents used in the CentriVap degrade the acrylic lid, it may be replaced with an optional glass lid to gain added chemical resistance. You may wish to add a secondary trap to trap vapors exhausted from the vacuum pump. - Page 25 Chapter 6: Accessories for Your CentriVap The following accessories are available for the CentriVap DNA Concentrator. PART # DESCRIPTION 7462900 Rotor (DNA) Holds (72) 0.5 ml microcentrifuge tubes 7462901* (60) 1.5 ml microcentrifuge tubes or (60) 2.0 ml microcentrifuge tubes 7450700 Rotor (1.5 ml) Holds (132) 1.5 ml microcentrifuge tubes or...
-
Page 26: Installing A Glass Lid
Chapter 6: Accessories for Your CentriVap Installing a Glass Lid Turn off the CentriVap. Unplug the power cord from the wall receptacle. Pull outward on the hinge pin knob. Lift and remove the old lid. To install the new lid, reverse the process. Installing a Secondary Chemical Trap An accessory secondary chemical trap is available to minimize the exhausting of solvents into the atmosphere. -
Page 27: Installing A Vacuum Gauge
Warning: This radiochemical cartridge does not meet NRC filter design recommendations. After operating, properly dispose of all hazardous materials in compliance with all applicable codes. Labconco is not responsible for improper disposal of any materials. Installing a Vacuum Gauge A user-supplied vacuum gauge may be attached to the CentriVap to monitor the vacuum level. -
Page 28: Installing A Centrizap Strobe Light
Chapter 6: Accessories for Your CentriVap Installing a CentriZap™ Strobe Light An accessory strobe light is available to enable you to see the samples as they are rotating in the rotor. Attach the holder to the right hand side of the CentriVap Concentrator using the screws provided. -
Page 29: Chapter 7: Troubleshooting
Troubleshooting Refer to the following if your CentriVap fails to operate properly. If the suggested corrective actions do not solve your problem, contact Labconco for additional assistance. The following failure codes may appear on the display when problems are sensed by the internal self check routine. - Page 30 Sample odor in lab Vent hose exhausting Redirect hose to fume hood. into lab area Evaporation rate is Heater inoperable Contact Labconco. reduced Vacuum pump failure Check pump. Obstruction in hose Remove obstruction or replace hose. Lack of adequate See below.
-
Page 31: Appendix A: Centrivap Components
Appendix A: CentriVap Components The following pages list components that are available for your CentriVap. The parts shown are the most common replacement parts. If other parts are required, contact Product Service. Item Quantity Part No. Description 7459000 Motor w/Capacitor 7546700 Valve, Vacuum Break (115V) 7546701... - Page 32 Appendix A: CentriVap Components Product Service 1-800-522-7658...
-
Page 33: Appendix B: Centrivap Dimensions
Appendix B: CentriVap Dimensions Product Service 1-800-522-7658... -
Page 34: Appendix C: Centrivap Specifications
Appendix C: CentriVap Specifications This Appendix contains technical information about the CentriVap including specifications, environmental operating conditions, wiring diagrams and evaporation rates. Electrical Specifications Nominal amperage for 115V CentriVap (model 7970010) (including vacuum pump): 5A Nominal amperage for 230V CentriVap (model 7970011) (including vacuum pump): 3A ... - Page 35 Appendix C: CentriVap Specifications Product Service 1-800-522-7658...
-
Page 36: Evaporation Rates
Evaporation Rates Solvent Tube Size Number of Sample Temp Time to Ballast Rate Overall (ml) Samples Size (ml) Dry (min.) (ml/min) Acetonitrile Open 2.36 Open 3.22 Open 3.88 Open 5.50 Open 1.61 Methanol Open 2.03 Open 2.64 Open 3.57 Open 4.71 Water Open...
Need help?
Do you have a question about the CentriVap DNA Systems and is the answer not in the manual?
Questions and answers