Table of Contents
Advertisement
Advertisement
Table of Contents

Related Manuals for Labconco CentriVap 7812010


Summary of Contents for Labconco CentriVap 7812010
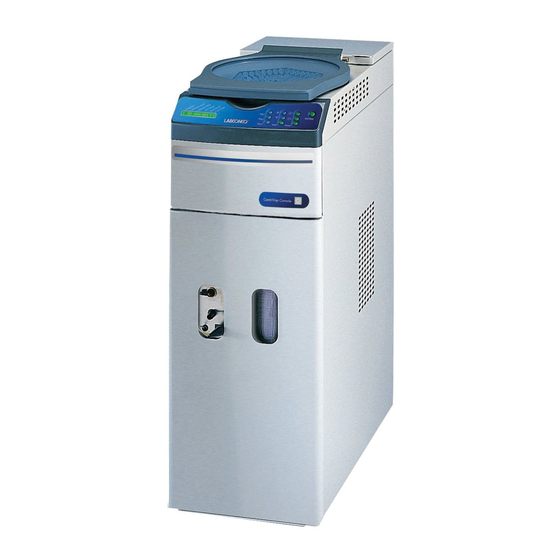
- Page 1 CentriVap Mobile Systems Models 7812010 7812011 7812012 7812013 7812014 7812015...
- Page 2 Warranty Labconco Corporation provides a warranty to the original buyer for the repair or replacement of parts and reasonable labor as a result of normal and proper use of the equipment with compatible chemicals. Broken glassware and maintenance items, such as filters, gaskets, light bulbs, finishes and lubrication are not warranted.
-
Page 3: Table Of Contents
CHAPTER 1: INTRODUCTION Safety Symbols CHAPTER 2: PREREQUISITES Electrical Requirements Location and Exhaust Requirements Vacuum Pump Requirements Vacuum Line Traps Space Requirements CHAPTER 3: GETTING STARTED Unpacking Your CentriVap CentriVap Components Setting Up Your CentriVap Emergency Access Into the Chamber Vacuum Pump Installation Exhaust Port Installing a Secondary Chemical Trap... - Page 4 CHAPTER 5: MAINTAINING YOUR CENTRIVAP CHAPTER 6: ACCESSORIES FOR YOUR CENTRIVAP Installing a Vacuum Gauge Installing a CentriZap Strobe Light Installing a Glass Trap in the Cold Trap CHAPTER 7: TROUBLESHOOTING APPENDIX A: CENTRIVAP COMPONENTS APPENDIX B: CENTRIVAP DIMENSIONS APPENDIX C: CENTRIVAP SPECIFICATIONS Electrical Specifications Environmental Conditions Wiring Diagram Concentrator (115V)
-
Page 5: Chapter 1: Introduction
Congratulations on your purchase of a Labconco CentriVap Mobile System. Models are available for operation on 115V or 230V. The Mobile System combines a concentrator and a cold trap in one cabinet. The concentrator uses centrifugal force with heat and vacuum to rapidly evaporate and condense solvents from biological and analytical samples. -
Page 6: Safety Symbols
Chapter 1: Introduction Safety Symbols Your CentriVap Concentrator was designed with safety in mind, however conditions may exist that could be hazardous. Throughout this manual potentially hazardous conditions are identified using the following words and symbols. It is important that you understand the warnings listed throughout this manual before you operate the CentriVap Concentrator. -
Page 7: Chapter 2: Prerequisites
Before you install your CentriVap, you need to prepare your site for installation. Carefully examine the location where you intend to install your CentriVap. You must be certain that the area is level and of solid construction. In addition, an exhaust means must be provided. -
Page 8: Location And Exhaust Requirements
Chapter 2: Prerequisites Location and Exhaust Requirements The CentriVap Concentrator should be located on a surface that is stable, flat and level. WARNING: If hazardous or flammable solvents are used, it is recommended that a benchtop CentriVap Concentrator is used and that it is located inside a fume hood. -
Page 9: Vacuum Line Traps
NOTE: Several components within the CentriVap are made from stainless steel or aluminum and can be degraded if exposed to acids. Before evaporating acids, be sure to contact Labconco. A moisture trap, solvent trap and radioisotope trap are also available. Refer to Appendix D: CentriVap Accessories for ordering information. - Page 10 Now that the site for your CentriVap Mobile System is properly prepared, you are ready to unpack, inspect, install, and test your CentriVap Mobile System. Read this chapter to learn how to: Unpack and move your CentriVap Mobile System. ...
-
Page 11: Chapter 3: Getting Started
NOTE: Do not return goods without the prior authorization of Labconco. Unauthorized returns will not be accepted. If your CentriVap was damaged in transit, you must file a claim directly with the freight carrier. Labconco Corporation and its dealers are not responsible for shipping damage. -
Page 12: Setting Up Your Centrivap
Chapter 3: Getting Started Setting Up Your CentriVap After you verify receipt of the proper components, move your CentriVap to the level and sturdy location where you want to install it. There is no need to secure the CentriVap to the work surface. Then, follow the steps listed below. Emergency Access Into the Chamber The CentriVap is designed to prevent access to the chamber in the event of a power disruption. -
Page 13: Vacuum Pump Installation
Chapter 3: Getting Started Vacuum Pump Installation The user-supplied vacuum pump can be installed inside the cabinet of the CentriVap Mobile Console. To gain access to the pump area, grasp the front lower panel near the top and pull it outward. The vacuum pump should be positioned on the lower shelf of the cabinet. -
Page 14: Exhaust Port
IMPORTANT: This radiochemical cartridge does not meet NRC filter design recommendations. After operating, properly dispose of all hazardous materials in compliance with all applicable codes. Labconco is not responsible for improper disposal of any materials. Electrical Connection Plug the power cord into the receptacle on the back of the CentriVap Concentrator and plug the other end into a suitable power receptacle. -
Page 15: Ground Wire
Chapter 3: Getting Started Ground Wire CAUTION: When draining the CentriVap Cold Trap always attach the grounding clip to the solvent catch pot to eliminate the risk of electrostatic spark ignition. Chemical Resistance of CentriVap Components Your CentriVap Mobile System is designed to be chemical resistant to most compounds that are commonly used in the concentration processes that are performed in it. - Page 16 CentriVap will degrade the oil if allowed to enter to pump. Frequent oil changes are required. Diaphragm vacuum pumps sold by Labconco have wetted parts either made from PTFE or protected by PTFE coatings and are suitable for nearly all procedures.
-
Page 17: Solvent Safety Precautions
Contact Labconco for ordering information. If the stainless steel cold trap chamber is attacked by the compounds in use consider using the optional Glass Trap insert. Contact Labconco for ordering information. When using a rotary vane vacuum pump the oil in the pump should be checked often. - Page 18 Chapter 3: Getting Started CAUTION: Solvents used in the CentriVap may be flammable or hazardous. Use extreme caution and keep sources of ignition away from the solvents. When using flammable or hazardous solvents, both the CentriVap and the vacuum pump should be operated inside a fume hood. If a sample is spilled in the chamber it must immediately be cleaned up.
-
Page 19: Chapter 4: Using Your Centrivap
After your CentriVap Mobile System has been installed as detailed in Chapter 3: Getting Started, you are ready to begin using your CentriVap. Read this chapter to learn how to: Set operating parameters. Operate the controls. Properly select and position glassware inside your CentriVap. ... -
Page 20: Planning
Chapter 4: Using Your CentriVap Mobile System Planning Thoroughly understand procedures and the equipment operation prior to beginning work. The unique performance of the CentriVap is dependent upon the proper balance of heat, vacuum and centrifugal force. If the proper balance is not established, it is possible to damage or lose a portion of the sample. -
Page 21: Heat Boost Operation
Chapter 4: Using Your CentriVap Mobile System The tables in Appendix C: CentriVap Specifications indicate approximate times required to evaporate various common solvents. Actual times must be determined by the user. The CentriVap can be set to alarm after a preset period of operation. When the time expires, the CentriVap will give an audible alarm and turn itself off. -
Page 22: Operating The Centrivap Controls
Chapter 4: Using Your CentriVap Mobile System 7. Set Point Select Button – To select a parameter to change, press the select button. Arrows on the display will point to the parameter that may be altered. 8. Heat Boost Button – If the model is so equipped, pressing the button will activate or deactivate the auxiliary Heat Boost heater. -
Page 23: Operating The Centrivap
Chapter 4: Using Your CentriVap Mobile System If during a run the “STOP” button is pressed, the timers remember the time at which stop occurred. If “RUN” is then pressed, the timers continue to count down from the time at which they were stopped. If you are running program 1, program 2 or program 3, pressing “PROG 1,”... -
Page 24: Operational Notes
Chapter 4: Using Your CentriVap Mobile System 9. Press “RUN.” If the display was showing set point parameters, it will change to show actual parameters. Press “RUN” again. The “S” (STOP) in the display changes to “R” (RUN). The program on the display alternately displays “R”... -
Page 25: Safety Precautions
Chapter 4: Using Your CentriVap Mobile System Safety Precautions Special precautions must be observed if the materials used in the CentriVap Concentrator are known to be hazardous, toxic, radioactive, or contaminated with pathogenic micro organisms. These actions should include but are not limited to the following: ... - Page 26 Under normal operation, the CentriVap Mobile System requires little maintenance. The following maintenance schedule is recommended. Before servicing the CentriVap Mobile System, disconnect electrical power. Special precautions must be observed if materials used in the CentriVap Concentrator are known to be hazardous, toxic, radioactive or contaminated with pathogenic micro organisms.
-
Page 27: Chapter 5: Maintaining Your Centrivap
Call Labconco if defects exist. 11. Check continuity of the protective earth between the ground terminal on the power inlet and a bare metal housing panel. Contact Labconco if there is no continuity. 12. Repair any defects to the surface where the CentriVap is installed. -
Page 28: Chapter 6: Accessories For Your Centrivap
The configuration of your CentriVap Mobile System can be changed to accommodate your needs. If the solvents used in the CentriVap degrade the acrylic lid, it may be replaced with an optional glass lid to gain added chemical resistance. To observe the samples while they are processing, an optional CentriZap Strobe light may be installed. - Page 29 Chapter 6: Accessories for Your CentriVap Mobile System The following accessories are available for the CentriVap Concentrator and Cold Trap System. PART # DESCRIPTION 7462900 Rotor (DNA) 7462901* Holds (72) 0.5 ml microcentrifuge tubes (60) 1.5 ml microcentrifuge tubes or (60) 2.0 ml microcentrifuge tubes 7450700 Rotor (1.5 ml)
- Page 30 Chapter 6: Accessories for Your CentriVap Mobile System 7995600 Ammonia Trap Insert 7815000 Radiochemical Trap Insert 7815200 Solvent Trap Insert CentriZap Strobe Light – For observing samples while the rotor is spinning. 7464300 Direct Drive Vacuum Pump – 117 liters/minute pumping capacity with gas 1472100 ballast.
-
Page 31: Installing A Vacuum Gauge
Chapter 6: Accessories for Your CentriVap Mobile System Vacuum Pump Oil 1 Liter – A mineral oil with low vapor pressure. For 7772700 vacuum pumps 7439000, 7439200, 7769600 and 7769800 Vacuum Pump – Two stage direct drive pump, 108 liters/minute. 115 VAC 7438700 50/60 Hz, single phase. -
Page 32: Installing A Centrizap Strobe Light
Chapter 6: Accessories for Your CentriVap Mobile System Installing a CentriZap™ Strobe Light An accessory strobe light is available to enable you to see the samples as they are rotating in the rotor. Attach the holder to the right hand side of the CentriVap Concentrator using the screws provided. -
Page 33: Installing A Glass Trap In The Cold Trap
Chapter 6: Accessories for Your CentriVap Mobile System Installing a Glass Trap in the Cold Trap An accessory Glass Trap is available for use in the Cold Trap for use when corrosive chemicals are used that could attack the stainless steel chamber of the Cold Trap. -
Page 34: Chapter 7: Troubleshooting
Refer to the following if your CentriVap fails to operate properly. If the suggested corrective actions do not solve your problem, contact Labconco for additional assistance. The following failure codes may appear on the display when problems are sensed by the internal self check routine. - Page 35 Sample odor in lab Vent hose exhausting Redirect hose to fume hood. into lab area Evaporation rate is Heater inoperable Contact Labconco. reduced Vacuum pump failure Check pump. Obstruction in hose Remove obstruction or replace hose. Lack of adequate See below.
- Page 36 Chapter 7: Troubleshooting PROBLEM CAUSE CORRECTIVE ACTION No vacuum/poor vacuum Ice formed on Cold Defrost and wipe dry. (cont.) Trap lid sealing surface Secondary Trap Tighten all connections to and from the Cannister not fitted Secondary Trap Cannister. properly Secondary Trap Insert Replace with new insert.
-
Page 37: Appendix A: Centrivap Components
The following pages list components that are available for your CentriVap. The parts shown are the most common replacement parts. If other parts are required, contact Product Service. CentriVap Concentrator Components Item Quantity Part No. Description 7546700 Valve, Vacuum Break (115V) 7546701 Valve, Vacuum Break (230V) 7453500... - Page 38 Appendix A: CentriVap Components Product Service 1-800-522-7658...
- Page 39 Appendix A: CentriVap Components CentriVap Cold Trap Components Item Quantity Part No. Description 1554900 Elbow 1554700 Stem 1554800 Stem Adapter 7398900 Insulation-Lid Assembly 7399900 Spacer Lid – Acrylic 7399500 7399400 Gasket 7397607 Spacer 7397608 Insulation 7871500 Glass Top 7468100 Temperature Sensor 7953800 Fan Motor (115V) 7953801...
- Page 40 Appendix A: CentriVap Components 15 & 16 Product Service 1-800-522-7658...
-
Page 41: Appendix B: Centrivap Dimensions
CentriVap Concentrator Product Service 1-800-522-7658... -
Page 42: Appendix C: Centrivap Specifications
This Appendix contains technical information about the CentriVap including specifications, environmental operating conditions, wiring diagrams and evaporation rates. Electrical Specifications Nominal amperage for 115V/60 Hz CentriVap (model 7812010) (excluding vacuum pump): 10A. Nominal amperage for 230V/50Hz CentriVap (model 7812011) (excluding vacuum pump): 4.7A. -
Page 43: Environmental Conditions
Appendix C: CentriVap Specifications Environmental Conditions Indoor use only. Maximum altitude: 6562 feet (2000 meters). Ambient temperature range: 41° to 104°F (5° to 40°C). Maximum relative humidity: 80% for temperatures up to 88°F (31°C), decreasing linearly to 50% relative humidity at 104°F (40°C). ... -
Page 44: Wiring Diagram Concentrator (115V)
Appendix C: CentriVap Specifications Wiring Diagram Concentrator (115V Model) (Models 7812010 and 7812013) Product Service 1-800-522-7658... -
Page 45: Wiring Diagram Concentrator (230V)
Appendix C: CentriVap Specifications Wiring Diagram Concentrator (230V Model) (Models 7812011, 7812012 7812014 and 7812015) Product Service 1-800-522-7658... -
Page 46: Evaporation Rates
Appendix C: CentriVap Specifications Evaporation Rates bp 40 Methylene Chloride Number Heater Time to Rate Tube Size Sample Temp Heat Vacuum Cold Overall (ml) Samples Size (ml) Boost Pump (min) Trap (ml/min) Diaphragm 3.75 Diaphragm 3.85 Diaphragm 4.00 Diaphragm 4.00 Toluene bp 111 Diaphragm... - Page 47 Appendix C: CentriVap Specifications bp 100 Water Number Heater Time to Rate Tube Size Sample Temp Heat Vacuum Cold Overall (ml) Samples Size (ml) Boost Pump (min) Trap (ml/min) Diaphragm 1397 0.21 Diaphragm 0.67 Diaphragm 0.70 Diaphragm 0.19 Diaphragm 0.30 Diaphragm 0.44 Diaphragm...
Need help?
Do you have a question about the CentriVap 7812010 and is the answer not in the manual?
Questions and answers