
Related Manuals for Labconco FreeZone 70061 6L -50C Series


Summary of Contents for Labconco FreeZone 70061 6L -50C Series
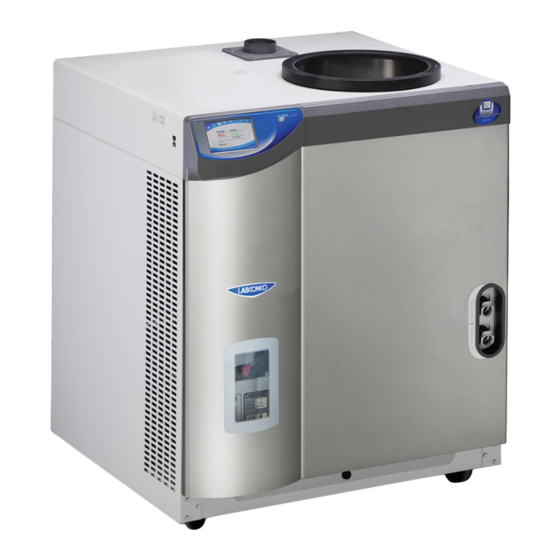
- Page 1 Original instructions Models 70061**** 6L -50C Series 71061**** 6L -84C Series 70121**** 12L -50C Series 71121**** 12L -84C Series 70181**** 18L -50C Series...
- Page 2 Warranty Labconco Corporation provides a warranty to the original buyer for the repair or replacement of parts and reasonable labor as a result of normal and proper use of the equipment with compatible chemicals. Broken glassware and maintenance items, such as filters, gaskets, light bulbs, finishes and lubrication are not warranted.
-
Page 3: Table Of Contents
Original instructions ABLE ONTENTS CHAPTER 1: INTRODUCTION Intended Use Freeze Dry Process Freeze Dry Rates Freeze Dry Capacity Samples Containing Volatile Substances About This Manual Typographical Conventions CHAPTER 2: PREREQUISITES Electrical Requirements Location Requirements Vacuum Pump Requirements Chamber or Manifold Requirements CHAPTER 3: GETTING STARTED Unpacking Your Freeze Dryer Freeze Dryer Components... - Page 4 Original instructions Programs Screen Data Logging Screen Settings Screen Language Time & Date Units Security Alerts Configure Email Settings Maintenance Vacuum Pump Settings Refrigeration System Settings Freeze Dryer Line Voltage Offset Vacuum Pump Protection Calibration Display Network Sensors Screen Drying Accessory Screen End Point Detection creen Help Screen...
- Page 5 Original instructions Vacuum Set Point Status Email Messages End Point Detection System Temp Variation System Temp Set Point Shelf Temp Variation Shelf Temp Set Point Power Fail Program Complete Copy (export) a Data Log File Downloading Data Log Files via Ethernet Copy a Program CHAPTER 6: MAINTAINING YOUR FREEZE DRYER Service Safety Precautions...
-
Page 6: Chapter 1: Introduction
The unit is easy to install and maintain. Proper care and maintenance of this product will result in many years of dependable service. Intended Use The Labconco Freeze Dryers described in this manual are intended for laboratory use to facilitate the lyophilization process. Freeze Dry Process Freeze drying is an important process in sample preparation and for the preservation and storage of biologicals, pharmaceuticals and foods. -
Page 7: Freeze Dry Rates
Original instructions Chapter 1: Introduction Freeze Dry Rates The efficiency of the Freeze Drying process is dependent upon the surface area and the thickness of the sample, the collector temperature and vacuum obtained, the eutectic point and solute concentration of the sample. It is important to remember these factors when trying to obtain efficient utilization of your Freeze Dry system. -
Page 8: Freeze Dry Capacity
Original instructions Chapter 1: Introduction efficient rate. In many applications, the maintenance of a vacuum of 0.133 mbar or less is recommended. The rate of freeze drying is directly proportional to the vapor pressure and the vapor pressure is dependent upon both eutectic temperature and solute concentration of the sample. -
Page 9: Samples Containing Volatile Substances
Original instructions Chapter 1: Introduction Samples Containing Volatile Substances In certain cases the solvent in a sample to be freeze dried may contain volatile components such as acetonitrile, methanol, acetic acid, formic acid or pyridine. In addition to these substances having an effect on the eutectic temperature, they may increase the vapor pressure at the surface of the sample. -
Page 10: Typographical Conventions
Original instructions Chapter 1: Introduction Appendix C: Freeze Dryer Specifications contains product specifications. Appendix D: Freeze Dryer Accessories see www.labconco.com for a complete list of Freeze Dry accessories. Typographical Conventions Recognizing the following typographical conventions will help you understand and use this manual: ... -
Page 11: Chapter 2 Prerequisites
Original instructions HAPTER REREQUISITES Before you install your Freeze Dryer, you need to prepare your site for installation. Carefully examine the location where you intend to install your Freeze Dryer. You must be certain that the area is level and of solid construction. An electrical source must be located near the installation site. -
Page 12: Location Requirements
Vacuum pumps used with 115V models should be equipped with a 115V, 15 Amp NEMA 5-15P plug. Vacuum pumps used with 230V models should be equipped with a reverse IEC plug (included with 230V pumps purchased from Labconco). This will allow the vacuum pump to be plugged into the receptacle on electrical box located within the Freeze Dryer cabinet. -
Page 13: Chapter 3 Getting Started
(15) days of IF YOUR FREEZE DRYER WAS DAMAGED IN TRANSIT, YOU delivery. MUST FILE A CLAIM DIRECTLY WITH THE FREIGHT CARRIER. LABCONCO CORPORATION AND ITS DEALERS ARE NOT RESPONSIBLE FOR SHIPPING DAMAGE. Product Service 816-333-8811 or 1-800-522-7658... -
Page 14: Freeze Dryer Components
7205304 Drain Hose If you did not receive one or more of the components listed for your Freeze Dryer, or if any of the components are damaged, contact Labconco Corporation immediately for further instructions. Setting Up Your Freeze Dryer After you verify receipt of the proper components, move your Freeze Dryer to the location where you want to install it. -
Page 15: Component Identification
Original instructions Chapter 3: Getting Started Component Identification 3” Vacuum Port Shell Freezer or Mini Chamber Collector Chamber (if equipped) & Coil USB port On/Standby Button & LED Indicator Touch Screen Display Vacuum Pump Viewing Window Quick-Connect drain coupling(s) Upper = Shell Freezer (if equipped) Lower = Collector Chamber Serial Tag (&... -
Page 16: Vacuum Pump Connection
Original instructions Chapter 3: Getting Started Vacuum Pump Inlet Port Console Inlet Port Connection Vacuum Pump Connection A vacuum pump (as described in Chapter 2: Prerequisites) is required to operate your Freeze Dryer properly. The Freeze Dryer is equipped with a 3/4" ID vacuum hose for connecting the collector chamber to the vacuum pump. -
Page 17: Electrical Connection
Original instructions Chapter 3: Getting Started 8. VERIFY THE VACUUM PUMP VOLTAGE SETTING AGREES WITH THE FREEZE DRYER VOLTAGE SHOWN ON THE SERIAL NUMBER LABEL. Reconfigure if necessary (see vacuum pump instructions). 9. Connect the vacuum pump power cord to the receptacle labeled “vacuum pump”... - Page 18 Original instructions Chapter 3: Getting Started 6 & 12L Baffle Align hole in baffle channel with rear vacuum port Properly Installed 18L Baffle 1. Place the baffle into the collector chamber. 2. Position the baffle so that the arrow points directly toward the front. 18L Baffle Top View Product Service 816-333-8811 or 1-800-522-7658...
-
Page 19: Drying Chamber Or Manifold Installation
Original instructions Chapter 3: Getting Started Drying Chamber or Drying Manifold Installation The drying chamber or drying manifold, purchased separately, may be positioned directly above the 3-inch port on the top of the Freeze Dryer. Follow the instructions supplied with the selected accessory. 4 or 8 Port Manifold Installation MANIFOLD 7206400 THUMB SCREW... -
Page 20: Chemical Resistance Of Freeze Dryer Components
Original instructions Chapter 3: Getting Started Chemical Resistance of Freeze Dryer Components The FreeZone Freeze Dry System is designed to be chemically resistant to most compounds that are commonly used in freeze drying processes. However, by necessity, the freeze dryer is comprised of a number of different materials, some of which may be attacked and degraded by certain chemicals. -
Page 21: Solvent Safety Precautions
Warranty on the affected parts will be voided if maintenance has been obviously neglected. If you have questions about using specific compounds in the Freeze Dryer, contact Labconco Technical Service at 1-800-821-5525 or 816-333- 8811 or e-mail: labconco@labconco.com. Solvent Safety Precautions Solvents used in the Freeze Dryer may be flammable or hazardous to your health. -
Page 22: Chapter 4: Lyo-Works ™ Operating System
Original instructions HAPTER ORKS™ PERATING YSTEM After your Freeze Dryer has been installed as detailed in Chapter 3: Getting Started, read this chapter to learn how to: Operate the controls. Understand the display. Do not use the Freeze Dryer in a manner not specified by the manufacturer (refer to Appendix C: Freeze Dryer Specifications). -
Page 23: Initial Power Up
Original instructions Chapter 4: Lyo-Works Operating System 2. On / Standby Button – If the display is illuminated pressing this button will put the display into low power mode (display backlight will be turned off). If the display is in low power mode, pressing this button will illuminate the display (Note: the display can also be brought out of low power mode by touching any location on the screen). -
Page 24: Main Menu Icons
Original instructions Chapter 4: Lyo-Works Operating System Main Menu Icons Menu icons are displayed across the top of the screen. Their descriptions from left to right are as follows: Home Programs Data Logging Settings Sensors Drying Accessory End Point Detection Help Moving Between Menu Screens You can move between menu screens by either touching the menu icons or... -
Page 25: Operation Buttons
Original instructions Chapter 4: Lyo-Works Operating System vacuum is > 1.500 mbar. The value displayed will be GREEN is the vacuum is ≤ 1.500 mbar. Line 3 Shell Freezer or Mini Chamber (factory installed options) – Only one of these two options may be installed on a single Console Freeze Dryer. If your Freeze Dryer has either of these two options installed, the left hand side of Line 3 will show the current measurement from its temperature sensor. -
Page 26: Programs Screen
Original instructions Chapter 4: Lyo-Works Operating System Programs Screen The Programs screen will allow you to create and store up to 30 programs with up to 16 segments per program. When no program has been selected the “New” button will be the only active button along the bottom of the screen. A program can be selected from the program list by pressing the program name. - Page 27 Original instructions Chapter 4: Lyo-Works Operating System “New” program When the “New” button is selected, one of the following program templates will be displayed, depending on the type of accessory connected to the Freeze Dryer. Bulk TD, Tray Dryer, Heated Product Shelves Stoppering Tray Dryer Pressing the program name field will allow you to edit the program name.
-
Page 28: Data Logging Screen
Original instructions Chapter 4: Lyo-Works Operating System will turn off the heater control and allow the system to reach its lowest possible temperature (approximately -45°C). Bulk Tray Dryer, Small Tray Dryer & Heated Product Shelves may be set from -20°C to +60°C ... -
Page 29: Settings Screen
Original instructions Chapter 4: Lyo-Works Operating System Settings Screen Many of the user preferences may be configured from the Settings menu. Before operating the freeze dryer you may want to configure some of the available preferences. There are nine categories in the Settings menu. 1. -
Page 30: Units
Original instructions Chapter 4: Lyo-Works Operating System 3. Units – Select your desired unit of measure for Temperature (°C , °F) and Vacuum (mbar, Pa, Torr) 4. Security – A four digit security code can be set that will require users to enter the code to gain access to selected screens. -
Page 31: Configure Email Settings
Edit – Use this button to edit an existing email address. Delete – Use this button to delete an existing email address. Device Name – The default name for this field will be “Labconco Freeze Dryer”. The name can be edited by pressing the name field. - Page 32 Original instructions Chapter 4: Lyo-Works Operating System If you do not know the proper information to enter into each of the SMTP fields, consult your IT personnel or email service provider. After entering the appropriate information in all of the SMTP fields, press the Save button.
-
Page 33: Maintenance
Original instructions Chapter 4: Lyo-Works Operating System 6. Maintenance – This screen contains data and settings pertaining to the operation hours and maintenance period for the vacuum pump and refrigeration system. Scroll up and down to view the entire page. ... -
Page 34: Calibration
Original instructions Chapter 4: Lyo-Works Operating System 7. Calibration – Some sensors in the Freeze Dryer can be calibrated. This process should be done by a qualified technician or metrologist with reference sensors that are known with certainty. An external reference sensor must be placed at the same measurement point (as close as physically possible) as the sensor being calibrated. -
Page 35: Display
Original instructions Chapter 4: Lyo-Works Operating System CALIBRATION Offset: ________ Cancel Calibrate Calibrate - Pressing this button will save the entered offset value. Temperature sensor offset values can range from -5 to +5° C. Vacuum Sensor offset values can range from -0.020 to +0.020 mbar. -
Page 36: Network
Original instructions Chapter 4: Lyo-Works Operating System 9. Network – If the DHCP Enabled button is turned ON, and an Ethernet cable is connecting the Freeze Dryer to an active network, then the IP Address, Subnet Mask, and Default Gateway fields will be populated automatically. If the DHCP Enabled button is turned OFF, the IP Address, Subnet Mask, and Default Gateway fields can then be manually entered to establish a network connection. -
Page 37: Drying Accessory Screen
Original instructions Chapter 4: Lyo-Works Operating System Drying Accessory Screen If an electrically controlled Drying Accessory is NOT connected to the Freeze Dryer (via the communication cable), the Drying Accessory icon will NOT appear in the main menu bar. If one of these accessories has been properly connected to the Freeze Dryer, the Drying Accessory icon will appear in the main menu bar and you will be able to control and monitor the Drying Accessory from this screen. -
Page 38: End Point Detection Screen
Original instructions Chapter 4: Lyo-Works Operating System End Point Detection Screen If the communication cable is NOT connected or if NONE of the vacuum sensors are connected to the End Point Detection Enclosure, the End Point Detection icon (checkered flag) will NOT appear in the menu bar. If the End-Zone end point detection accessory is properly connected to the Freeze Dryer, this screen will be used to control the End Point Detection settings for up to five individual freeze dry flasks. -
Page 39: Help Screen
Freeze Dryer (Voltage, Current & Frequency) and allow the user to run Manual or Auto Diagnostics on the unit. User’s Manual – Go to Labconco.com for current manuals About – Displays the catalog number of the Freeze Dryer and the software versions currently installed. -
Page 40: Chapter 5: Using Your Freeze Dryer
Original instructions HAPTER SING REEZE RYER Operation Checklist The following checklist should be followed prior to each use of your Freeze Dryer: 1. Remove the accessory drying chamber or manifold from the connection port and using a soft, lint-free cloth or paper towel, wipe the port gasket(s) and sealing surfaces of the drying chamber/manifold and connection port to remove any dirt or contaminants that could cause a vacuum leak. -
Page 41: Vacuum Pump Ballast Setting
Original instructions Chapter 5: Using Your Freeze Dryer 11. Attach a pre-frozen sample to sample valve on drying chamber or manifold. Note: If using a Clear Chamber, Tray Dryer or Heated Product Shelves, the vacuum chamber must be fully vented (to atmospheric pressure) in order to remove acrylic chamber or open door before loading sample into the drying chamber. -
Page 42: Auto Start-Up (With Purge Valve Option)
Original instructions Chapter 5: Using Your Freeze Dryer VACUUM will start when collector temperature reaches -40°C Auto start-up (with Purge Valve option) 1. Go to Home screen 2. Press AUTO, then press START COLLECTOR will start immediately PURGE valve will close immediately ... -
Page 43: Pre-Freezing Samples
Original instructions Chapter 5: Using Your Freeze Dryer on heated shelves or in glassware attached to manifold valves, the volatility of the sample itself, the size of the sample and the heat energy supplied to the sample. Some guidelines for setting the vacuum level are shown below. Exact protocols must be determined by the user for the specific samples that are being freeze dried. -
Page 44: Starting A Program
Original instructions Chapter 5: Using Your Freeze Dryer Bevel in “vent” position Vent/Backfill Port Bevel in “vacuum” position Adapter 2. Before adding another sample, allow system vacuum to return to 0.133 mbar or lower. Any combination of valves and sample sizes may be utilized at one time provided that the system vacuum and collector temperature remain sufficiently low to prevent melting of the frozen sample. -
Page 45: Shut Down
Original instructions Chapter 5: Using Your Freeze Dryer 1. Go to the Programs screen. You can access the Programs screen in two different ways, both lead to the same location. a. Directly access the Programs screen by selecting the Programs icon from the main menu bar at the top of the display. -
Page 46: Operating The Shell Freezer (Optional Feature)
Original instructions Chapter 5: Using Your Freeze Dryer Never attempt to start the vacuum pump when there is liquid in the collector chamber. This could result in damage to the vacuum pump. Operating the Shell Freezer (optional feature) The optional built in shell freezer is designed for shell freezing samples in flasks in preparation for freeze-drying. -
Page 47: Operating The Mini Chamber (Optional Feature)
Original instructions Chapter 5: Using Your Freeze Dryer Operating the Mini Chamber (optional feature) The Mini Chamber is designed for freeze drying small samples, either in bulk or in small containers such as vials or 96 well plates. It may be used in conjunction with other drying accessories that are mounted on top of the Freeze Dryer or independently. -
Page 48: Alerts
Original instructions Chapter 5: Using Your Freeze Dryer f. Turn off the Freeze Dryer, defrost and drain the collector chamber per instructions in this manual. Alerts A number of events may occur during a lyophilization procedure that will cause an alert to be displayed on the Freeze Dryer touch screen. -
Page 49: Service Vacuum Pump
Original instructions Chapter 5: Using Your Freeze Dryer Service Vacuum Pump The vacuum pump normally plugs into the vacuum pump electrical receptacle on the back of the Freeze Dryer. When the Freeze Dryer has accumulated a total of 1000 operating hours, an alert will be activated. It may be necessary to service the vacuum pump more frequently than every 1000 hours depending on the operation of the Freeze Dryer. -
Page 50: Shelf Temp Set Point
Original instructions Chapter 5: Using Your Freeze Dryer Shelf Temp Set Point (optional accessory) If a Bulk Tray Dryer, Tray Dryer or Heated Product Shelves accessory is connected to the Freeze Dryer this alert will be activated if the shelf temperature stabilized without reaching the Shelf Temp Set Point. -
Page 51: Copy A Program
Original instructions Chapter 5: Using Your Freeze Dryer 6. The following webpage will appear with a list of all the Data Log files that are stored on the Freeze Dryer. 7. Single click on a file name from the list to download the file. 8. -
Page 52: Chapter 6: Maintaining Your Freeze Dryer
Original instructions HAPTER AINTAINING REEZE RYER Service Safety Precautions Always ensure that only authorized technicians service the refrigeration, vacuum and electrical systems. If performing any electrical maintenance, always disconnect the power at the main disconnect. If the refrigeration system must be operated with access panels removed (for diagnostic purposes only), stay clear of moving fan blade. - Page 53 Original instructions Chapter 6: Maintaining Your Freeze Dryer 6. Check the collector chamber for condensed or frozen solvents and dispose of appropriately. Completely empty the collector chamber before the next run or before attempting to start the vacuum pump. 7. If sample valves leak or stems become difficult to turn, pull the stem out of the rubber valve body and apply a thin coat of vacuum grease to the stem.
-
Page 54: Chapter 7: Troubleshooting
Labconco for additional assistance. Labconco Freeze Dry Systems that are clean, dry and without samples attached should reach a vacuum of 0.133 mbar within 10 minutes and should achieve an ultimate vacuum of 0.040 mbar within 18 hours when the refrigeration is operating. -
Page 55: Gaskets, Tubing, Connections, Sample Valves
Original instructions Chapter 7: Troubleshooting 4. Isolate the pump by disconnecting the vacuum hose from the Freeze Dryer. Deadhead the pump by inserting the vacuum sensor from a secondary vacuum gauge into the end of the vacuum hose and observe the vacuum reading obtained. - Page 56 Original instructions Chapter 7: Troubleshooting The illustrations below show how the sample valve installs on a chamber and a manifold. Knob & Stem Assembly Valve Body Valve Assembly (Clear Chamber with Valves) Bulkhead Nut Valve Body Manifold Assembly Thrust Washer Valve Body Gasket Bulkhead...
-
Page 57: System Components & Collector Chamber Isolation
Original instructions Chapter 7: Troubleshooting III. System Components and Collector Chamber Isolation This test determines if the source of a leak is in the drying chamber or manifold. 1. Remove the drying chamber or manifold. 2. Leave the gasket on and turn a large freeze dry flask upside down to cover the connection port. - Page 58 Original instructions Chapter 7: Troubleshooting The following test determines if a vacuum leak is in the collector chamber. COLLECTOR COIL STOPPER 1. Insert a rubber stopper (#2) in the vacuum port in the left side of the collector chamber. 2. Start the Freeze Dryer and observe the vacuum indication. If the vacuum is good, the problem is in the collector chamber.
-
Page 59: Refrigeration Module Operation
If any repairs are required on the refrigeration module, contact your local laboratory supply dealer. If your laboratory supply dealer is unable to provide assistance, please call Labconco. Repairs should only be undertaken by a competent refrigeration technician or through an authorized Labconco service agency. -
Page 60: Appendix A: Freeze Dryer Components
Original instructions PPENDIX REEZE RYER OMPONENTS The following pages list components that are available for your Freeze Dryer. The parts shown are the most common replacement parts. If other parts are required, contact Product Service. Product Service 1-800-522-7658... - Page 61 Original instructions Appendix A: Freeze Dryer Components 6L -50C Models (70061xxxx) 6L -84C Models (71061xxxx) 12L -50C Models (70121xxxx) 12L -84C Models (71121xxxx) 18L -50C Models (70181xxxx) Item Part No. Description -50C -84C -50C -84C -50C 7690800 Lid Gasket - Collector 7532900 Lid Collector 7408400...
- Page 62 Original instructions Appendix A: Freeze Dryer Components Item Part No. Description -50C -84C -50C -84C -50C 7339200 Electrical Enclosure Assembly 115V 7339201 Electrical Enclosure Assembly 230V 7339202 Elec. Enclosure Cascade Assy 115V 7339203 Elec. Enclosure Cascade Assy 230V 7340300 Elec. Enclosure with Purge Assy 115V 7340301 Elec.
- Page 63 Original instructions Appendix A: Freeze Dryer Components Product Service 816-333-8811 or 1-800-522-7658...
- Page 64 Original instructions Appendix A: Freeze Dryer Components Product Service 816-333-8811 or 1-800-522-7658...
-
Page 65: Appendix B: Freeze Dryer Dimensions
Original instructions PPENDIX REEZE RYER IMENSIONS 6L -50C Models (70061xxxx) 6L -84C Models (71061xxxx) 12L -50C Models (70121xxxx) 12L -84C Models (71121xxxx) 18L -50C Models (70181xxxx) 31.8 29.6 80.7 75.1 36.6 *Dimensions in inches & (centimeters) Product Service 1-800-522-7658... -
Page 66: Appendix C: Freeze Dryer Specifications
Original instructions PPENDIX REEZE RYER PECIFICATIONS This Appendix contains technical information about the Freeze Dryer including electrical specifications and operating conditions. Electrical Specifications Voltage Frequency Amps Operating Max. with Catalog # Description Nominal (Hz) Range Vacuum Pump 115V 103-127 70061xxxx 6L -50C 230V 187-253... -
Page 67: Environmental Conditions
Original instructions Appendix C: Freeze Dryer Specifications Environmental Conditions Indoor use only. Ambient temperature range: 41° to 104°F (5° to 40°C). Maximum relative humidity: 80% for temperatures up to 88°F (31°C), decreasing linearly to 50% relative humidity at 104°F (40°C). ... -
Page 68: Appendix D Freeze Dryer Accessories
Original instructions PPENDIX REEZE RYER CCESSORIES Labconco offers a full line of accessories to enhance your Freeze Dryer’s operation and usability. For a complete list of these accessories, please consult our website at www.labconco.com. Product Service 816-333-8811 or 1-800-522-7658...
Need help?
Do you have a question about the FreeZone 70061 6L -50C Series and is the answer not in the manual?
Questions and answers