Table of Contents
Advertisement
Advertisement
Table of Contents

Subscribe to Our Youtube Channel
Related Manuals for Labconco CentriVap 73100 Series


Summary of Contents for Labconco CentriVap 73100 Series
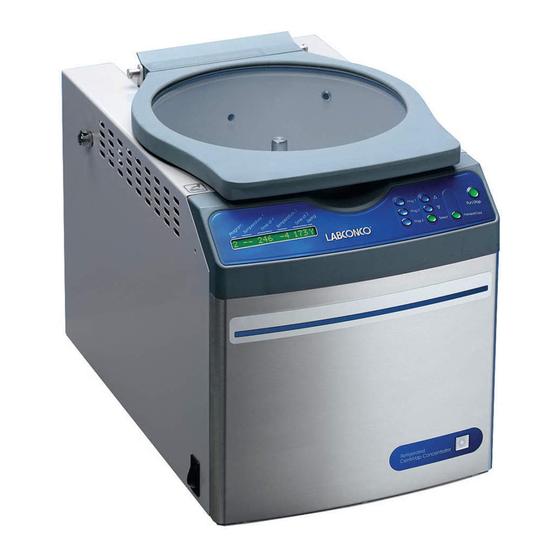
- Page 1 CentriVap Refrigerated Centrifugal Concentrators Models 73100 Series...
- Page 2 Warranty Labconco Corporation provides a warranty to the original buyer for the repair or replacement of parts and reasonable labor as a result of normal and proper use of the equipment with compatible chemicals. Broken glassware and maintenance items, such as filters, gaskets, light bulbs, finishes and lubrication are not warranted.
-
Page 3: Table Of Contents
ABLE ONTENTS CHAPTER 1: INTRODUCTION Safety Symbols CHAPTER 2: PREREQUISITES Electrical Requirements Location and Exhaust Requirements Vacuum Pump Requirements Vacuum Line Traps Space Requirements CHAPTER 3: GETTING STARTED Unpacking Your CentriVap CentriVap Components Emergency Access Into the Chamber Component Orientation & Hose Connections Electrical Connection Rotor Installation Chemical Resistance of CentriVap Components... - Page 4 CHAPTER 5: MAINTAINING YOUR CENTRIVAP CHAPTER 6: ACCESSORIES FOR YOUR CENTRIVAP Installing a Glass Lid Installing a Vacuum Gauge Installing a CentriZap Strobe Light CHAPTER 7: TROUBLESHOOTING APPENDIX A: CENTRIVAP COMPONENTS APPENDIX B: CENTRIVAP DIMENSIONS APPENDIX C: CENTRIVAP SPECIFICATIONS Electrical Specifications Environmental Conditions Evaporation Rates...
-
Page 5: Chapter 1: Introduction
Chapter 1: Introduction Congratulations on your purchase of a Labconco CentriVap Refrigerated Concentrator. Models are available for operation on 115V or 230V. The CentriVap Refrigerated Concentrator, when combined with the CentriVap Cold Trap, uses centrifugal force and vacuum with or without heat to rapidly evaporate and condense solvents from biological and analytical samples. -
Page 6: Safety Symbols
Chapter 1: Introduction Safety Symbols Your Refrigerated CentriVap Concentrator was designed with safety in mind, however conditions may exist that could be hazardous. Throughout this manual potentially hazardous conditions are identified using the following words and symbols. It is important that you understand the warnings listed throughout this manual before you operate the CentriVap Concentrator. -
Page 7: Chapter 2: Prerequisites
Chapter 2: Prerequisites Before you install your CentriVap Refrigerated Concentrator, you need to prepare your site for installation. You must be certain that the area is level and of solid construction. In addition, a means to exhaust the vacuum pump must be provided. An electrical source must be located near the installation site. -
Page 8: Location And Exhaust Requirements
Chapter 2: Prerequisites Location and Exhaust Requirements The CentriVap Concentrator should be located on a surface that is stable, flat and level. WARNING: The CentriVap System should be located within a fume hood if hazardous or flammable solvents are used. Heating of materials could lead to the liberation of hazardous gases. -
Page 9: Vacuum Line Traps
NOTE: Several components within the CentriVap Refrigerated Concentrator are made from stainless steel or aluminum and can be degraded if exposed to acids. Contact Labconco before evaporating acids. A moisture trap, solvent trap and radioisotope trap are also available. Refer to Chapter 6: Accessories for Your CentriVap for ordering information. -
Page 10: Chapter 3: Getting Started
Chapter 3: Getting Started Now that the site for your CentriVap is properly prepared, you are ready to unpack, inspect, install, and test your CentriVap. Read this chapter to learn how Unpack and move your CentriVap. Set up your CentriVap. ... -
Page 11: Unpacking Your Centrivap
NOTE: Do not return goods without the prior authorization of Labconco. Unauthorized returns will not be accepted. If your CentriVap was damaged in transit, you must file a claim directly with the freight carrier. Labconco Corporation and its dealers are not responsible for shipping damage. -
Page 12: Emergency Access Into The Chamber
7396206 If you do not receive one or more of the components listed for your CentriVap, contact Labconco Corporation immediately for further instructions. Emergency Access into the Chamber The CentriVap is designed to prevent access to the chamber in the event of a power disruption. -
Page 13: Component Orientation & Hose Connections
Chapter 3: Getting Started Component Orientation & Hose Connections The relative position of the CentriVap, Cold Trap and Vacuum Pump should be as shown to optimize the air flows of the refrigeration systems. There must be at least 6 inches between the Refrigerated CentriVap and the Cold Trap. -
Page 14: Electrical Connection
Chapter 3: Getting Started Electrical Connection Plug the power cord into the receptacle on the back of the CentriVap Concentrator and plug the other end into a suitable power receptacle. Plug the power cord into the receptacle on the back of the CentriVap Cold Trap and plug the other end into a suitable power receptacle. - Page 15 Chapter 3: Getting Started Acids Bases Solvents Acids Bases Solvents COMPONENT MATERIAL Standard CentriVap Chamber Epoxy coated Aluminum Acrylic D D C D D C D Bearings High Carbon Steel D D D D D D D Lid Gasket EPDM C C D Rotor Shaft Stainless Steel...
-
Page 16: Solvent Safety Precautions
Chapter 3: Getting Started Diaphragm vacuum pumps sold by Labconco have wetted parts either made from PTFE or protected by PTFE coatings and are suitable for nearly all procedures. When using compounds in the CentriVap that are hostile to the materials of construction, it is imperative that the equipment is appropriately maintained. - Page 17 Chapter 3: Getting Started that the solvents used are compatible with these temperatures. Do not evaporate solvents that have an autoignition temperature below 180°C. Do not evaporate solvents that are classified as Group A, B, or C by the National Electrical Code. Evaporate only non-flammable or Group D solvents with autoignition temperatures 180°C or above.
-
Page 18: Chapter 4: Using Your Centrivap
Chapter 4: Using Your CentriVap Refrigerated Concentrator After your CentriVap has been installed as detailed in Chapter 3: Getting Started, you are ready to begin using your CentriVap. Read this chapter to learn how to: Set operating parameters. Operate the controls. ... -
Page 19: Glassware Selection
Chapter 4: Using Your CentriVap Refrigerated Concentrator Glassware Selection Normally, sample tubes should be filled no more than approximately half full. Select the size of the sample tube so it is compatible with the rotor and the desired sample size. Tubes should not be excessively loose in the rotor. Rotors are available with holes for various size tubes. -
Page 20: Operating The Centrivap Controls
Chapter 4: Using Your CentriVap Refrigerated Concentrator 1. Display – The liquid crystal display (LCD) shows set point parameters and actual measured conditions. 2. Program Buttons – Used to initiate the start of a run with the use of just one button. -
Page 21: Operating The Centrivap
Chapter 4: Using Your CentriVap Refrigerated Concentrator Change “Run Time” set points: To change the time set points, press the set point “SELECT” button until arrows point to the “Time at 1” or “Time at 2” set point which can be changed from 1 to 999 minutes by pressing the increase or decrease buttons. -
Page 22: Operational Note
Chapter 4: Using Your CentriVap Refrigerated Concentrator 6. Load the rotor with samples into the chamber. 7. Close the lid. A safety switch prevents the CentriVap from starting when the lid is open. 8. Press “RUN.” If the display was showing set point parameters, it will change to show actual parameters. -
Page 23: Safety Precautions
Chapter 4: Using Your CentriVap Refrigerated Concentrator Safety Precautions Special precautions must be observed if the materials used in the CentriVap Concentrator are known to be hazardous, toxic, radioactive, or contaminated with pathogenic micro organisms. These actions should include but are not limited to the following: ... -
Page 24: Chapter 5: Maintaining Your Centrivap
Chapter 5: Maintaining Your CentriVap Refrigerated Concentrator Under normal operation, the CentriVap requires little maintenance. The following maintenance schedule is recommended. Before servicing the CentriVap Refrigerated Concentrator, disconnect electrical power. Special precautions must be observed if materials used in the CentriVap Concentrator are known to be hazardous, toxic, radioactive or contaminated with pathogenic micro organisms. - Page 25 Call Labconco if defects exist. 11. Check continuity of the protective earth between the ground terminal on the power inlet and a bare metal housing panel. Contact Labconco if there is no continuity. 12. Repair any defects to the surface where the CentriVap is installed.
-
Page 26: Chapter 6: Accessories For Your Centrivap
Chapter 6: Accessories for Your CentriVap The configuration of your CentriVap can be changed to accommodate your needs. If the solvents used in the CentriVap degrade the acrylic lid, it may be replaced with an optional glass lid to gain added chemical resistance. To observe the samples while they are processing, an optional CentriZap Strobe light may be installed. - Page 27 Chapter 6: Accessories for Your CentriVap The following accessories are available for the CentriVap Concentrator and Cold Trap System. PART # DESCRIPTION 7462900 Rotor (DNA) 7462901* Holds (72) 0.5 ml microcentrifuge tubes (60) 1.5 ml microcentrifuge tubes or (60) 2.0 ml microcentrifuge tubes 7450700 Rotor (1.5 ml) 7450701*...
-
Page 28: Installing A Glass Lid
Chapter 6: Accessories for Your CentriVap Vacuum Pump – 195 liters/minute capacity with gas ballast. Ultimate pressure 1.3 x 10 1467700 mBar. 115 VAC, 60 Hz, single phase, 7.8 amp. Vacuum Pump – 117 liters/minute pumping capacity with gas ballast. Ultimate pressure 1.3 1472100 x 10 mBar. -
Page 29: Installing A Centrizap Strobe Light
Chapter 6: Accessories for Your CentriVap Installing a CentriZap™ Strobe Light An accessory strobe light is available to enable you to see the samples as they are rotating in the rotor. Attach the holder to the right hand side of the CentriVap Concentrator using the screws provided. -
Page 30: Chapter 7: Troubleshooting
Troubleshooting Refer to the following if your CentriVap fails to operate properly. If the suggested corrective actions do not solve your problem, contact Labconco for additional assistance. The following failure codes may appear on the display when problems are sensed by the internal self check system. - Page 31 Chapter 7: Troubleshooting Product Service 1-800-522-7658...
- Page 32 Sample odor in lab Vent hose exhausting into lab Redirect hose to fume hood. area Evaporation rate is reduced Heater inoperable Contact Labconco. Vacuum pump failure Check pump. Obstruction in hose Remove obstruction or replace hose. Lack of adequate vacuum See below.
- Page 33 Chapter 7: Troubleshooting PROBLEM CAUSE CORRECTIVE ACTION Frequent oil change needed in Secondary Trap insert is spent Change insert often. pump Cold Trap is not emptied after Empty the traps (glass or stainless steel) after each run and dried each run and replace. Vacuum too strong for chemical Use a Secondary Trap insert and diaphragm pump.
- Page 34 Appendix A: CentriVap Refrigerated Concentrator Components The following pages list components that are available for your CentriVap. The parts shown are the most common replacement parts. If other parts are required, contact Product Service. Item Quantity Part No. Description 7310601 Motor w/Capacitor 7546700 Valve, Vacuum Break (115V)
-
Page 35: Appendix B: Centrivap Dimensions
Appendix A: CentriVap Refrigerated Concentrator Components Product Service 1-800-522-7658... -
Page 36: Appendix A: Centrivap Components
Appendix A: CentriVap Components Product Service 1-800-522-7658... - Page 37 Appendix B: CentriVap Refrigerated Concentrator Dimensions Product Service 1-800-522-7658...
-
Page 38: Electrical Specifications
Appendix C: CentriVap Refrigerated Concentrator Specifications This Appendix contains technical information about the CentriVap including specifications, environmental operating conditions, and evaporation rates. Electrical Specifications Nominal amperage for 115V CentriVap Concentrator (model 7310020 series) (excluding vacuum pump): 3.1 amps (with vacuum pump) 12.00A max. -
Page 39: Environmental Conditions
Appendix B: CentriVap Dimensions Environmental Conditions Indoor use only. Maximum altitude: 6562 feet (2000 meters). Ambient temperature range: 41° to 104°F (5° to 40°C). Maximum relative humidity: 80% for temperatures up to 88°F (31°C), decreasing linearly to 50% relative humidity at 104°F (40°C). ... - Page 40 Appendix B: CentriVap Dimensions Evaporation Rates Tube Number Sample Heater Vacuum Time to Cold Rate Size (ml) of Samples Size (ml) Temp (C) Pump Dry (min) Trap Overall (ml/min) Methylene bp 40 Chloride Diaphragm 3.75 Diaphragm 4.00 Toluene bp 111 Diaphragm 1.47 Diaphragm...
Need help?
Do you have a question about the CentriVap 73100 Series and is the answer not in the manual?
Questions and answers