Oracle X6-2 Installation Manual
Exadata storage server extreme flash
Hide thumbs
Also See for X6-2:
- Installation and configuration manual (337 pages) ,
- Service manual (284 pages) ,
- Installation manual (144 pages)

Related Manuals for Oracle X6-2


Summary of Contents for Oracle X6-2
- Page 1 Oracle Exadata Storage Server X6-2 ® Extreme Flash Installation Guide Part No: E63688-03 July 2018...
- Page 3 Oracle. Oracle Corporation and its affiliates will not be responsible for any loss, costs, or damages incurred due to your access to or use of third-party content, products, or services, except as set forth in an applicable agreement between you and Oracle.
- Page 4 Oracle Corporation et ses affiliés déclinent toute responsabilité ou garantie expresse quant aux contenus, produits ou services émanant de tiers, sauf mention contraire stipulée dans un contrat entre vous et Oracle. En aucun cas, Oracle Corporation et ses affiliés ne sauraient être tenus pour responsables des pertes subies, des coûts occasionnés ou des dommages causés par l'accès à...
-
Page 5: Table Of Contents
Power Specifications .................. 17 Shipping Carton Space Requirements .............. 17 Agency Compliance .................. 18 About Rack Installation .................. 19 Rack Installation Procedure Overview ............... 19 Rack Requirements .................. 20 Maintenance Space Requirements .............. 21 Configuration Restrictions ................ 21 Exadata Database Machine X6-2 Configuration Restrictions ........ 21 Exadata Storage Expansion Rack X6-2 Configuration Restrictions ...... 22... - Page 6 References for Troubleshooting and Diagnostics .......... 67 Technical Support Information Worksheet ............ 68 Locating the Storage Server Serial Number ............ 68 Locating the Exadata Database Machine Rack Serial Numbers and JobID Label .. 69 Index ........................ 71 Oracle Exadata Storage Server X6-2 Extreme Flash Installation Guide • July 2018...
-
Page 7: Using This Documentation
Using This Documentation Overview – Contains hardware installation procedures for the Oracle Exadata Storage ■ Server X6-2 Extreme Flash. Audience – Trained technicians and authorized service personnel who have been instructed ■ on how to install the storage server into a rack. - Page 8 Oracle Exadata Storage Server X6-2 Extreme Flash Installation Guide • July 2018...
-
Page 9: Storage Server Features And Components
Machine X6-2 spares kit. Storage Server Integration Into Exadata The Oracle Exadata Storage Server X6-2 Extreme Flash is factory installed as part of your integrated Exadata Database Machine configuration. Use the information in this document only if you are adding additional storage servers to the Exadata rack configuration, or if you need to service components within the storage server. -
Page 10: Storage Server Components
Six PCIe Gen3 slots that accommodate low-profile PCIe cards: slots ■ Slots 1, 2, 5, and 6: x8 electrical interface, contain Oracle PCIe switch controller cards. ■ Slots 3 and 4: x16 electrical interface. Slot 3 contains a dedicated InfiniBand (IB) QDR-CX3 PCIe host channel adapter (HCA) card;... -
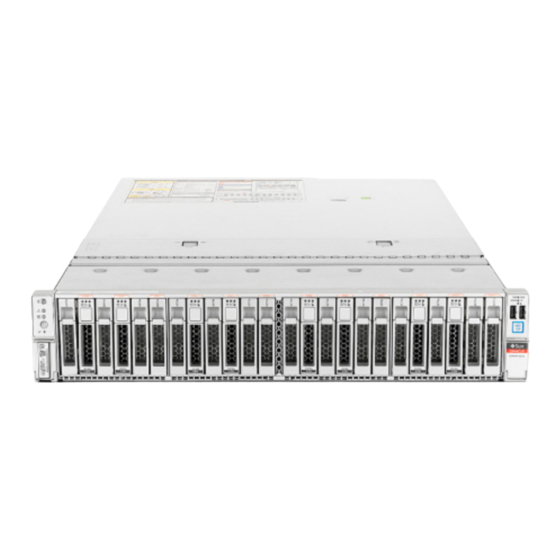
Page 11: Front Panel Status Indicators, Connectors, And Drives
Front Panel Status Indicators, Connectors, and Drives The following figure shows the status indicators (LEDs), connectors, and drives on the front panel of a Oracle Exadata Storage Server X6-2 Extreme Flash configured with eight NVM- Express storage drives. Call Out... -
Page 12: Back Panel Status Indicators, Connectors, Drives, And Pcie Slots
Back Panel Status Indicators, Connectors, Drives, and PCIe Slots Back Panel Status Indicators, Connectors, Drives, and PCIe Slots This section shows the Oracle Exadata Storage Server X6-2 Extreme Flash back panel and describes its controls, connectors, status indicators (LEDs), and PCIe slots. Call Out... -
Page 13: Shipping Inventory
Keep all contents and packing material for the agent's inspection. The carton contains the server and the ship kit. The ship kit for the Oracle Exadata Storage Server X6-2 Extreme Flash includes the following items: Power cords, packaged separately with country kit ■... - Page 14 Oracle Exadata Storage Server X6-2 Extreme Flash Installation Guide • July 2018...
-
Page 15: System Specifications
Related Information “Storage Server Features and Components” on page 9 ■ Physical Specifications The following table lists the physical specifications for the Oracle Exadata Storage Server X6-2 Extreme Flash. Oracle Exadata Storage Server X6-2 Extreme Flash Physical Specifications TABLE 2... -
Page 16: Environmental Specifications
Roll-off: 1.25-inch roll- off free fall, front to back IEC 60068-2-27 Test Ea rolling directions Threshold: 13 mm threshold height at 0.65 m/s impact velocity ETE-1010-02 Rev A Oracle Exadata Storage Server X6-2 Extreme Flash Installation Guide • July 2018... -
Page 17: Power Specifications
Frequency 50/60 Hz (47 to 63 Hz range) Shipping Carton Space Requirements The following table lists the dimensions and weights for the shipping cartons that contain the Oracle Exadata Storage Server X6-2 Extreme Flash. Shipping Carton Specifications TABLE 5 Requirement... -
Page 18: Agency Compliance
■ 2012/19/EU WEEE Directive † All standards and certifications referenced are to the latest official version. For additional detail, please contact your sales representative. ‡ Other country regulations/certifications may apply. Oracle Exadata Storage Server X6-2 Extreme Flash Installation Guide • July 2018... -
Page 19: About Rack Installation
“Exadata Storage Expansion Rack X6-2 Configuration Storage Expansion Rack. Restrictions” on page 22 Rack Installation Procedure Overview The following table lists the tasks you need to complete to install the Oracle Exadata Storage Server X6-2 Extreme Flash into a rack. Step Description Links Review important safety documentation. -
Page 20: Rack Requirements
Rack Requirements The Oracle Exadata Storage Server X6-2 Extreme Flash is a 2 rack unit (2U) storage server that fits inside Oracle's Exadata rack. The rack specifications are listed in the following table. Exadata Rack Specifications... -
Page 21: Maintenance Space Requirements
Maintenance Space Requirements The maintenance area for the rackmounted Oracle Exadata Storage Server X6-2 Extreme Flash must have the required access space. The following table lists the maintenance access requirements for the storage server when it is installed in a rack. -
Page 22: Exadata Storage Expansion Rack X6-2 Configuration Restrictions
6. 1 storage server in U41 to U42. Exadata Storage Expansion Rack X6-2 Configuration Restrictions The following restrictions apply to Oracle Exadata Storage Expansion Rack X6-2 flexible configurations: Up to 19 Exadata storage servers are supported in the expansion rack. - Page 23 Exadata Storage Expansion Rack X6-2 Configuration Restrictions 2. Up to 4 storage servers in U08 to U15, starting with U08. 3. Up to 7 storage servers in U27 to U40, starting with U27. 4. Up to 2 storage servers in U26 to U23, starting with U26.
- Page 24 Oracle Exadata Storage Server X6-2 Extreme Flash Installation Guide • July 2018...
-
Page 25: Installing The Storage Server Into A Rack
■ Installation Prerequisites Ensure that the following tasks are complete before you start the rackmount procedures: Read the Oracle Exadata Storage Server Extreme Flash Safety and Compliance Guide and ■ the Important Safety Information for Oracle Hardware Systems. Ensure that your site meets the required electrical and environmental requirements. See ■... -
Page 26: Safety Precautions When Rackmounting The Storage Server
(for example, use of power strips). Mounted Equipment: Slide-rail-mounted equipment is not to be used as a shelf or a Caution - work space. Oracle Exadata Storage Server X6-2 Extreme Flash Installation Guide • July 2018... -
Page 27: Esd Precautions
Wear an antistatic grounding strap connected to a metal surface on the chassis when you work on system components. Read the safety information in the Oracle Exadata Storage Server X6-2 Extreme Flash Safety and Compliance Guide and in the Important Safety Information for Oracle Hardware Systems before installing the storage server. -
Page 28: Rackmount Kit Contents
Installation card Related Information “Rack Requirements” on page 20 ■ Install the Storage Server Into the Rack Use the following procedures to install the storage server into the rack: Oracle Exadata Storage Server X6-2 Extreme Flash Installation Guide • July 2018... -
Page 29: Stabilize The Rack For Installation
Stabilize the Rack for Installation “Stabilize the Rack for Installation” on page 29 ■ “Install Mounting Brackets” on page 30 ■ “Mark the Rackmount Location” on page 31 ■ “Connect AC Power Cables Before Installing Tool-less Slide-Rails in Sun Rack II ■... -
Page 30: Install Mounting Brackets
Callout Description Chassis front Oracle Exadata Storage Server X6-2 Extreme Flash Installation Guide • July 2018... -
Page 31: Mark The Rackmount Location
Mark the Rackmount Location Callout Description Slide-rail lock Mounting bracket Mounting bracket clip With the heads of the five chassis locating pins protruding through the five keyhole openings in the mounting bracket, pull the mounting bracket toward the front of the chassis until the mounting bracket clip locks into place with an audible click. - Page 32 Mark the mounting holes for the rear slide-rails. Related Information “Rack Requirements” on page 20 ■ “Install Mounting Brackets” on page 30 ■ “Attach Tool-Less Slide-Rail Assemblies” on page 35 ■ Oracle Exadata Storage Server X6-2 Extreme Flash Installation Guide • July 2018...
-
Page 33: Connect Ac Power Cables Before Installing Tool-Less Slide-Rails In Sun Rack Ii 1042
Connect AC Power Cables Before Installing Tool-less Slide-Rails in Sun Rack II 1042 Connect AC Power Cables Before Installing Tool-less Slide- Rails in Sun Rack II 1042 Note - You must perform the procedure in this section if you are installing the storage server in the Sun Rack II 1042 (1000-mm) system rack. -
Page 34: Install Ac Power Cables And Slide-Rails
Prior to installing the slide-rails into the rack, install right-angle AC power cables into the left-side and right-side PDU electrical sockets for the servers you are going to rack mount. Install the slide-rails into the rack. Oracle Exadata Storage Server X6-2 Extreme Flash Installation Guide • July 2018... -
Page 35: Attach Tool-Less Slide-Rail Assemblies
Attach Tool-Less Slide-Rail Assemblies “Attach Tool-Less Slide-Rail Assemblies” on page Attach Tool-Less Slide-Rail Assemblies Use this procedure to attach tool-less slide-rail assemblies to the rack. Installing the Storage Server Into a Rack... - Page 36 Attach Tool-Less Slide-Rail Assemblies Orient the slide-rail assembly so that the ball-bearing track is forward and locked in place. Callout Description Slide-rail Ball-bearing track Locking mechanism Oracle Exadata Storage Server X6-2 Extreme Flash Installation Guide • July 2018...
- Page 37 Attach Tool-Less Slide-Rail Assemblies Starting with either the left or right side of the rack, align the rear of the slide- rail assembly against the inside of the rear rack rail, and push until the assembly locks into place with an audible click. Align the front of the slide-rail assembly against the outside of the front rack rail, and push until the assembly locks into place with an audible click.
-
Page 38: Install The Storage Server Into The Slide-Rail Assemblies
Push the slide-rails into the slide-rail assemblies in the rack as far as possible. Position the storage server so that the rear ends of the mounting brackets are aligned with the slide-rail assemblies that are mounted in the rack. Oracle Exadata Storage Server X6-2 Extreme Flash Installation Guide • July 2018... - Page 39 Install the Storage Server Into the Slide-Rail Assemblies Insert the mounting brackets into the slide-rails, and then push the storage server into the rack until the mounting brackets encounter the slide-rail stops (approximately 12 inches, or 30 cm). Callout Description Inserting mounting bracket into slide-rail Slide-rail release lever...
-
Page 40: Install The Cable Management Arm
Follow this procedure to install the cable management arm (CMA), which you can use to manage cables connected to the rear of the storage server. Unpack the CMA. Oracle Exadata Storage Server X6-2 Extreme Flash Installation Guide • July 2018... - Page 41 Install the Cable Management Arm The following figure shows the CMA components. Callout Description Connector A Front slide bar Velcro straps (6) Connector B Connector C Connector D Slide-rail latching bracket (used with connector D) Rear slide bar Installing the Storage Server Into a Rack...
- Page 42 The CMA ships with three flat cable covers installed. If you are going to install the CMA Note - on a Oracle Exadata Storage Server X6-2 Extreme Flash, remove the flat cable covers and install the round cable covers. Remove the flat cable covers and install the round cable covers.
- Page 43 Install the Cable Management Arm The CMA has three cable covers, two with two hinges (one of which is shown the Note - following figure), and one with a single hinge. All three cable covers are shown in the illustration in Step Apply upward pressure to the outside edge of each hinge connector until the hinge connector comes off the hinge [frame 3].
- Page 44 Insert the CMA's connector A into the front slot on the left slide-rail until it locks into place with an audible click [frames 1 and 2]. The connector A tab (callout 1) goes into the slide-rail's front slot (callout 2). Oracle Exadata Storage Server X6-2 Extreme Flash Installation Guide • July 2018...
- Page 45 Install the Cable Management Arm Gently tug on the left side of the front slide bar to verify that connector A is properly seated. Callout Description Connector A tab Left slide-rail front slot To install the CMA's connector B into the right slide-rail: Insert the CMA's connector B into the front slot on the right slide-rail until it locks into place with an audible click [frames 1 and 2].
- Page 46 Gently tug on the right side of the front slide bar to verify that connector B is properly seated. Callout Description Connector B tab Right slide-rail front slot To install the CMA's connector C into the right slide-rail: Oracle Exadata Storage Server X6-2 Extreme Flash Installation Guide • July 2018...
- Page 47 Install the Cable Management Arm Align connector C with the slide-rail so that the locking spring (callout 1) is positioned inside (storage server side) of the right slide-rail [frame 1]. Callout Description Connector C locking spring Insert connector C into the right slide-rail until it locks into place with an audible click [frames 2 and 3].
- Page 48 D and the latching bracket as one assembly into the slide-rail. Gently tug on the left side of the CMA's slide bar to verify that connector D is properly seated. Oracle Exadata Storage Server X6-2 Extreme Flash Installation Guide • July 2018...
- Page 49 Install the Cable Management Arm The slide-rail latching bracket has a green release tab. This tab is used to release and Note - remove the latching bracket so that you can remove connector D. Gently tug on the four CMA connection points to ensure that the CMA connectors are fully seated before you allow the CMA to hang by its own weight.
- Page 50 As you push the storage server into the rack, verify that the CMA retracts without binding. Oracle Exadata Storage Server X6-2 Extreme Flash Installation Guide • July 2018...
- Page 51 You will hear an audible click when the storage server is in the normal rack position. Connect cables to the storage server, as required. Refer to the Oracle Exadata Database Machine documentation for instructions. Power cables should already be installed in the Sun Rack II 1042 (1000-mm) system Note - rack.
- Page 52 Oracle Exadata Storage Server X6-2 Extreme Flash Installation Guide • July 2018...
-
Page 53: Verify Operation Of Slide-Rails And Cable Management Arm
Verify Operation of Slide-Rails and Cable Management Arm If necessary, bundle the cables with additional Velcro straps to ensure that they stay clear Note - of other equipment. If you need to install additional Velcro straps, wrap the straps around the cables only, not around any of the CMA components;... - Page 54 You will hear an audible click when the storage server is in the normal rack position. Adjust the cable straps and the CMA, as required. Related Information “Install the Cable Management Arm” on page 40 ■ Oracle Exadata Storage Server X6-2 Extreme Flash Installation Guide • July 2018...
-
Page 55: Remove The Cable Management Arm
Remove the Cable Management Arm Remove the Cable Management Arm Follow this procedure to remove the cable management arm (CMA). Before you begin this procedure, refer to the illustration in Step 1 and identify CMA connectors A, B, C, and D. You should disconnect the CMA connectors in the reverse order in which you installed them, that is, disconnect connector D first, then C, then B, and finally A. - Page 56 Throughout the remainder of this procedure, the CMA must be supported until all the remaining connectors are disconnected and the CMA can be placed on a flat surface. Callout Description Connector D release tab (green) Oracle Exadata Storage Server X6-2 Extreme Flash Installation Guide • July 2018...
- Page 57 Remove the Cable Management Arm Callout Description Slide-rail latching bracket release tab (labeled PUSH) Use your right hand to support the CMA. Use your left thumb to push in (toward the left) on the connector D latching bracket release tab labeled PUSH (callout 2), and pull the latching bracket out of the left slide-rail and put it aside [frames 3 and 4].
- Page 58 Connector B release lever To disconnect connector A: Place your left arm under the CMA to support it and grasp the rear end of connector A with your left hand. Oracle Exadata Storage Server X6-2 Extreme Flash Installation Guide • July 2018...
- Page 59 Remove the Cable Management Arm Use your right thumb to pull the connector A release lever to the right away from the left slide-rail (callout 1), and use your left hand to pull the connector out of the slide-rail [frames 1 and 2]. Callout Description Connector A release lever...
- Page 60 Oracle Exadata Storage Server X6-2 Extreme Flash Installation Guide • July 2018...
-
Page 61: Cabling The Storage Server
Rear Cable Connections and Ports The following figure shows the locations of cable connectors and ports on the back of the Oracle Exadata Storage Server X6-2 Extreme Flash and the cables and devices that you would typically connect to them. - Page 62 Oracle ILOM service processor. This port supports local connections to the storage server and only recognizes Oracle ILOM command-line interface (CLI) commands. Typically, you connect a terminal or terminal emulator to this port. Oracle Exadata Storage Server X6-2 Extreme Flash Installation Guide • July 2018...
-
Page 63: Ethernet Ports
The storage server has four RJ-45 10-Gigabit Ethernet (10GbE) network connectors, labeled NET 3, NET 2, NET 1, and NET 0, from left to right on the storage server rear panel. Use these ports to connect the storage server to the network as described in the Oracle Exadata cabling instructions. - Page 64 2.9 seconds off) and the SP OK LED is steady on, indicating that the SP (and Oracle ILOM) is ready for use. In standby power mode, the storage server is not initialized or fully powered on at this point. Oracle Exadata Storage Server X6-2 Extreme Flash Installation Guide • July 2018...
- Page 65 Connect the Power Cords For the location of the status indicator LEDs, see “Front Panel Status Indicators, Connectors, and Drives” on page 11 “Back Panel Status Indicators, Connectors, Drives, and PCIe Slots” on page Do not operate the storage server unless all fans, component heatsinks, air baffles, Caution - and the top cover are installed.
- Page 66 Oracle Exadata Storage Server X6-2 Extreme Flash Installation Guide • July 2018...
-
Page 67: Troubleshooting Installation Issues
References for Troubleshooting and Diagnostics For product-specific information about troubleshooting problems, refer to “Troubleshooting and Diagnostics” in Oracle Exadata Storage Server X6-2 Extreme Flash Service Manual. Knowledge articles, white papers, and product updates are available through the Oracle Support portal: https://support.oracle.com Troubleshooting Installation Issues... -
Page 68: Technical Support Information Worksheet
This sheet includes the serial number. From the Oracle ILOM CLI, type the show /System command. ■ Related Information “Front Panel Status Indicators, Connectors, and Drives” on page 11 ■ Oracle Exadata Storage Server X6-2 Extreme Flash Installation Guide • July 2018... -
Page 69: Locating The Exadata Database Machine Rack Serial Numbers And Jobid Label
Locating the Exadata Database Machine Rack Serial Numbers and JobID Label Locating the Exadata Database Machine Rack Serial Numbers and JobID Label During a service call, you might need the serial numbers and the JobID label from the Exadata Database Machine rack. Record these numbers for future use. You can find the system serial numbers and JobID label in the following physical locations: Look for the Large System Serial Number label and JobID label on the front of the rack, ■... - Page 70 Oracle Exadata Storage Server X6-2 Extreme Flash Installation Guide • July 2018...
-
Page 71: Index
Index agency compliance specifications, 18 physical specifications, 15 rack installation, 25 cable management arm (CMA) rackmount installing on storage server, 40 kit, 25 uninstalling, 55 rail assembly, 25 verifying operation, 53 stabilizing the rack, 29, 49, 53, 55 cabling, required cable connections, 61 rail assembly, 25 environmental specifications, 16 serial management (SER MGT) port, 62... - Page 72 Index video port, location, 62 worksheet, support, 68 Oracle Exadata Storage Server X6-2 Extreme Flash Installation Guide • July 2018...
Need help?
Do you have a question about the X6-2 and is the answer not in the manual?
Questions and answers