Table of Contents
Advertisement
Quick Links
Film-Tech
The information contained in this Adobe Acrobat pdf
file is provided at your own risk and good judgment.
These manuals are designed to facilitate the
exchange of information related to cinema
projection and film handling, with no warranties nor
obligations from the authors, for qualified field
service engineers.
If you are not a qualified technician, please make no
adjustments to anything you may read about in these
Adobe manual downloads.
www.film-tech.com
Advertisement
Table of Contents

Related Manuals for NEC NC1500c

Summary of Contents for NEC NC1500c
- Page 1 Film-Tech The information contained in this Adobe Acrobat pdf file is provided at your own risk and good judgment. These manuals are designed to facilitate the exchange of information related to cinema projection and film handling, with no warranties nor obligations from the authors, for qualified field service engineers.
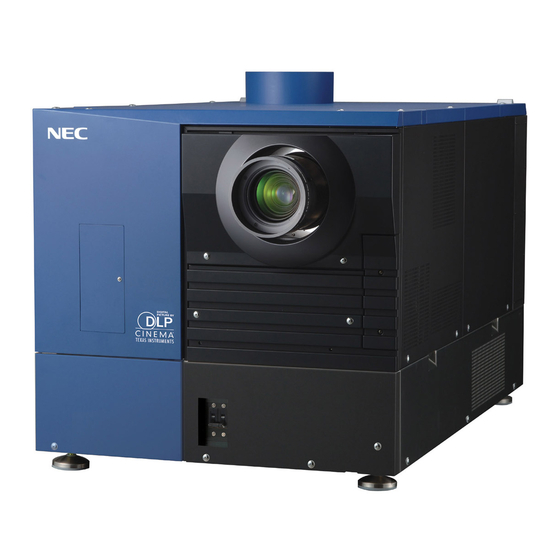
- Page 2 DLP Cinema Projector Installation manual NC1500C...
- Page 3 Please read this will required correct prior to setup to use your NC1500C interference at his own expense. safely. To use this projector safely, always observe the following precautions Important Safeguards when setting up the projector. There is the possibility of serious accidents that...
- Page 4 NC2500S Important Information Warning 4. Handle your projector carefully. Dropping or jarring your projector Always connect to a ground prior could damage internal components. to connecting to the AC power supply. 5. To carry the projector, a minimum • A very high, leaked current will flow of six persons are required.
- Page 5 NC2500S Important Information Cleaning 6. When using a LAN cable: For safety, do not connect to the connector for 1. Shut down AC power to the projection peripheral device wiring that might head before cleaning. have excessive Voltage. 2. Clean the cabinet periodically with a damp cloth.
- Page 6 • While cooling after the lamp has been turned off. (The POWER indicator In Europe blinks in orange while the fan is NEC Europe, Ltd. / European Technical Centre rotating, and the LCD screen is Address: Unit G, Stafford Park 12, displaying "cooling...". The cooling fun Telford TF3 3BJ, U.K.
-
Page 7: Table Of Contents
NC2500S Table of Contents Table of Contents Important Information ..................D-2 Table of Contents ....................D-6 1. Before Setting Up Your Projector..D-8 Exhaust equipment specifications ............ D-8 Selecting Primary/Anamorphic Lenses for Your Projector ....D-9 1.2.1 Screen Type ..................D-9 1.2.2 Selection of Anamorphic Lens .............. - Page 8 NC1500C Table of Contents 4. LCD Menu .......D-39 List of menu ................... D-39 4.1.1 When you use the service personnel menu ..........D-40 Title Select ..................D-41 4.2.1 Title select (Title Memory) ..............D-41 4.2.2 Test Pattern ..................D-41 Configuration ................. D-42 4.3.1 Lamp Setup..................D-42...
-
Page 9: Before Setting Up Your Projector
Before Setting Up Your Projector Exhaust equipment specifications It is necessary to connect the air outlet of the projector to the exhaust equipment. accessory protective sheet should also be mounted because the area around the air outlet can become very hot. For Exhaust equipment Installation, see “2.7. Mounting the exhaust equipment”... -
Page 10: Selecting Primary/Anamorphic Lenses For Your Projector
NC1500C 1. Before Setting Up Your Projector Selecting Primary/Anamorphic Lenses for Your Projector This section provides guideline information on how to select a screen size and projector mounting position appropriate for your presentation purposes and about selection of types of lenses as well. -
Page 11: Selection Of Primary Lens
NC1500C 1. Before Setting Up Your Projector Available Anamorphic Lenses Screen mask type Screen Type Anamorphic lens Remarks Horizontal moving SCOPE ×1.25 VISTA - HDTV - Vertical moving SCOPE ×1.25 or None No anamorphic lens should be used if the zooming power of the primary lens is insufficient. - Page 12 NC1500C 1. Before Setting Up Your Projector Projected Images The anamorphic lens works to magnify projected images horizontally when you use a wide screen for projection (SCOPE). How to Calculate the Magnification of Primary Lens SCOPE projection: Primary lens Length of projection (L) magnification = Screen width (W) ÷Anamorphic lens magnification...
-
Page 13: Removing The Projector Covers
NC1500C 1. Before Setting Up Your Projector Removing the projector covers You can remove covers of the projector by opening hexagonal fasteners. As shown below, a projector has 9 covers: Name of the cover B; Top rear cover I; Lamp change door A;... -
Page 14: Top Rear Cover Removal Procedure
NC1500C 1. Before Setting Up Your Projector 1.3.1 Top rear cover removal procedure Remove the top front cover of the projector. To remove the top front cover, an exclusive key is required. Cancel the locking with the exclusive key and remove the hexagonal fasteners (at 4 places) at the top to remove the cover. -
Page 15: Top Cover Mounting Procedure
NC1500C 1. Before Setting Up Your Projector Remove the top rear cover. 1.3.2 Top cover mounting procedure Place the top rear cover of the projector once on the top of the projector. Place it at a position where the cables from rear status indicators can be connected. -
Page 16: Side Cover Removal & Mounting
NC1500C 1. Before Setting Up Your Projector 1.3.3 Side cover removal & mounting Side cover removal procedure Remove the side rear cover and lens side cover by removing the hexagonal fasteners (2 places) at the bottom of covers and pulling down the covers. -
Page 17: Setting Up Your Projector
Setting Up Your Projector Setup procedure Set up the projector according to the procedure below. This chapter describes the installation procedure until turning on of the power. - STEP1 Projector installation (See page D-17) - STEP 2 Connecting the power cord (See page D-18) - STEP3 Mounting the primary lens (See page D-21) - STEP4... -
Page 18: Projector Installation
NC1500C 2. Setting Up Your Projector Projector installation Move the projector to the projection position and install it corresponding to the screen and projection conditions. To correct the inclination to the right or left of the projector, use the level adjusters at 4 positions. -
Page 19: Connecting The Power Cord
NC1500C 2. Setting Up Your Projector Connecting the power cord Connect the power cords of the lamp power supply unit and the projector. The AC power cord is not attached as an accessory. Consult with your dealer/distributor for the cord. - Page 20 NC1500C 2. Setting Up Your Projector Mount the mounting bracket Mount the mounting bracket B to the power cord kit using the mounting screws (4 pieces). Mounting bracket B Connect the power cord to the noise filter terminal. (1) Japan; black, Euro/USA; Brown (2) Japan;...
- Page 21 NC1500C 2. Setting Up Your Projector Mount the front cover of the projector. Mount the cover according to the procedure below. <1> Insert the claws at the cover top (2 places) into the cover mounting holes of the projector. <2> Close the hexagonal fasteners (3 places) at the cover bottom.
-
Page 22: Mounting The Primary Lens
NC1500C 2. Setting Up Your Projector Mounting the primary lens Mount the attached lens holder (NC-PH01) before mounting the primary lens to the projector. Remove the lens holder mounting screws (4 pieces). The lens holder is separated into two parts. - Page 23 NC1500C 2. Setting Up Your Projector Tighten the fixing screws (2 screws) for the lens holder. The lens is fixed. Connect the control signal cable. Mount the front covers (top and bottom) of the projector. Mount the sponge attached to the lens after screen ratio adjustment.
-
Page 24: Mounting The Anamorphic Lens Motorized Turret
NC1500C 2. Setting Up Your Projector Mounting the anamorphic lens motorized turret Use an optional anamorphic lens for projection of cinemascope size. Anamorphic lens motorized turret (separately sold: NC-AT01) is required for mounting of the anamorphic lens. 2.5.1 List of accessories attached to turret... -
Page 25: Mount The Turret
NC1500C 2. Setting Up Your Projector 2.5.3 Mount the turret Remove the anamorphic lens mounting covers (2 places) of the projector. You will find fixing holes on the right and left of the front cover (bottom). On the opposite side of the lens, you will see a socket for the control cable. -
Page 26: Installation Of Small Iris (Information For Service Personnel
NC1500C 2. Setting Up Your Projector Installation of Small Iris (Information for Service Personnel) If it is requested by the customer to reduce the projector's lamp luminance because it is too bright even when set to the minimum level, you may reduce it as follows. This operation will also improve the contrast ratio. - Page 27 NC1500C 2. Setting Up Your Projector Remount the iris plate now attached with the small iris to the engine block. Use 4 screws you have removed at Step 2 to mount the iris plate. Mount the lens side cover to the projector.
-
Page 28: Mounting The Exhaust Equipment
NC1500C 2. Setting Up Your Projector Mounting the exhaust equipment It is necessary to connect the air outlet of the projector to the exhaust equipment. The accessory protective sheet should also be mounted because the area around the air outlet can become very hot. -
Page 29: Projector Adjustment And Connecting
Projector Adjustment and Connecting Flow of Adjustment and Connecting Adjustment and Connecting of the projector accord to the procedure below. - STEP1 Turning your projector on (See page D-29) - STEP2 Setting the projector projection method (See page D-30) - STEP3 Adjusting the primary lens (See page D-31) Display the test pattern to adjust the screen size, screen ratio and focus. -
Page 30: Turning Your Projector On
NC1500C 3. Projector Adjustment and Connection Turning your projector on The power to this projector is separated to the power to the projector head and power to the lamp. To project an image, it is necessary for both power supplies to be on. -
Page 31: Setting The Projector Projection Method
NC1500C 3. Projector Adjustment and Connection Setting the projector projection method When the projector is shipped from the factory, the projection method is set to the front mode (projection from the front of the screen with the projector installed on the pedestal). -
Page 32: Adjusting The Primary Lens
NC1500C 3. Projector Adjustment and Connection Adjusting the primary lens Display the test pattern and adjust the screen size, focus and screen position with the primary lens. 3.4.1 Display the test pattern Press the MENU button of the remote controller. - Page 33 NC1500C 3. Projector Adjustment and Connection Press the “ZOOM+-” buttons on the remote control panel or of the projector to roughly adjust the screen size so that the screen height and the image height are the same. Press the “FOCUS+-” buttons of the remote control or the projector to roughly adjust the focus.
-
Page 34: Mounting And Adjusting The Anamorphic
NC1500C 3. Projector Adjustment and Connection Mounting and adjusting the anamorphic Mount the anamorphic lens to the anamorphic lens, adjust the anamorphic lens position. 3.5.1 Mounting the anamorphic Mount the anamorphic lens to the anamorphic lens motorized turret mounted in 2-5. -
Page 35: Adjusting The Anamorphic Lens Position
NC1500C 3. Projector Adjustment and Connection 3.5.2 Adjusting the anamorphic lens position Adjust the anamorphic lens position so that it becomes parallel with the primary lens in horizontal and vertical directions. In addition, rotate the lens to adjust it so that the enlarged projection screen becomes horizontal. -
Page 36: Adjusting The Anamorphic Lens Inclination
NC1500C 3. Projector Adjustment and Connection 3.5.3 Adjusting the anamorphic lens inclination Rotate the lens to set the projection screen horizontally and vertically. Loosen the lens clamp and rotate the lens in the lens holder so that the vertical and... -
Page 37: Connecting The Image Input
NC1500C 3. Projector Adjustment and Connection Connecting the image input Your projector has four image input terminals, namely, the HDSDI A input terminal, the HDSDI B input terminal, the DVI-D A input terminal, and the DVI-D B input terminal. HDSDI A/B input terminal... -
Page 38: Connecting The Various Control Terminal
NC1500C 3. Projector Adjustment and Connection Connecting the various control terminal For control, your projector comes with such ports as the PC control terminal and the Ethernet port (RJ-45). PC control terminal Use this terminal when controlling the projector in serial (PC CONTROL) connection from a PC. -
Page 39: Controlling Your Projector Using A Wireless Lan Card
• Although the built-in Ethernet ports (LAN-A/LAN-B) cannot be used to control your Note projector Model iS10 when a wireless LAN card is set, you can access the “NC1500C” through these ports even when a wireless LAN card is set. -
Page 40: Lcd Menu
LCD Menu This chapter describes the menus displayed in the LCD screen on the projector’s control panel and their functions. For basic operations of menus, refer to the operation manual. List of menu Menus in parentheses are menus for our service personnel. Normally, these menus cannot be used. -
Page 41: When You Use The Service Personnel Menu
NC1500C 4. LCD Menu Bulb Warning Sets the lamp bulb warning time (only when the projector is in standby mode). New Lamp House Resets the lamp house usage time, and makes settings or selects modes (only when the projector is in standby mode). -
Page 42: Title Select
NC1500C 4. LCD Menu Title Select 4.2.1 Title select (Title Memory) Select the title of the signal to be projected. You can register up to 99 titles. You can also assign registered titles to the macro keys 1 to 8 on the projector's control panel and call them up directly using those buttons. -
Page 43: Configuration
NC1500C 4. LCD Menu Configuration 4.3.1 Lamp Setup Adjust Adjusts the lamp output (brightness). Control the output at 10W increments. ← Displays the lamp output (%) with regard to the setting. ← Adjusts the lamp brightness. • Lamp output below 70% will cause an error. Arrange the setting so that the lamp output Note becomes 70% at least. - Page 44 NC1500C 4. LCD Menu Turret Controls the turret on which the anamorphic lens is mounted. ← Displays the control item ← Displays the currently selected item with asterisk (*). ← Displays the setting Manual Manually control the turret. - Without Anomo: Disables anamorphic lens.
- Page 45 NC1500C 4. LCD Menu • Even if the buttons on the projector’s control panel are locked, remote controller buttons Note are available. • When the buttons on the projector’s control panel are locked, press the CANCEL button on the projector for about 10 sec. to unlock them (The key lock setting on the projector becomes Unlock).
-
Page 46: Installation
NC1500C 4. LCD Menu 4.3.3 Installation Image Orient Make a selection according to the setup position of your projector and screen. ← Displays the currently selected item with asterisk (*). ← Displays the setting Normal-F Projection is made from front of the screen. - Page 47 NC1500C 4. LCD Menu ← Displays the currently selected item with asterisk (*). ← Displays the setting Date/Time Use this to set the date and time on the projector. ←Select the item to be set ←Input numeric values Use the remote controller to input numeric values. For the procedure to input alphanumeric characters, refer to “Users Manual”.
- Page 48 NC1500C 4. LCD Menu New Lamp house When the lamp house is replaced, reset the lamp house time and select the lamp house. This menu is active in standby mode only. ← Displays the currently selected item with asterisk (*).
-
Page 49: Memory
NC1500C 4. LCD Menu 4.3.4 Memory This menu is the service personnel menu. For the using service personnel menu, refer to “4.1.1. When you use the service personnel menu” (Page D-40). Save the current status of lamp and lens to the memory in the projector (lens memory function and lamp memory function). -
Page 50: Title Setup
NC1500C 4. LCD Menu Title Setup This menu is the service personnel menu. For the using service personnel menu, refer to “4.1.1. When you use the service personnel menu” (Page D-40). 4.4.1 Macro Key Use this key to set the titles to be assigned to the macro keys. -
Page 51: Information
NC1500C 4. LCD Menu Information Displays the hours of lamp bulb use, the version information and error codes. 4.5.1 Lamp Displays information relating to the lamp. (Such as lamp output and the type of lamp bulb.) Output Displays the lamp brightness (output) setting. -
Page 52: Macro Key
NC1500C 4. LCD Menu 4.5.2 Macro Key Displays the titles assigned to the macro keys of 1 to 8 on the projector’s control panel. ←Selects the macro key whose contents you want to display. ←Displays the assigned title numbers. ←Displays the registered names of the assigned titles. -
Page 53: Version
NC1500C 4. LCD Menu 4.5.5 Version Displays the versions of the projector head, and the multi-media switcher (MMS) (optional).。 System Displays the version information of the projector head. ←Selects the item to display. ←Displays the version information. BIOS Displays the BIOS version of the projector head. -
Page 54: Ip Address
NC1500C 4. LCD Menu 4.5.6 IP Address Displays the IP address set in the projector head. ←Selects the item to display the IP address. ←Displays the IP address. System Displays the IP address set for the projector head (System). Cinema Displays the IP address set for the projector head (Cinema). -
Page 55: Appendix
Appendix Trouble shooting [T.B.D] 5.1.1 List of Error code [T.B.D] List of registered titles (when shipped from the factory) The data listed below have been cataloged in your projector before shipping from our factory. When projecting an image source covered by these data, you do not need to change the settings of your projector. -
Page 56: Index
NC2500S 5. Appendix Index Lens carriage .........D-31 Lens Center ...........D-53 List of default Titles ........D-62 Adjust ...........D-50 Macro Key ........D-57, 59 Memory..........D-56 Baudrate ..........D-53 MMS Select ..........D-53 Breaker ..........D-10 MMS Status ...........D-61 Bulb Alignment........D-55 MMS(Built-in) .........D-60 Bulb Type [A] .........D-58 Mounting terminals .........D-11 Bulb Type [H] .........D-58 Bulb Type [W] ........D-58... - Page 57 © NEC Viewtechnology, Ltd. 2006 Ver.0.04. 04/06...
Need help?
Do you have a question about the NC1500c and is the answer not in the manual?
Questions and answers