Advertisement
Quick Links
Advertisement

Subscribe to Our Youtube Channel
Related Manuals for Insportline R60i


Summary of Contents for Insportline R60i
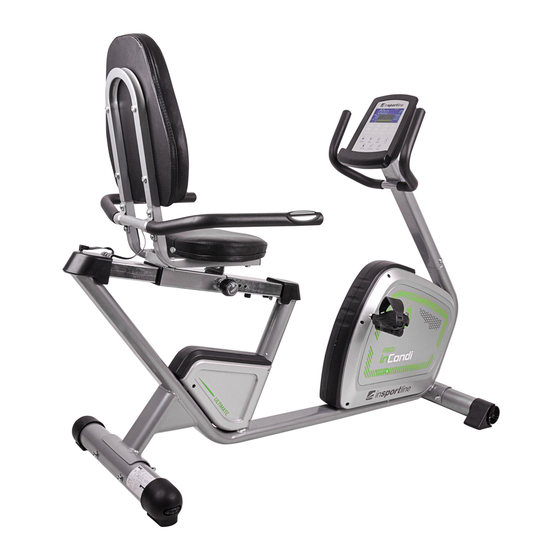
- Page 1 USER MANUAL – EN IN 8721 Recumbent inSPORTline R60i...
-
Page 2: Table Of Contents
CONTENTS SAFETY INSTRUCTIONS ........................3 IMPORTANT NOTES ..........................3 EXPLODED DRAWING ........................... 4 CHECK LIST............................5 PARTS LIST ............................6 ASSEMBLY ............................. 9 SM2570 iConsole+ INSTRUCTION MANUAL ..................15 TERMS AND CONDITIONS OF WARRANTY, WARRANTY CLAIMS ..........19... -
Page 3: Safety Instructions
SAFETY INSTRUCTIONS • To ensure the best safety of the exerciser, regularly check it on damages and worn parts. • If you pass on this exerciser to another person or if you allow another person to use it, make sure that that person is familiar with the content and instructions in these instructions. •... -
Page 4: Exploded Drawing
• The general rule is that exercisers and training devices are no toys. Therefore, they must only be used by properly informed or instructed persons. • Stop your work-out immediately in case of dizziness, nausea, chest pain or any other physical symptoms. -
Page 5: Check List
CHECK LIST... -
Page 6: Parts List
PARTS LIST Part No. Description Computer set Computer SM-2570-31 Bolt M5*0.8*10L Handlebar set Handlebar Handle pulse cable Foam Screw ST4*1.4L*20L Handle pulse sensor Half-ball cap Handlebar post set Handlebar post Half-ball cap Foam Upper handle pulse cable Upper computer cable Backrest Wireless chest belt Front stabilizer set... - Page 7 Fixing plate for magnet set Fixing plate for magnet Spring D1.0*55L Nut M6*1*6T Flat washer D13*D6.5*1.0T Nylon washer D6*D19*1.5T Nut M6*1*6T BoltM6*65L Nylon nut M8*1.25*8T Bolt M8*52L Idle wheel set Fixing plate for idle wheel Flat washer D30*D8.5*2.0T Bolt M8*25 Allen bolt M10*35L Spring D2.2*D14*65L Plastic cover...
- Page 8 Inner tube Square cap Pedal set Right pedal Left pedal Chain cover set Right chain cover Left chain cover Rear chain cover (left) Rear chain cover (right) Pin D6*26.5*7.7 Screw ST4.2x1.4x20L Adaptor Belt wheel set Belt wheel Crank axle Round magnet Bolt M6x1.0x15L Spacer D22.5*D17.2*6.4T Flat washer D23*D17.2*1.5T...
-
Page 9: Assembly
Screw ST4.2*1.4*15L Lower computer cable Z-10 Bearing ASSEMBLY STEP 1 N-1x4 N-4x8 N-3x4 N-2x4 Step-1 1) Fix the front stabilizer (F) and rear stabilizer (G) onto the main frame by using spring washer (N-3), domed nut (N-2), allen bolt (N-1) and curved washer (N-4). 2) The height can be adjusted by the adjustable cap (G-2). - Page 10 STEP 2 N-8X4 N-7X4 Step-2 1) Assemble the seat (I) onto the seat support set (O) with flat washer (N-7) and allen bolt (N-8) like picture shown. 2) Assemble the seat support set (O) with the sliding beam set (M) by the knob (O-2).
- Page 11 STEP 3 N-6x2 N-9x2 N-7x4 N-3x2 N-2x2 Step-3 1) Fix the backside of sliding beam set (M) with main frame by allen bolt (N-6) and flat washer (N-7) as fig A shown. 2) Fix the front side of sliding beam set (M) with main frame by square neck bolt (N-9), spring washer (N-3), flat washer (N-7) and domed nut (N-2) as fig B shown.
- Page 12 STEP 4 N-5x4 N-3x4 N-4x2 N-7x6 N-8x4 N-7 N-8 Step-4 1) Connect the upper computer cable (C-5) with lower computer cable (Z-9). 2) Assemble the handlebar post set (C) with the main frame (Z) by flat washer (N-7), spring washer (N-3), allen bolt (N-5) and curved washer (N-4). 3) Assemble the backrest (D) with the backrest supporting set (U) by flat washer (N-7) and the allen bolt (N-8).
- Page 13 STEP 5 N-5x4 N-7x4 N-3x4 N-7 N-5 S-11 P-2 S-8 Step-5 1) Assemble the left &right pedal (P-2&P-1) with the left &right crank (S-8&S-11). 2) Assemble the handlebar set (B) with the backrest supporting set (U) by allen bolt (N-5), spring washer (N-3), and flat washer (N-7).
- Page 14 STEP 6 A-2X4 Step-6 1) Assemble the computer set (A) with the handlebar post set (C) by the bolt (A-2). 2) Plug the adaptor (R) and turn on the computer.
-
Page 15: Sm2570 Iconsole+ Instruction Manual
SM2570 iConsole+ INSTRUCTION MANUAL SUPPORT DEVICES Support iOS devices: Support Android devices: iPod touch (5th generation) Android tablet OS 4.0 or above iPod touch (4th generation) Android tablet resolution 1280X800 pixels iPod touch (3rd generation) Android phone OS 2.2 or above iPhone 5S Android phone resolution: iPhone 5C... - Page 16 “Made for iPod,” “Made for iPhone,” and “Made for iPad” mean that an electronic accessory has been designed to connect specifically to iPod, iPhone, or iPad, respectively, and has been certified by the developer to meet Apple performance standards. Apple is not responsible for the operation of this device or its compliance with safety and regulatory standards.
- Page 17 • Body fat Test body fat% and BMI. OPERATION POWER ON Plug in power supply, computer will power on and display all segments on LCD for 2 seconds. After 4 minutes without pedaling or pulse input, console will enter into power saving mode. Press any key may wake the console up.
- Page 18 4) Press START/STOP key to pause workout. Press RESET to reverse to main menu. ADVANCE MODE 1) Press UP or DOWN to select workout program, choose Advance mode and press ENTER to enter. 2) Press UP or DOWN to preset TIME. 3) Press START/STOP key to start workout.
-
Page 19: Terms And Conditions Of Warranty, Warranty Claims
1) Press UP or DOWN to select workout program, choose WATT and press ENTER to enter. 2) Press UP or DOWN to preset WATT target. (default: 120) 3) Press UP or DOWN to preset TIME. 4) Press START/STOP key to start workout. Press UP or DOWN to adjust Watt level. 5) Press START/STOP key to pause workout. - Page 20 Warranty Period The Seller provides the Buyer a 24 months Warranty for Goods Quality, unless otherwise specified in the Certificate of Warranty, Invoice, Bill of Delivery or other documents related to the Goods. The legal warranty period provided to the Consumer is not affected. By the Warranty for Goods Quality, the Seller guarantees that the delivered Goods shall be, for a certain period of time, suitable for regular or contracted use, and that the Goods shall maintain its regular or contracted features.
- Page 21 VAT ID: CZ26847264 Phone: +420 556 300 970 E-mail: eshop@insportline.cz reklamace@insportline.cz servis@insportline.cz Web: www.insportline.cz INSPORTLINE s.r.o. Headquarters, Warranty & Service centre: Elektricna 6471, 911 01 Trencin, Slovakia CRN: 36311723 VAT ID: SK2020177082 Phone: +421(0)326 526 701 E-mail: objednavky@insportline.sk reklamacie@insportline.sk servis@insportline.sk Web: www.insportline.sk...
Need help?
Do you have a question about the R60i and is the answer not in the manual?
Questions and answers