Viessmann PLC VITOCAL 350-HT PRO Service Instructions For Contractors
Heat pump control unit
Hide thumbs
Also See for PLC VITOCAL 350-HT PRO:
- Installation and service instructions manual (81 pages) ,
- Operating instructions for the system user (36 pages)

Related Manuals for Viessmann PLC VITOCAL 350-HT PRO


Summary of Contents for Viessmann PLC VITOCAL 350-HT PRO
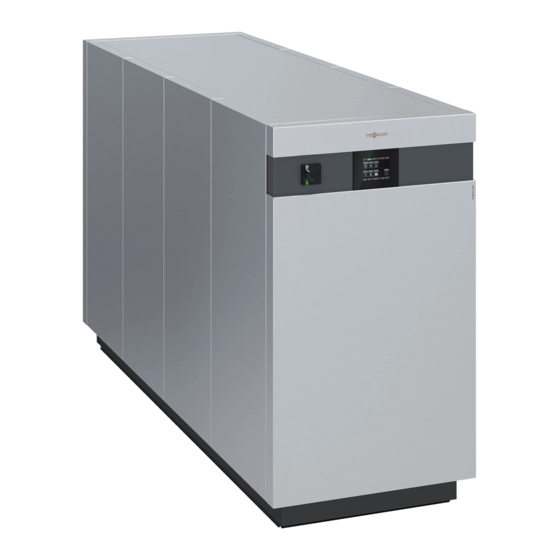
- Page 1 Viesmann Service instructions for contractors PLC Vitocal 350-HT Pro Heat pump control unit PLC VITOCAL 350-HT PRO Please keep safe. 5801 542 GB 7/2017...
- Page 2 Prior to removing covers from the appliances, Replace faulty components only with genuine wait at least 4 minutes until the voltage has Viessmann spare parts. completely dropped out. Safeguard the system against reconnection. ■ Wear suitable personal protective equipment when ■...
- Page 3 Installing non-authorised components and making non-approved modifications or con- versions can compromise safety and may inva- lidate our warranty. For replacements, use only original spare parts supplied or approved by Viessmann.
-
Page 4: Table Of Contents
Index Index Information Symbols ....................Introduction Scope of functions ................. Setting levels ..................System user ..................■ Service ....................■ Configuring the system Operating information ................Main page ....................Switching the system on/off ..............Menu ...................... Setting the time and date ............... 10 Login and language ................ - Page 5 Index Index (cont.) 2-way valve, natural cooling ............... 50 ■ System status ..................51 Testing the temperature sensors ............51 PCBs and connection Main PCB ....................53 options Expansion PCB ..................55 Commissioning/service Control parameter report ............... 57 reports Heating water buffer cylinder (HWB) and high temperature mainte- ■...
-
Page 6: Information Symbols
Information Symbols Symbol Meaning Reference to other document containing further information Step in a diagram: The numbers correspond to the order in which the steps are carried out. Warning of material losses and environ- mental pollution Live electrical area Pay particular attention. Component must audibly click into place. -
Page 7: Introduction Scope Of Functions
■ The password-protected settings may only be per- formed by heating contractor personnel who have been trained in the use of Viessmann heat pumps. To change password-protected settings, please see the "Login and language" and "Configuration" chap- ters. -
Page 8: Configuring The System Operating Information
"Menu" Launches the "Menu" page Launches the "Alarm list" page Outside temperature See page 30. Back Shows the current user ("Viessmann") Launches the main page Launches the "Login and language" page Switches the system on/off Green The system is switched on... -
Page 9: Switching The System On/Off
Configuring the system Switching the system on/off button switches off the entire system. Controller If the mains isolator is switched off, then the power and sensors remain operational. The power supply to supply to the system will be completely interrupted. the system will not be interrupted. -
Page 10: Setting The Time And Date
Configuring the system Setting the time and date Launch: Tap on the date/time (top right) Fig. 3 Enter the "Time" (format: hh:mm), "Date" (format: Confirm each with ">>". DD:MM:YY) and day of the week. -
Page 11: Login And Language
The login data for the Service level (service and com- missioning engineers) is as follows: Note User Viessmann The password viesstech15 should not be disclosed to Password viesstech15 the system user! Please note that the user name and password are The login data for the system user level is as follows: case-sensitive. -
Page 12: Configuration
Configuring the system Configuration Launch with ■ "Menu" "Configuration" ■ Fig. 5 Buttons: "DHW" ■ ■ "Sys." Configure the extension for domestic hot water heat- Configuration of system ing (DHW cylinder) ■ "Network" ■ "Coolant" Network settings Configure the extensions for the coolant buffer cylin- "Sys. -
Page 13: System Configuration
Configuring the system Configuration (cont.) System configuration Launch with ■ "Menu" ■ "Configuration" ■ "Sys." Fig. 6 Buttons: "GLS mode" "Y"/"N" ■ "No. of comprssr stages" "2"/"3" Is the system being controlled by a building manage- ■ Number of compressors which are installed in the ment system (BMS)? machine The Modbus stage enable from the BMS is taken as... -
Page 14: Network
Configuring the system Configuration (cont.) Network Launch with ■ "Menu" ■ "Configuration" ■ "Network" Fig. 7 Once the system is connected to an existing network, Please note the settings "IP address", "Subnet" and "Gateway" If the programming unit is connected via the must be agreed with the network administrator. -
Page 15: System Data
Configuring the system Configuration (cont.) System data On this page, you can change the data that is dis- played on the main page. The data is not reset after logging off. If people are to be notified of faults via email, up to 5 email addresses can be given. -
Page 16: Heating Water Buffer Cylinder (Hwb)
Configuring the system Configuration (cont.) Heating water buffer cylinder (HWB) Launch with ■ "Menu" ■ "Configuration" ■ "HWB" Fig. 9 Buttons: "Control extension, HW buffer" ■ "Y"/"N" Does the system have a heating water buffer cylin- der which is charged in response to an enable sig- nal? "Spec. -
Page 17: Extension For Domestic Hot Water Heating
Configuring the system Configuration (cont.) Extension for domestic hot water heating Launch with ■ "Menu" ■ "Configuration" ■ "DHW" Fig. 10 Buttons: "Control extension, DHW cylinder" ■ "Y"/"N" DHW heating extension installed? ■ "Spec. set val, DHW cylinder" Method of assigning set values for the DHW cylinder "Intrnl"... -
Page 18: Coolant Buffer Cylinder Extension And Residual Heat Extension
Configuring the system Configuration (cont.) Coolant buffer cylinder extension and residual heat extension Launch with ■ "Menu" ■ "Configuration" ■ "Coolant" Fig. 11 Buttons: "Control extension, resid. heat" ■ "Y"/"N" Residual heat extension installed? "Control extension, coolant buffer" ■ "Y"/"N" Extension for coolant buffer cylinder (AC/NC cooling) installed? ■... -
Page 19: Adjusting Set Values
Configuring the system Adjusting set values Launch with ■ "Menu" "Set val." ■ Fig. 12 Buttons: "EEV" ■ ■ "HWB" Set values for electronic expansion valve Set values for heating water buffer cylinder and high ■ "IHE" temperature maintenance Set values for internal heat exchanger "DHW"... -
Page 20: Set Values For Heating Water Buffer Cylinder (Hwb) And High Temperature Maintenance
Configuring the system Adjusting set values (cont.) Set values for heating water buffer cylinder (HWB) and high temperature maintenance Launch with ■ "Menu" ■ "Set val." ■ "HWB" Fig. 13 The following settings can be changed: "Start temp, heating water buffer cylinder" ■... -
Page 21: Set Values For Domestic Hot Water (Dhw)
Configuring the system Adjusting set values (cont.) Set values for domestic hot water (DHW) Launch with ■ "Menu" ■ "Set val." ■ "DHW" Fig. 14 The following settings can be changed: "Start temp, DHW cylinder => set value -" ■ "Set value, cyl"... -
Page 22: Set Values For The Coolant Buffer Cylinder
Configuring the system Adjusting set values (cont.) Set values for the coolant buffer cylinder Launch with ■ "Menu" ■ "Set val." ■ "Coolant" Fig. 15 The following settings can be changed: "Start temp, coolant buffer cylinder" ■ "Set value, cyl" If the temperature differential is greater than this ■... -
Page 23: Set Values For Compressor
Configuring the system Adjusting set values (cont.) Set values for compressor Launch with ■ "Menu" ■ "Set val." ■ "Comprssr" Fig. 16 The following settings can be changed: "Min. time betw. compressor starts" ■ "Restart block" Minimum waiting time between starts of the individ- ■... -
Page 24: Set Values For Application Limits
Configuring the system Adjusting set values (cont.) Set values for application limits Launch with ■ "Menu" ■ "Set val." ■ "Applicatn limits" Fig. 17 The following settings can be changed: "MOP point" ■ "Max. condensing temperature" Maximum operating pressure point: ■... -
Page 25: General Set Values
Configuring the system Adjusting set values (cont.) General set values Launch with ■ "Menu" ■ "Set val." ■ "General" Fig. 18 The following settings can be changed: "Stop temp, casing ventilation" ■ "Max. casing temp" Casing temperature below which the casing fan is ■... -
Page 26: Set Values For The Electronic Expansion Valve (Eev)
Configuring the system Adjusting set values (cont.) Set values for the electronic expansion valve (EEV) Launch with ■ "Menu" ■ "Set val." ■ "EEV" Fig. 19 The following settings can be changed: "Evaporator superhtg" ■ Set value for evaporator superheating ■... -
Page 27: Set Values For The Internal Heat Exchanger (Ihe)
Configuring the system Adjusting set values (cont.) Set values for the internal heat exchanger (IHE) Launch with ■ "Menu" ■ "Set val." ■ "IHE" Fig. 20 The following settings can be changed: "Suction gas temp increase if condensation temp ■ "Min sprhtg downstr.of IHE"... -
Page 28: Set Values For The Circulation Pumps
Configuring the system Adjusting set values (cont.) Set values for the circulation pumps Launch with ■ "Menu" ■ "Set val." ■ "CP" Fig. 21 The following settings can be changed: "Adv.runtime, circ.pumps" ■ Waiting time between activation of the circulation pumps and enabling of the compressors ■... - Page 29 Configuring the system Communication (cont.) Terminal Assignment Termination /RX/TX output RX/TX output Termination Termination ■ The internal terminator must be activated if the heat pump is connected to the start or end of the RS485 bus. Two wire jumpers must be used for this purpose: Connect terminals 5 and 6 to each other –...
-
Page 30: Troubleshooting Alarm List
Troubleshooting Alarm list Faults trigger alarms. For an overview of the fault messages, see page 31. If an alarm has been triggered, the alarm signal is Launch with red. The causes of the fault must be eliminated to ensure normal operation of the system. Fig. -
Page 31: Explanation Of The Alarms
The following faults may cause consequential dam- age. All faults that are marked with an additional "!" should be reported to Viessmann Service before they are acknowledged. Do not acknowledge faults more than once. If a fault remains active or occurs more than once, please contact your heating contractor or Viessmann Service. -
Page 32: Other Fault Messages
You may acknowledge the following fault messages at any time. These fault messages do not prevent opera- tion of the heat pump. If a fault remains active or occurs several times, please contact your heating con- tractor or Viessmann Service. Fault message Effects Possible cause "Replace PLC battery"... - Page 33 Troubleshooting Overview of fault messages (cont.) Fault message Effects Possible cause "Sensor fault,oil press.2" Compressor 2 remains shut The oil pressure sensor of com- down for as long as the fault is pressor 2 is faulty current "Sensor fault,oil press.3" Compressor 3 remains shut The oil pressure sensor of com- down for as long as the fault is...
- Page 34 Troubleshooting Overview of fault messages (cont.) Fault message Effects Possible cause "Fault, oil sump heater 2" Compressor 2 switches on auto- The oil sump heater of compres- matically as soon as the fault is sor 2 was switched off for too no longer current long "Fault, oil sump heater 3"...
-
Page 35: Conditions For Enabling The Heat Pump And Conditions For Automatic Starting Of The Heat Pump
Troubleshooting Conditions for enabling the heat pump and conditions for automatic starting of the heat pump If the "Enable heat pump" display is not active (green), the heat pump cannot switch on. 1. Conditions for "Enable heat pump" Power supply utility enable (in status display) ■... -
Page 36: Diagnosis General Hydraulic Scheme
Diagnosis General hydraulic scheme Fig. 23 Control extension residual heat (part no. ZK02826) Control extension well circuit/groundwater Control extension DHW heating (part no. ZK02828) (part no. ZK02829) Control extension geothermal probe Control extension AC/NC cooling (part no. ZK02827) (part no. ZK02830) Waste heat Note Pos. - Page 37 Diagnosis General hydraulic scheme (cont.) Pos. Designation Pos. Designation Flow switch (AC/NC cooling) Cooling water circulation pump DHW cylinder Buffer temperature sensor, top Cylinder temperature sensor Buffer temperature sensor, bottom Immersion heater 2-way valve (heat source shut-off) Cylinder loading pump 3-way mixing valve, low temperature mainte- nance Heat exchanger, cylinder loading system...
-
Page 38: Operating Conditions And Actuator Tests
Diagnosis Operating conditions and actuator tests Heat source Launch with ■ "Menu" ■ "Heat source" Fig. 24 Circulation pumps, see page 48. Primary circuit flow temperature (inlet) Mixing valve, low temperature maintenance Primary circuit return temperature (outlet) 3-way valves, see page 49. Primary pump... -
Page 39: Heat Pump
Diagnosis Operating conditions and actuator tests (cont.) Heat pump Launch with ■ "Menu" ■ "Heat pump" Fig. 25 Compressor 1, 2 and 3, see page 47. Casing temperature White Switched OFF "High press." condensing temperature, calculated Green Switched ON from pressure Fault Temperature, condenser inlet "Low press."... -
Page 40: High Temperature Maintenance
Diagnosis Operating conditions and actuator tests (cont.) High temperature maintenance Launch with ■ "Menu" ■ "T maint." Fig. 26 Secondary pump 3-way mixing valve, secondary high temperature maintenance with degree of opening Set and actual values, high temperature mainte- nance Temperature, inlet, heat pump, secondary Buttons: ■... -
Page 41: Suctioning
Diagnosis Operating conditions and actuator tests (cont.) Suctioning Launch with ■ "Menu" ■ "Suctioning" Fig. 27 The following information is displayed: Buttons: "Suct. switching act." "Y"/"N" "Suctioning" ■ ■ "Suction pr. (1.2 bar = 0 °C)" The function is activated: ■... -
Page 42: Heating Water Buffer Cylinder (Hwb)
Diagnosis Operating conditions and actuator tests (cont.) Heating water buffer cylinder (HWB) Launch with ■ "Menu" ■ "HWB" Fig. 28 Secondary pump Set value for heating water buffer cylinder 3-way mixing valve, secondary high temperature Heating water buffer cylinder temperature, top maintenance Heating water buffer cylinder temperature, bottom Set and actual values, high temperature mainte-... -
Page 43: Domestic Hot Water Heating (Dhw)
Diagnosis Operating conditions and actuator tests (cont.) Domestic hot water heating (DHW) Launch with ■ "Menu" ■ "DHW" Fig. 29 Set and actual values, high temperature mainte- Mixing valve, DHW nance Cylinder loading pump DHW cylinder inlet temperature Mixing valve, secondary high temperature mainte- DHW circulation pump nance Set value for DHW cylinder... -
Page 44: Coolant
Diagnosis Operating conditions and actuator tests (cont.) Coolant Launch with ■ "Menu" ■ "Coolant" Fig. 30 Set temperature for the coolant buffer cylinder Temperature, heat pump primary inlet Coolant buffer cylinder temperature, top Temperature, heat pump primary outlet Coolant circulation pump Flow temperature, coolant buffer cylinder Mixing valve, low temperature maintenance Coolant buffer cylinder temperature, bottom... -
Page 45: Residual Heat
Diagnosis Operating conditions and actuator tests (cont.) Residual heat Launch with ■ "Menu" ■ "Resid. heat" Fig. 31 Dry cooler Circulation pump, residual heat 2-way valve (dry cooler shut-off) Mixing valve, frost protection and return tempera- Temperature, condenser outlet ture raising Temperature, condenser inlet 2-way valve (heat source shut-off) Secondary pump... -
Page 46: Manual Switching
Diagnosis Operating conditions and actuator tests (cont.) Manual switching Launch with Fig. 32 The page shows how system parts are being control- The corresponding pages are launched via the but- led. tons. -
Page 47: Compressor
Diagnosis Operating conditions and actuator tests (cont.) Compressor Launch with ■ "Menu" ■ "Heat pump" ■ Symbol (compressor 1, 2 or 3) Fig. 33 Example The following information is displayed: ■ "Restart block" "Reset" "Op." "Y"/"N" The remaining time of the restart block is reset and ■... -
Page 48: Circulation Pumps
Diagnosis Operating conditions and actuator tests (cont.) Circulation pumps Launch with the circulation pump symbol Fig. 34 Example The following information is displayed: Buttons: ■ "Op." ■ "Reset" "Y" (green) Circulation pump is on The "Hours run" and "Activations" counters are "N"... -
Page 49: 3-Way Valves
Diagnosis Operating conditions and actuator tests (cont.) 3-way valves Launch with the 3-way valve symbol Fig. 35 Example ■ "Act.sig" Displays the position of the valve ■ "Manl actuat. sig" To change between manual switching and automatic operation "AUTO" The position of the valve is determined by the heat pump. -
Page 50: 2-Way Valve, Natural Cooling
Diagnosis Operating conditions and actuator tests (cont.) 2-way valve, natural cooling Launch with ■ Button ■ "NC valve" Fig. 36 ■ "Act.sig" Displays the current position of the valve "Manl actuat. sig" ■ "AC"/"NC" Set position for manual switching "AUTO"/"MANL" To change between manual switching and automatic opera- tion "AUTO"... -
Page 51: System Status
Diagnosis System status Launch with Fig. 37 This page provides information on the various system ■ PSU enable present statuses. No priority 1 alarm active ■ A green dot indicates an enable or normal operation. Heating or cooling demand present ■... - Page 52 Diagnosis Testing the temperature sensors (cont.) 1600 1500 1400 1300 1200 1100 1000 Temperature in °C Fig. 38...
-
Page 53: Pcbs And Connection Main Pcb
PCBs and connection options Main PCB Pin1 X1 Pin10 X2 Pin1 Pin8 X19 X13 X11 Pin8 Pin1 Fig. 39 Note The following terminal assignments apply only to the Vitocal 350-HT Pro. Terminal assignments Connection Terminal Address Explanation Digital out X1 O 64 Start command, evaporator pump O 65... - Page 54 PCBs and connection options Main PCB (cont.) Connection Terminal Address Explanation Analogue out X6 AO 0 Control signal, EEV AO 1 Control signal, IHE AO 2 Control signal, mixing valve, low tempera- ture maintenance AO 3 Control signal, mixing valve, high tempera- ture maintenance Analogue out X7 AO 4...
-
Page 55: Options Expansion Pcb
PCBs and connection options Expansion PCB Fig. 40 Note The following terminal assignments apply only to the Vitocal 350-HT Pro. Terminal assignments Connection Terminal Address Explanation Digital out X20 O 256 Shut-off valve, cooling mode O 257 Diverter valve, residual heat O 258 Shut-off valve, dry cooler O 259... - Page 56 PCBs and connection options Expansion PCB (cont.) Connection Terminal Address Explanation Analogue in X25 AI 2 0-10 V specified set value for high tempera- ture maintenance 0 V = 40 °C ■ 10 V = 90 °C ■ AI 3 Room temperature sensor AI 4 Heating water buffer cylinder temperature...
-
Page 57: Commissioning/Service Control Parameter Report
Commissioning/service reports Control parameter report Heating water buffer cylinder (HWB) and high temperature maintenance See page 20. Parameter Delivered condition Commissioning Maintenance/ service "Heating water buffer cyl." 90 °C "Maintaining set val" 90 °C "Htg limit" 18 °C "Start temp, heating water buffer cylinder" "Stop temp, compressor stage 1"... -
Page 58: Coolant Buffer Cylinder
Commissioning/service reports Control parameter report (cont.) Coolant buffer cylinder See page 22. Parameter Delivered condition Commissioning Maintenance/ service "Set value, cyl" 5° C "Cooling lim." 18 °C "Start temp, coolant buffer cylinder" "Stop temp, compressor stage 1" 0 °C "Stop temp, compressor stage 2" 5 °C "Stop temp, compressor stage 3"... -
Page 59: General
Commissioning/service reports Control parameter report (cont.) General See page 25. Parameter Delivered condition Commissioning Maintenance/ service "Max. casing temp" 65 °C "Start temp, room vent." 35 °C "Stop temp, room ventilation" 30 °C "Start temp, casing vent." 30 °C "Stop temp, casing ventilation" 25 °C "Frost protection (evaporation temp)"... -
Page 60: Certificates Declaration Of Conformity
Certificates Declaration of conformity Heat pump installation and service instructions... -
Page 61: Keyword Index
Keyword index Keyword index Actuator test............... 38 Network..............14 Alarm – Email............... 15 Alarm list..............30 Operating conditions..........38 Alarms................ 31 Parameters Communication............28 – Report..............57 Configuration..............12 Password..............11 – Saving/loading............12 Connection options............ 53 – Expansion PCB............55 Control parameter reports.......... 57 –... - Page 64 Viessmann Werke GmbH & Co. KG Viessmann Limited D-35107 Allendorf Hortonwood 30, Telford Telephone: +49 6452 70-0 Shropshire, TF1 7YP, GB Fax: +49 6452 70-2780 Telephone: +44 1952 675000 www.viessmann.com Fax: +44 1952 675040 E-mail: info-uk@viessmann.com...
Need help?
Do you have a question about the PLC VITOCAL 350-HT PRO and is the answer not in the manual?
Questions and answers