Advertisement
Package Contents
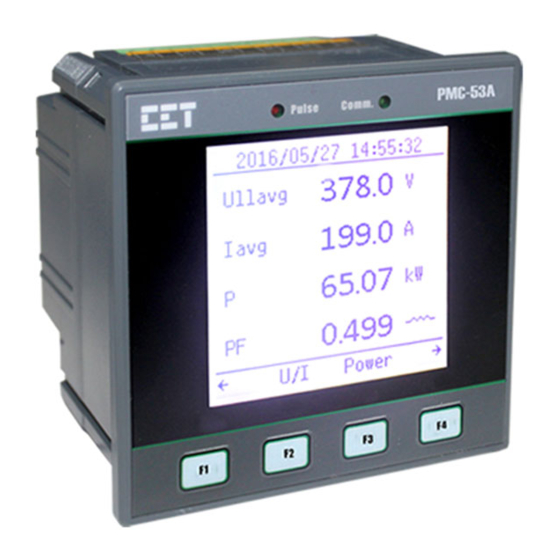
Meter Overview
Front View
A
kWh/kvarh LED Pulse Output
B
Enclosure
C
Front Panel
D
Communication Indicator
E
Using the Front Panel Buttons
The PMC-53A's Front Panel has been designed with a menu-driven interface that is extremely user friendly such that all one has to do is to
simply follow the menu at the bottom of the screen. The button definitions for F1 to F4 under Display Mode and Setup Mode are explained
in the following table. The default password is 0000 (four zeros).
Display Mode
Button
Main Menu
←
F1
(Menu Left)
F2
Select Option
F3
Select Option
F4
→
(Menu Right)
Mounting the Meter
Remove the installation clips from the meter.
Fit the meter through a 92mmx92mm cutout as shown in the
right Figure.
Re-install the installation clips and push the clips tightly
against the panel to secure the meter.
PMC-53A Quick Start Guide
a. PMC-53A with all mounting clips and plug-in connectors installed
b. Factory Test Report
c. CD with PMC-53A User Manual
d. Quick Start Guide (this document)
Rear View - 4DI, 2DO, RS-485, 2xExpansion Modules
F
G
H
I
Units
J
Sub Menus
Esc
(Exit)
↑ (Page Up) or
Select Option
(View Only)
↓ (Page Down) or
Select Option
→ (Menu Right) or
Select Option or
Null (Not Used)
Version 1.2
Measurements
Buttons
Voltage Input Terminals
Power Supply Terminals
Expansion Module A (2
nd
RS-485 or I4)
Password
Enter
Page
Password
(Until a parameter is selected)
Esc
Cancel
(Exit)
(Exit)
Browse
←
(Shift Left)
Null
↑
(Not Used)
(Increment)
Enter
OK
(Confirm)
(Confirm)
Serial Number & Warning Labels
K
Expansion Module B (I/O Options)
L
M
Optional DI Terminals
N
Optional DO Terminals
O
Current Input Terminals
Setup Mode
Enumerated
Browse/Setup Menu
Esc
(Exit)
↑
(Cursor Up)
↓
(Cursor Down)
Enter
(Select Parameter)
RS-485 Terminals
Numeric
Parameter
Parameter
Cancel
Cancel
(Exit)
(Exit)
←
←
(Previous)
(Shift Left)
↑
↑
(Next)
(Increment)
OK
OK
(Confirm)
(Confirm)
Revision Date: October 26, 2020
Advertisement
Table of Contents

Subscribe to Our Youtube Channel
Related Manuals for CET PMC-53A


Summary of Contents for CET PMC-53A
- Page 1 Using the Front Panel Buttons The PMC-53A’s Front Panel has been designed with a menu-driven interface that is extremely user friendly such that all one has to do is to simply follow the menu at the bottom of the screen. The button definitions for F1 to F4 under Display Mode and Setup Mode are explained in the following table.
- Page 2 Wiring Diagrams 3P4W (Direct Connect with 3CTs) 3P4W (3PTs and 3CTs) 3P4W (Direct Connection, 4CTs) 3P4W (3PTs and 4CTs) 3P3W (Direct Connect with 3CTs) 3P3W (Direct Connect with 2CTs) 3P3W (2PTs and 3CTs) 3P3W (2PTs and 2CTs) 1P3W (Direct Connect with 2CTs) 1P2W, L-N (Direct Connect with 1CT) 1P2W, L-L (Direct Connect with 1CT) Basic Setup Parameters...
Need help?
Do you have a question about the PMC-53A and is the answer not in the manual?
Questions and answers