NeuraLabel 600e Printing Manual
Hide thumbs
Also See for 600e:
- Installation manual (10 pages) ,
- Installation and quick start manual (22 pages)
Table of Contents
Advertisement
Quick Links
Advertisement
Table of Contents

Related Manuals for NeuraLabel 600e


Summary of Contents for NeuraLabel 600e
- Page 1 NeuraLabel 600e Label Printing Guide July 2018...
- Page 3 Oki Printing Solutions C610/C711 Users Guide. 46195601EE Rev. 1 Copyright © 2011. Oki Printing Solutions C711 Specifications. C711_tcm3-103563_tcm103-23088.pdf. NeuraLabel Printing Solutions, aka, Neuralog LP, is a partner to Oki Data Americas, Inc. NeuraLabel 600e Label Printing Guide © 2018 Neuralog, LP NeuraLabel Printing Solutions 4800 Sugar Grove Blvd., Suite 200...
-
Page 5: Table Of Contents
Contents NeuraLabel 600e Label Printing Solution .................1 The Print Engine ........................2 The Continuous Feed Attachment ..................2 The Cut Sheet Tray ......................4 NeuraLabel 600e Setup ......................5 Setting up the Printer ......................5 Unpacking the Printer ......................5 Location ..........................5 Power ..........................6 Network ..........................7 USB .............................9... - Page 6 Getting the Best Looking Print ...................30 Setting the Media Type and Weight in the Web Interface ..........31 Setting the Media Type and Weight in the Operator Panel ..........32 NeuraLabel 600e Web Server ....................33 NeuraLabel 600e Operator Panel ..................35 Network Address of the Printer ..................35 Continuous Print Parameters .....................36...
-
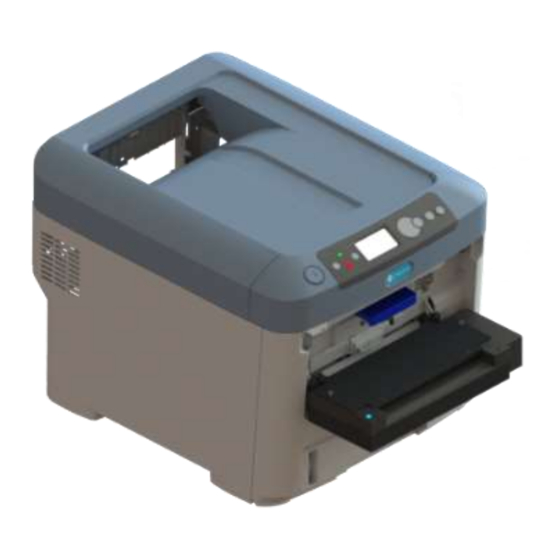
Page 7: Neuralabel 600E Label Printing Solution
(CFA) that will feed and guide media into the printer, as well as cut the media at the end of a print job. The printing technology in the 600e is based on light emitting diodes (LEDs), very similar to a laser printer. The printer uses toner that is transferred through an image drum onto the media and then fused onto that media using a high temperature fuser. -
Page 8: The Print Engine
NeuraLabel 600e Printing Guide The following section provides a summary of the print engine components: The Print Engine CFA Attachment Bar and Guides: An attachment bar with guides and a media ramp are located at the media entrance. The CFA will hook onto this bar. - Page 9 They correspond to the locations provided on the NeuraLabel 500e/600e media specification. When marked media with cut marks are used in the 600e, a cut can be made in the media gap. When no marks are present, gap sensing is used, and the cut occurs across the media itself and not in the gap.
-
Page 10: The Cut Sheet Tray
Cut Sheet Tray The NeuraLabel 600e cut sheet tray is accessible even when the CFA is attached, although it is not easily seen. The picture above shows the tray with the CFA removed. It is possible to completely remove the tray by pulling it all the way out and tiling it upwards. -
Page 11: Neuralabel 600E Setup
NeuraLabel 600e Setup Setting up the Printer NeuraLabel 600e setup is simple and should only take a few minutes. Before you begin, you will need to choose an easily accessible location and decide how the printer will be integrated into your network. You will need a power outlet, a physical network connection and a network address for your printer. -
Page 12: Power
CFA. This will allow the media to properly unfold as it leaves the box. The NeuraLabel 600e has been designed to pull continuous form media directly from the box. However, it is important to make sure the flow is in no way restricted by the box lid, placement of the box, or by plastic in the box. -
Page 13: Network
Setting up Power to your NeuraLabel 600e Network The NeuraLabel 600e has an easy to use network setup panel. The network socket is at the printer exit side as shown in the picture above (with a network cable). The printer can be given a static or dynamic IP address and can be placed on your company’s local area network or on a... - Page 14 Printer Operator Panel Setting up a Static Network Address For simple static address setup of your NeuraLabel 600e follow these steps. For other configurations, please see your system administrator. • Obtain a static IP network address from your system administrator. Most companies have a local area network with dynamic and static addresses.
-
Page 15: Usb
Use the TCP/IPv4 connection. o Please see your system administrator if you need help. The NeuraLabel 600e can also be used with USB. The USB socket is at the printer exit side as shown in the picture above (with no cable). -
Page 16: Installing The Continuous Feed Attachment
NeuraLabel 600e Printing Guide Installing the Continuous Feed Attachment Once you find an appropriate location for your NeuraLabel 600e you can attach the CFA, or Continuous Feed Attachment. The CFA should always be handled with two hands. You should NOT attach or un-attach the CFA to the printer unless the printer’s power has been turned OFF. -
Page 17: Cfa Boot-Up And Diagnostics
NeuraLabel 600e Printing Guide 3. Disconnect the CFA/printer connectors. 4. With two hands unsnap each hook that attaches the CFA to the printer. 5. Set the CFA on the table in a secure place. CFA Boot-up and Diagnostics The CFA receives both control and power from the printer through the wiring harness. When the printer is powered up and the CFA receives power it goes through a boot up sequence that can be used for diagnostics. -
Page 18: Loading The Continuous Form Media
Loading the Media Media is loaded into the NeuraLabel 600e printer with the printable side of the media face up and marks, if they are present, face down. Loading media is very simple. Using two hands pick up the first sheet of continuous form media and then place the media in the CFA within the media guides. - Page 19 The perforation should be positioned like that shown in the photo. Proper Loading of Continuous Form Media for NeuraLabel 600e If you need to pull the media out of the CFA, gently pull the media back out with both hands.
- Page 20 NeuraLabel 600e Printing Guide - 14 -...
-
Page 21: Neuralabel 600E Media
NeuraLabel 600e Printing Guide NeuraLabel 600e Media To achieve the best results with the NeuraLabel 600e label printer, it is imperative to use the proper label media. NeuraLabel will provide references for our media partners or visit our website http://www.neuralabel.com/Qualified-Media.php to see specific qualified media and to obtain a list of NeuraLabel media partners. -
Page 22: Media Liner And Glue
Marked or Not Marked (Gaps) The NeuraLabel 600e can print on die-cut label media with gaps using a gap sensor found in its CFA, on die-cut label media with marks using a mark sensor found in its CFA, or on continuous label media stock without marks or gaps. -
Page 23: Media Dimensions For Die-Cut Labels
The width of the media allowed in the NeuraLabel 600e is also set by the fuser. Standard 600e fusers can tolerate media as narrow as 7 inches. If media narrower than 7 inches is fed through the NeuraLabel 600e with the standard fuser, the heat cannot properly dissipate;... -
Page 24: Types Of Media
Types of Media The NeuraLabel 600e is an LED/laser printer that uses a hot fuser to melt the toner onto the media. Media can be classified into papers or synthetics. Synthetics are further classified into the most common categories of polyester (PET), polypropylene (BOBB), or vinyl. Most paper media will work with the 600e with no problems. -
Page 25: Neuralabel 600E Driver
NeuraLabel 600e Printing Guide NeuraLabel 600e Driver A custom printer driver is provided for the NeuraLabel 600e. This driver specifies certain printing parameters such as label page size and media type. The NeuraLabel 600e driver can be downloaded at: http://www.neuralog.com/updates/NLP3/Utilities/NeuraLabel600eDriver.zip. - Page 26 NeuraLabel 600e Printing Guide NeuraLabel 600e Driver - 20 -...
- Page 27 • Name: Provide a meaningful name for the media to distinguish from your other media. The size is added automatically. • Width: Set the width to 8.5 inches. A lower width can be entered, however, the NeuraLabel 600e standard CFA media guide is designed for media with a width of 8.5 inches...
- Page 28 To move the image up the page, adjust to a smaller number. • Cut is 0.70 for NeuraLabel marked media. This allows the printer to stop in the correct location for cutting in the media gap, providing a precision cut based on media marks.
-
Page 29: Printing On Unmarked Label Media As A Label Press
Printing on Unmarked Label Media as a Label Press Another common way to use the NeuraLabel 600e printer is as a Label Press. In this configuration you will print on an unmarked media. The label artwork and registration marks are printed together on the media, ready for a second step of label finishing. - Page 30 NeuraLabel 600e Printing Guide • Set the Adjust Mode to No Adjustment, telling the printer not to look for marks or gaps. • Enter a Footer Margin, which is the gap between the labels, for example, 0.25. • The Start and Cut should be set to 0 since this is not a die-cut label configuration.
-
Page 31: Printing On Cut Sheet Media
NeuraLabel 600e Printing Guide Printing on Cut Sheet Media The NeuraLabel 600e can also print on cut sheet label media using the 530 cut-sheet tray. This tray is located directly below the CFA. Standard size cut sheet media is supported. There is no duplex option on the NeuraLabel 600e printer. - Page 32 Configuring the Driver for Cut Sheet Printing Using the above driver parameters should make cut-sheet label printing quick and easy. The NeuraLabel 600e supports both continuous and cut sheet printing without reconfiguring the printer or removing the CFA. - 26 -...
-
Page 33: Media Settings And Print Quality
NeuraLabel 600e Printing Guide Media Settings and Print Quality Selecting the Media Weight in the Driver The chart below provides insight regarding the speed and temperature for each of the media weight selections found in the printer driver. If the media is melting or the toner looks smeared and smudgy, choose a setting with a lower temperature or increase the speed. -
Page 34: Advanced Media Settings
Many medias require a more precise control to achieve the highest print quality. This section explains how to tune your media to achieve the highest quality. The NeuraLabel 600e driver offers several predefined Weight settings, with the Films or Labels settings being the most often recommended for synthetic label printing and the Labels or Glossy settings being the most often recommended for paper labels. - Page 35 It is not an in-depth technical guide. For information on tuning the transfer voltage, temperature and speed to your particular media, contact NeuraLabel Printing Solutions. We can find the optimal settings for your media, or we can jointly pursue creating custom media settings.
-
Page 36: Getting The Best Looking Print
NeuraLabel 600e Printing Guide Transfer Voltages for NeuraLabel 600e as related to Driver Settings Black Yellow Magenta Cyan Labels1 2300 2300 2400 2500 Labels2 2700 2700 3000 3300 Glossy 2000 1900 2000 2000 Films 1600 1700 2500 3200 Getting the Best Looking Print While a discussion of printer speed, fuser temperature and transfer voltage is technically interesting, the end goal is to produce prints with the highest possible quality. -
Page 37: Setting The Media Type And Weight In The Web Interface
NeuraLabel 600e Printing Guide Paper Labels Determine the best overall setting. • Print using the driver settings of Medium, Labels 1, Labels 2 or Glossy (if glossy paper) and select the best setting. • Change the Driver Weight Setting to Printer Setting. -
Page 38: Setting The Media Type And Weight In The Operator Panel
NeuraLabel 600e Printing Guide Select Media Setup listed under Printer. • For Continuous Printing, set values in the MPTray • Set Values for Media Type. o Plain o Letterhead o Films o Labels o Bond o Recycled o Card Stock o Rough Glossy •... -
Page 39: Neuralabel 600E Web Server
NeuraLabel 600e Printing Guide NeuraLabel 600e Web Server The NeuraLabel 600e Web Server is accessed through the printer’s internet address. It is not accessible via USB. Once your network is successfully set up, you can use these pages to access information about the printer. - Page 40 Available in the Links section are useful short cuts to various locations on the Neuralog and NeuraLabel web sites. Support Links Driver Download http://www.neuralog.com/updates/NLP3/Utilities/NeuraLabel600eDriver.zip Technical Support http://www.neuralabel.com/NeuraLabel-600e-support.php Order Consumables http://www.neuralog.com/store/categories/NeuraLabel-600e/ Register Printer http://www.neuralabel.com/warranty_activation.php Download Firmware http://www.neuralabel.com/NeuraLabel-600e-support.php NeuraLabel 600e Support Links in Web Page - 34 -...
-
Page 41: Neuralabel 600E Operator Panel
NeuraLabel 600e Printing Guide NeuraLabel 600e Operator Panel The NeuraLabel 600e Operator Panel is used to access information about the printer and to set certain printing parameters. The most important or frequently used buttons and operations are discussed below. Menu Button... -
Page 42: Continuous Print Parameters
A best practice is to keep this set to OFF because it does cause a significant amount of wasted media. NeuraLabel 600e is designed for a trained operator to be able to web-up, or load, the media onto the rewinder on-the-fly without needing the print to be paused. -
Page 43: Start Printing Labels
NeuraLabel 600e Printing Guide Start Printing Labels When you are ready to print, open your label application and select the NeuraLabel 600e printer. There are many software applications that are used to print labels. Make sure the application you use interfaces with a standard Windows printer driver. -
Page 44: Load The Media
NeuraLabel 600e Printing Guide Load the Media Load the media into the CFA. See the instructions for loading media in the NeuraLabel 600e section. If you are using the NeuraLabel 600e Unwinder/Rewinder, follow the setup instruction in it, making sure the media is oriented correctly and fed under the Unwinder dancer arm. -
Page 45: Check The Printing System
Printable side up Mark on this side, facing down. Media Loaded into the 600e Continuous Feed Attachment Check the Printing System Before you print verify that the media you loaded, the parameters you set in the driver, and the printer and CFA setup all match. Here are a few important things to double check so that the print will be successful. - Page 46 NeuraLabel 600e Printing Guide Media Weight must be carefully set for medias with low melting points, namely polypropylenes. Other media weights are more flexible, and the best setting may be chosen by user preference. Media Driver Media Weight Setting Papers and Polyesters...
-
Page 47: Troubleshooting
NeuraLabel 600e Printing Guide Troubleshooting The following sections provide a variety of troubleshooting tips for the NeuraLabel 600e. Operating the Printer and CFA • Media is too wide (greater than 8.52 inches) for Media will not load into CFA. the standard CFA. -
Page 48: Print Quality
NeuraLabel 600e Printing Guide Print Quality Printed image has white smears/black color is The media may be poor quality and have missing. an uneven coating. The environment may have excessive Printed labels are wrinkled. humidity. The media may be wavy or crooked, causing it to bubble inside the printer. -
Page 49: Cleaning The Printer And Cfa
NeuraLabel 600e Printing Guide Cleaning the Printer and CFA If you do a significant amount of printing, it is inevitable that label glue will build up inside the printer and CFA. The printer entrance and the CFA can be wiped off with an alcohol pad to remove this residue. -
Page 50: Printer Media Entrance
NeuraLabel 600e Printing Guide • Wipe off glue that has collected in the media path with an alcohol pad. Most buildup will probably be at the left and right ends. Cleaning the Continuous Feed Attachment • Replace the lid and tighten the thumb screws. -
Page 51: Led Head
NeuraLabel 600e Printing Guide Media enters printer under this metal rod. Cleaning the Printer Entrance • Rotate the metal rod to clean its full circumference by placing multiple fingers on the top of the rod and rotating it towards you. - Page 52 NeuraLabel 600e Printing Guide Printer Cover Release Button Printer Release Button to Open the Cover • Gently wipe off each of the four LED heads with a lint-free cleaning cloth. Do NOT use alcohol or cleaning solutions on the LED head.
-
Page 53: Printer And Cfa Specifications
NeuraLabel 600e Printing Guide Printer and CFA Specifications The following is basic information about the print engine and CFA. Physical Specifications Printer Dimensions 17.1” x 21.5” x 15.3” or 435mm x 547mm x 389mm (W x D x H) Printer Weight 61lbs/27.6Kg... - Page 54 NeuraLabel 600e Printing Guide - 48 -...
-
Page 55: Neuralabel 600E Consumables
NeuraLabel 600e Printing Guide NeuraLabel 600e Consumables NeuraLabel Printing Solutions provides the toners, drums, and fusers for the 600e printer. The transfer belt is also replaceable if needed. The table below provides page yields at the industry standard of 5% coverage. These consumables must be purchased from NeuraLabel Printing Solutions or an authorized provider. -
Page 56: Procedure For Removing The Toner From The Drum
NeuraLabel 600e Printing Guide Toner/Drum Replacement WARNING: Use caution when removing the drum. It is delicate and light sensitive and can be scratched. Do not touch the green drum surface. Do not leave the drum surface exposed to light for more than 5 minutes. If available, place the drum in the black plastic bag that ships with new consumables. -
Page 57: Procedure For Removing The Fuser From The Printer
NeuraLabel 600e Printing Guide Toner/Drum Separation Procedure for Removing the Fuser from the Printer Turn OFF the printer if the fuser needs to be removed. The fuser will be hot. It is recommended that the printer be allowed to cool for 10 minutes before the fuser is removed. - Page 58 NeuraLabel 600e Printing Guide Fuser Replacement • Carefully pull the fuser up and out of the printer by the handle (a). • Place the fuser on a pre-determined surface that will not be damaged by heat. • When replacing the fuser, the two locating lugs (c) will face towards you. You should also be able to read the yellow caution label.
-
Page 59: Procedure For Removing The Transfer Belt From The Printer
NeuraLabel 600e Printing Guide Procedure for Removing the Transfer Belt from the Printer To remove the transfer belt from the printer, you must remove the 4 toner/drums; the fuser does not need to be removed. Follow the preceding instructions and use extreme caution when handling the delicate drums and when handling the fuser if it is still warm. - Page 60 NeuraLabel 600e Printing Guide Replacing the Transfer Belt • Replace the belt by lowering into place, using the lifting bar at the front and the drive gear near the rear. • Lock the belt back into place using the two blue latches.
-
Page 61: Index
NeuraLabel 600e Printing Guide Index clean the CFA, 16 cleaning, 4, 43 coating, 42 5% coverage, 49 colder locations, 5 Connector, 3 consumables, 49 Continuous Feed, 10, 12 600e driver, 19 Continuous Feed Attachment, 2, 4, 10, 12, 38 600e Operator Panel, 35... - Page 62 Labels print settings, 27 network switch, 9 leading edge, 38 NeuraLabel 600e driver, 19 LED Color Codes, 11 NeuraLabel 600e Operator Panel, 35 LED heads, 45, 46 NeuraLabel 600e Web Server, 33 LED Status Light, 3 No Adjustment, 24 Length, 17, 21...
- Page 63 NeuraLabel 600e Printing Guide outside (L/R) media guides, 12 roll unit, 1 rolled media, 15, 38 rotary cutter, 11 Page Size, 19 pages, 49 Paper Feed Options, 19 Shut Down, 36 paper labels, 31 Size, 19 paper media, 18 Sleep, 47...
- Page 64 NeuraLabel 600e Printing Guide Weight settings, 28 White LED, 3 Wait time, 36 white smears, 42 WARNING, 4, 22, 24, 45, 50 Width, 21 wavy, 42 width of the media, 17 Web Server, 33 wrinkled, 42 Weight, 5, 19, 25, 27, 47...
Need help?
Do you have a question about the 600e and is the answer not in the manual?
Questions and answers